Turn a Men’s Dress Shirt into a Girl’s Summer Dress! It’s fun, easy, and a great way to reuse one of Dad’s old shirts. A few of the versions we’ve done…..
 Seaside Stripes:

 Desert Beauty, Shirred Shirt Dress:
 Green Dress:
 (more shirt dress versions at the end of this tutorial)
 TURN A MEN’S DRESS SHIRT INTO A GIRL’S DRESS
Skill Level: Easy
Items Needed:
Men’s Dress Shirt
Fabric for waistband
1/4 inch elastic
Sewing machine
Average Sewing Time: 2-3 hours
This Dress is very easy to make and holds sentiment, knowing it originated from a tired-out shirt in Dad’s closet. If you don’t have any dress shirts to spare, check your local thrift stores and garage sales. An old shirt comes to life as a bouncy summer dress.
Now let’s get started!

 —————————————————————
1. Create a Pattern.
I know this may sound difficult but it’s really an easy pattern, with two pieces. I have provided sketches here of the pattern I created for myself. These measurements work for a SKINNY 2T-3T (my daughter is a skinny 3 year old who fits both 2T and 3T). If your daughter is average size or larger, you MUST extend the length where noted. You can also adjust it to fit your own child by using one of their current shirts or dresses as a measurement guideline. Or if you already have a pattern you love, use that!
Draw this image (using a clothing item of your child’s as the guideline) onto a junk piece of fabric or a large piece of paper. You can buy fabric pens for marking your pattern but I always just use a Sharpie marker to draw directly on my fabric.
Next, cut out your two pattern pieces and make sure they’re what you want. You can even hold the pieces up to your child to see if it will fit around her ribcage, waist, shoulders, etc. Make sure you allow for about 1/2 inch seam allowance on each side. If the pattern pieces don’t work, draw it out again on another piece of junk fabric or paper, making adjustments.
FOR ADDITIONAL PATTERN DETAILS, SEE MY NOTES HERE.
Here are the two pattern pieces:
 2. Start with a Men’s Dress shirt (or if you’re going to make an infant size dress, use a boy’s dress shirt). The larger the shirt, the better because you will have more fabric to work with.
FOR ADDITIONAL DETAILS ON PICKING THE RIGHT SHIRT, SEE MY NOTES HERE.
 First, carefully remove the front pocket (if there is one) with a seam-ripper. Then cut off the sleeves and collar:
 Cut the sleeves in half. In this tutorial, we will use the top portion of the sleeve. But if you’d like to create to a sleeve like this, you will use the bottom portion (not discussed in this tutorial).
 3. Cut out your Dress.
Lay your pattern pieces down on your dress shirt (which you created on a junk piece of fabric or paper). You will cut the front and back of the dress at the same time; they are the same pattern piece:
 With a sharpie or fabric pen, trace around your pattern and draw directly on to the dress shirt:
 Cut out the Dress front and back. Leave the length of the dress un-cut until the very end, when you can try it on for size:
 Trace and cut out your sleeves. Make sure you cut TWO of these:

 4. Start Sewing.
With right sides of the fabric together, pin the diagonal portion of one sleeve to the diagonal shoulder area of the dress:
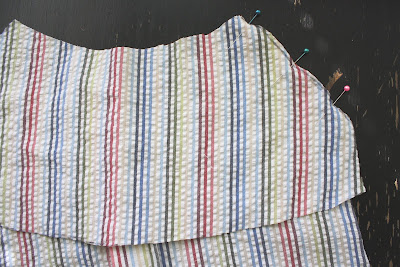 and sew (using a 3/8 or 1/2 inch seam guideline on your machine. Make sure you use the same seam allowance on the entire project):
 It will look like this when you turn it right-side out:
 Repeat with the other sleeve:
 And then sew both sleeves to the back of the dress in the same manner. When you’re done, it will look similar to a painting smock, like this:
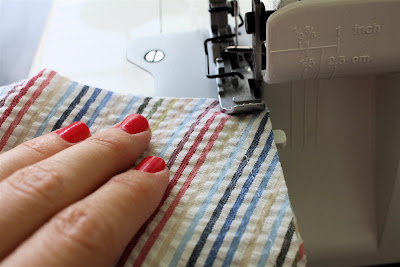
 If you have a serger, finish off all your seams, by serging down each one.
* If you don’t have a serger, you can zigzag your seams (to give strength to the seam and avoid frayed edges when the dress is washed) or you can just leave them as is:
 5. Create a casing for the neck.
Serge all the way around the entire neck area to finish of the edge and prepare for the neck casing:
 When you’re done, it will look like this:
 * If you don’t have a serger, you will need to double-fold iron…meaning….
You will need to fold the fabric over 1/4 inch all the way around the neck area and iron, and then fold it over again and iron to create a casing for the elastic (so there are no raw edges):
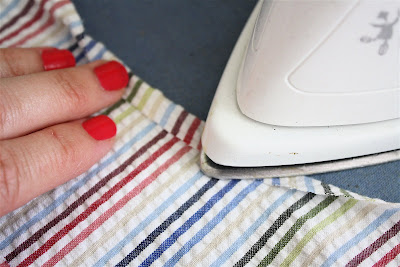 You will be stringing elastic through the neck casing with a safety pin. So, before you iron the fabric over to create the casing, lay the pin on top as a guideline, to make sure you make the casing big enough for the safety pin to get through (otherwise this will become a very frustrating project)
 Create the neck casing by ironing over:
(note: Because the neck area curves around, the casing won’t lay entirely flat in some spots when you iron it down. This is normal. Also, if the casing bunches up a bit when sewing that’s okay too. It will be on the inside and won’t be seen by others. And since this area will eventually be gathered with elastic, it won’t matter anyway!)
 Pin the neck all the way around, making sure when you sew it down that you leave an opening for the elastic to go in and to come out. To help me remember this, I do double-pins at the beginning and end (as Start and Stop points). If you’re going to add a personalized clothing label, make your opening large enough to accommodate the label (sewn in later):
 For great ADDITIONAL tips on sewing the neck casing see Sarah’s notes HERE on Presser Foot.
Start at the first double pins and sew all the way around the neck line and end at the other double pins:
 Just FYI, you will be sewing the top front of the dress closed by doing this (so that the dress does not open all the way in front with the buttons). The dress front is more of a facade:
 6. Sew the sleeves and dress sides.
Serge the edges of both sleeves:
 * If you don’t have a serger, you will later do the double-fold iron method mentioned above with the neck line.
With right sides of the dress front and back together, pin the dress together on both sides, from the end of each sleeve all the way down the sides of the dress:
 If you are going to add a small label to the side of the dress, insert it now about 2/3 of the way down the side of the dress:
 and pin it in:
 Start at the end of the sleeve and sew all the way down, curving and turning at the armpit area and continuing down the side of the dress:

 Serge and finish off your seams and iron out your side seams. (It took me years to realize that you clothes will look FAR more professional if you iron all your seams and hems well)
 7. Create the sleeve casing.
Iron each sleeve cuff over (using your safety pin as a measurement guideline).
* If you did not serge your sleeve edges (in Step #6 above), first iron over the sleeve 1/4 inch and then iron it over again the size of your safety pin:
 Pin down the sleeve casing, leaving an opening for the elastic to be strung through, and mark the Start and Stop points with double pins:
 Start with the first double pins and sew all the way around to the second set of double pins:
 8. Create a waistband (optional but adds fun spice to the dress).
Decide where you want the waistband to be (best if it’s between buttons) and measure the width of the dress, adding two inches to each side of that measurement (if the dress is 15 inches across, you will cut your waistband 19 inches across, to allow for the A-line cut of the dress)
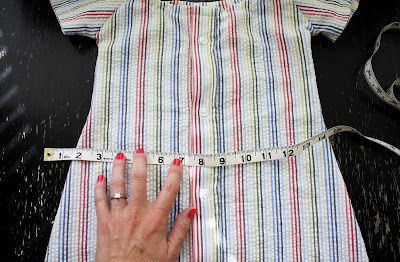 There are various ways to create the band but this is the method I used this time around. Your waist band will be about 2 inches wide and your fabric will be folded/doubled over.
So, you’re going to create two rectangles that measure 5 inches by 19 inches (or whatever the width of your dress was, plus 2 inches on each side). These measurements include room for a 1/2 inch seam:
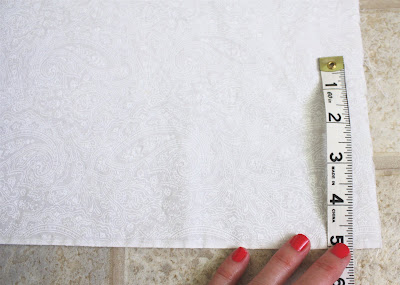
 Taking one of the rectangles, pin both sides together, lengthwise:
 and sew the rectangle closed, creating a long tube. Repeat this step with the other rectangle too:
 To turn each tube/band right-side out, attach a safety pin to one end:
 Stuff the pin down into the fabric tube:
 and continue to push it through:
 Till it comes out the other end:
 Do this to both waist band pieces and iron them flat:
 Lay them on top of each other and on top of the dress, in the position you want them in:
 Using a pen, draw a diagonal line down each side of the waist band as a guideline, so the band will fit exactly on top of the dress:
 Using the drawn guidelines, sew the two waist band pieces together (sewing right on top of that line) and cut off the excess seam (no serging is needed here):
 Turn the entire band right-side out and pull it over the dress and into position on the dress (with one part the band on the dress front and one part on the dress back):
 This is not the easiest step, but slip your hand under the dress and carefully pin the band down, all the way around the dress, marking Start and Stop points for the the elastic to be strung through:
 Your dress should look something like this:
 First sew one side of the band down (again, leaving a small opening for elastic to go through):
 Then sew the other side of the band:
 And now you’re going to create three small casings in the waistband. I usually eyeball the width of these casings and sew a line 1/3 of the way in from each edge. If you don’t feel comfortable with this, use a fabric marker (one that will WASH out later) and mark a few guidelines all the way around to help you sew the lines.
*NOTE: if you’d like to leave the waist un-gathered like this, you can simply sew the waist band down on both edges and skip down to the next step.
 (make sure you leave openings in each of these casings):
 Your waist band should look something like this:
 9. String the Elastic
Using 1/4 inch wide elastic, you will need to cut 5 pieces of elastic to finish off the entire dress. Lengths will vary, depending on the measurements of your child. So, use a current shirt of theirs or measure around their arms and waist, so you don’t make anything too tight.
The measurements I used are this:
Arms: 9 inches (2 pieces)
Waist: 20 inches (2 pieces)
Neck: 19 inches
 Attach a safety pin the end of your elastic. I double-pin, to avoid the skinny elastic ripping free half-way through the project:
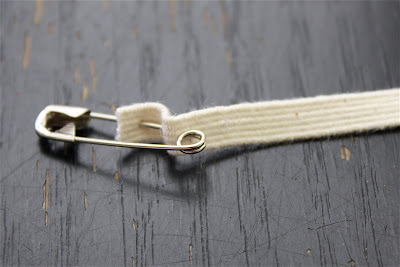 We will start with the waistband, pulling elastic through the two outer casings (there will not be elastic in the middle casing). Push the pin through the opening:
 And pin the other end of the elastic to the end of the opening:
 Push the safety pin and elastic all the way around the dress, till it comes out the other end. It can be hard to push through the seams and button front but wiggle and push the pin till it continues through:
 Pin the beginning and end of the elastic pieces together to hold them till you’re ready to sew the elastic together:
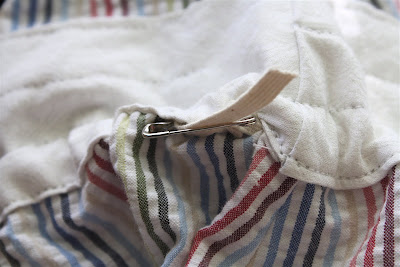 When you’re done with the first casing, it should look like this:
 Repeat this step with the other waist band casing:
 Shift the gathered fabric around so it’s evenly distributed and at your desired width. Pull both elastic pieces together:
 And sew them together using a zig-zag stitch for strength:
 Then finish off your casings by stretching the fabric straight and sewing all the waist band casings closed:
 When you’re done, it should look like this:
 In the same manner, string the elastic through the sleeve and the neck casings. Sew the elastic closed with a zigzag stitch:
 If you’re going to add a personalized label, pin it in to the neck opening and sew the casing closed with the label inside:
 Pull the fabric straight and sew another line across the top of the label (sewing over the elastic inside) to keep the elastic and fabric from gathering in this part and warping the label:
 When you’re done, it should look like this:

 10. Create the Hem.
Try the dress on your little one and find a desired dress length. I prefer chunky 1 or 2 inch hems, so allow accordingly for the fabric to be folded over and ironed before cutting the length.
Starting at one end of the button front, serge all the way around the bottom of the dress (do NOT serge the dress closed. Leaving the bottom portion open makes it easier for playtime).
* If you do not have a serger, double-iron the hem by ironing over 1/4 inch first and then ironing over the desired hem length:
 Pin down your hem and sew all the way around:
 Sew off the small side opening near the button front:
 I also prefer a double-stitch hem (looks more professional). This can be done with a double needle but I’m lazy and don’t want to change needles. So I use my machine foot as a guideline, putting the first line right next to the number 1 below. I then sew a second hemline all the way around:
 So it looks something like this:
 Iron your hem down one more time (it will look more professional):

 AND…..You’re done! Congratulations!





I cannot see why if the shirt is large enought, turn the shirt up side down, lay the pattern peice on the shirt and the dress will be button up the right way.
What a GREAT idea! THX
I love this dress! Such a cute idea – I can’t wait to try it. The directions are super easy to follow also. Thanks!
Hi Dana, Did you give permission for your photo to be used on this blog –
http://thesparklingmartins.blogspot.com/2011/03/boy-who-loved-dresses.html
Thought you might want to know…
Hello,
I came across this tutorial after googling “how to make a shirt dress” I am interested in making one for myself and your tutorial and the end result is what I am looking for, BUT I am by no means anywhere near the 2T size lol I am a new to sewing and was wondering if you had a guesstimate (for lack of a better word) at how many inches I would add to make this into a womens size (6 to be exact lol)? Or a suggestion on how to figure it out for myself… Thank you for any tips or pointers! And Thank you for your blog I LOVE it!!!
Hi! I love this tutorial! I’m a beginner at sewing, but this tutorial is so detailed that I think even I could make this cute little dress! 🙂 Do you mind if I “pin” it to Pinterest?
Hi Dana! This tutorial is what brought me to your site over 8 months ago. I just now was able to give it a try, but sadly I didn’t get the pattern right and my dress went to waste! Any suggestions on how I could make this work? Best wishes to you and baby!
Take a current size dress from your daughter and trace that?
Dear Dana, love your work, I was trying to draw the pattern to translate it on to centimeters with autocad and I found out that when I try to match the sleeves with the dress it doesn´t work so I redraw it ¿How can I send you the sleeve that matchs with the dress?
Thanks and best regards
Dear Marta, I would like to do this lovely shirt dress and I am also in the cm-world 😉 Could you send me your pattern? That would be fantastic and a great help! Many thanks in advance and best regards.
What a fantastic idea love loved it.
Hey, I was able to put your pattern onto transparency and trace it bigger. Used the 14 inches as reference, found that the sleeve’s 6 inches is actually 4 inches. while on the main dress part, the 6 inches is 6 inches. The measurement is off, 🙁 (even asked husband who is good with this kind of thing, he says its off) so by any chance Marta got her updated pattern sent to you?
I love this dress! Such a cute idea – I can’t wait to try it. The directions are super easy to follow also. Thanks!
I found this via Pinterest, and was so excited to try it! I showed my husband, and he immediately pulled out 5 or 6 old shirts for me to use. I have done it twice now, and my little girls loves them both. The first one I put some decorate fabric flowers on, and the second, I did a silky sash that ties in the back. Thank you for this wonderful re-purposing tutorial!
Thank you for this tutorial! I just made it and it looks soooo cute on my little daughter.
My husband just threw out an old flannel shirt in great shape. Is there an easy way to make this as a long-sleeve dress for the winter? I’m a beginner but would love to try! Thanks!
sure! Just cut the sleeves long and add elastic at the bottom of the sleeves…so it’s a cute long “puff” sleeve.
Hi,
Can not wait to make this 🙂 Have a free day today and an old checked nightshirt which is just perfect for recycling. Never made an item of clothing at all before and very new at sewing with a machine but I’m just going to dive in and give it a whirl.
Thanks for sharing this great pattern – looking forward to seeing my 4 year old daughter wearing a handmade item of mine 🙂 xxx
Such a great idea! I made a Princess Dress out of an old men’s shirt today. I have linked to this post and your blog as a source of inspiration. I hope that is OK 🙂 You can find the post here: http://prettybobbins.blogspot.com/2012/03/mens-shirt-into-princess-dress.html
Dana, thank you so much for such wonderful tutorials! I just finished my first one of these shirt dresses. She’s a little older so it’s more of a tunic on her. But I love it and she loves it. You make it so easy for someone who has never sewn clothes before to make beautiful things. Thank you again. I linked back to your tutorial in my post too.
I love your blog and tutorials! Thank you so much for sharing. I have made my little one two dresses, two pairs of capris, and so many diaper covers. I’m such a fan!
Hi 🙂 Your blog is so cute! Is there any way you could translate this pattern to be used to make an adult- sized dress?
hi just wanted to say thank you soo much for this tutorial!..i am a beginner with sewing and i made matching ones for my older and younger daughter from my husbands and older sons white shirts and i added pleats at the bottom with some pretty fabric that matched the waistband!..so excited for them to wear them and take pictures!!!…thanks soo much!
I just finished my second shirt dress using this tutorial. It was SO easy to follow and the dresses came out beautifully! The last dress I made was a size 8, to fit my niece who is almost 8 years old! To add some length to the dress, I used the same method that you used for the waistband. Thank you so much!
These are adorable! I will definetely being trying these out! I am so glad I found your website.
must try this…love…but where did you get your labels? love them 2
Hi! Thank you for the instructions. I’ve been looking for a way to make my daughter some dresses from my husbands shirts. These are so cute! Thanks again for sharing.
I finally buckled down and MADE this! Thanks for sharing a great tutorial! http://www.bearrabbitbear.com/2012/06/shirt-dress-from-made-i-finally-did-it.html
Ciao! Complimenti il tuo tutorial è fantastico e la tua idea di riciclare le vecchie camicie lo è ancora di più!!! un saluto da Federica!
Wow, this is awesome. So clever and cute! Thanks for sharing such a great idea.
Thank you for this wonderful idea and the very detailed instructions!
I made a dress for my 7 year old girl this spring and finally got some pictures.
This one is special because I made it from the very shirt that her daddy wore when we got married, seven years ago! It has been hanging in his closet and now has new life:)
I was so inspired as to also make myself a new blouse, from another of my husband’s “cast off’s.” /Users/French Family/Desktop/IMG_3210.JPG
Thanks again,
Mary
/Users/French Family/Desktop/IMG_3225.jpg
I love your dress, I would like to make this for my granddaughter out of one of her Pap’s shirts. He just passed away two weeks ago and she loves dresses, this one would be really special for her. Thank you for sharing your talent with others.
Why don’t you make it leaving the collar on cut sleveless, from the arm hole to the neck?
Hi I am a beginner at sewing and I really like this dress for my granddaughter but I think I missed a step somewhere. Why would I have to cut two retangle pieces for the band if you already cut one 19 inches? does the band go all the way around the dress? and how do you get the band seams tucjed into the side of the dress? Remember I am a beginner, I know very little about sewing thanks for your help
Good question! I’m not a beginner and find that I’m missing something! The waist band seems to be confusing me? Why would I need two rectangles should there be something about sewing them together at least once?
Hi Dana,
I love you website. My mother has given me about 20 of my grandmother’s satin and silk button-down shirts. They are great patterns. Would you attempt the shirt dress in these fabrics? I have never sewn with either and am a bit leery. Do you think it would still be as cute at the cotton?
Thanks!
Loved this tutorial! Linked it to my blog when sharing the dresses and shirts that I made using this tutorial and my husbands unwanted shirts. 😀
http://2ofum.wordpress.com/2012/08/08/10/
Happy Crafting!
Rebecca
Ive tried several times now to copy this pattern, unfortunately the measurements are all wrong and dont fit,,the 6 inch on the sleeve arm and on the dress doesnt say at what angle its to be and there isnt any measurement for the depth of the curveture of the neck or arms,,nice idea and great instructions just a shame the measurements are insufficient, i was really looking forward to making this dress for my niece 🙁
LOVE this! Just made one for my daughter, but made a romper suit rather than a dress. CUTEST OUTFIT EVER and so little work! Making one for my bigger daughter latter today! 😀
Hi…I tried to make this dress, and I’m fairly certain something is not quite right. I’d really like some clarification if possible, particularly about the sleeves. I blew up your pattern to actual size, so it appears to scale. But…your pattern seems different from your actual photos. The curve on the sides of the dress don’t seem as deep, and I cannot figure out how to get that 2.5″ line on the sleeves without increasing the bottom curve to over 14.” Please help…I seem from the comments above that I’m not the only one with problems. Thanks!
please do a tutorial a teen girl dress please
btw your tutorials are very creative!
Totally love this but my question is different. Where do you get your tags made? I turn recycled wool into things and want tags but have not found a source and I loved yours. May have to add old dress shirts to my list on my next wool hunt (daddy’s a banker and just does boring white). Thanks for so many great ideas
Dear Dana your tutorials are perfect! so nice and cute, I’ve made still a lot of them!! Keep bring us your gougeous ideas!!!
I like it, hopefully I can make it
Ik just love this! Too bad we haven’t got a girl here … I would make hundreds of those. Gonna start with one for my little niece …
this is an awesome 1!! cant wait to try it on my lil one! you make it all quite easy n simple to follow. thanks a ton!
Has anyone worked out what the problem is with the pattern measurements? I just tried to make this and it didnt work out right???
Hi
great tutorial.l am new to sewing. I got stuck in sleeves measurement. Cant get the 10-6-14 measurement right.pls help. If i want to make it for my 7 yr old what changes are needed
thanks
Hi,
Cute dress pattern.
Love this dress and have lots of shirts to do this with. Unfortunately I’ve tried and tried to make this pattern without much luck. Any chance you could sell the pattern for this? I’m not quite sure how to make the curves even when making my own pattern.
hi how did you get the swirls on the brown plad dress? or did the shirt come that way? =)
Thanks for the awesome tutorial. I used it to make a dress for one of my girls, and I’m going to make ONE MILLION more. So cute and easy.
A) I love your nail polish.
B) I followed ALL YOUR DIRECTIONS, which is new for me. I had never zigzagged the edge before sewing and it looks SO MUCH NICER. I also PRESSED, which I usually skip.
Thanks again!
Hey there. I tried my hand at my own shirt dress for my daughter. Love your site- thank you!
Love your website and have been an addict since I have started sewing 6 months ago! still trying to figure out sleeves, I guess I need more practice! LOL
thanks again for all the free, easy tutorials!
Nicole
Today I transformed my grandmothers old shirtdress into a lovely dress for my daughter with your help – thank you!
Many thanks for this tutorial! I converted an old shirt in a beautiful dress for my little girl! Thank you!
You should publish a book on your shirt- to- dress designs.
I have made MANY of these dresses for the little loves in my life and my advice is if you don’t have a serger fix the zigzag settings on your machine to do a tiny, short stitch and pretend you are “serging” the edges. Doing the double fold causes a lot of frustration for me so this little trick really helps!!
I like this idea! I think I will give it a try!
I think the little girls’ dresses are not only beautiful and charming, but so appropriate. The lengths are excellent. Much of the clothing for girls today is too short or shows too much at the top — ready-made and often home-sewn. But then this goes for women’s clothing too! Fantastic job!
Haven’t tried yet but I think it is a very clever .Well done. Look forward to making one for my daughter
really would LOVE a printer friendly version. (or if you have a tab point me in the right direction) As I suck at sewing so I print and send to my aunt that is a wiz at sewing but 57 pages later. Not so cost effective to make things from scratch
Dana,
I love, love, love your website! Your ideas are terrific and your instructions are clear. Wanted to let you know how I used them: I wanted to make simple dresses for Little Dresses for Africa, a non-profit that provides clothes for extremely poor children overseas, so, using men’s shirts I bought at the Goodwill for $1, I combined the Pillowcase Dress pattern on the LDFA website with your Shirt Dress idea to make darling little sleeveless dresses. I even followed your tutorial to make bias tape from the sleeves of the shirts which I used to bind the sleeve edges and make the shoulder ties. They came out SO CUTE! Thanks for being the inspiration!
Kudos för besöket, det här vart intressant!
Great !!!! Thank u so much….
This is so very cute! Can’t wait to make for my granddaughter! Thanks!
i like your photo. very nice and i like your post. very interesting.. great postt..
espectacular…. las felicito… son ideas muy buenas… y bellos quedan los vestidos…
hi, i tried to make this little dress but when i got to the sleeve the pattern you show has 6in, then 10in and then another 6in. but at the bottom is shows that it should be 14in, so im confused. if you cut the piece the size you show the bottom is 22in across, i don’t sew so it’s probably something im doing wrong, could you please explain what im doing wrong. thanks, corinn
Love the step by step instructions. Just raided my husbands closet for shirts. I think he still wears some of them (shhhh…).
Hi Dana,
Thank you for the step by step instructions, I have just finished a beautiful stripey shirt dress for my daughter from her daddy’s old shirt and it looks great. Please let me have your email address if you are interested in seeing a photo. Many thanks again,
Maria
London,UK
love ur work its amazing..thank u so much for this easy tutorial.. I ao glade tm find your blog
Hi, I’m really grateful that you shared this pattern here… I want to ask, how do I make one that would fit me. Someone gave me a very big checkered men’s shirt ans I’m hoping to make it into my blouse… Thanks.
Hi
Love this tutorial and have made several of the First Day Dresses for my twin daughters.
Do you think a shirred waist would work instead of a separate waistband?
Thanks
Hi Dana,
I pinned your Desert Beauty tutorial several years ago, now my daughter is 3, and I’m ready to make this dress! However, your tutorials are down on your blog. If you are still checking this, I would appreciate your posting the Desert Beauty again so very much! I have the perfect shirt to use – been saving it since I was pregnant. Thanks so much!! 🙂
My girls are 7 and almost 9. We lost their father to cancer almost 4 years ago. I would LOVE to make them a dress from one of his dress shirts. He was an auto mechanic so did not dress up much but I know I kept a dress shirt or two of his. I used 2 of his t-shirts to make my 2 boys throw pillows this year and have been wondering what I could do for the girls. He was a tall guy, 6 feet. Do you think a dress shirt would be big enough for a dress for an average height skinny 9 year old and average 7 year old. I think clothes wise they are wearing size 6 and 7 pants so they are not tall.
Hi Debbie,
I’m so sorry about their father :(….but what a cool idea.
For a 9 year old, a tunic style shirt dress would prob be best–with a pair of leggings underneath?
You’ll need to do some measuring on your girls and create your own “Pattern” piece to go along. OR use an existing pattern with this tutorial concept.
Have fun sewing!
Hello, Dana!
Thanks a lot for the tutorial from deep in Siberia, Russia 🙂
I found it ages ago and made a dozen of dresses not only for my girls. I think it’s a great hand-made gift-idea. The tutorial is very clearly written which makes the process really simple. Thanks once again!
Awesome tutorial! I’m a petite woman and this would totally work for me too! I’m thinking of using your tutorial as a guide to turn my husband’s shirt into an off the shoulder romper. Thank you!
Is there any way I can get a copy of the following post shirtdress July6,2008 or if you know of any other patters Thanks Denise
I have been reading out many of your posts and i can claim pretty good stuff. I will make sure to bookmark your site.
I have enjoyed your posts . Very creative and cute. A tip from a grandmother on sewing and pinning the waistband. Mark where you wish the waistband to go with a pencil or chalk. Then put dress on an ironing board as if you are planning to iron dress. Then place a piece of card board between dress and ironing board. Then pen waist band to dress(much easier than the hand under fabric method).