 I never seem to grow tired of flowers. And this version reminds me of being a kid, with a grown-up twist.
Did you ever make those tissue paper flowers in grade school? You know, where you fold them up like a fan and then pull the petals back?
 Yep, that’s what we’re doing here! But by using paper napkins, instead of tissue paper, the flowers have a more structured hold. They almost look like fabric.
 And the white ones look like real magnolias to me. So pretty.
 These are very easy to make and add a lovely touch to any sort of celebration or even your day-to-day decor.
Let’s get started!
I used nice 3-ply, party-style paper napkins for this project. Of course you can make them with tissue paper as well but I wanted to see how it would work with napkins. You can purchase packages of napkins at most stores: Target, Walmart, Party City, Hobby Lobby, etc.
I purchased my napkins at IKEA because they usually have unique colors, such as the Chartreuse below. They usually only carry about 5 colors at any given time (and once they’re gone, they’re gone). So when I see a color I like, I buy a pack or two and keep it in my stash. At $2 each, it’s worth it. That gorgeous blue below is currently in stores. So grab them!
You can use any size of napkin you’d like but I really liked the large over-sized look for a wall, so I used the largest size IKEA napkins (and some smaller ones for the centers).
 Okay, no rocket science here. And there are so many variations you can do on this project. So, I’ll show you the basics and you can run with it.
Grab about 4 Large napkins:
 Unfold them and lay them on top of each other in a pile:
 If you’d like to add a contrasting center to your flower, place a different colored napkin on top. It works better if the center napkin is slightly smaller. Or just take a large napkin and trim it down. ALSO, I realized this after the fact, but you may want to scallop the edges of your center napkin right now (but that will make more sense in a bit).
 Now start folding your stack of napkins up like a fan, or accordion:
 Just keep flipping it over and folding, flipping over and folding the next piece on top of that,

 until everything is folded up like this:
 Then pinch the center of your flower together and kind of smush it down where you’re pinching together:
 Then use string, pipe cleaners, staples, whatever you want to hold the flower together in the center. THE BEST THING TO USE is wire twist ties (the kind you find on bread bags or with garbage sacks)
 Cut a small semi-circle at each end of your fan, so that the napkins become “scalloped”:
 Should look like this:
 Then very carefully (so you don’t rip the napkin), start to peel each layer of the flower up. You may need to carefully pull the petals out a bit at the center of the flower so that they come together better in the middle.

 If you didn’t scallop your center napkin, you can do it now. In fact, I always take a pair of scissors to each flower when I’m done, just to trim things here and there, for a pleasing look.
 Shape your petals the way you like it, and you’re done! You have a gorgeous over-sized flower to decorate a table, hang on your wall, or you could even downsize it and make a corsage.

 VARIATIONS:
* Reverse Scallop and Tissue Paper look. If you cut the edge off of your napkin, you’ll be able to peel away the individual ply-s of each napkin, so that it looks more like tissue paper:
 And if you cut a reverse scallop on the ends…..
 You get a cool spiky look:
 * Stripes. It’s fun to use striped napkins for the outer flower, or for the center. I varied the direction of the stripes:
 and put a bright color in the middle:
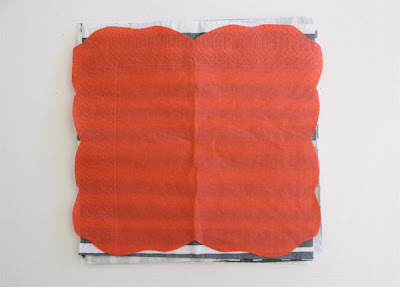 Fun.
Fun.
 * Pom Poms – By pulling the layers all the way around to the back you can create a Pom-Pom look. It’s cute to hang them from the ceiling or from an outdoor patio cover. (sorry, no photos but something similar to what Martha’s done).
* Flowers on a stem. If you have left-over dowels from your No-Sew Flowers, glue a little napkin on there and stick them in a tin can. Simple. Place it on your desk!
 * Magnolias. This is probably my favorite version of these flowers. Because of the thickness of the napkins, the petals look so much like a real magnolia. If I were as craft-minded 5 years ago as I am now, I may have made a ton of these to decorate my wedding reception.
 Just follow the directions above and….
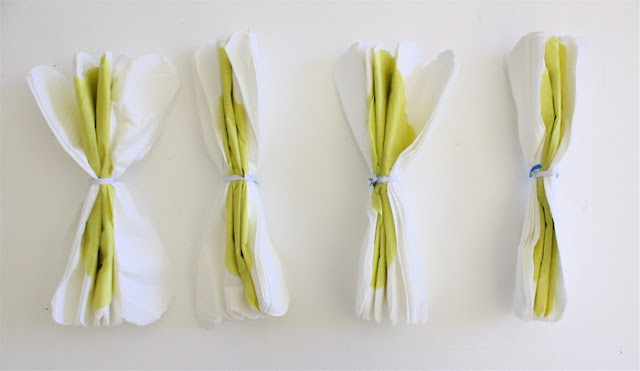 Blossoms are everywhere.

 Of course to truly make them Wallflowers, you should hang them on the wall! Grab some twine, rope, whatever you’d like to use:
 If you’ve made your flowers with twist ties, then just open the tie a bit, lay the rope down, and twist it back up:
 String a whole bunch together and you have the perfect Wallflower Garland:


 Or link your large wallflowers and hang them vertically. It’s adds nice accent to a big plain wall:

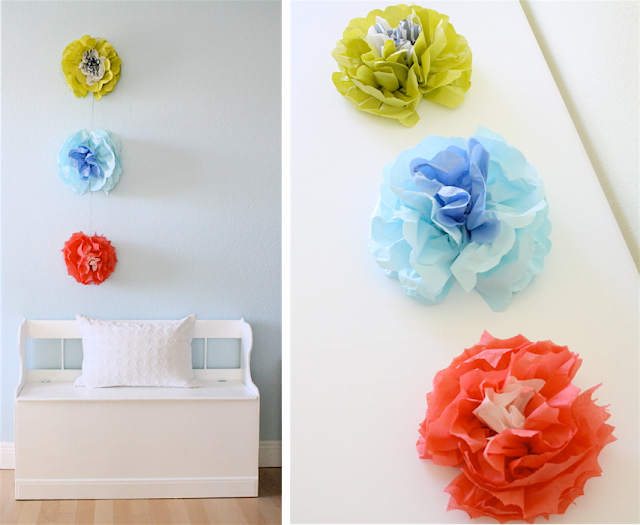 They’ll be a conversation starter when visitors come to your home.
In fact, when Casey came home and saw them he said, “Wow, they look elaborate.”
Ahhh! My tactics are working. Mwah-hah-hah. A very simple sheep, disguised in wolves’ clothing.
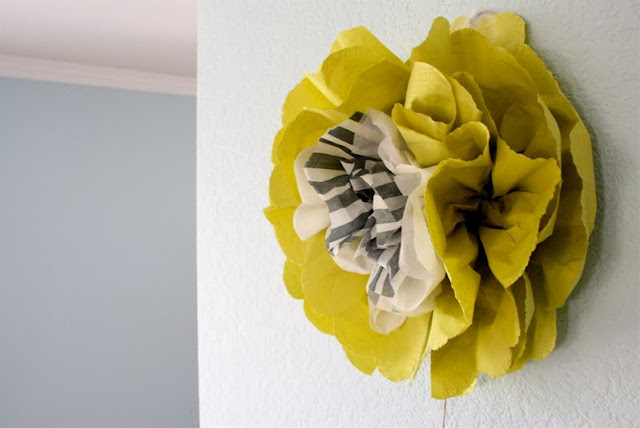 Enjoy!





Just came across these on a rainy California night and really appreciated their bright colors. I can’t wait to try this out! Have walls just waiting for them…
These are beautiful! I’ve made them with tissue paper before and fluffed them all the way out. I love this variation!
Estas flores están muy bonitas, yo las he hecho de nailon o sea de plástico, quedan bien también.
They´re looking really great!!!
I love all these flowers, will be making them all soon
Absolutely LOVE these…Made a bunch to make a flowerd wall for my little girls room!!!
Wow!! I’ve been meaning to do this since years ago, and now’s the perfect time since i have my room to decorate!! Quick question. If, say I don’t have any of those paper tissues and I’m sort of broke right now, would it be fine if I use normal paper or recycled notes?
i am always looking for activities to do with residents i work with in a nursing home – many of them have dementia, i have come across your site and these flowers are perfect. easily put together in a short time but very effective and pleasing to look at. any resident who made these would be proud of what they have created, i will be making these with the residents for a display and passing your site on to other activity planners.
Awesome flowers and beautifully written tutorial. I just want to sit down with papers and start making these.
thanks.
Love this tutorial – my 8 year old daughter and I are making them for her Earth Day project! She needed to make a project using things around the house!! Love them! Next we are making pink and white ones to string up in her room.
Thank you
I like it:)
I just made a hundred of these with my class for the spring dance decorations. You have some great, unique colors here.
Mom used to make these in the 60’s! We had a large bouquet in our living room in a really cool Mexican vase.
Finally found you online – been trying to remember how she did it! I know she used sheets of heavy crepe paper.
Thanks so much!
Oh my gosh, I love those flowers.
So pretty 😀
Just beautiful!
My daughter’d made those for me for my birthday, and I intend making some with my grandchildren, who always like “to do work” like that when spending afternoons at me
These are so cute, I love the idea of using napkins. Your site is awesome, I love your sewing tutorials as well. You are so talented!!!! Thank you for sharing your talent with the public.
These are absolutely beautiful. Thanks so much for taking the time to post this tutorial. I am trying to make my 12 year olds birthday really special and was very stuck for decorations. This is perfect! I can already see her face when she sees them on her special day. thanks.
In the community where I grew up, you made these with cheap facial tissues and taped them to the cars for weddings. The bride and groom was always white and the other cars were in some kind of coordinating color that matched the wedding colors. Then you drove around town honking your horns on the way to the reception. It was great fun!
I LOVE YOU! you have just saved my life! I’m going to make these now!
These flowers are absolutely stunning! Thanks for the great instructions. I love your sewing tutorials as well. You are one talented lady.
realmente muy bonito, adoro las flores, están estas muy lindas y muy monas, saludos!
love these, and the colors you used are very pleasing, we used to do these is school, great tutorial
I’ve made these flowers to brighten up and indoor garden party. They’re really easy to make and great on a budget.
I have made a “Whole bunch” of these flowers in bright fiesta colors and they are ready for my daughter’s birthday “fiesta” this weekend! Thanks for sharing!
I love to make these. If you will take a pin and seperate the layers of the napkin one more time, they come out twice as pretty. Each layer is really 2 layers pressed together.
These really are fabulous. I will be raiding my napkin supplies tomorrow. Thanks for sharing.
Going out to the dollar store in the AM. I needed something to decorate for a House Party next week. These are perfect, thank you so much.
I saw this flowers already before, but couldn,t remember how to do it. I need it for our womens week in our church. you just saved my day. thank you.
natascha, from London
my best friend made these with tissue paper! btw your idea of using napkins is genius! your site is awesome
Thanks a lot ! Merci beaucoup 😉
Wow! Thank you so much! I have just made a couple of these and can’t believe how easy it is. That’s my wedding bouquet, flower girls and buttonholes sorted. I wanted something a bit different and these are perfect! X
Hi. I wanted them smaller so I took one serviette and cut it in four – worked beautifully. Thank you for sharing.
Really appreciate your GREAT tutorial – THANK YOU! Question – any ideas on how to transport these? I’m thinking of making for my son’s Rehearsal Dinner – but I’d have to carry them a ways. Did you have to transport yours – even across town? Thanks for any ideas on keeping them safe and from getting squashed. 🙂
You can keep them flat in their “fan” shape until you get to the dinner and then pull the petals back. Or, make the entire flowers in advance and just poof and fix some of the petals here and there at the party.
The first and most important thing of all, at least for writers today, is to strip language clean, to lay it bare down to the bone.
ルイヴィトンコピー老舗
海外人気ルイヴィトン コピー老舗です。
いろいろ高品質ルイヴィトンコピー品を販売しております。
開業多年、安心と信頼のヴィトンバッグコピー激安専門ショップです