


 Yes, that could very well be true.
 He’s been obsessed with these fabric cookies at our house all week (okay, I’ve been obsessed with making them too. I had no idea I’d love it so much!)
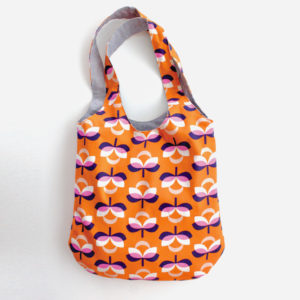
 Last week I made another School Bag for Lucy’s class.
The theme was:
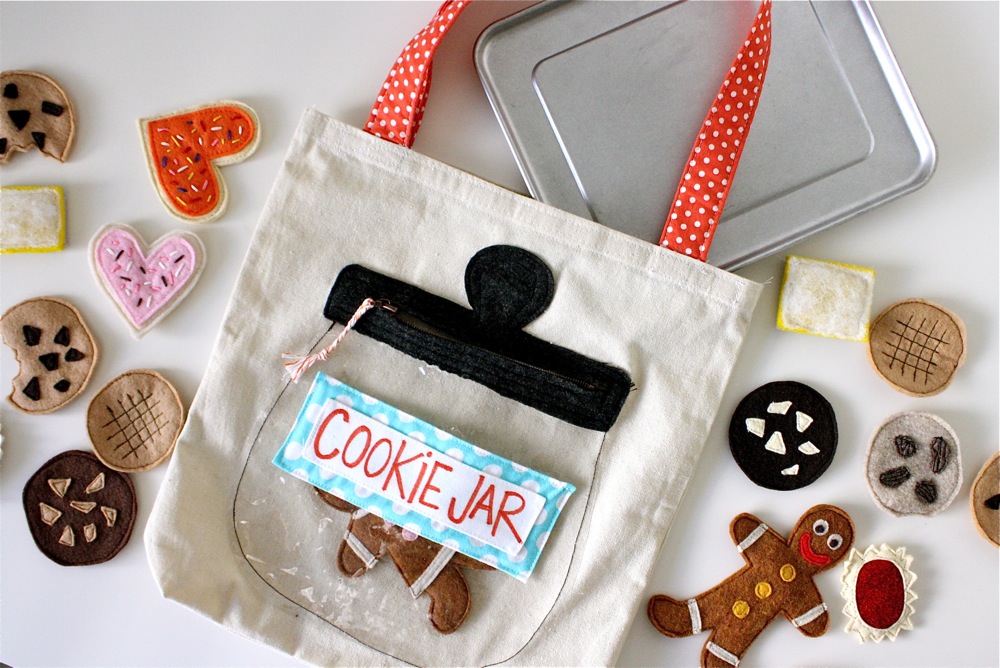
 So I made a clear vinyl jar on the bag, added a zipper opening, and stuffed it full of 20 felt cookies. I slipped a mini cookie sheet in the bag too (from our toaster oven) because I’m sure the kids will want to “bake” them.
 It was so much fun!
And of course it became more involved than I originally planned.
But that’s how it goes with creative projects.
Many of you asked about the book we’re using to make these themed school bags. So far I’ve made Rainy Day, Tooth Fairy, and the Cookie Jar here (yikes. Have I only done 3? I need to scale it down).
Lucy’s teacher bought this book about 20 years so I’m not sure where you can find it now. I saw this book with the same title on half.com, but I’m not entirely sure it’s the same one.
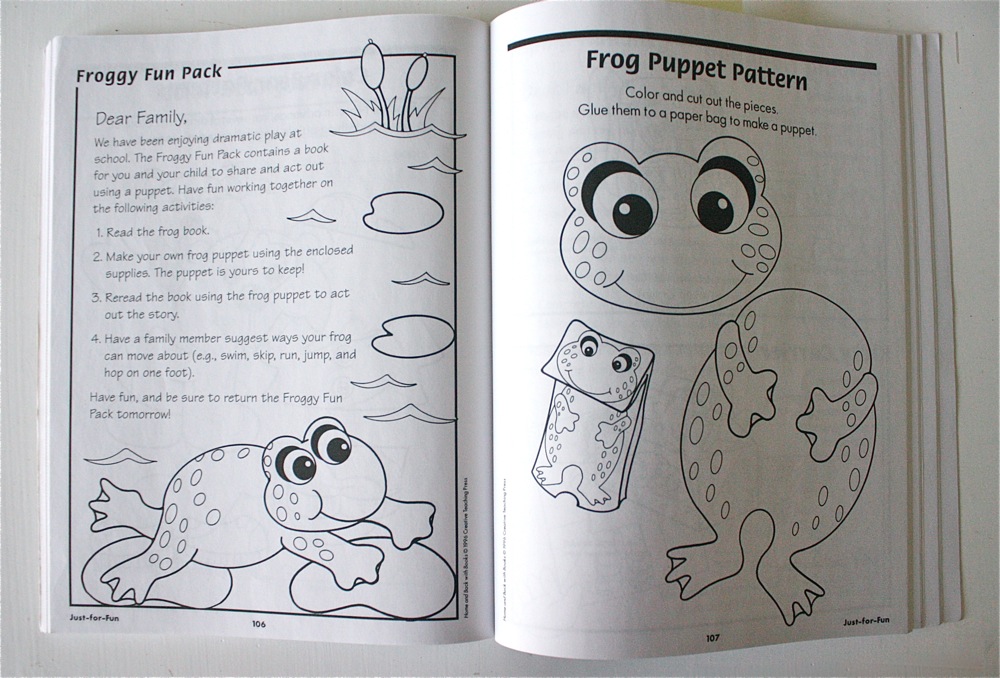
 Inside the book are ideas for 60 take-home activity bags that kids can check out from school and work on with their families. Some themes are scholastically based (science wizard, graphing, math) and some are “for fun” like the Froggy Fun Pack below. But you don’t need the book to come up with your own bags!
Maybe these pages will give you a good starting point….
 Basically, there’s a bag decorated with the theme on the outside (I’ve made some of my bags interactive but it’s not necessary).
Inside the bag goes:
* a book based on that theme. For example you could include If you Give a Mouse a Cookie with this bag. Lucy’s teacher purchased all the insert books years ago so I’m not sure what titles she has for each theme.
* A letter to the family explaining what’s in the bag and that they should interact together using the items in the bag (play a game, do the activity together, etc)
* Interactive objects. These might be tools, toys based on the theme, games, a jump rope, stuffed animal, etc.
* Journals. Some of the themes encourage the child to write down some thoughts or answer questions about what they’re doing. Usually this is just a piece of paper in the bag that says “journal” but it might be more fun to use a real book journal, then each child can add their thoughts to it.
* Whatever you want! The themes are pretty open to your own ideas.
I need to put this info in a separate post with links to the other bags and a list of all the themes.
AND…if you have ideas for each theme, please leave it in the comments! (book ideas, game ideas, etc).

 So….
So….
for the Cookie Jar, the book recommended using a real large glass jar. That sounded like a disaster so I went with a DIY vinyl jar instead. I drew out a simple jar on paper, then traced it to clear vinyl. You can buy vinyl at most fabric shops. It’s cheap and comes in varying weights. Keep the tissue paper on or it tends to stick together and the tissue paper makes it easier for sewing. For more info on sewing with clear vinyl, check out the Split Pea Shamrocks post.
I used felt for the jar lid, sewed a small zipper underneath so the jar would open, and….since I think you like seeing my mistakes?…well, here you go:
 I totally botched up the jar the first time around. I wrote the words in Sharpie marker onto white vinyl, then tried to sew the two together without the tissue paper on top. Ugh. Well, the whole thing stretched and warped as I tugged it through my machine and the then the marker smeared. Best to sew with the tissue on top and then tear it off.
So I started over.
And ahhhh. Much better.
Totally what I envisioned (minus a slightly crooked “cookie jar” sign on front. oh well)

 And then I went cookie crazy.
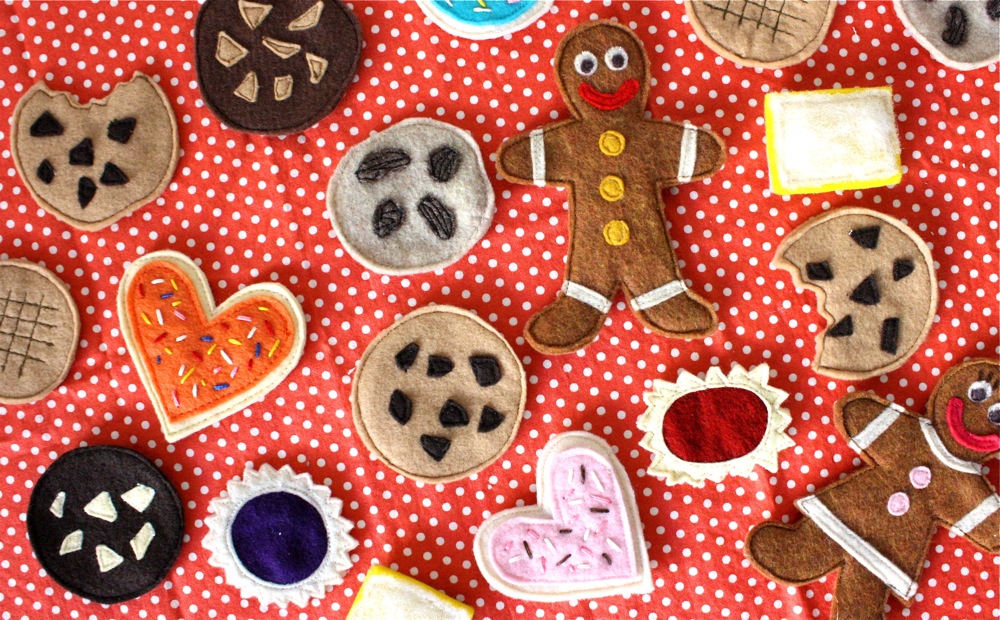
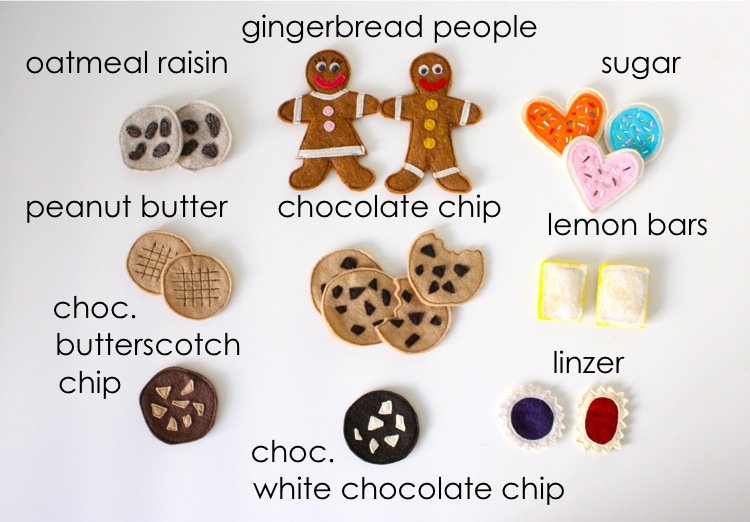
I’ve sewn felt food before (tutorial HERE). But for some reason I became obsessed with these little cookies. First I made classic chocolate chip. Then I thought….there should be chocolate with white chips….then sugar cookies…and then I just made a whole slew of them because I couldn’t stop (and I’m sure my husband thought I was crazy).

 With each new cookie I thought, oh this one’s my favorite. Raisins! Linzer cookies! Lemon bars! They were all so “cute.”
Notes on the cookies:
– They’re all made of felt
– They were sewn in layers by machine: the details were sewn on top and then sandwiched with a back cookie to hide the mess underneath. It’s easiest to cut the bottom cookie after you sew the two together, since the felt might shift slightly as you go (esp on the linzer cookies and the cookie with a bite). After sewing the two layers together, trim off the edges.
– The sugar cookie sprinkles were hand-sewn with embroidery thread
– The lemon bars have a layer of poly batting on topto give it a powdered sugar look.
– The raisins are small pieces of felt sewn on by machine with black thread. Sew 2-3 vertical lines down the middle and curve the lines as you go to give them a textured look.
– For the peanut butter cookies, use your presser foot to sew parallel lines next to each other.
I thought it would be educational for the kids to learn the names of some unfamiliar cookies (my kids hadn’t heard of a few) so I tried to vary the types. And someone just mentioned Animal Cookies too. Darling! Hadn’t thought of that one (maybe the pink and white frosted ones with sprinkles. Mmmmm)

 There are multiples of most cookies since I’m sure over the years a few will be lost. The teacher can hold a few back and replace them when needed.
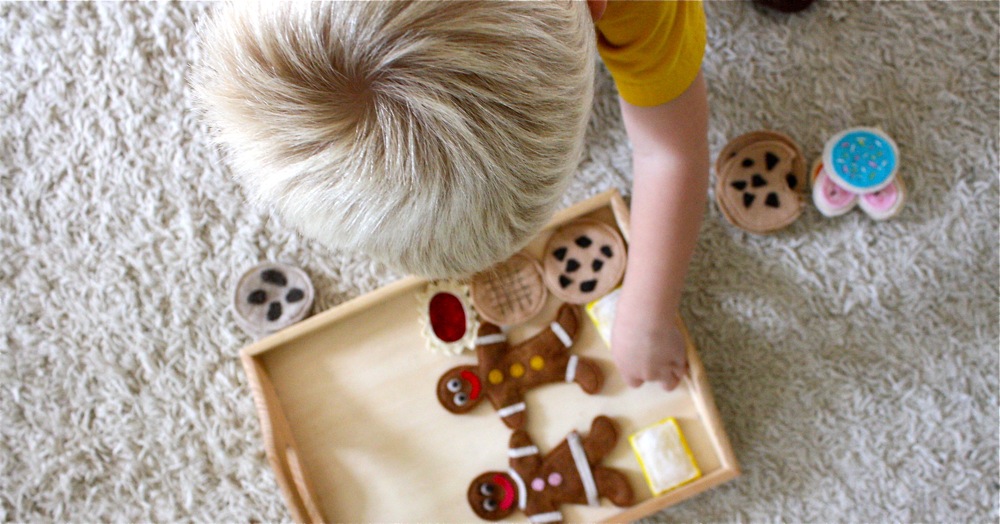
I finished making the cookies late at night so in the morning when the kids woke up, the jar was bursting with treats. You would have thought it was Christmas morning! No joke. Owen played “cookie store” for two hours straight (while I slept in, that was nice).
 And then the next morning he woke up and did it all again….organizing the cookies in the right spot, walking around asking who wanted to buy them. Really cute. I better make him another batch for Christmas.

 And of course with all this sweet talk the kids insisted we make real treats after school. So we went with Classic Chocolate Chip.

 Simple pleasures.


This is such a cute idea. I really love it. The sugar cookies the most!
I am currently in the process of writing a set of tutorials for cookie cutter crafts I have come across in the past 25 years or so.
I must say I have never seen this one! It is very unique. And your tutorial is fantastic!
I plan to include a breif description of your project and a link to your tutorial when I get to the topic of “Cookie Cutters: Not Just For Cookies Anymore: Kid’s Crafts”.
You can find my tutorials at http://buggalcrafts.wordpress.com/
Thanks so much for sharing this craft project and for sharing your mistakes. This will be so benifical to people who are trying this project.
Stop by and see me. I know I will be checking in with you to see what new craft projects you are up too!
I love this idea…my girls would have sooo much fun with these. We make real cookies together all the time but this is awesome! Now they can play as soon as I’m done making they’re pretend kitchen!
Thanks!!!
Just wondering would you be interested in making one and selling it ? Let me know thank you for your time.
Sharon
sorry, I don’t sell products, I just share ideas 🙂
Love this idea! So cute! Here is the book on amazon: http://www.amazon.com/Home-Back-Books-Take-Home-Activities/dp/1574711601/ref=sr_1_1?s=books&ie=UTF8&qid=1350962432&sr=1-1&keywords=home+and+back+with+books
Compact, creative, clever and contained! This is the most amazing idea ever. I’ve seen lots of activity bags stuffed with dollar store crap, but this is so much nicer. A homemade toy shared amongst an entire class and that encourages family interaction is awesome. You have thought of everything–even replacement cookies. Thanks so much for sharing.
I love your tutorial, thank you! Here’s a picture of the one I made:
http://pinterest.com/pin/43769427600260319/
Just stopping by to let you know I gave you a shout out and shared my own version of your excellant cookie kit! http://www.craftinterrupted.com/2012/12/felt-cookie-baking-kit.html Thanks so much!
What a cute idea….think I will make this for my niece and nephew!
This is the cutest thing I have ever seen!! Just adorable!! I would love for you to share it at our craft party SHOW-Licious Craft Showcase!!
Just follow this link…..http://sew-licious.blogspot.com/2013/02/saturday-show-licious-craft-showcase-21.html
xoxo, Marti
adore this idea! always looking for fun pretend toys for my daycare kids. these are totally do-able!
Hi! I am new to your blog and I already love it!!! 🙂 Wow!!! I’m an Early Childhood Teacher and would give anything to have a mom like you to volunteer to make such adorable little story bags for my class!!! 🙂 I’m sure that she appreciates all of your hard work and realizes that you are a blessing to have as a parent! I just wanted to tell you, “Thank you”, for helping out your child’s teacher! I wish that other parents would be as kind and as involved in their child’s education.
Many Blessings, Mel
P.S.
Thank you for sharing your lovely ideas. 🙂
I just got this book from half.com and it’s the same one! Going to making lots of these for 2 kindergarten teachers.
These fabric cookies are soooo adorable! kids will be so much thrilled about these…I’m so in love with them! Thanks for sharing! I featured this post in my blog: http://www.plushiepatterns.com/cookie-jar-fabric-cookies/
Hi Dana!
These are so cute! I love how creative you are! I’m 10 years old and I think you are so creative!
I love this bag! I am a first grade teacher and am searching for ideas to create take home bags for my kids and families. I am fortunate i came across your blog- your daughter’s teacher is incredibly fortunate to have a class parent like you! I would love an involved parent to help create bags for my class.