
Owen is big on textures. He’s always been a cuddly/snuggly kid, he sleeps with this random knit fabric pillowcase that I got at Ikea (which gets snugglier with every wash), and he loves to wear t-shirts that are super soft. I can’t blame him. I love giving him hugs in his super soft Tees. He’s my Owen bear.

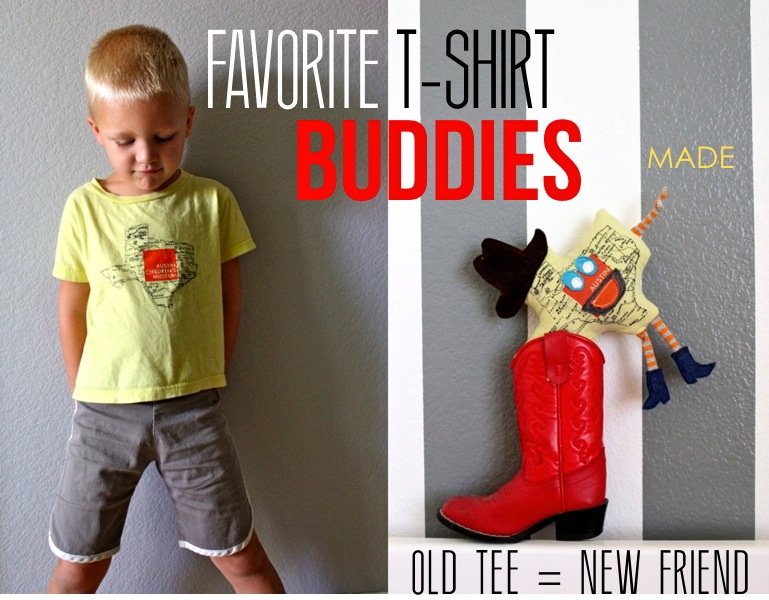
And this t-shirt from the Austin Children’s museum is his absolute fave. Whenever I ask him to go pick out some clothes, he grabs the “Texas shirt”. What’s not to love? Yellow, orange, geography, and super soft fabric. But seriously. It’s way too small now. And a while back some of you mentioned that I should make him a toy out of the t-shirt. Yes!

So I chopped it up, gave it some boots, and Owen’s got a new Buddy.

He was so confused that his shirt could become something new and resusable (he still hasn’t caught on to the whole thing I’m doing in my sewing room). But he was super excited about his new toy! He even helped pick out the colors and accessories.
You can make this project with any scraps of fabric you have lying around. I’ve got a few more t-shirts to tackle after this: 
• Simply cut out two layers of your shape (give it a 1/2 inch seam allowance and add another 1/2 inch to account for puffiness when the toy is stuffed).
• Use scraps of knit fabrics to cut out a face. Sew it to the Front piece of fabric.
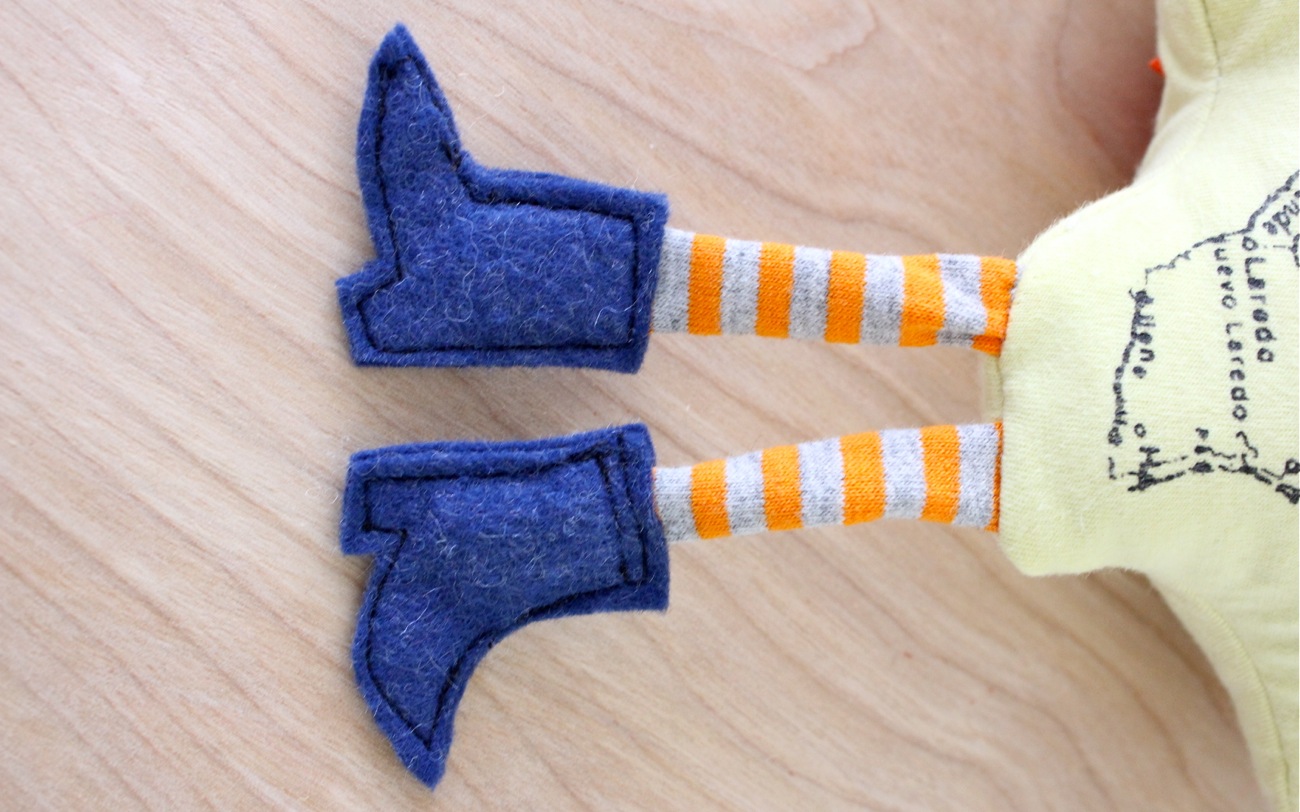
• For arms and legs I love to cut 1 1/2 inch wide strips of knit, then tug on both ends and the knit curls up at the edges forming a small tube of fabric. No sewing needed! Just use it as-is. Sew some felt boots or circles for shoes. Add hands. Do whatever!
• When sewing the limbs on, they need to be facing IN on the body. I recommend baste stitching them first with a 1/4 inch seam allowance to the front layer of fabric before sewing both body pieces together. Gives you more control. Also, if you’re going to angle the legs or arms, first lay them how you’d like the finished legs to be, then flip them into the body so you can see which direction they need to be angled for sewing (since it can be opposite of what you think). Sounds confusing. Try it and see.

• With right sides of fabric together, sandwich the two body layers together, tucking all the limbs and hat into the middle, pin it around, and sew around the outside of the body, leaving an opening somewhere so you can turn it right side out. I left my opening at the top, because the hat will cover it.
• Clip all the curved seam areas, especially right angles and turn him right-side out.
• Stuff him with whatever you have on-hand. I pulled stuffing out of a bed pillow my husband discarded.
• Pin the opening closed and sew it closed by machine or by hand. It will take some strength to do it with the machine, so use both hands, pulling the stuffing as far over as you can.
And there you go!
Welcome new buddy.

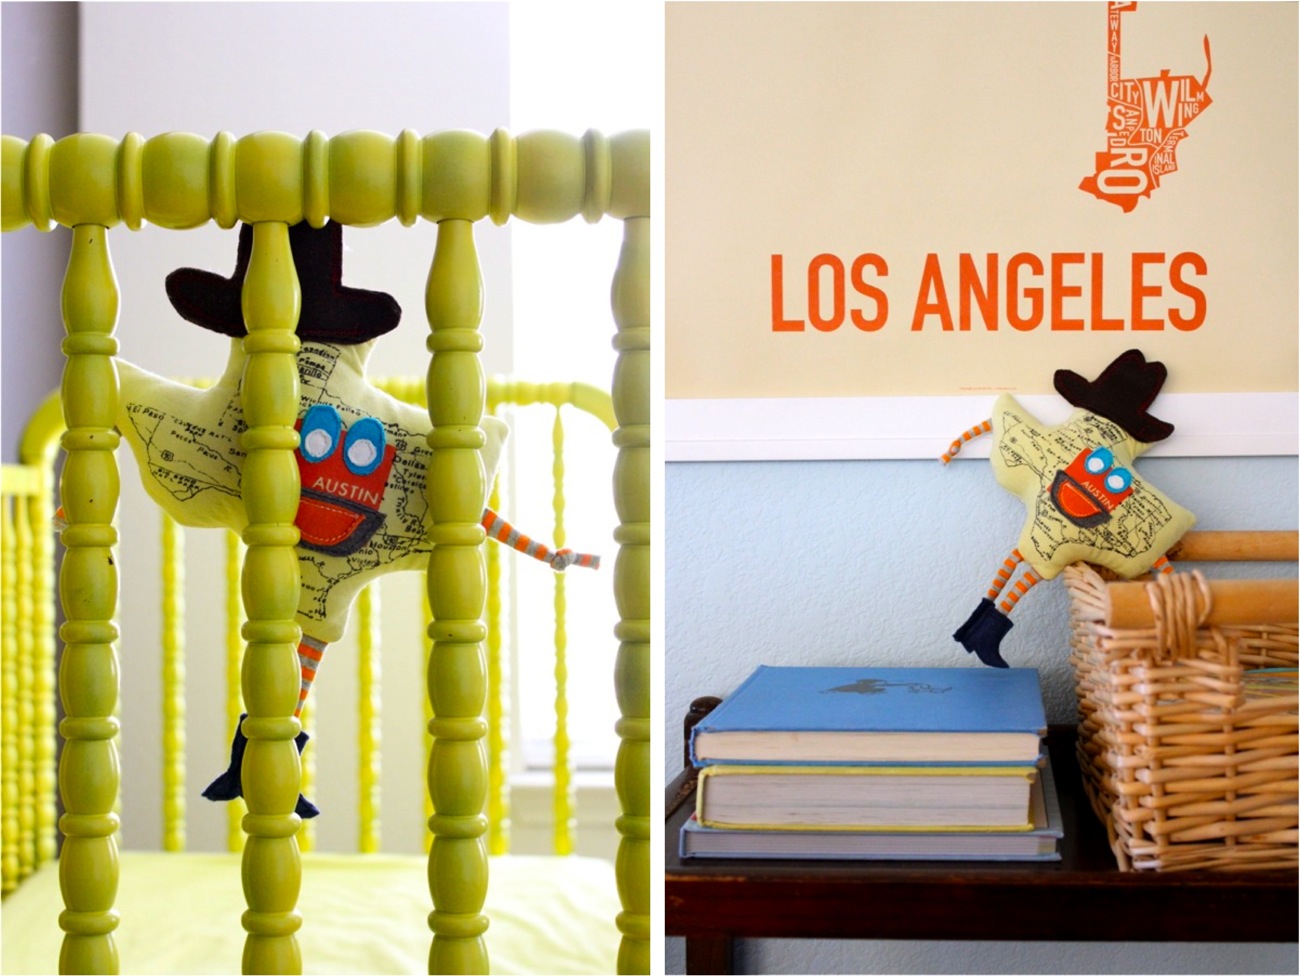
With or without his stuffing (pre-stuffing above), he’s right at home in our Austin neighborhood.
And I have a feeling he might become the “Elf on the Shelf” of our family.

You might see him hanging from his bootstrap….or stuck in a bootstrap.

Spending the day behind bars and skipping town for the border (might be related to his bootstrap situation).
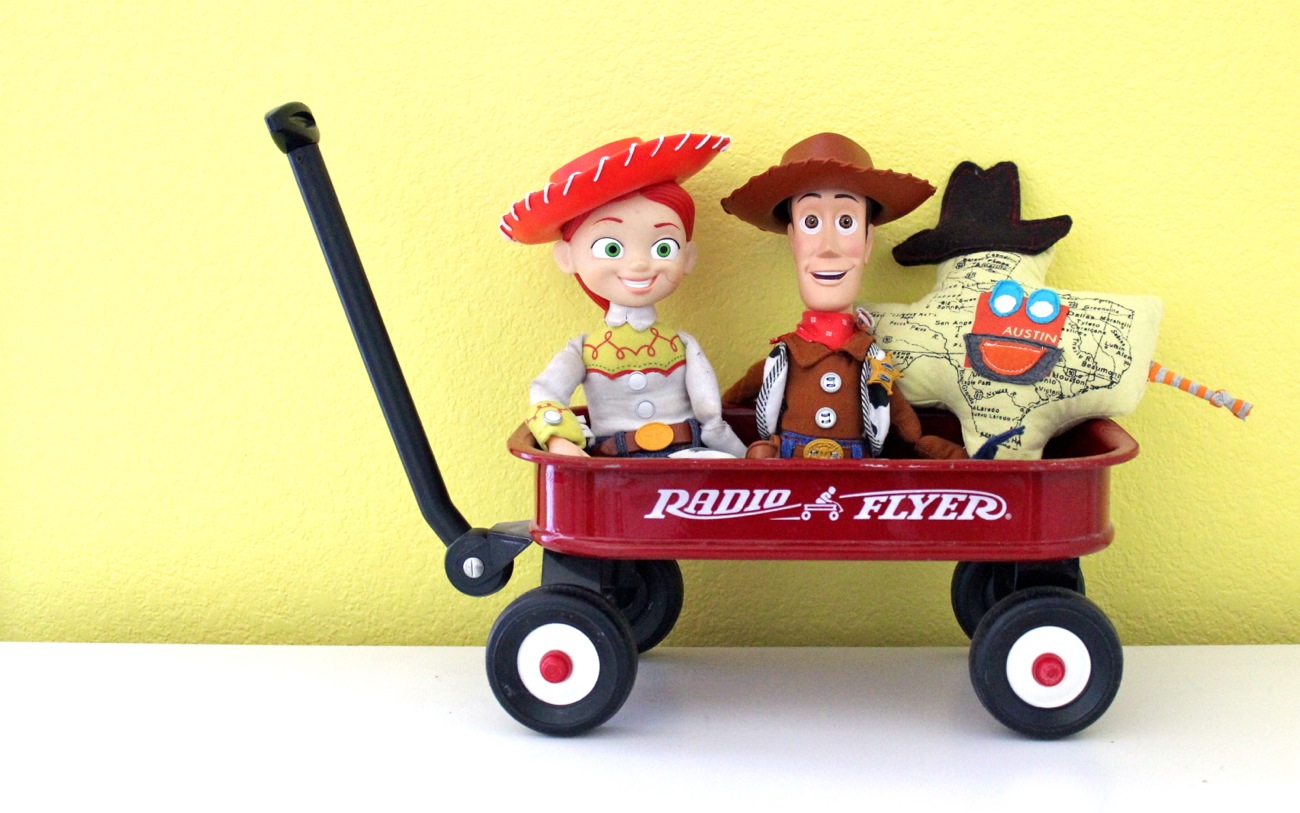
Rolling with his homies.
Scaling a wall….and being tortured by Big Baby.

Playing social Mixer games with the other bedroom groupies.

And just today Owen thought Mr. Texas would make the perfect Rancor for Jabba’s palace…..which if you even know who/what that is, you’re in a special group of Star Wars lovers.

He’s making the rounds.
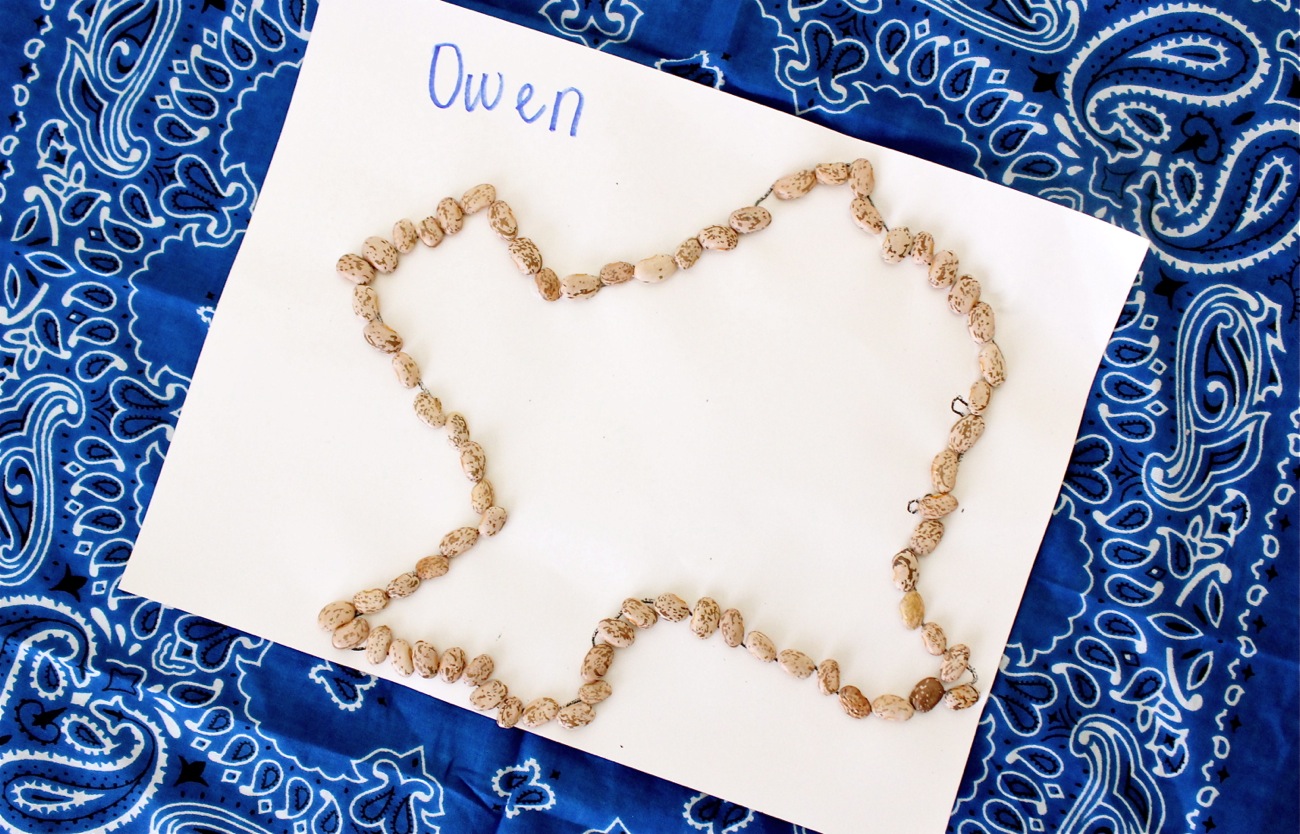
And just this week in school Owen has been learning about Texas. They made this little Texas bean picture below which is so simple and so brilliant. So I was thinking….wouldn’t it be fun to take Mr. Texas around Texas with us??
Show him the Alamo, the Austin capitol, the beach, some longhorns. Might make for a fun photo adventure.
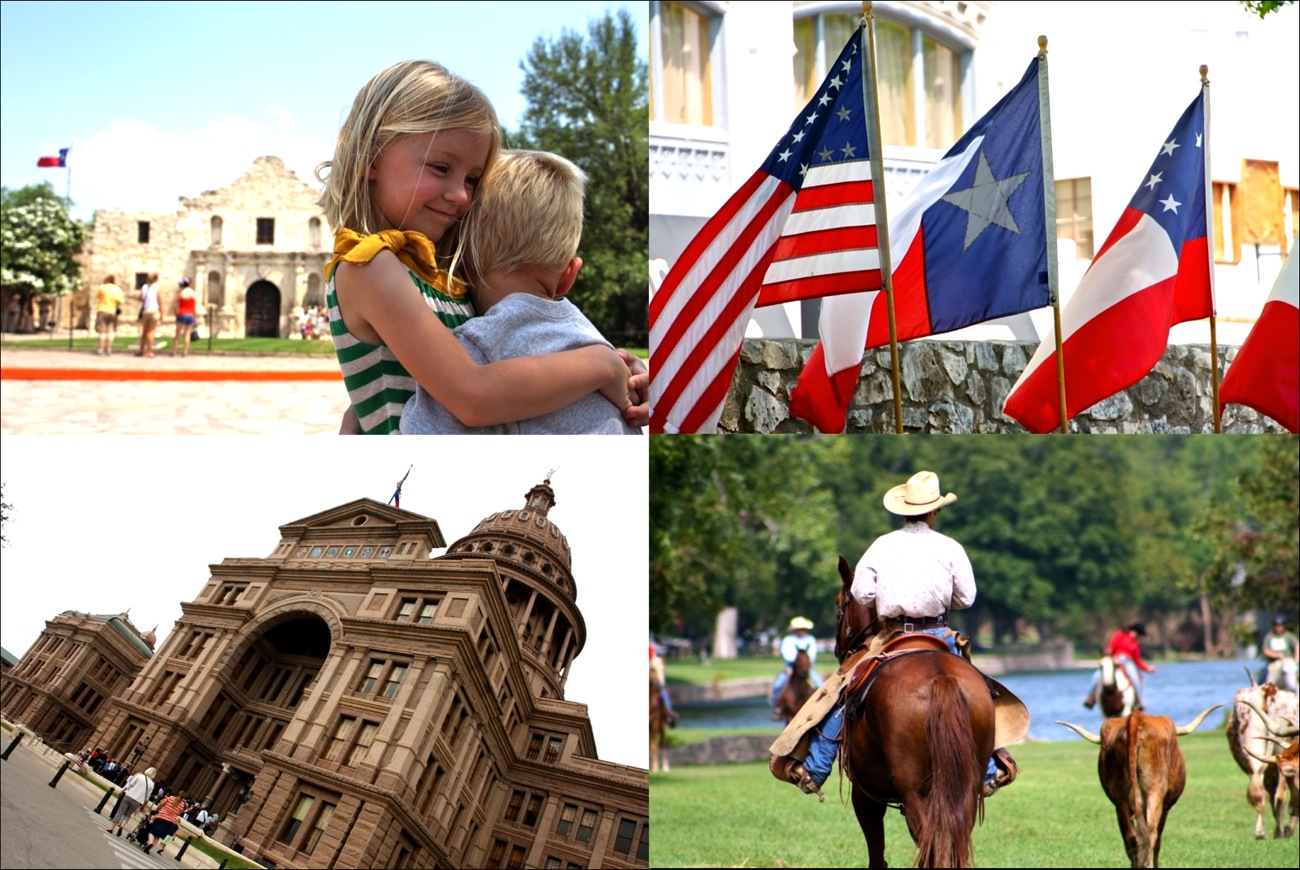

Yeehaw!
We’re doing it.
The only thing we need to settle….is his name.
Owen wants Mace. I thought of Texas Tim (in honor of Tim Riggins. Love me some FNL).
And we both agreed on Austin, for obvious reasons.
But that’s pretty boring.
Any thoughts for Buddy?

——————————————————————–

This is part of Celebrate the BOY, a series hosted by me and Made by Rae.
Here’s what we’ve done so far:
DAY 1: Dana: 5 Steps to the Basic Tee • Rae: Saffron Pants and Color Roundup
DAY 2: Dana: Pants Roundup • Rae: Little Bit of Color Hoodie
DAY 3: Dana: KID Pants with Back Pockets • Rae: Little Bit of Color Hoodie
DAY 4: Dana: 13 DIY Fabrics • Rae: Show your Stripes Turtleneck
DAY 5: Dana: Favorite T-shirt Buddies • Rae: Stripes Rule Roundup and Celebration Garland
• Keep adding your own BOY projects to the CTB Flickr Group!
• And check out the Archives for additional projects


Cutest idea ever!! This post totally made me smile. 🙂 go dana!!
Oh my, Owen is so big, if you look the first picture and the last one!!
He’s adorable.
I rarely comment but that is brilliant!!!
This is so super cute Dana! I love that. A little photo adventure with…I actually like Austin. Maybe “Boots?”
This is too stinkin cute and such a fun idea!
Ahem. Um…I do, in fact, know what a Rancor is. I’m nerdy and I know it…
I love it!!! Mr. Tex, maybe?
how about Buddy?
Kind of like flat Stanley, but with your Texas toy…Ha!! Cute!
omg I think I just fell off my chair!! “Rolling with his homies” Hee. DYING.
Oh dear. I must be tired from this fun week of boy if I’m this slaphappy, it’s been a fun week m’dear!
Love Owen’s little stuffed state. How about Toro? Mr Longhorn? I don’t know. I’m not good at making up names. 🙂
Dana- everything about this is awesome! You are awesome. Thank you!
I was going to say Tex. And I have a 5 year old boy with that same lego set and we have had random toys like his stuffed monkey or a plastic dinosaur be the rancor. We have learned more about Star Wars than we EVER thought we would…and we liked it before kids.
Mace, like Mace Windu, huh? Yeah, we watch a lot of Star Wars here, too. I love this idea! My middle son has a thing for food-themed shirts, and has a ton. He wears them until they’re way too small and I have to steal them away in the night. I pass them onto his younger brother, because I’m cheap like that. But I may have to convert some into a toy or two. He’d love it! Thanks so much!
That is hilarious. And awesome.
That is so cute! I need to do that with one of my old shirts that I never wear — although it won’t be as cute as your little Texas buddy, for sure. 🙂
Love, Lindsay
You could call him Big Tex, after the giant inflatable cowboy at the state fair. Or maybe Little Tex would be more fitting? =)
so cute – Buddy Austin? 🙂
Bevo 🙂
that is unbelievably cute!!! I vote for Cowboy, Ags, Aggie, or Gig. 😉 RIggins, Rig, or Rigs would be a cute name too.
I would go with Mace! Whenever I try to help name my kids’ toys, the inevitably go back to the nam they first wanted (my daughter got a doll with her same name, which I loved! She loves the doll, but renamed it ariel because it also came with a mermaid costume).
And playing the rancor?! That is awesome!
Great idea – and I love the photos of his adventures. If that had been me taking the pictures I would have been giggling away at how funny I was!
Genius! I love this idea. I am one of those nerds who is familiar with Jabba and his outlaws. Please make sure you show us what you do with the droid t-shirt. I would love to see that. Nerdy, I know. 🙂 And I love all the pics you shared.
Melissa
Oh this is the cutest idea I’ve seen in a while! Go Dana
Tex, Pal, Pardner, Big Guy, Lone Star…did you ever know the song, “I’m a Rhinestone Cowboy” or does that make me, um, old?
I am obsessed with this toy! How about Big Tex, in honor of the one that burned down at the state fair this year?? I am going to figure out how to make one of these for my boy, sans Texas tshirt!
AUS-TIM!
completely off topic(sorry), but where did you get that orange knitted puppy? cute cutecute!
This is brillaint. As someone who can’t bear to throw anything even remotely sentimental away, I love it!
So cute and I love the Flat Stanley type idea. I love me some FNL too but I like Austin as his name.
OH that came out super cute! I love Texas Tim personally, but start calling it that and hemight just get the name stuck in his head and start calling him TXTim!
What a lovely idea, I still have some of my kids old T-shirts (they are teenagers now!) I wish I had thought of this when they were younger!
That is such a cute idea, wish I would of thought of it when my kids were young, they would of loved this! Thanks for sharing! I still think you should stick with Austin for the name. 🙂
Dude, I’d name that guy Mr. T and then walk him around the house all day saying,
“I pity the fool” in a Texas accent.
liZ
Wow that is a cute way to give life to an old shirt! I love it. I also love this series as sewing for my boy is one of my favorite things to do.
What a great idea! I have a few nominations for little buddies of my own.
I think I’d name it Texie.
I love everything about this blog entry! So fun and incredibly cute.
How about Sam, for Sam Houston?
Love it! My kids get very attached to particular t shirts, and when they get too small I usually cut out the graphic and appliqué it on a larger shirt, but I can’t wait to try this idea, too!
Very cute. Kind of like Flat Stanley but he can play with him. Perhaps you could just call him Tex?
I vote Texas Tim. Ahh, Tim Riggins. I haven’t thought of him in a really long time! Perhaps I should start FNL again if I start getting Texas homesick.
And I LOVE that Texas Tim was having a social mixer with the others.
OMG that is soooooo cute!! I cannot wait to have kids so I can do all your fun projects for them!!!
For newest news you have to pay a quick visit world-wide-web and on the web
I found this web site as a most excellent site for newest updates.
I love this project so much….
My son has SPD and for about 8 mos his favorite shirt was an AC/DC shirt. At one point he wore it for about 2 weeks in a row. When he grew out of it I made it into a mini pillow that he Jason his bed 2 yrs later.