
Download the FREE DIAPER PATTERN HERE
—————————————–
Hi friends!
I know you guys like making diaper covers, cause I’ve been watching you do it for years.
The Perfect Diaper Cover pattern was one of those first really detailed tutorials + patterns that I put up on the blog, many years ago. So I decided it was time to give it a baby face lift.
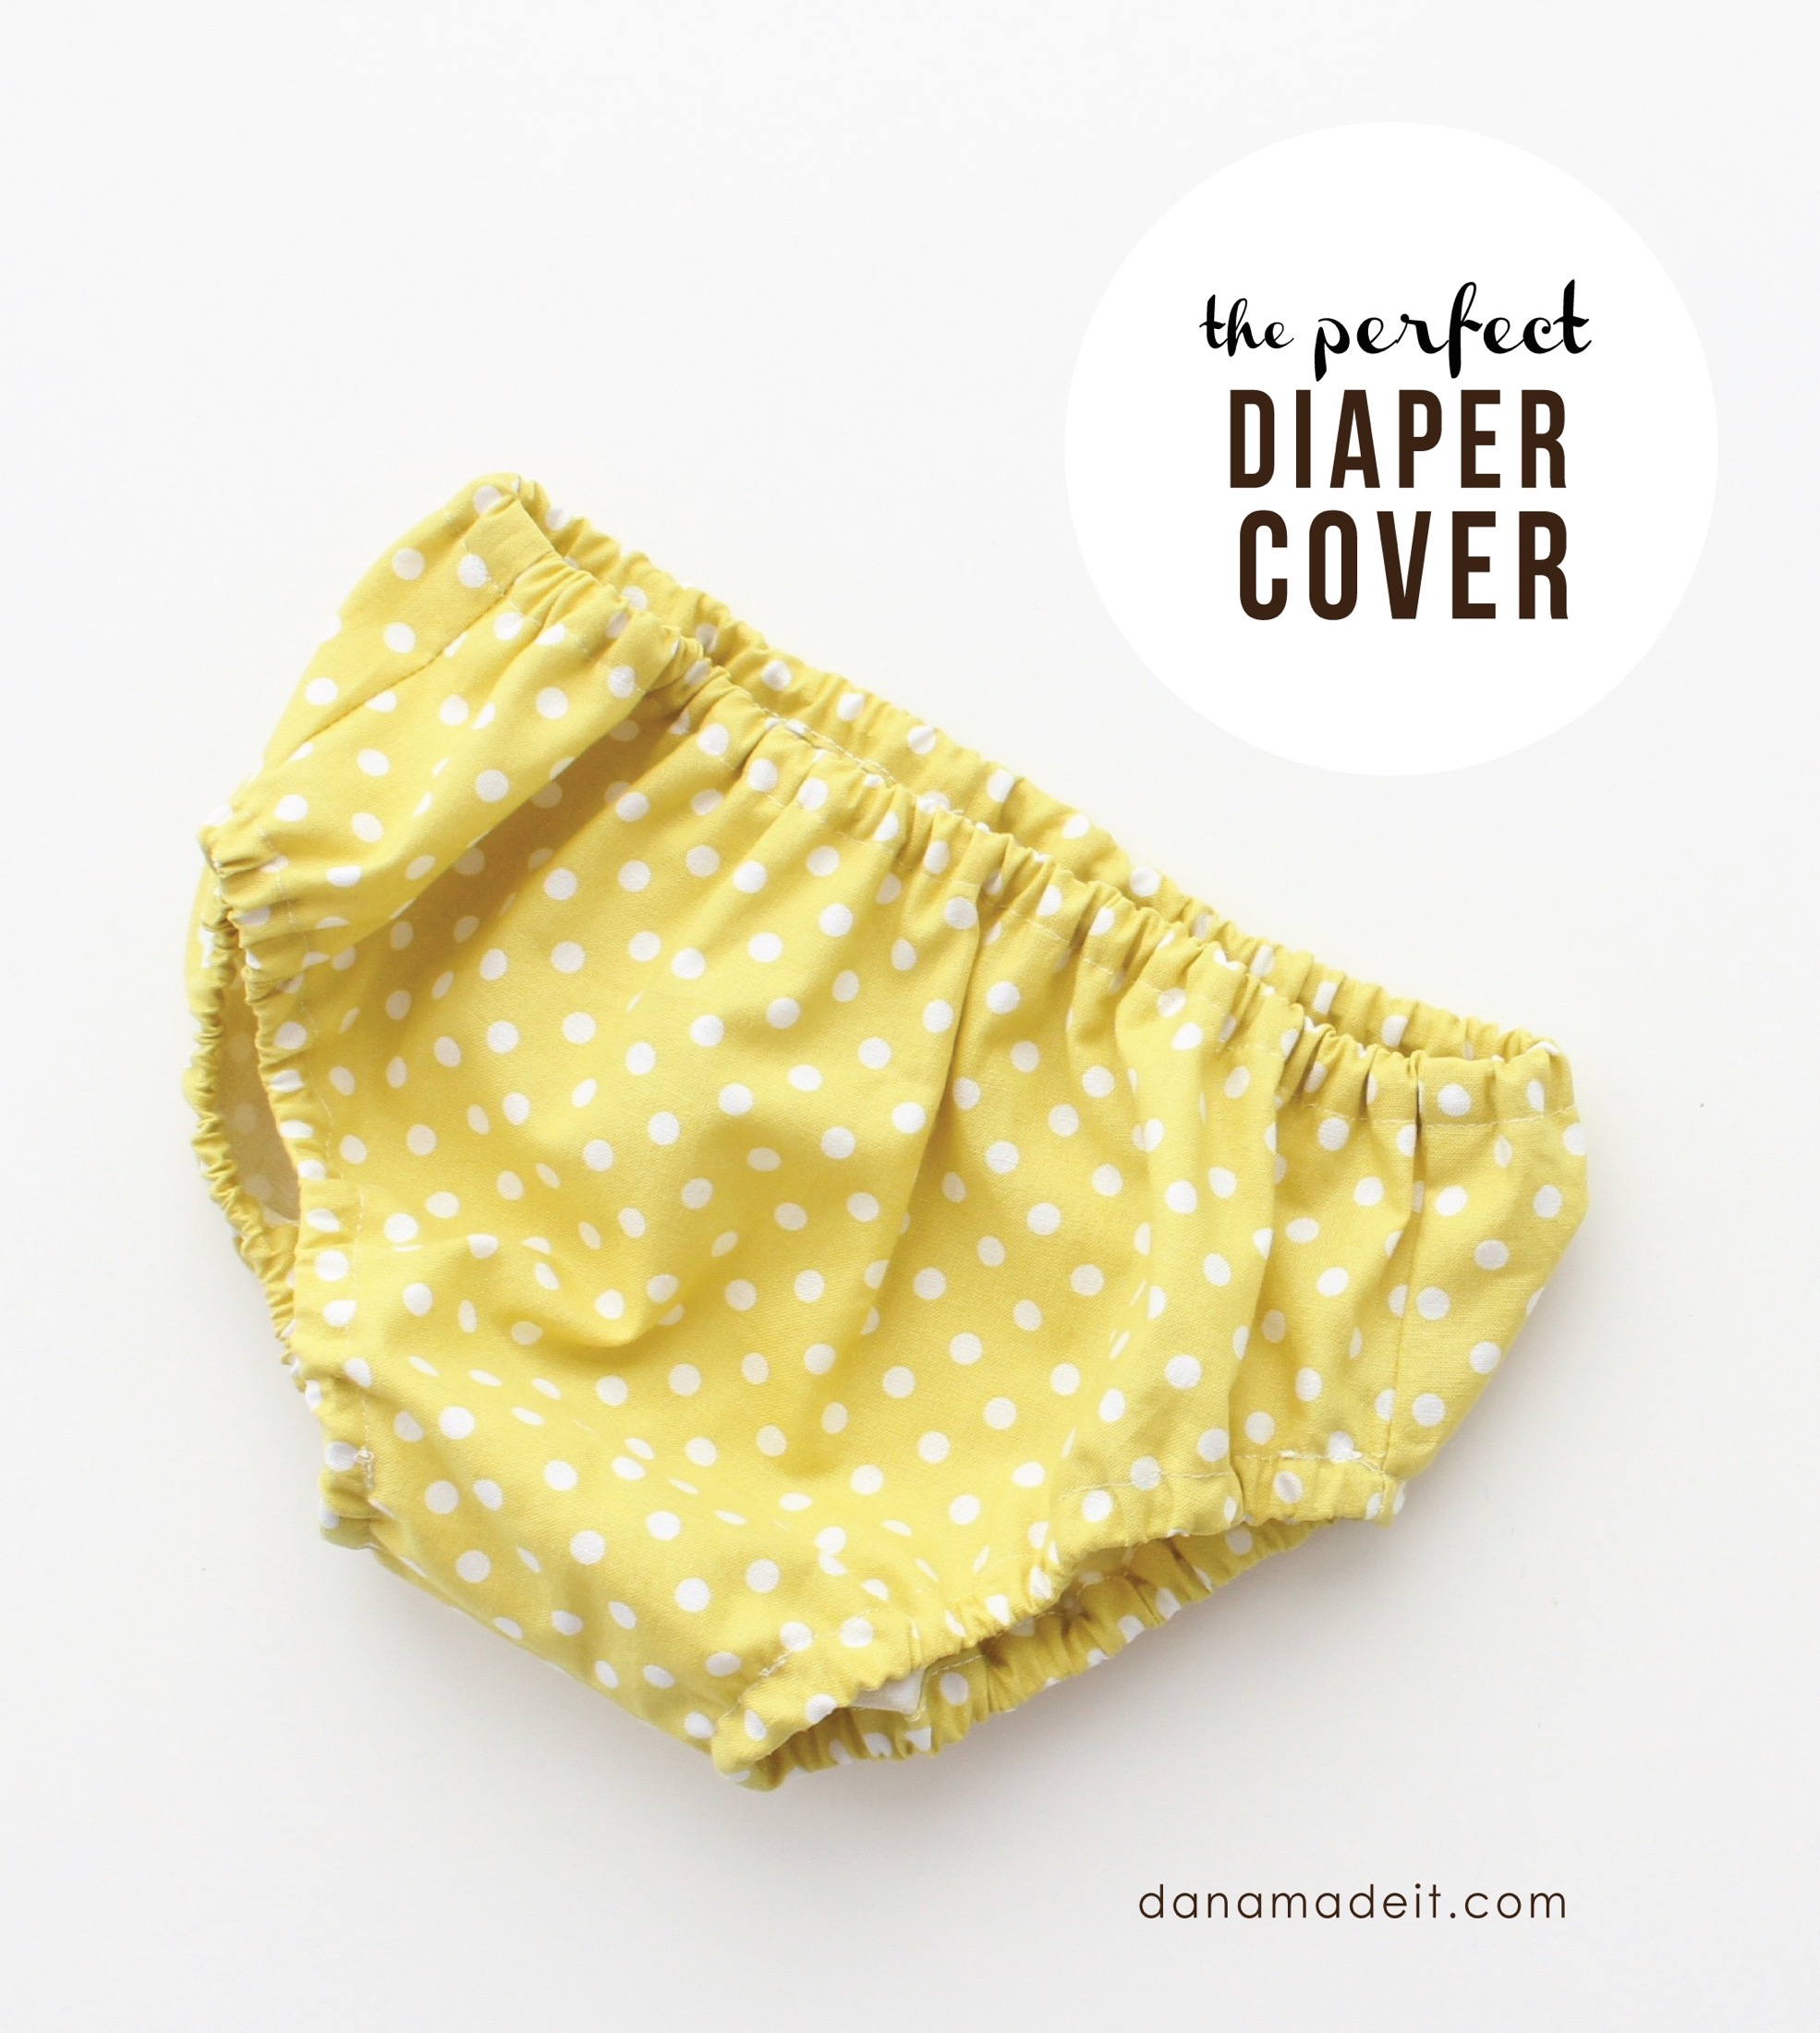
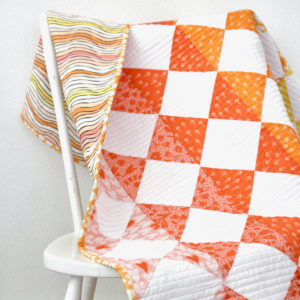
This is the new and improved Perfect Diaper + Nappy Cover


You can watch my video version of this tutorial by pressing the play button below (or clicking here).
OR keep reading for the blog post version…
The age old question I continue to ask myself is, when?
When will manufacturers make plain, white, solid-colored diapers?? I will be first in line to order them by the ton.
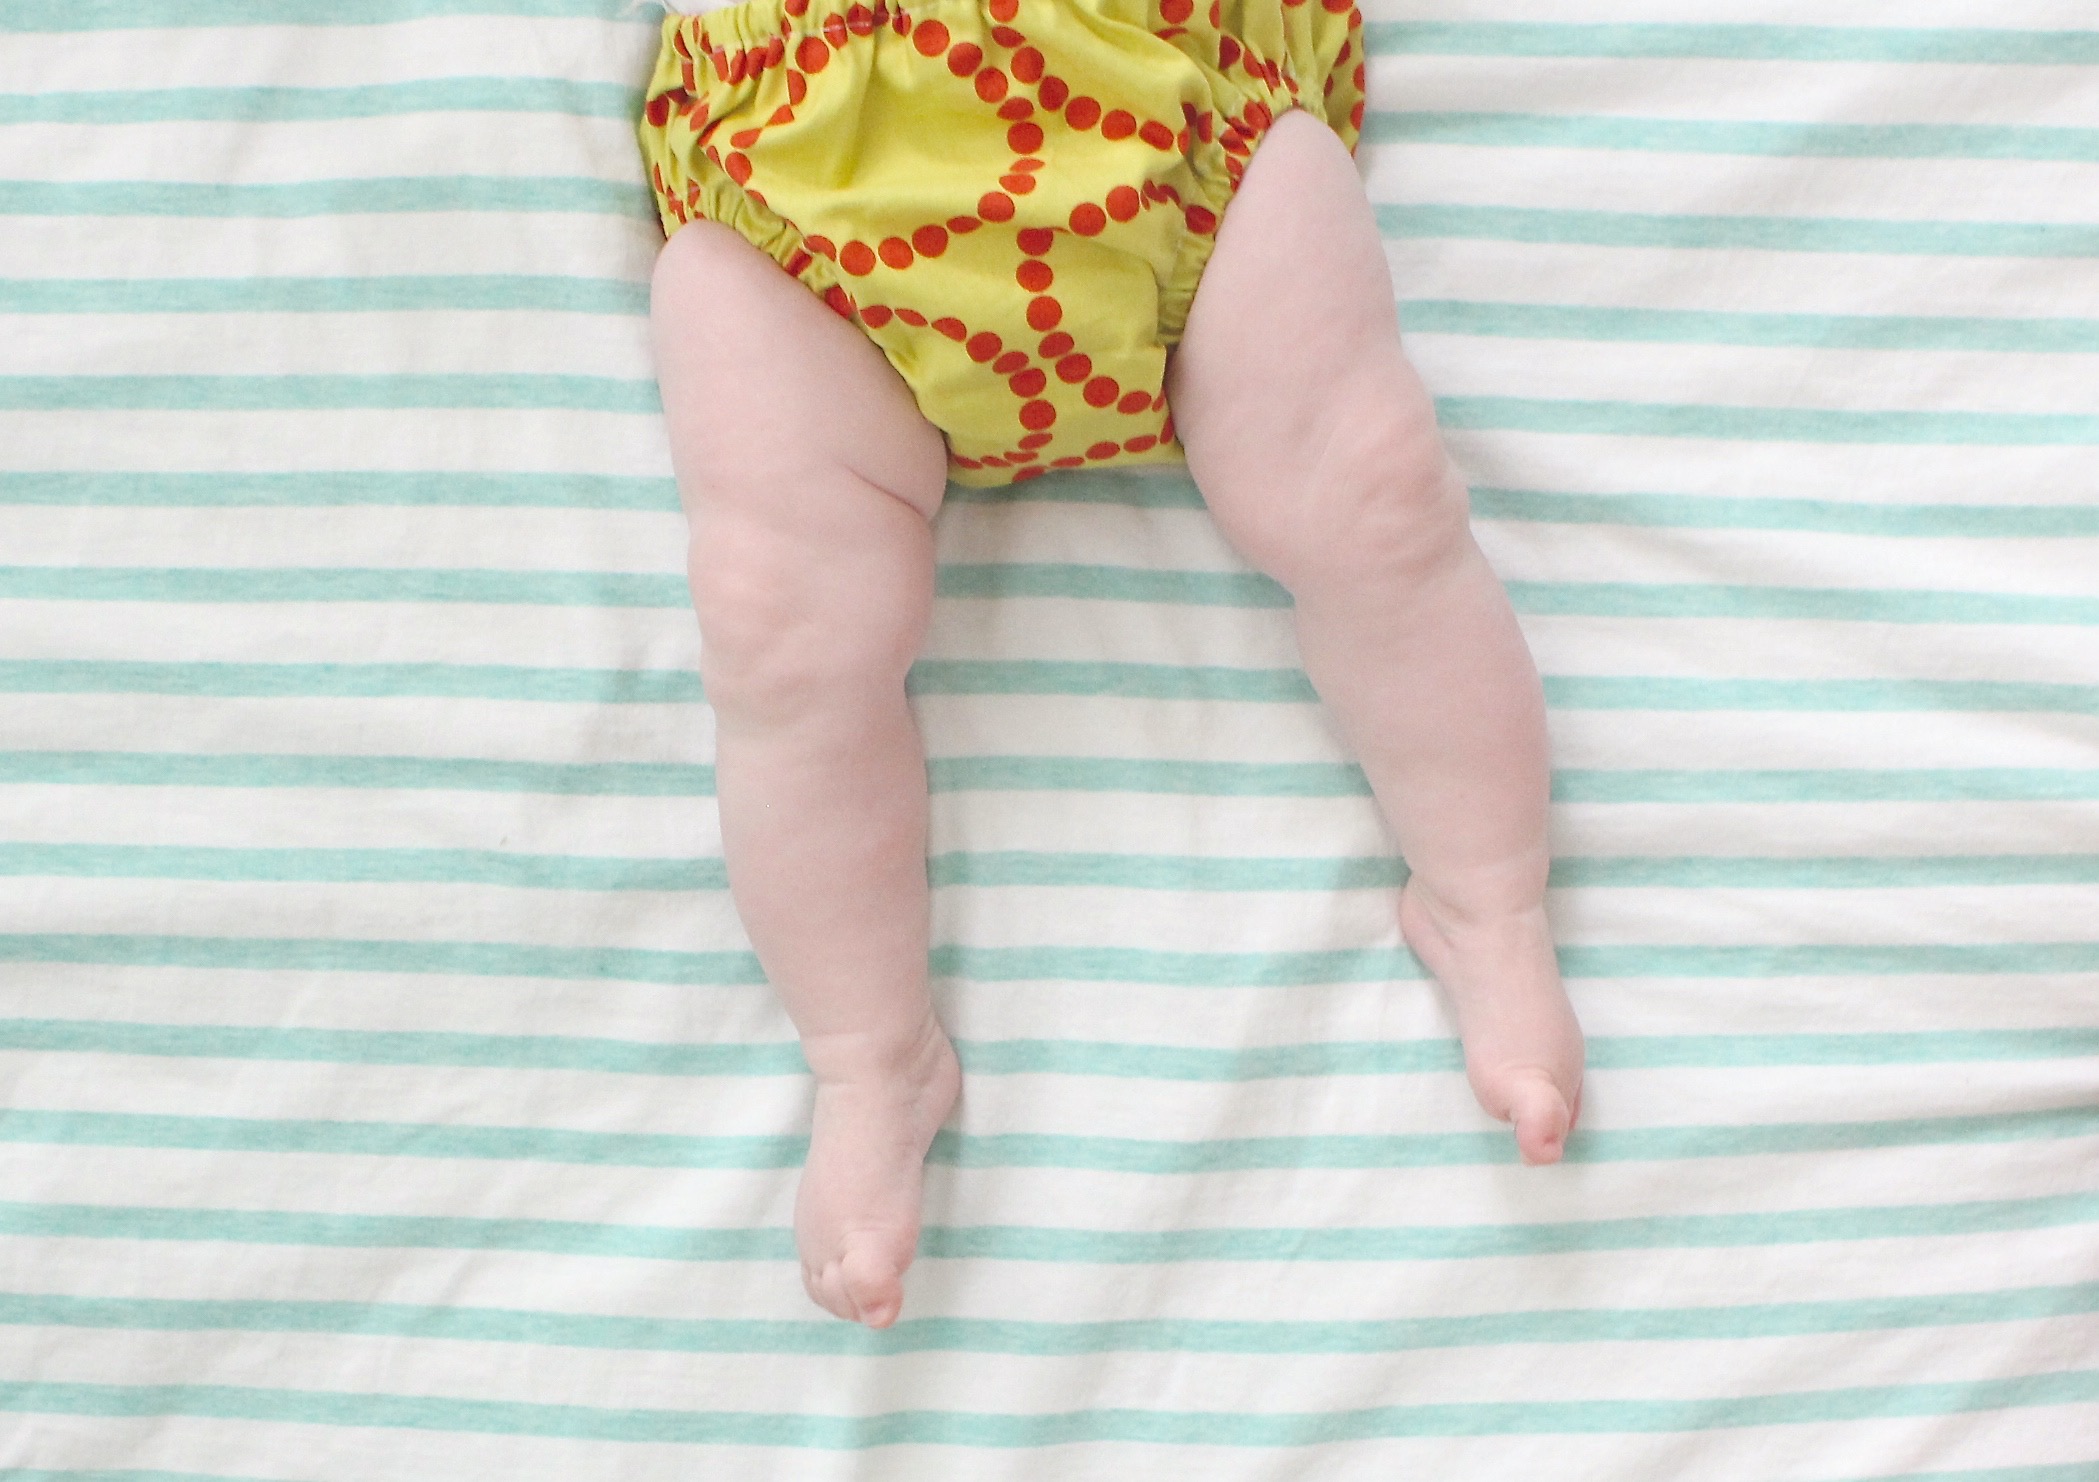
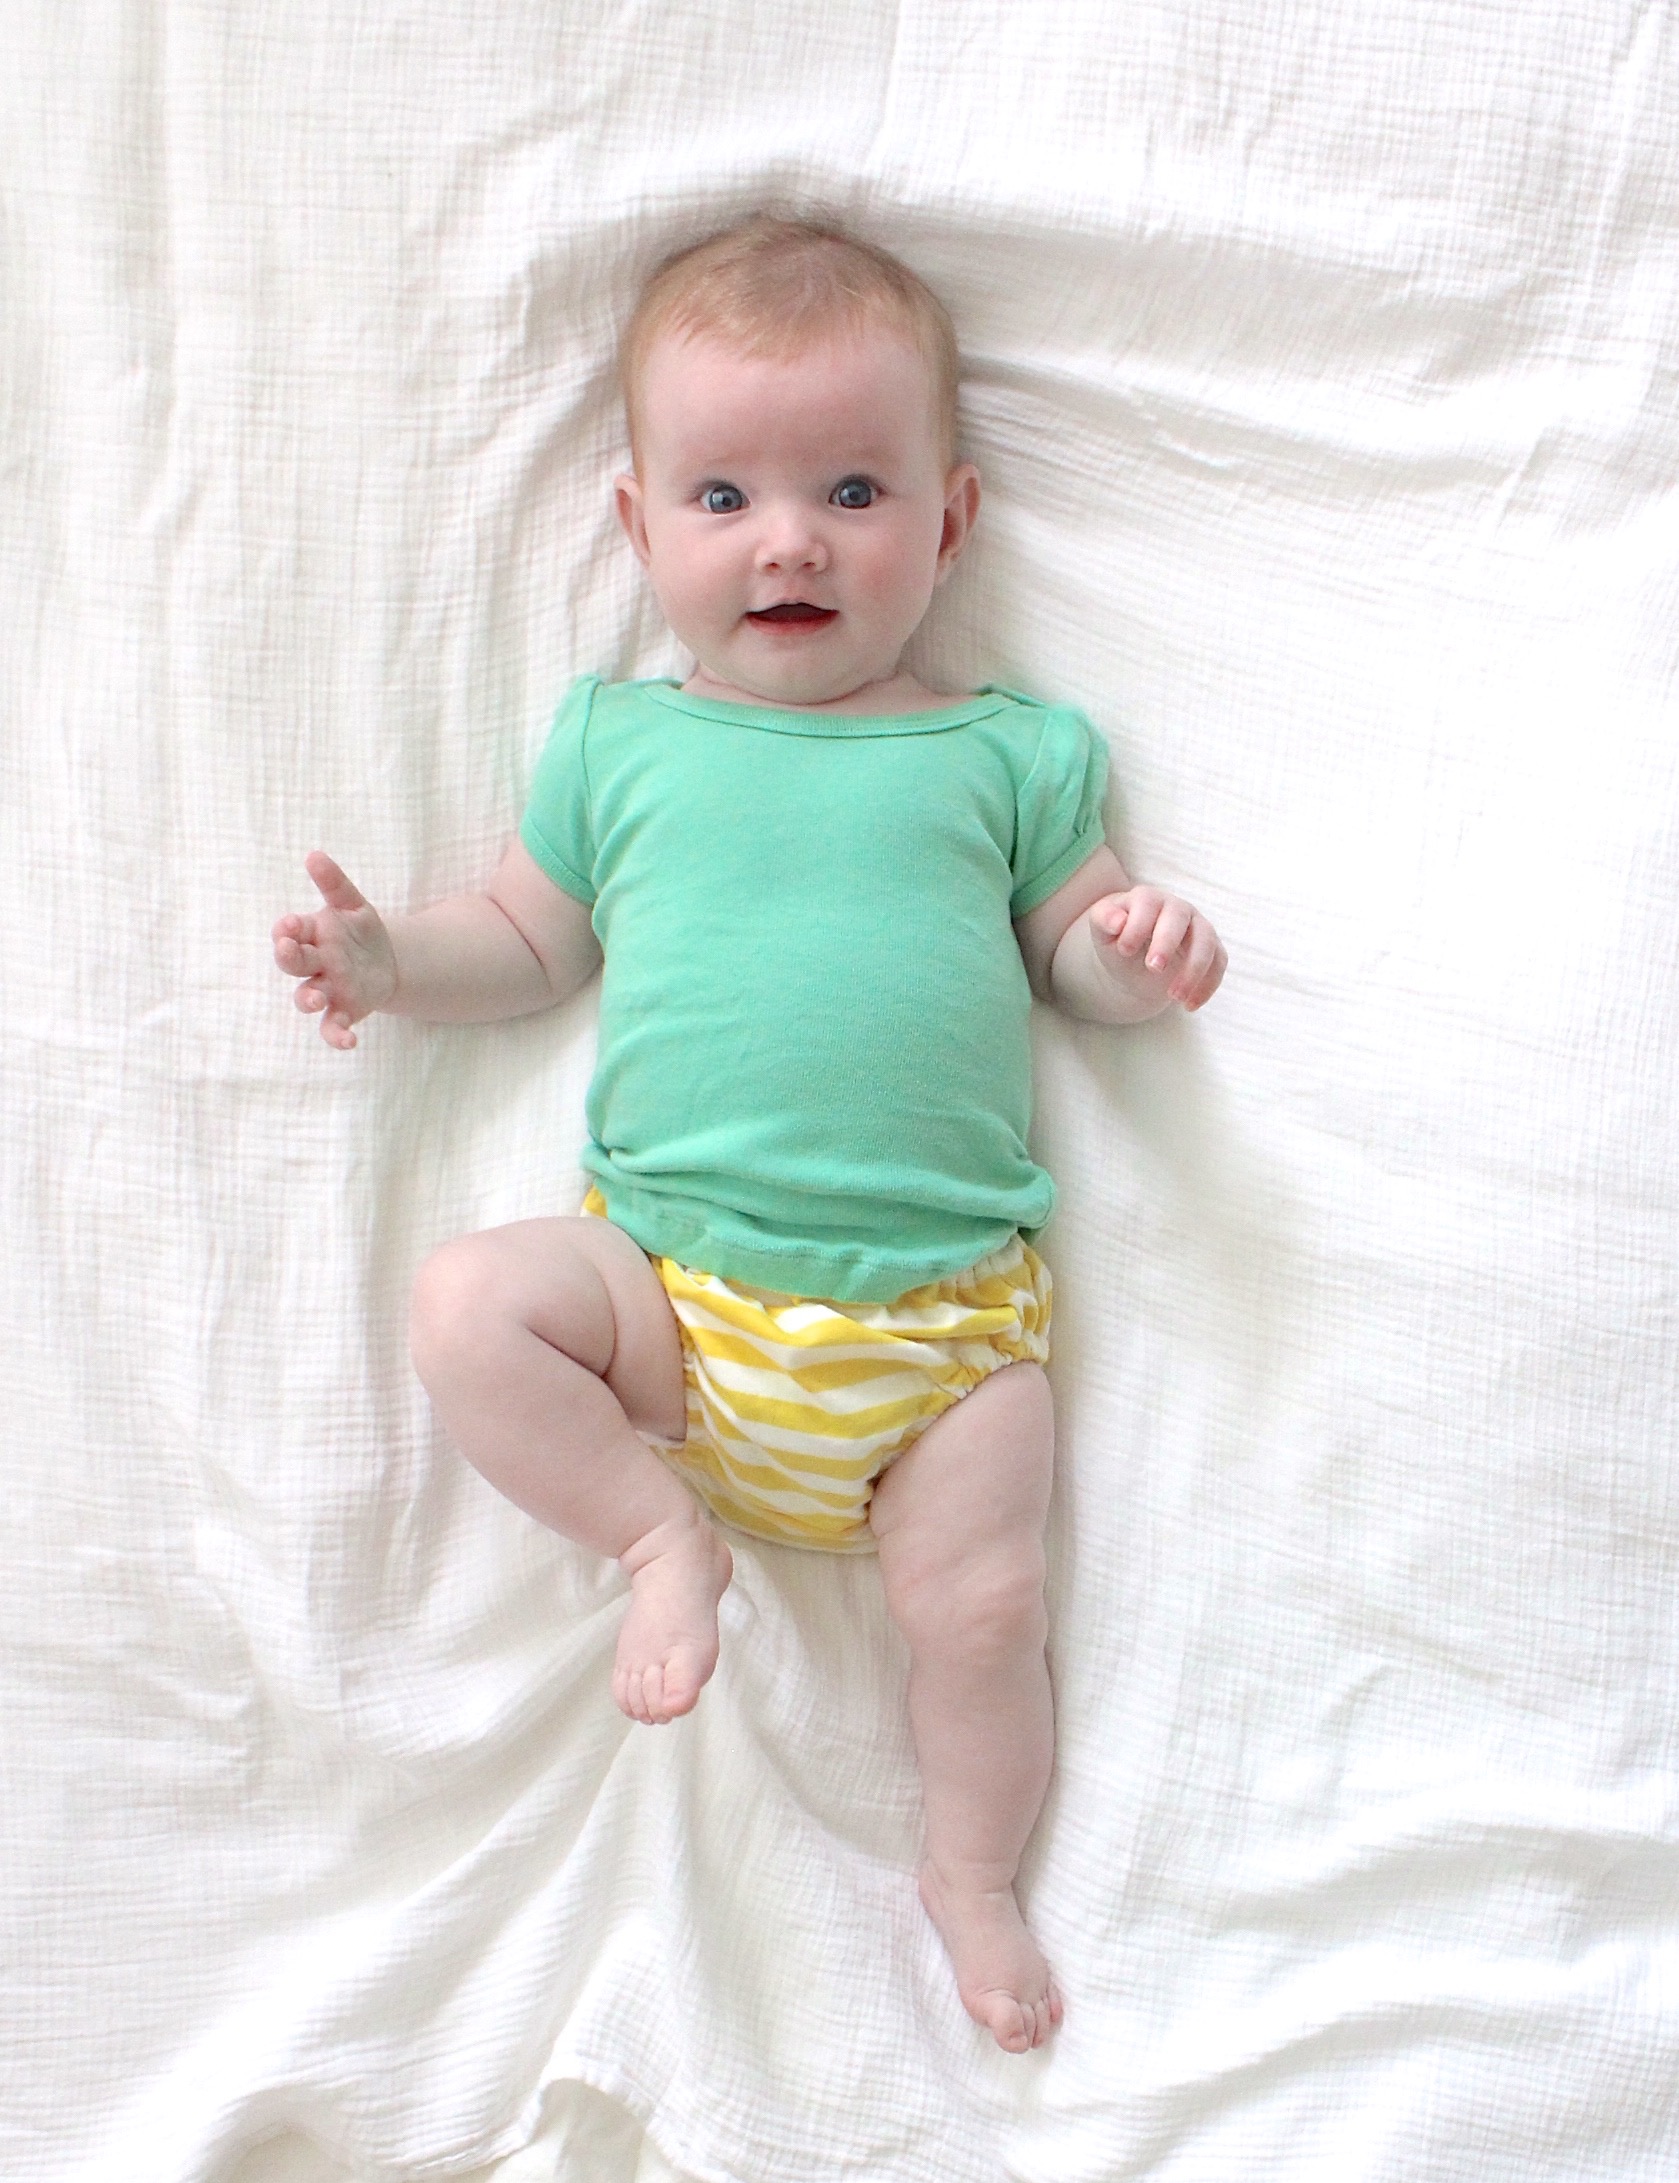
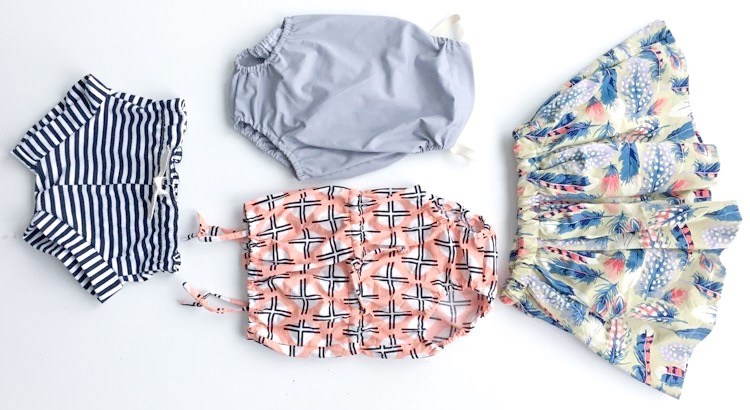
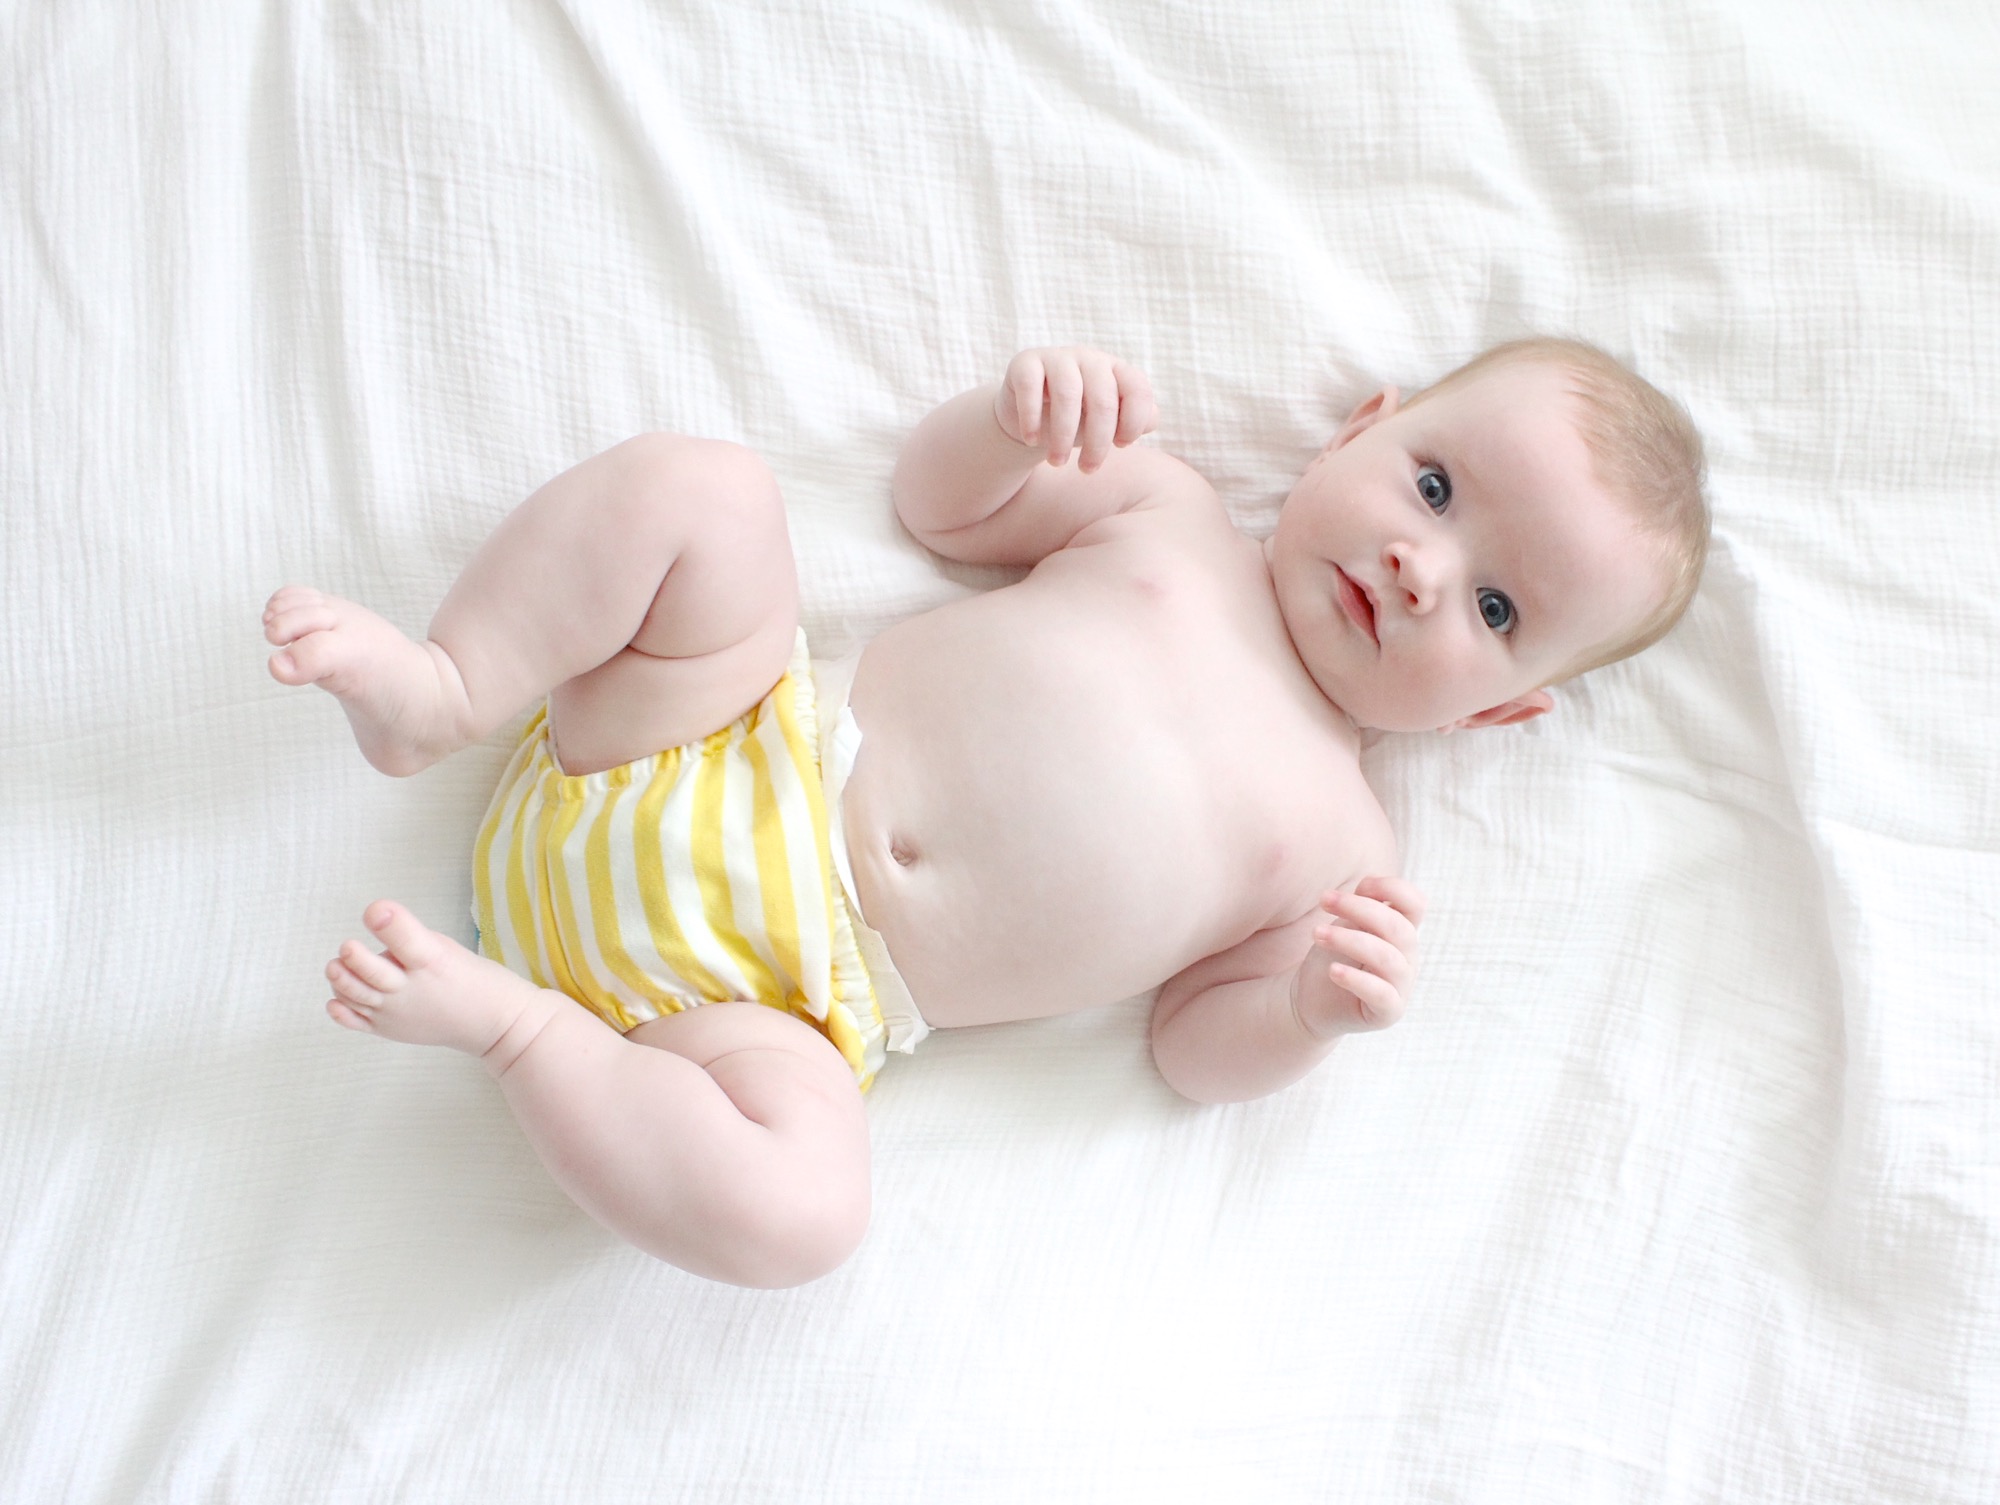
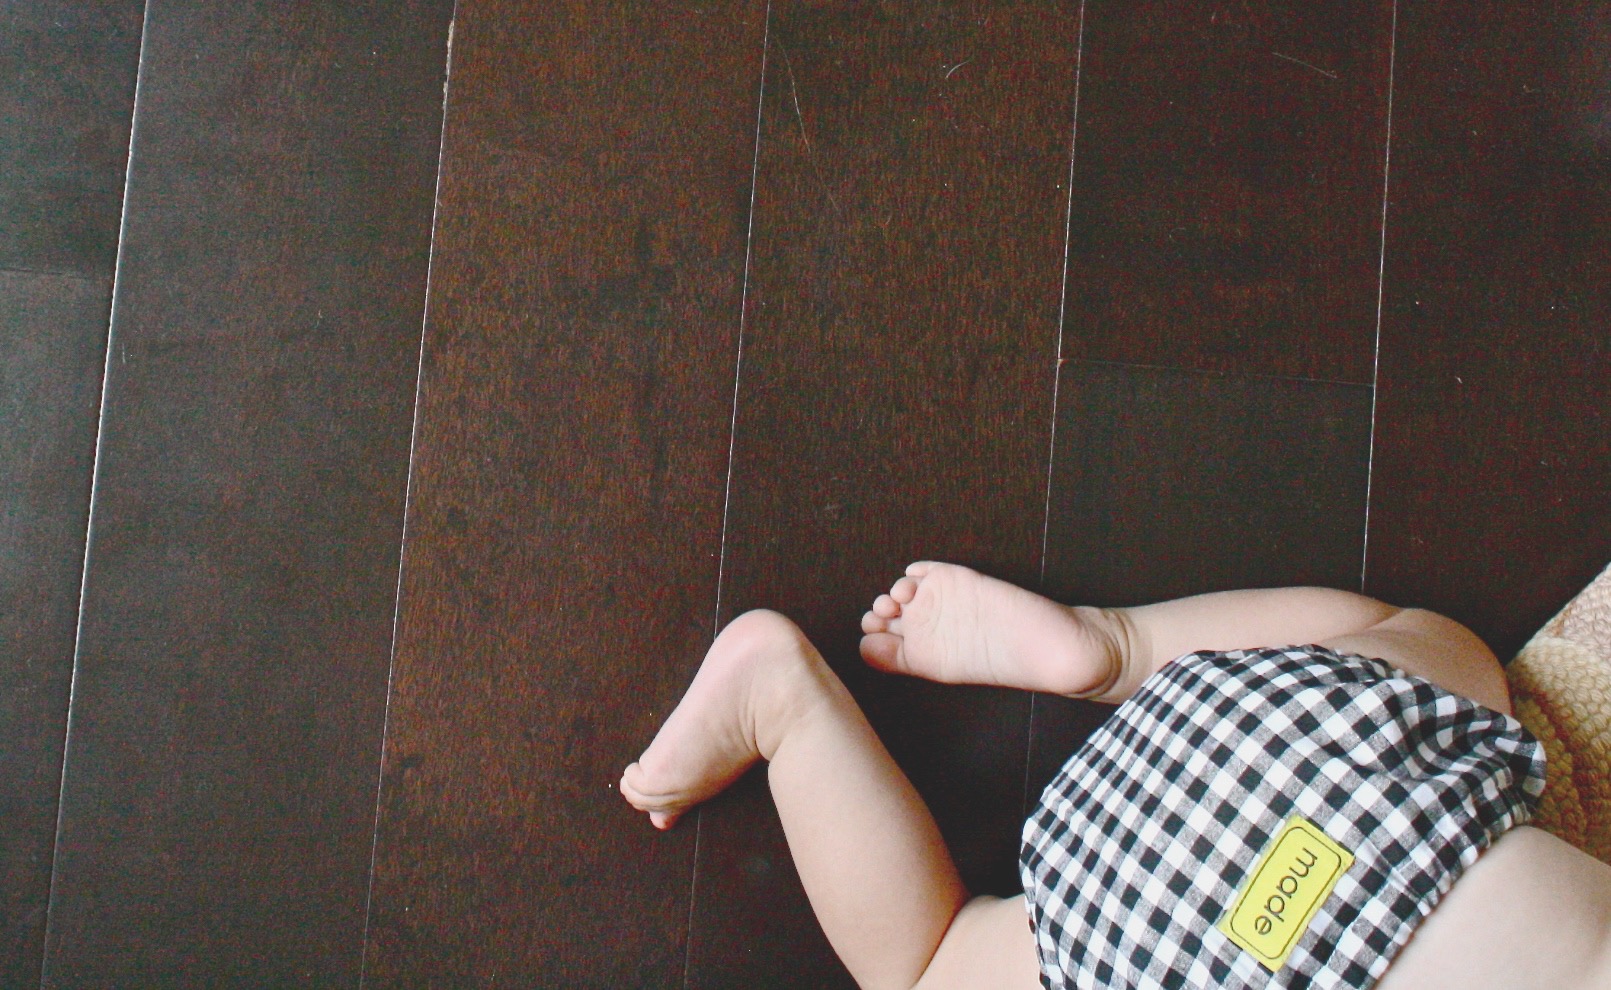
But until that happens, I guess a simple diaper or nappy cover is the perfect thing to wear under a summer dress or with a little t-shirt or with a bare belly! Yum.
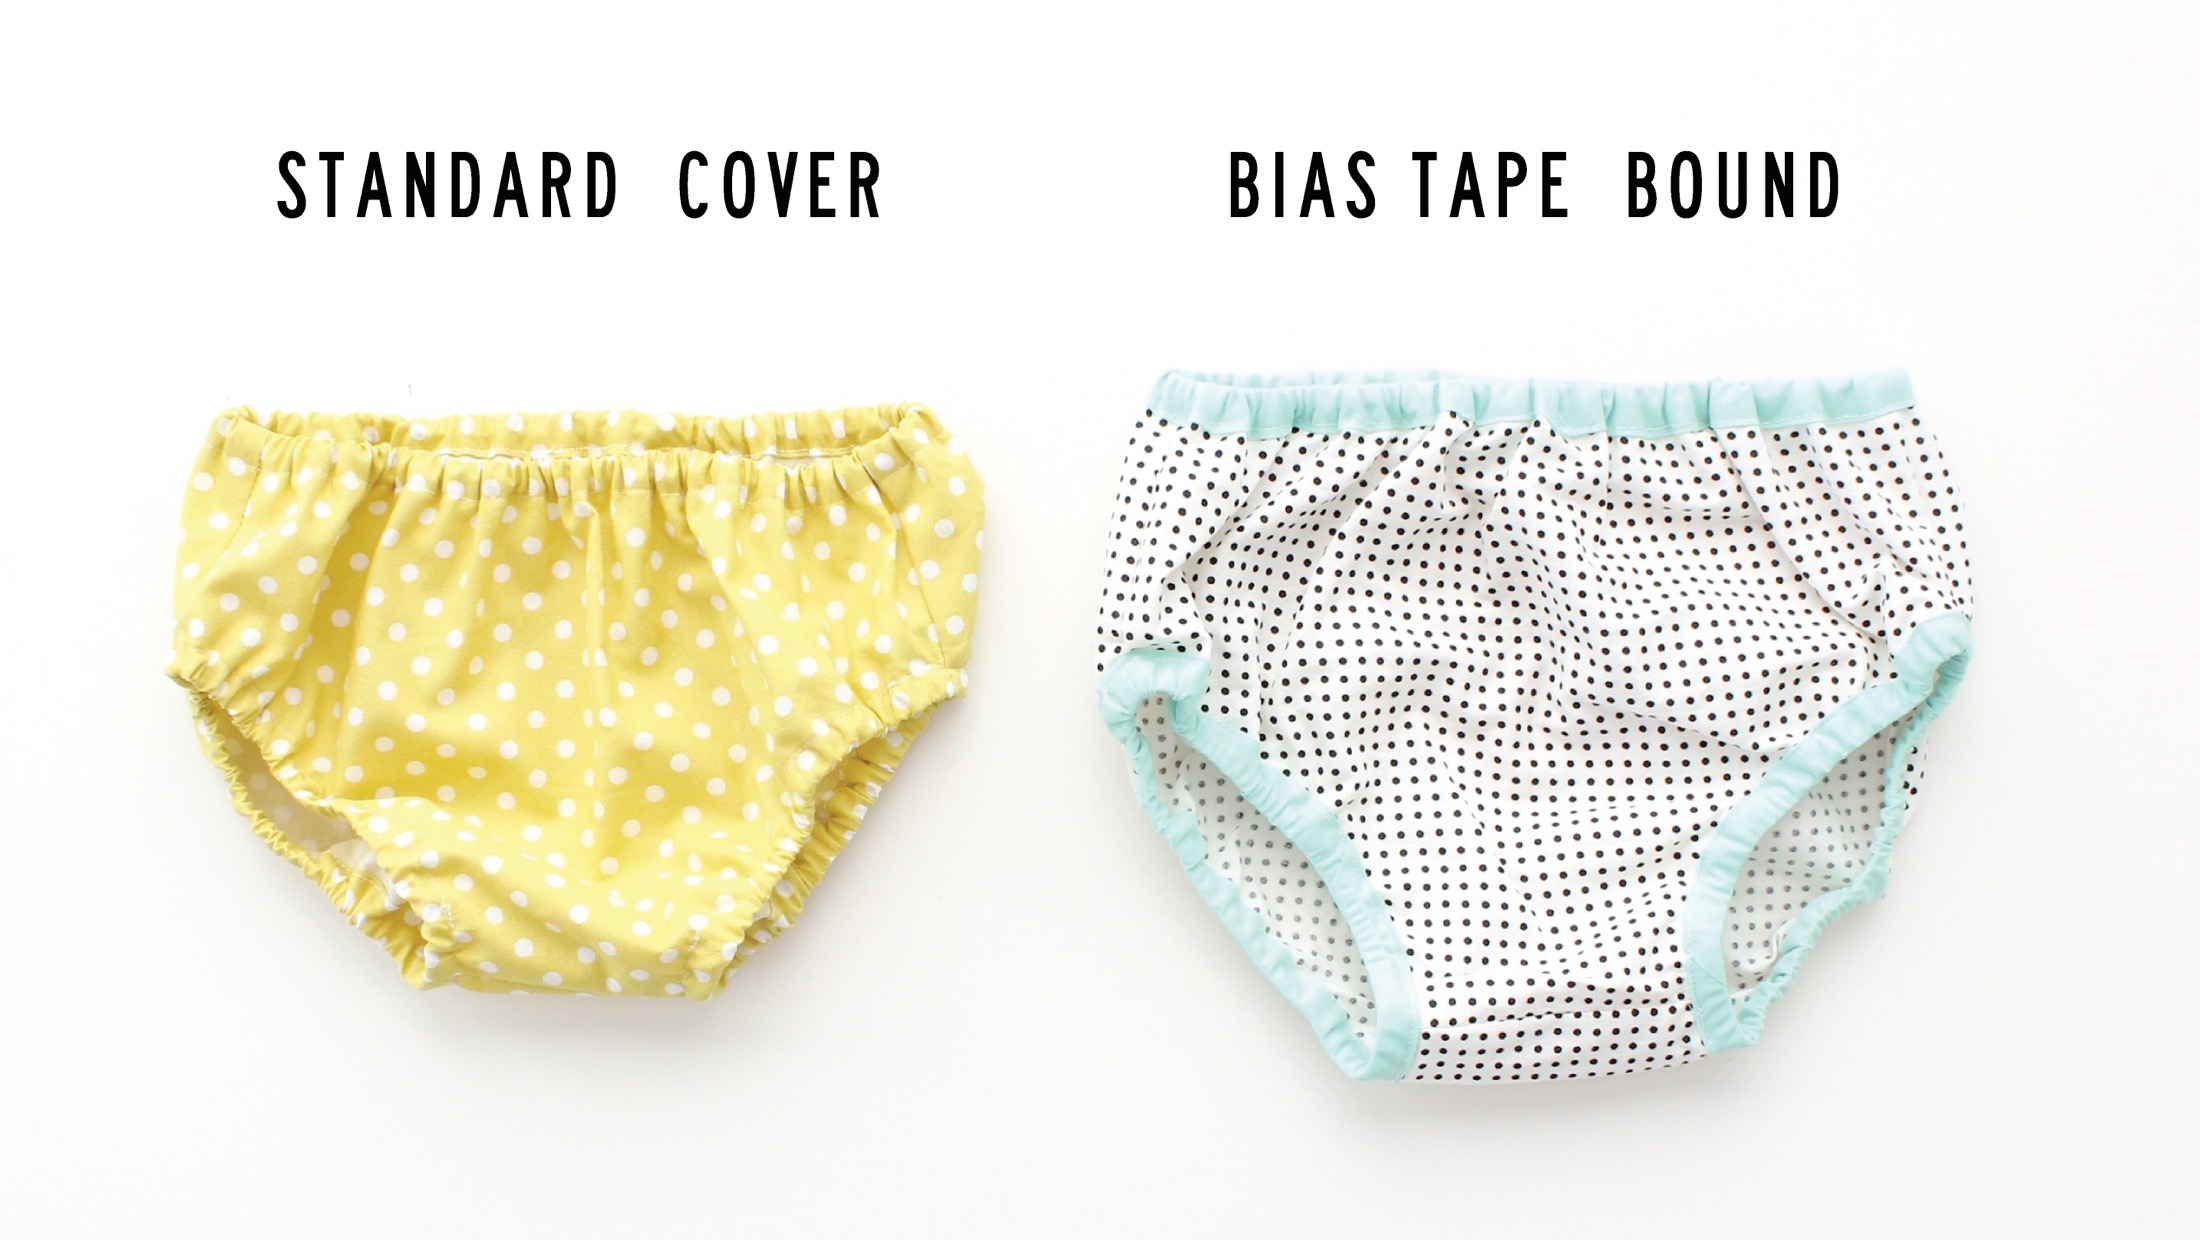
They work for boys and girls. And I’ll show you two ways to make them:
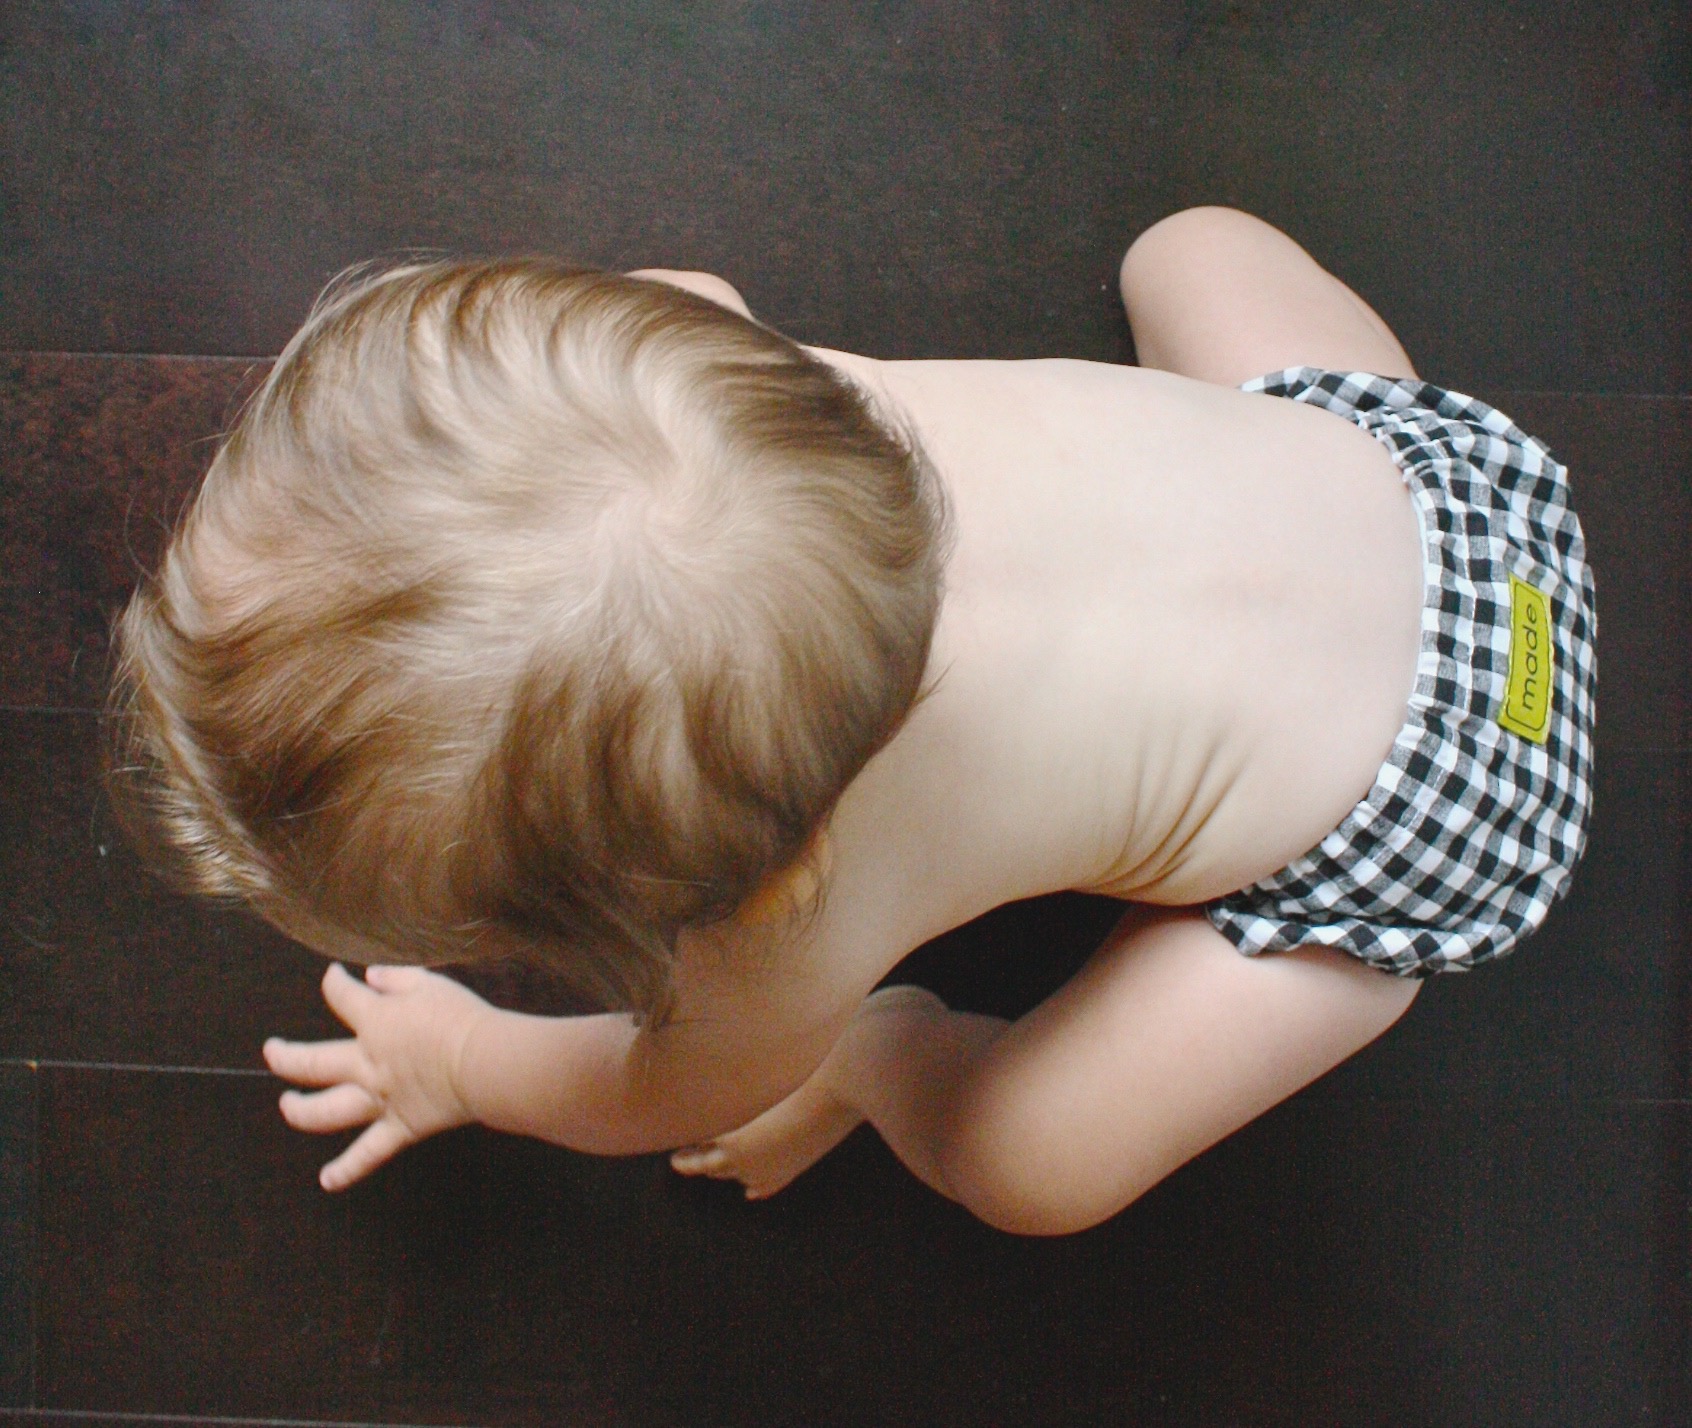
Then your babe will be chilling or cruising in comfy style.


Let’s get started!
And for more variations on the Diaper Cover, check out these FOUR tutorials by Miranda at One Little Minute:
PATTERN
Download the Free 4-page pattern HERE
• You’ll automatically be prompted to open the PDF document in Preview or Adobe Acrobat.
• Do not print from a pop up version of the pattern, but rather Save/Export the pattern to your computer first. THEN reopen it and print the document to your home printer.
• DO NOT shrink or “scale to print” in your settings. You want the pattern to print at 100%. Check the 1-inch square box on the pattern with a ruler to make sure it printed to the proper size.
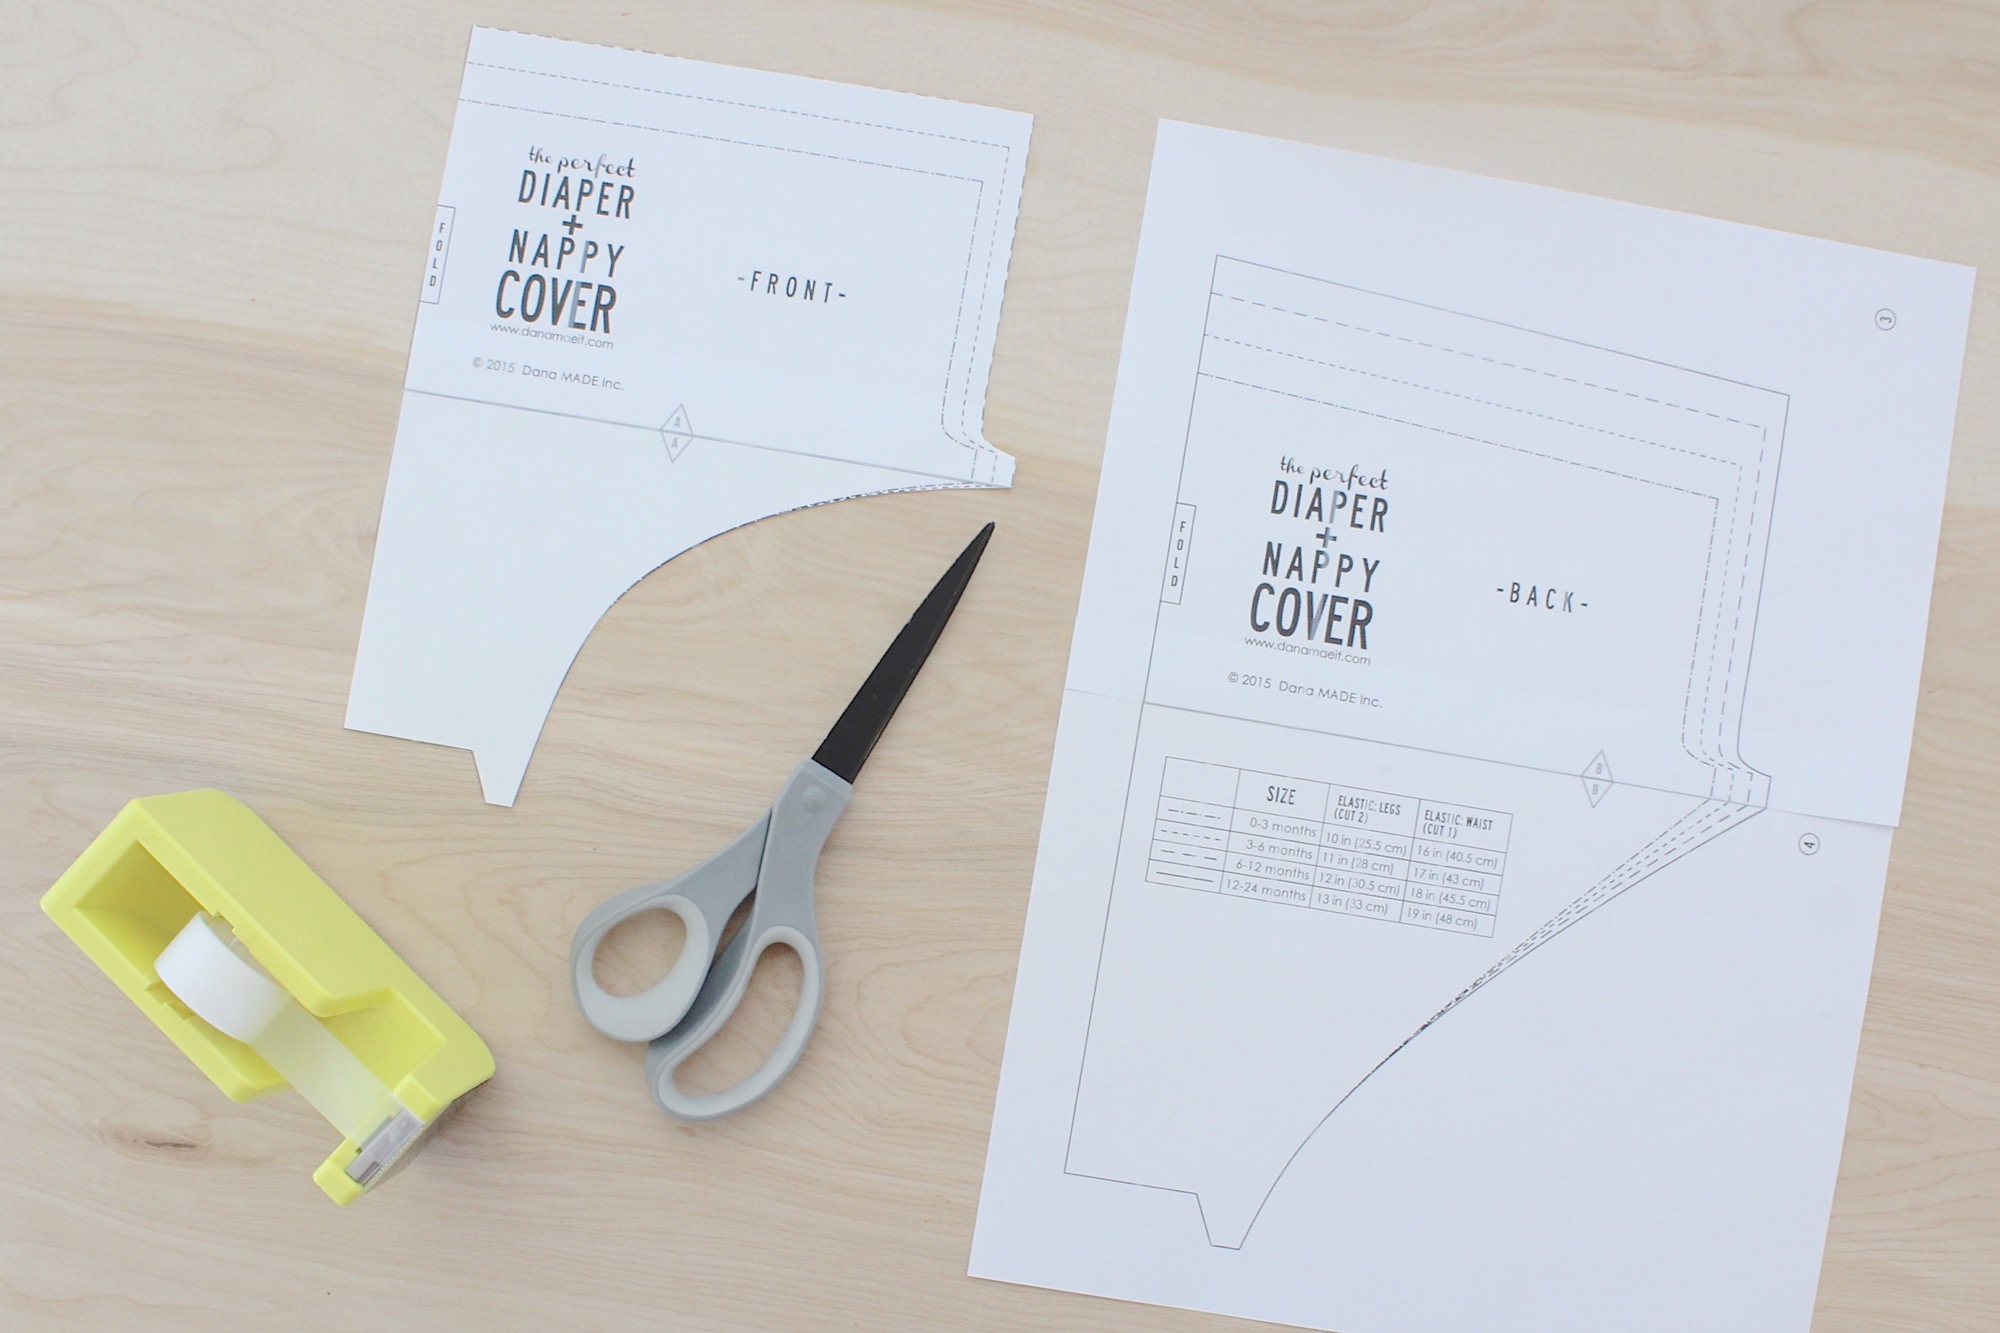
Now we need to piece the 4 pages together, which is easy to do (refer to the photos below).
• Page 1 and 2 go together and match up at the triangles marked “A” (which create a diamond when they’re put together). Page 3 and 4 go together and match up at “B” triangles.
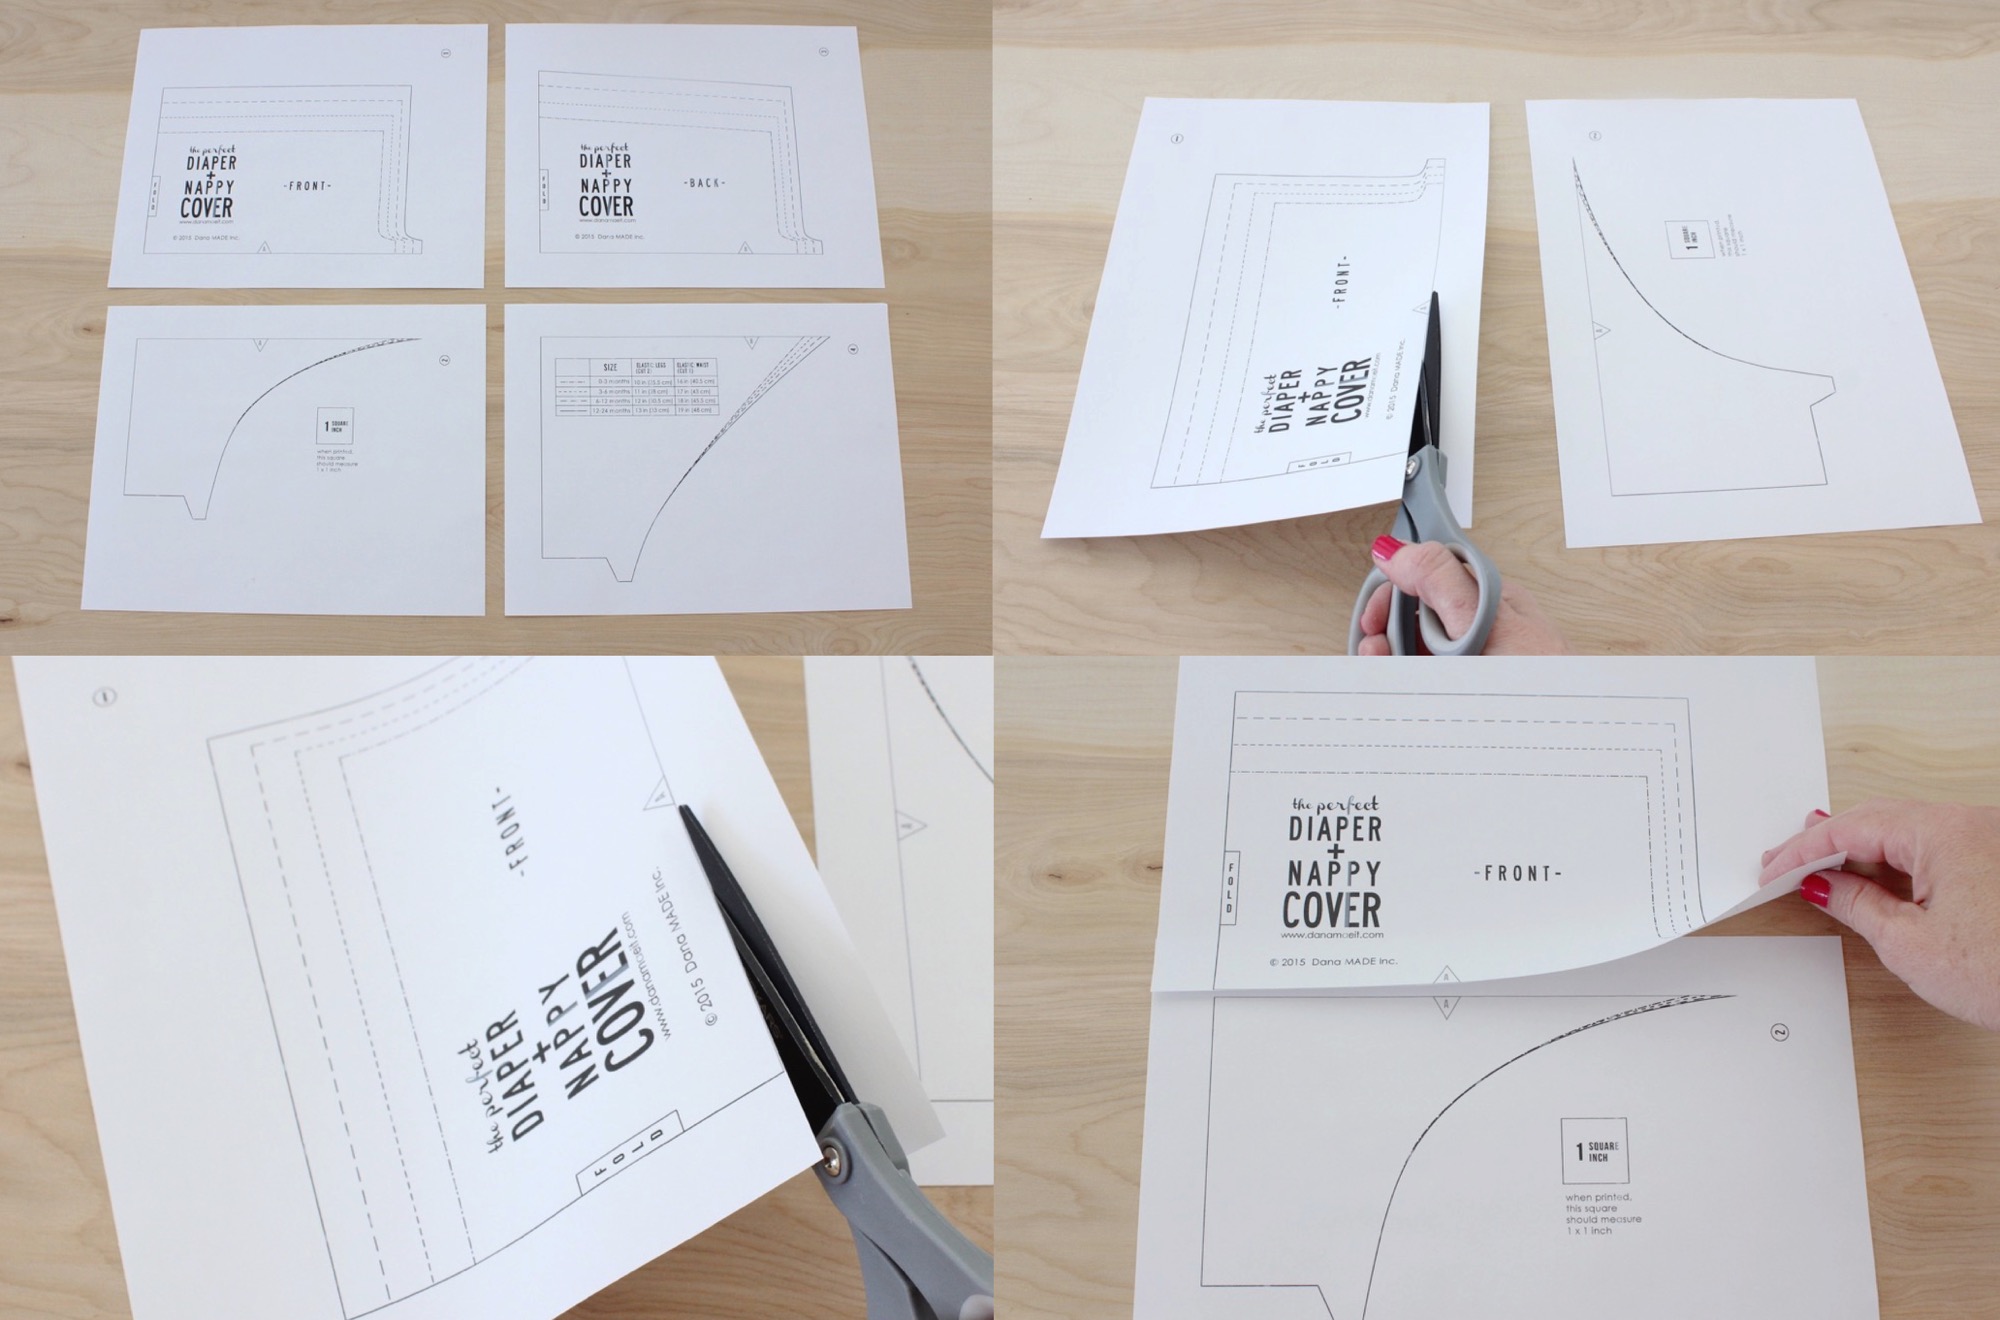
• Cut along the bottom line of the pattern on page 1 and lay it over the top line on page two. The lines and triangles should match up perfectly. Tape the pages together on front and back. Then do the same for pages 3 and 4.
• Then cut along the line for your desired size.
The pattern comes in 4 sizes:
0-3 months
3-6 months
6-12 months
12-24 months
The pattern is easily adjusted to fit larger sizes. If you look at the way the pattern is drawn, there’s a consistent increase (or grading) between each size. So, simply draw additional lines similar to the previous size and increase the lengths of your elastic!
The biggest change to this pattern over the last one is that I’ve added some extra “tabs” at the side seams. This is going to help when creating the casings for our leg holes.
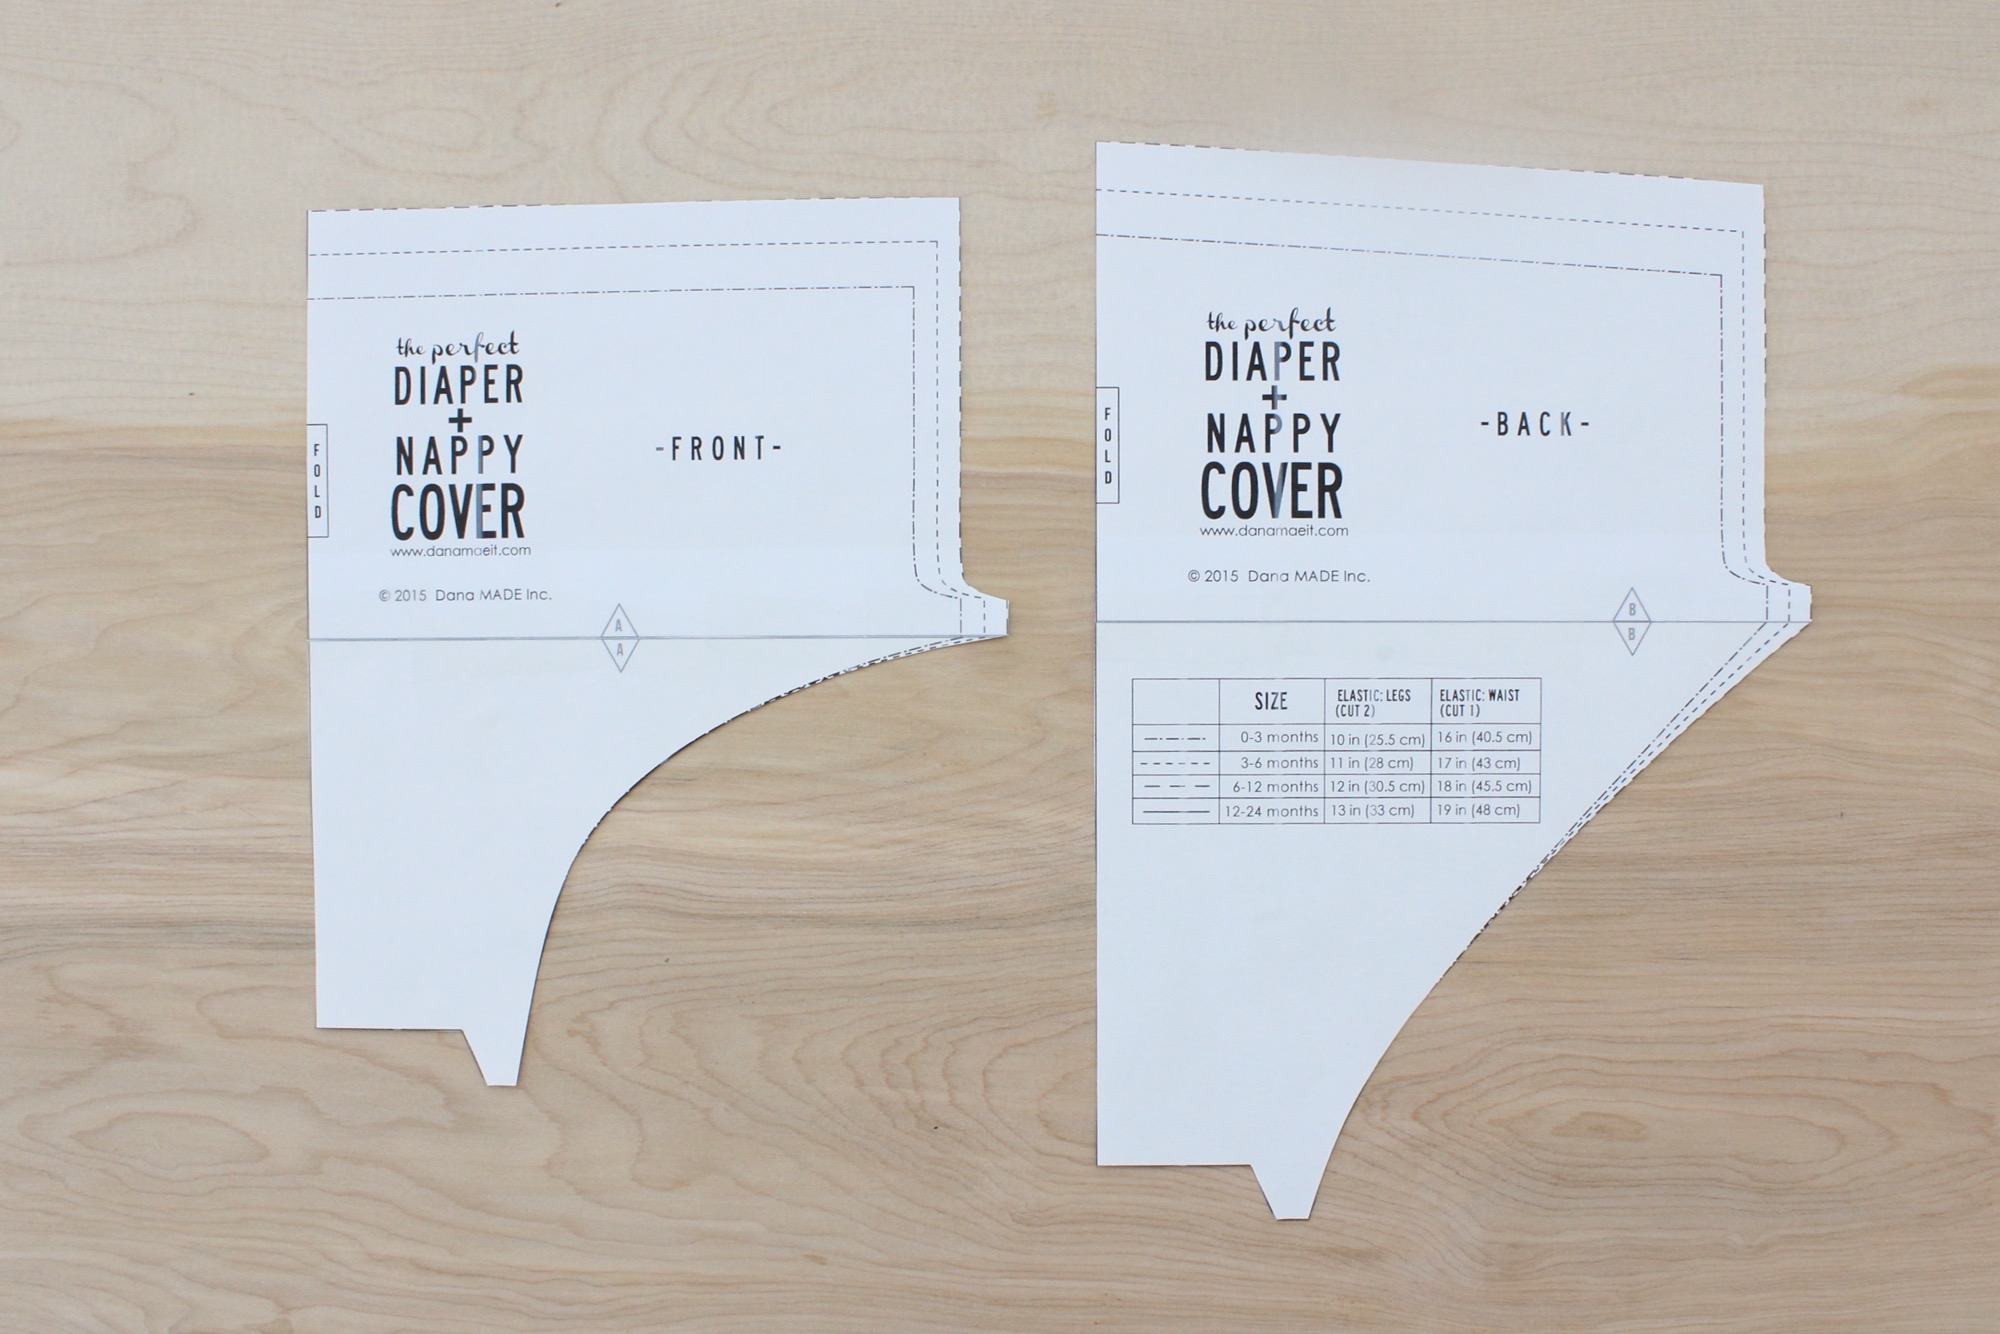
When you’re done you will have two pattern pieces—a FRONT and a BACK.
Now we’re ready to cut and sew!
STANDARD DIAPER COVER
Let’s start with a basic cover—which is probably my favorite to make.
• You need about a 1/2 yard of fabric.
• Make sure you always pre-wash and dry your fabrics before sewing, unless you’re using a specialty fabric that should not be washed.
• Cut one FRONT piece and one BACK piece from your fabric. These should both be cut “on the fold” as specified on the pattern pieces. This means, fold your fabric, lay the pattern piece on that fold, and cut—so that you end up with a symmetrical piece.
Pattern Piece NOTE: The BACK piece will be slightly taller than the FRONT piece. This is to accommodate big baby bum, and also to help the diaper cover fall below their baby belly in front, for comfort. However, the two pieces (the Front and Back) will match up perfectly at the side seams.
Seam Allowance NOTE: Seam allowances are included in the pattern pieces–meaning, you do not need to cut any additional room around the pattern pieces. Simply cut along the lines in the pattern.
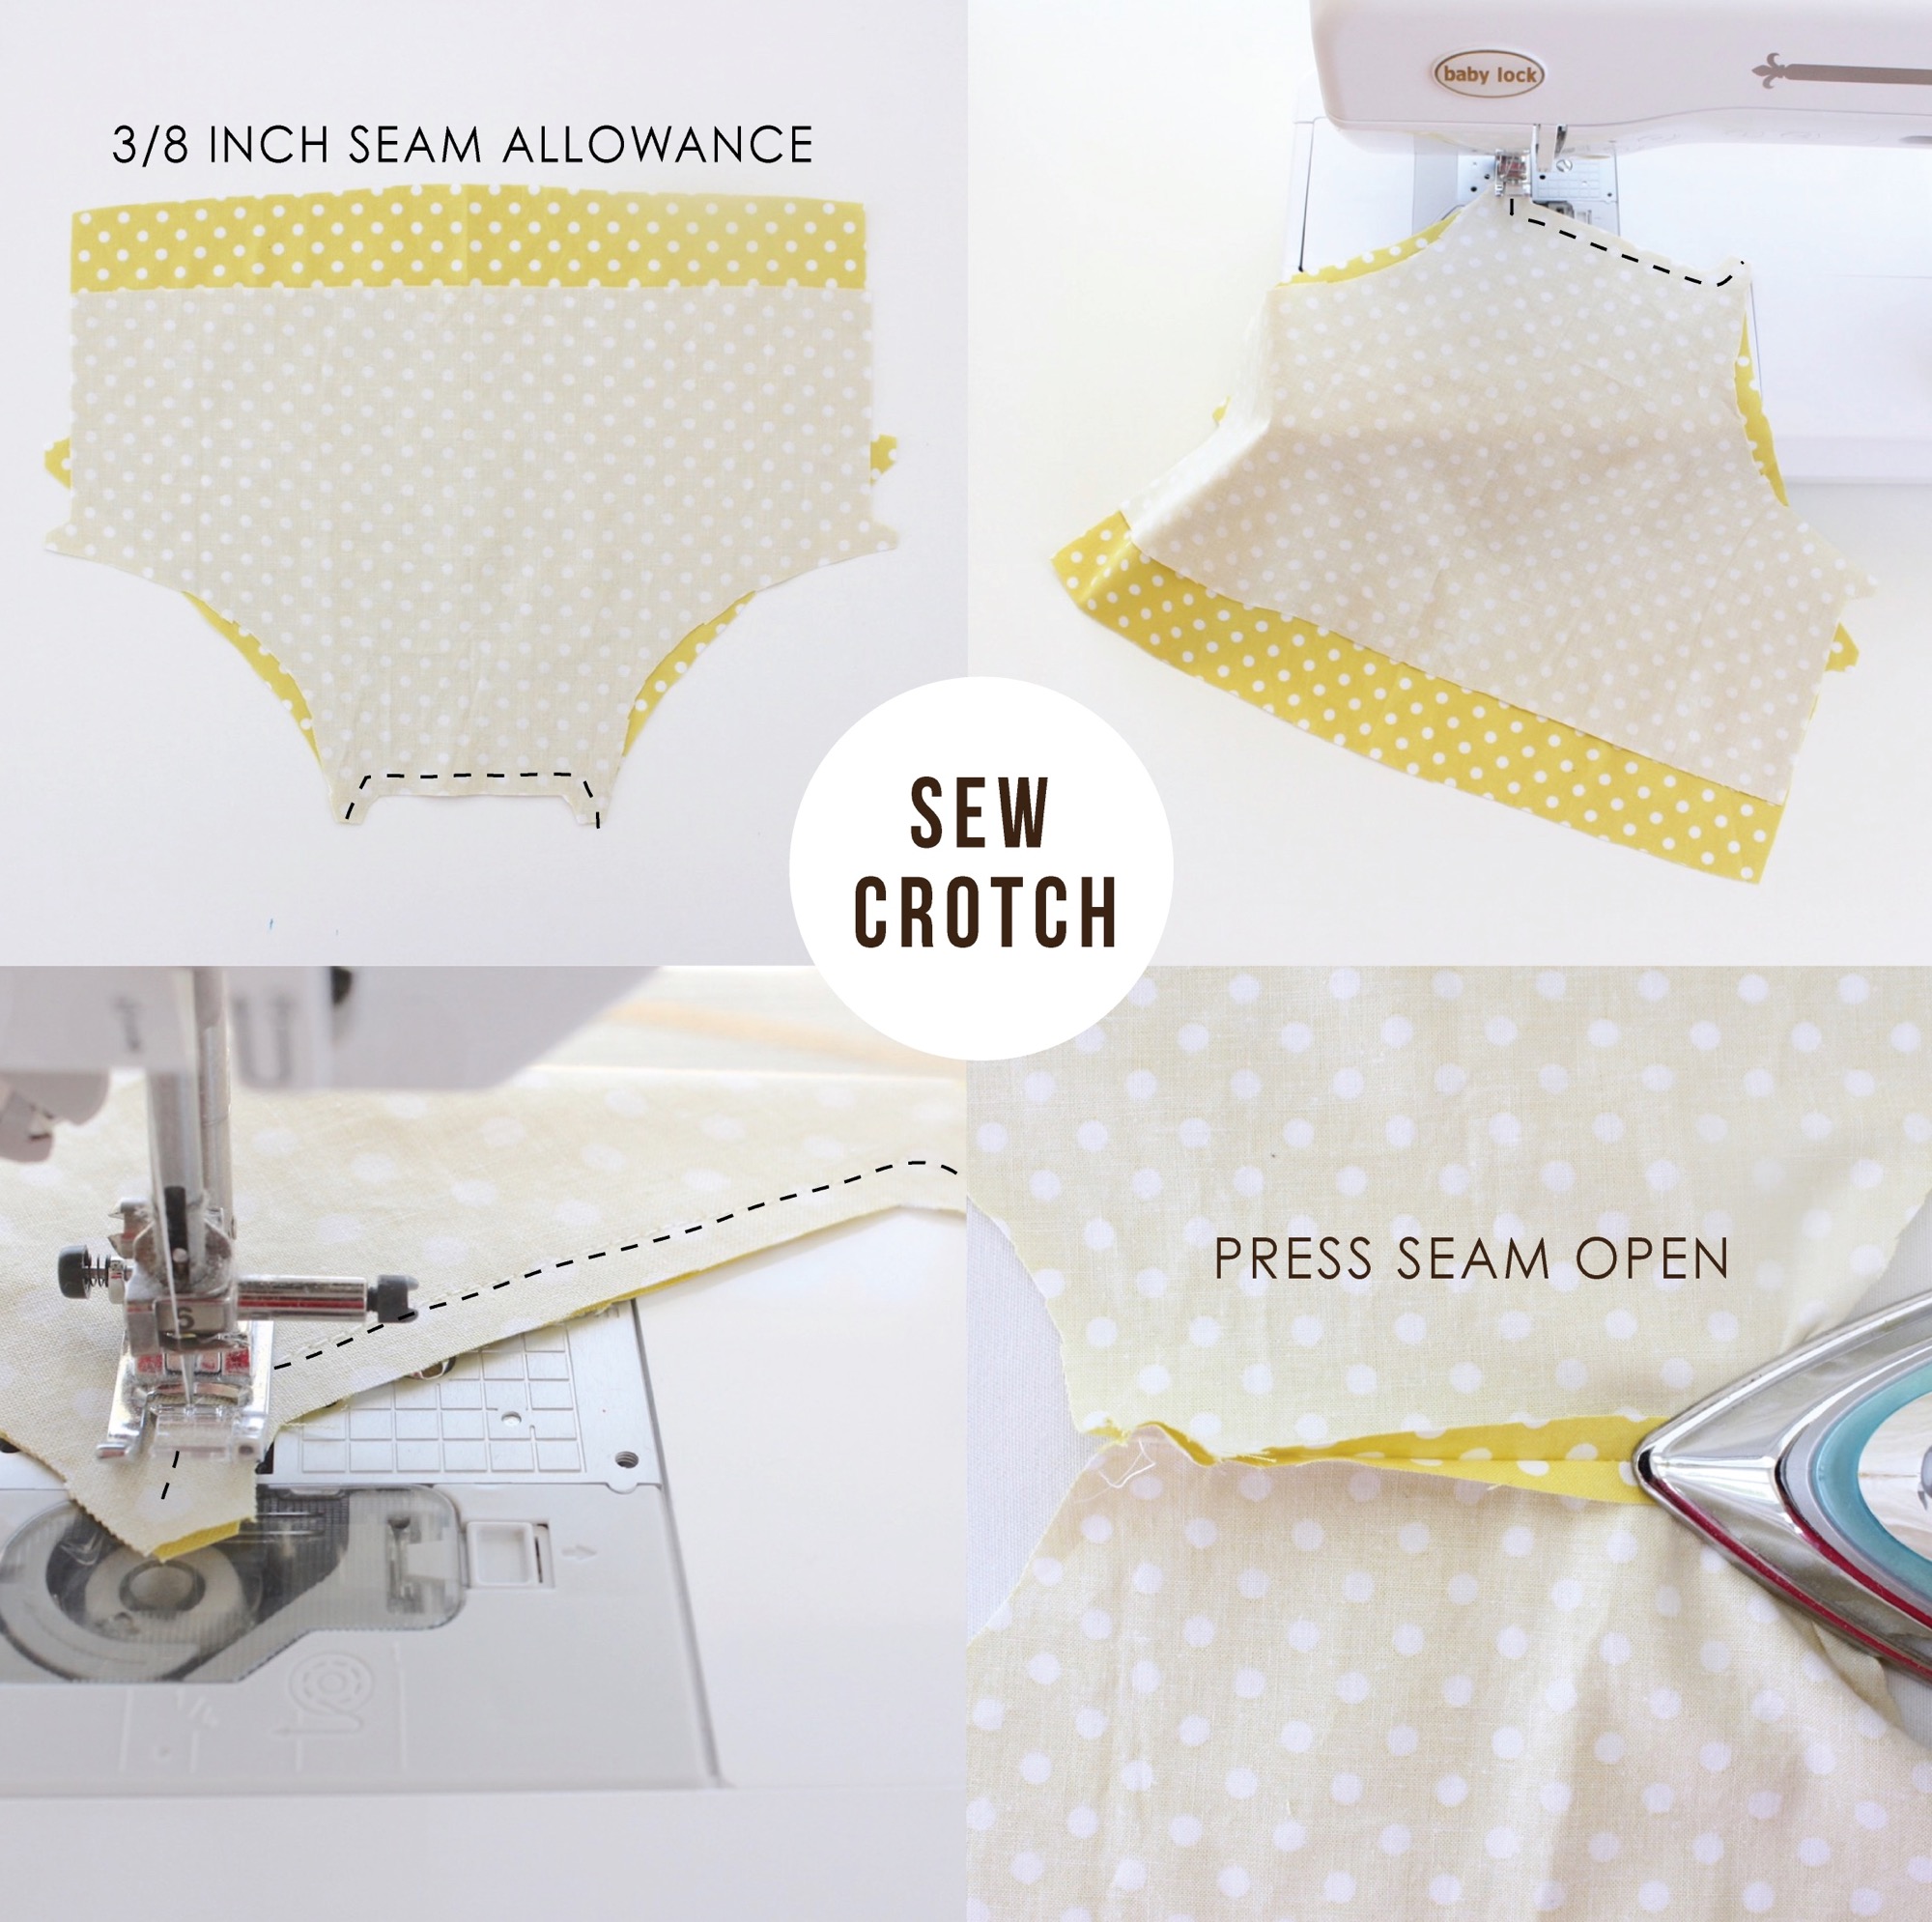
When sewing, we will use a 3/8 inch seam allowance, unless otherwise stated.
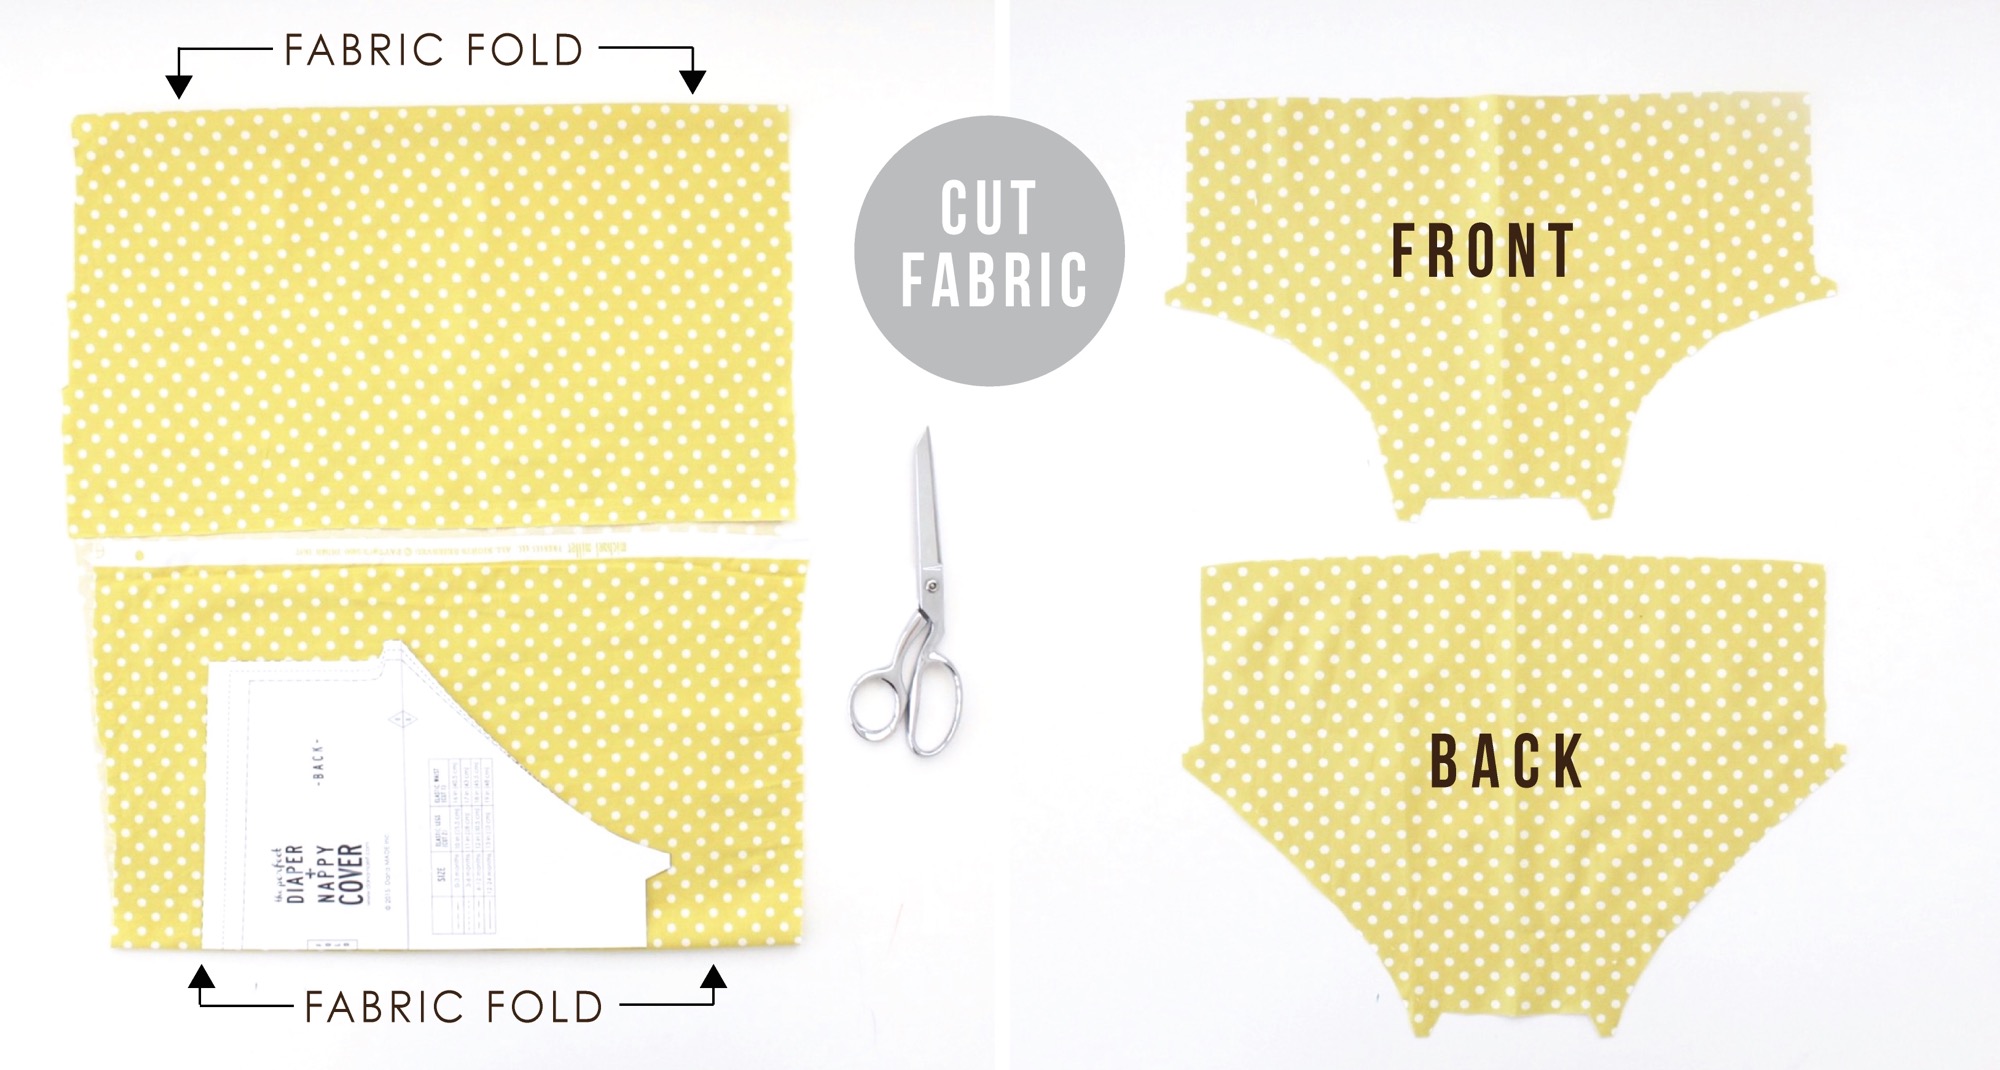
When cutting my fabric I like to fold my 1/2 yard of fabric so that it creates two folds that meet in the middle (photo above). Then I cut the first pattern piece on the bottom fold, and I cut the other pattern piece on the top fold—BUT you need to flip that 2nd pattern piece over (not pictured) so that’s the printed words of the pattern are facing down on your fabric, and cut it out flipped, so that your fabric print is going the same direction. It doesn’t matter much with this polka dot print….but on another print you would notice if the pattern print was upside down on your diaper cover.
Sorry. That sounds confusing. Do it once and it’ll make sense.
Okay.
Let’s sew!
Sew the crotch seam
• With right sides of the fabric together, sew the Front and Back together at the crotch (see dotted lines below) Sew from one tab, along the bottom, and around to the other tab.
• Press the seam open with an iron. Just do your best when you press the tabs open–they won’t be perfectly flat.
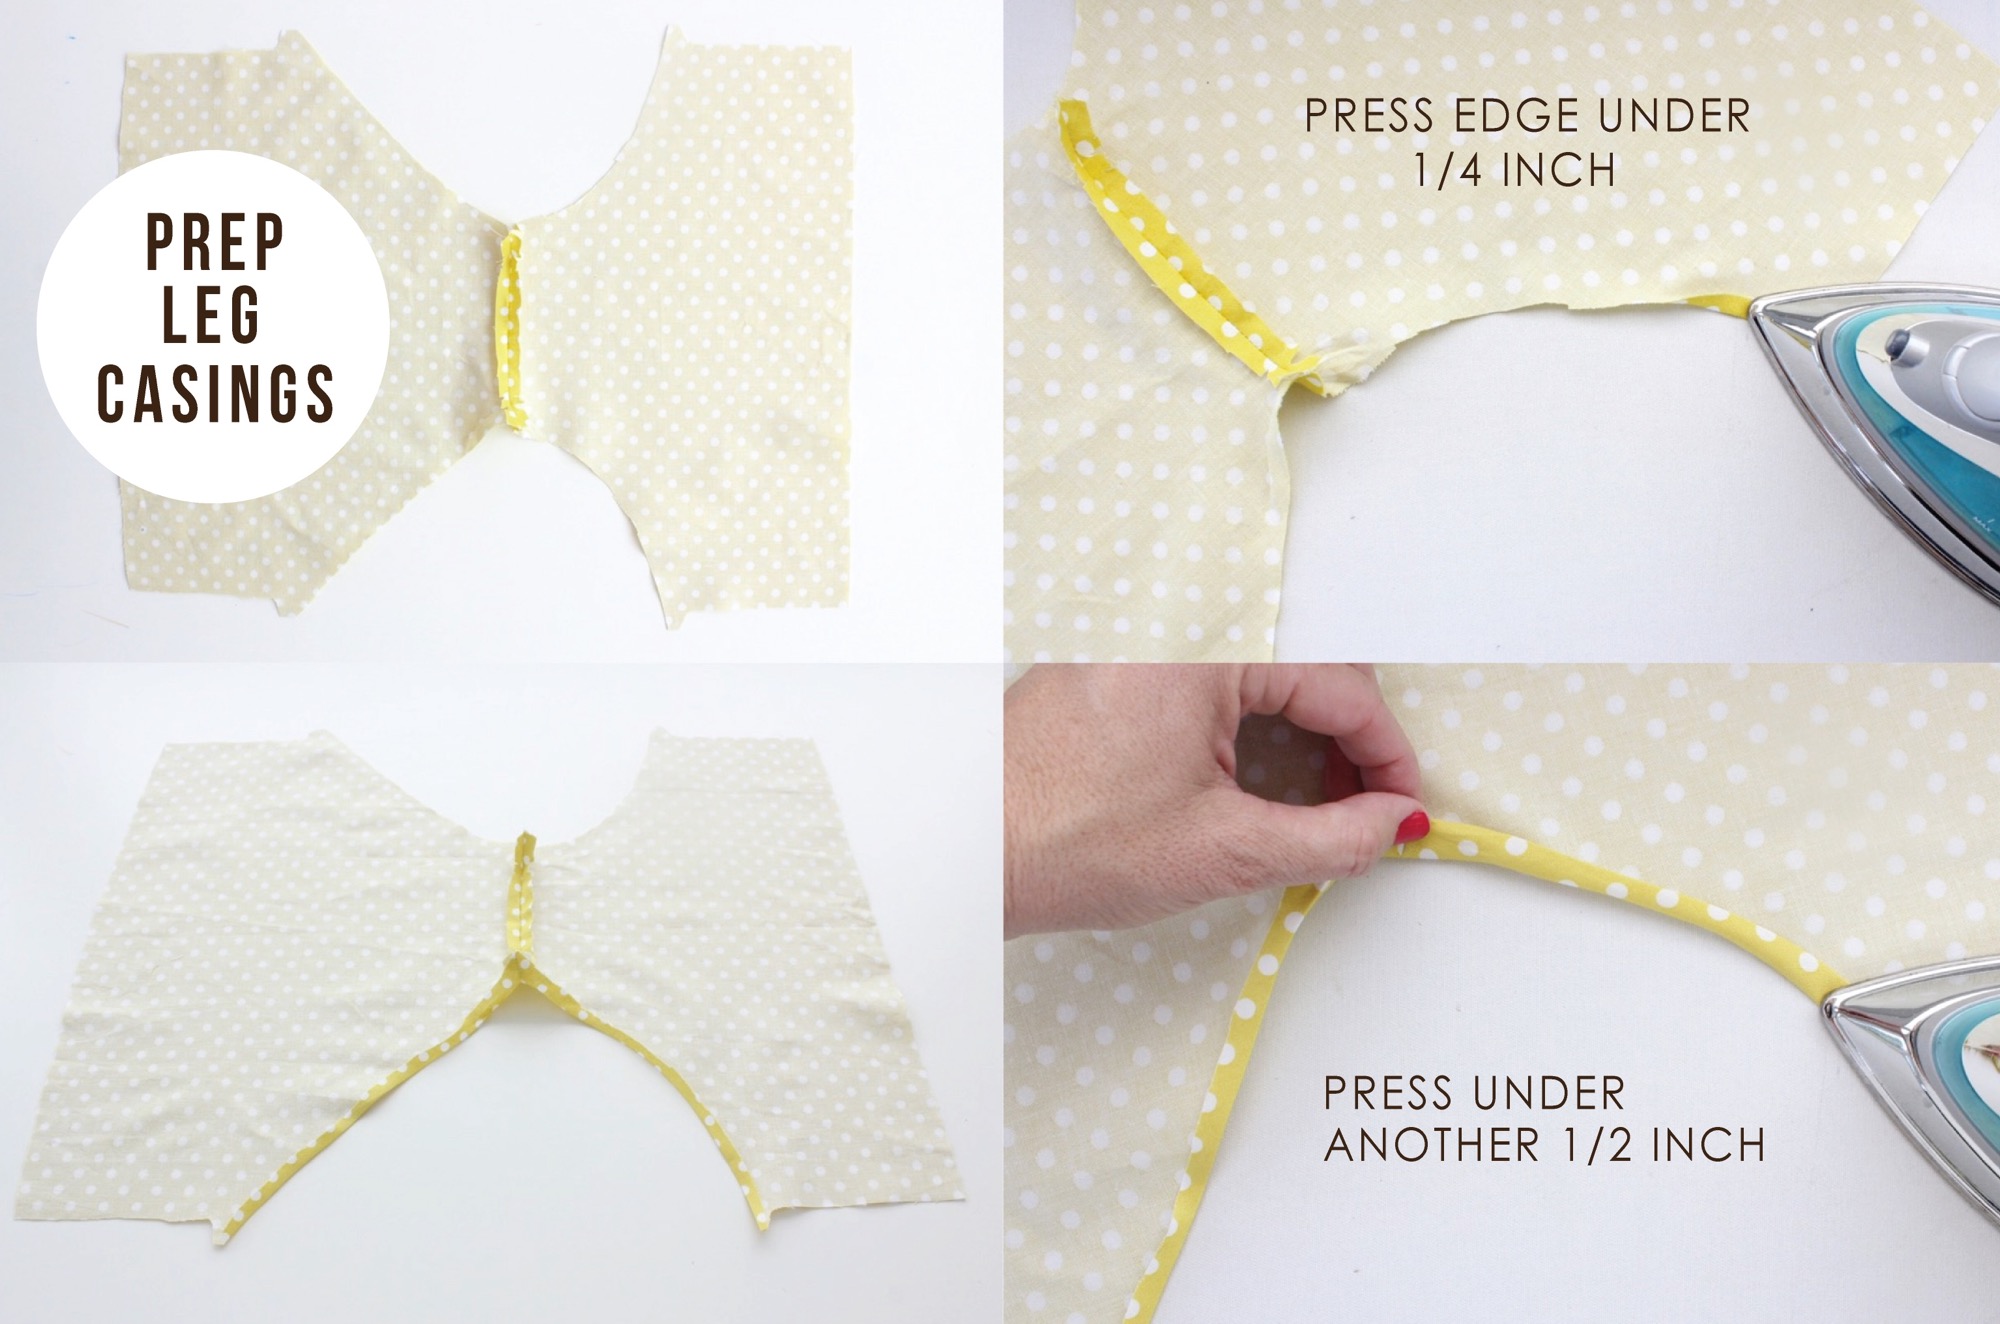
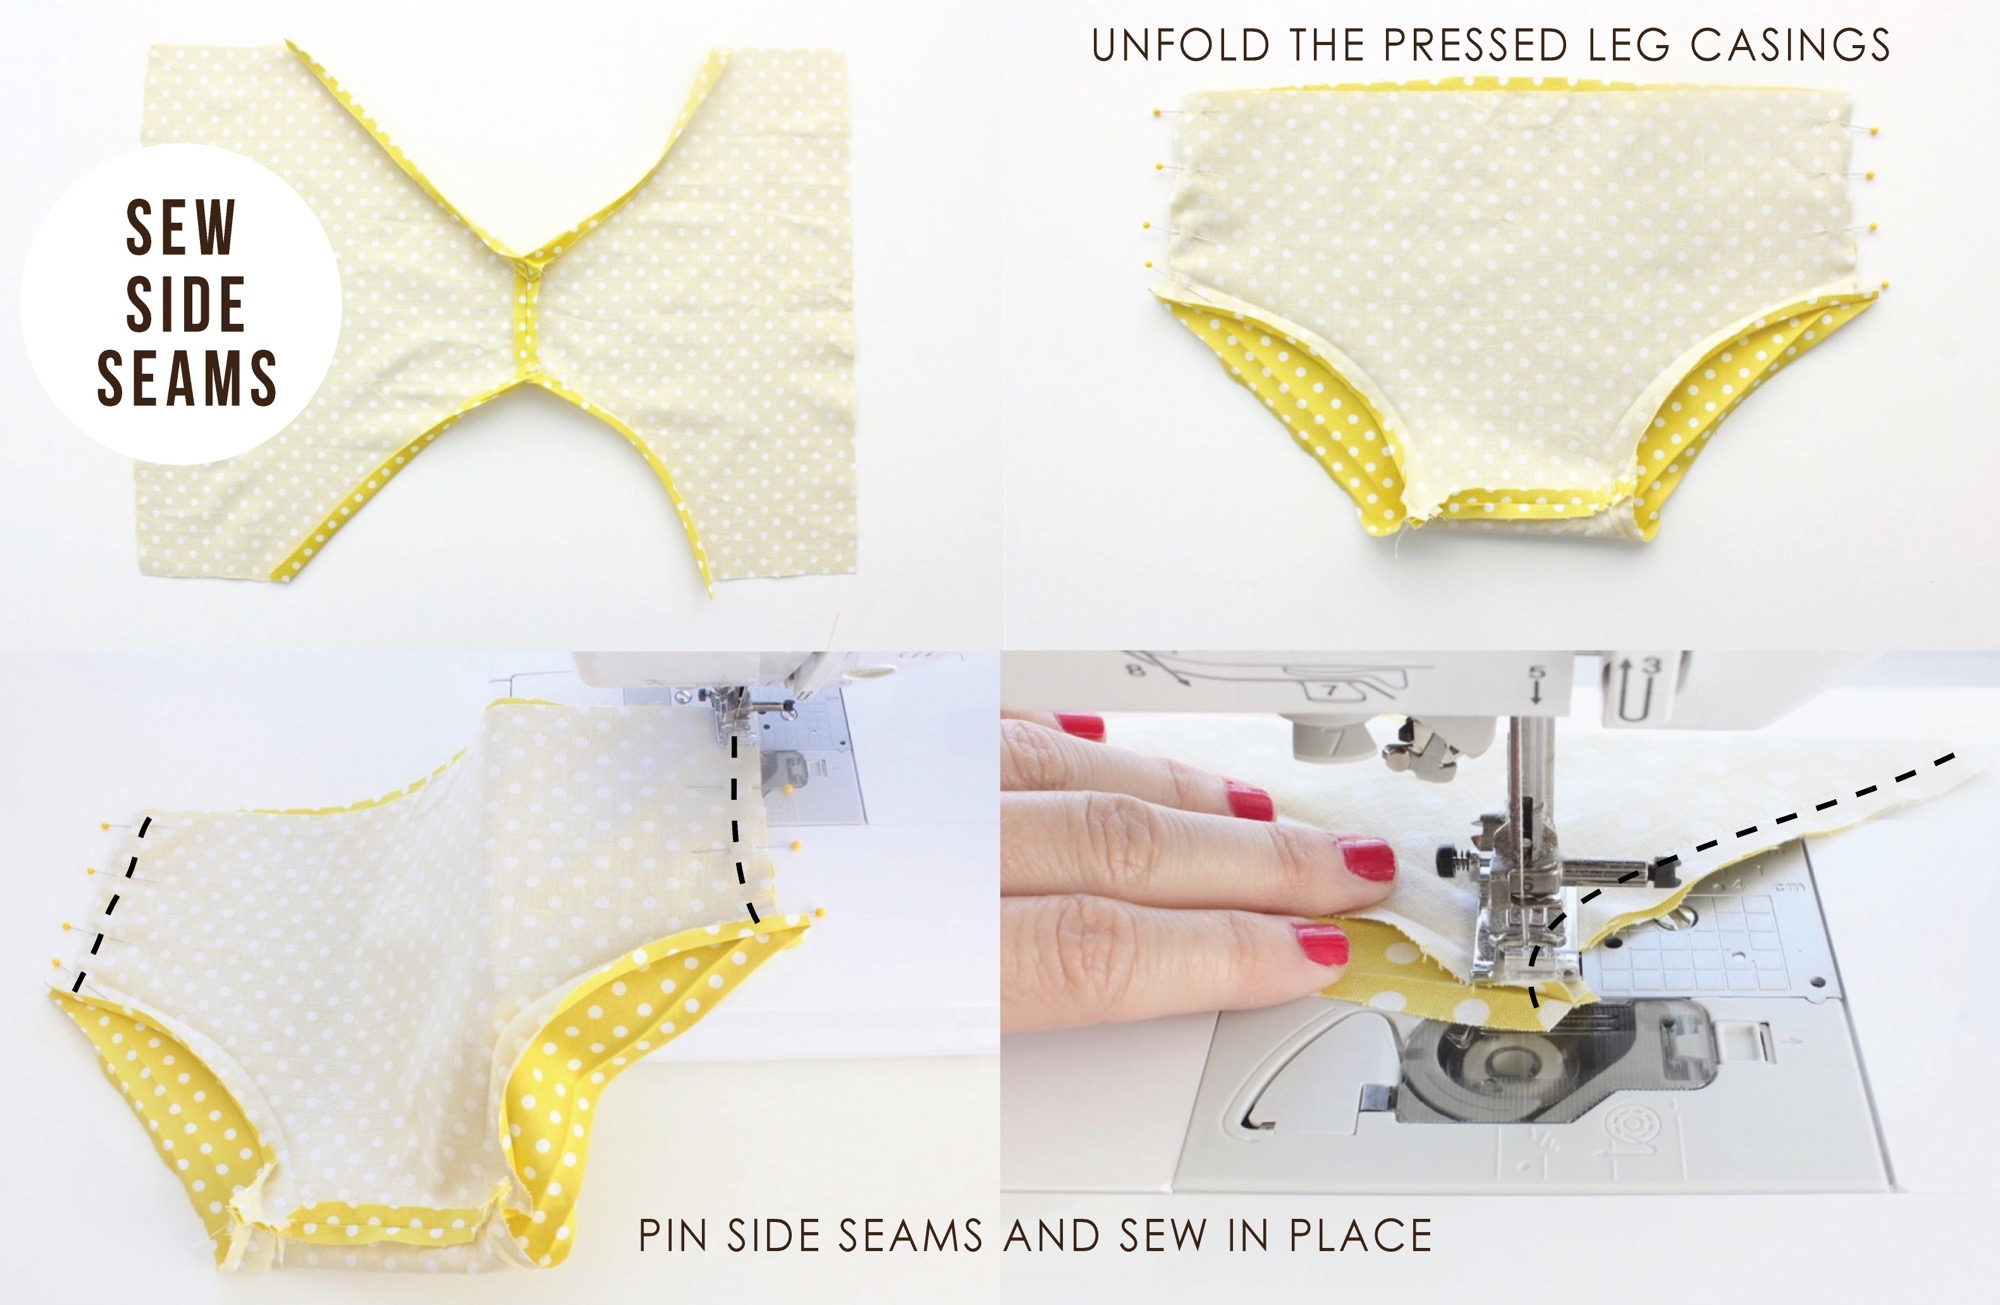
Prep the Leg Casings
I love prepping for the later steps by ironing the fabric when it’s way more convenient. So, rather than ironing the leg casings under once they’ve been sewn in a circle, let’s do it now….while the fabric is flat! Then we can easily fold it into place when we’re ready to sew the leg casings.
• Press the edge of the leg hole under 1/4 of an inch.
• Then press it under another 1/2 inch.
• Do this for both sides.
As you press the edges under, those tabs in the fabric give you extra wiggle room to press everything flat. The tabs will become somewhat folded up inside of the casings, and become flush with the side edge of the diaper cover once you’re done pressing everything in place.
Sew the Side Seams
• Unfold what we just ironed and pin the Front and Back together at the side seams (with right sides of the fabric together). Sew down both sides (remember we’re using a 3/8 inch seam allowance)
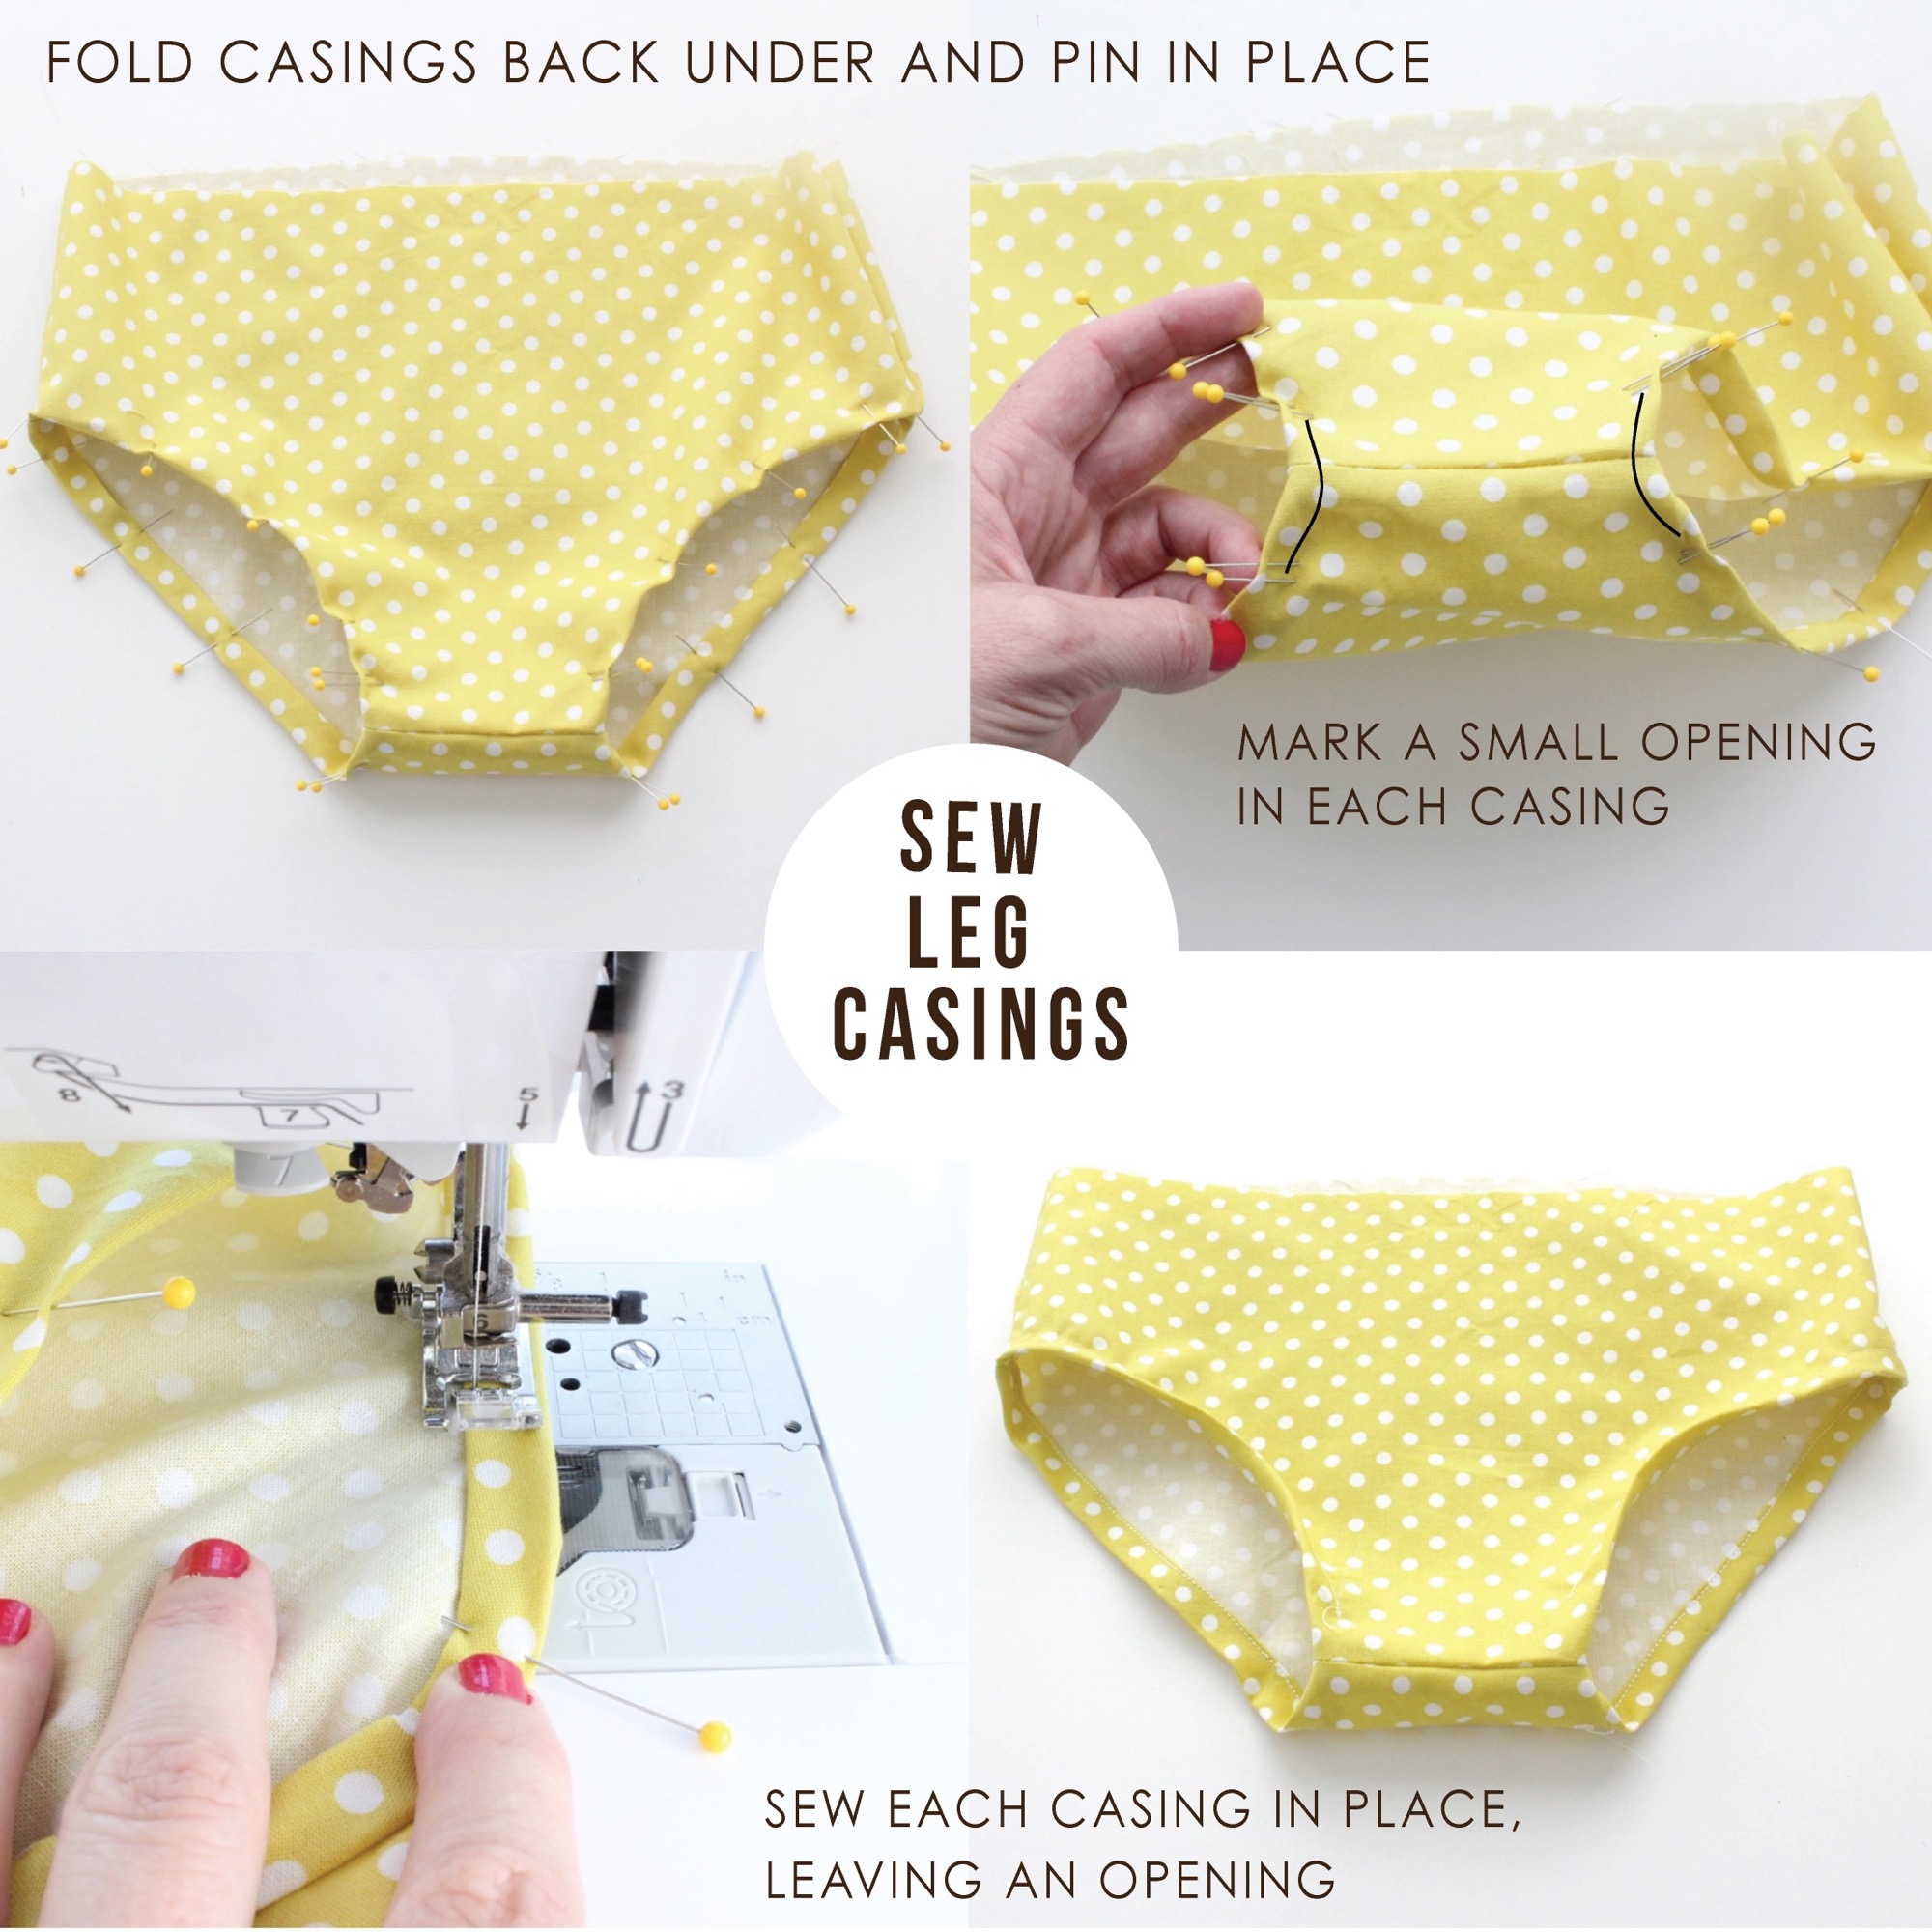
Sew the Leg Casings
• Fold the leg casings under (this is easy to do now!) and pin the casings in place.
• Leave a small opening in each leg for the elastic to come in and out. I like to leave the opening near the crotch so you don’t notice the extra stitching when I’m done. But you can leave the opening anywhere on the casing. And I like mark the opening with double pins so I have a clear Start and Stop point for sewing.
• Sew each leg casing in place. Start sewing at your first set of double pins and sew around till you get to the Stop point (the second set of double-pins). Sew about 1/8 inch from the edge of the casing so you leave enough room to string elastic through the casing.
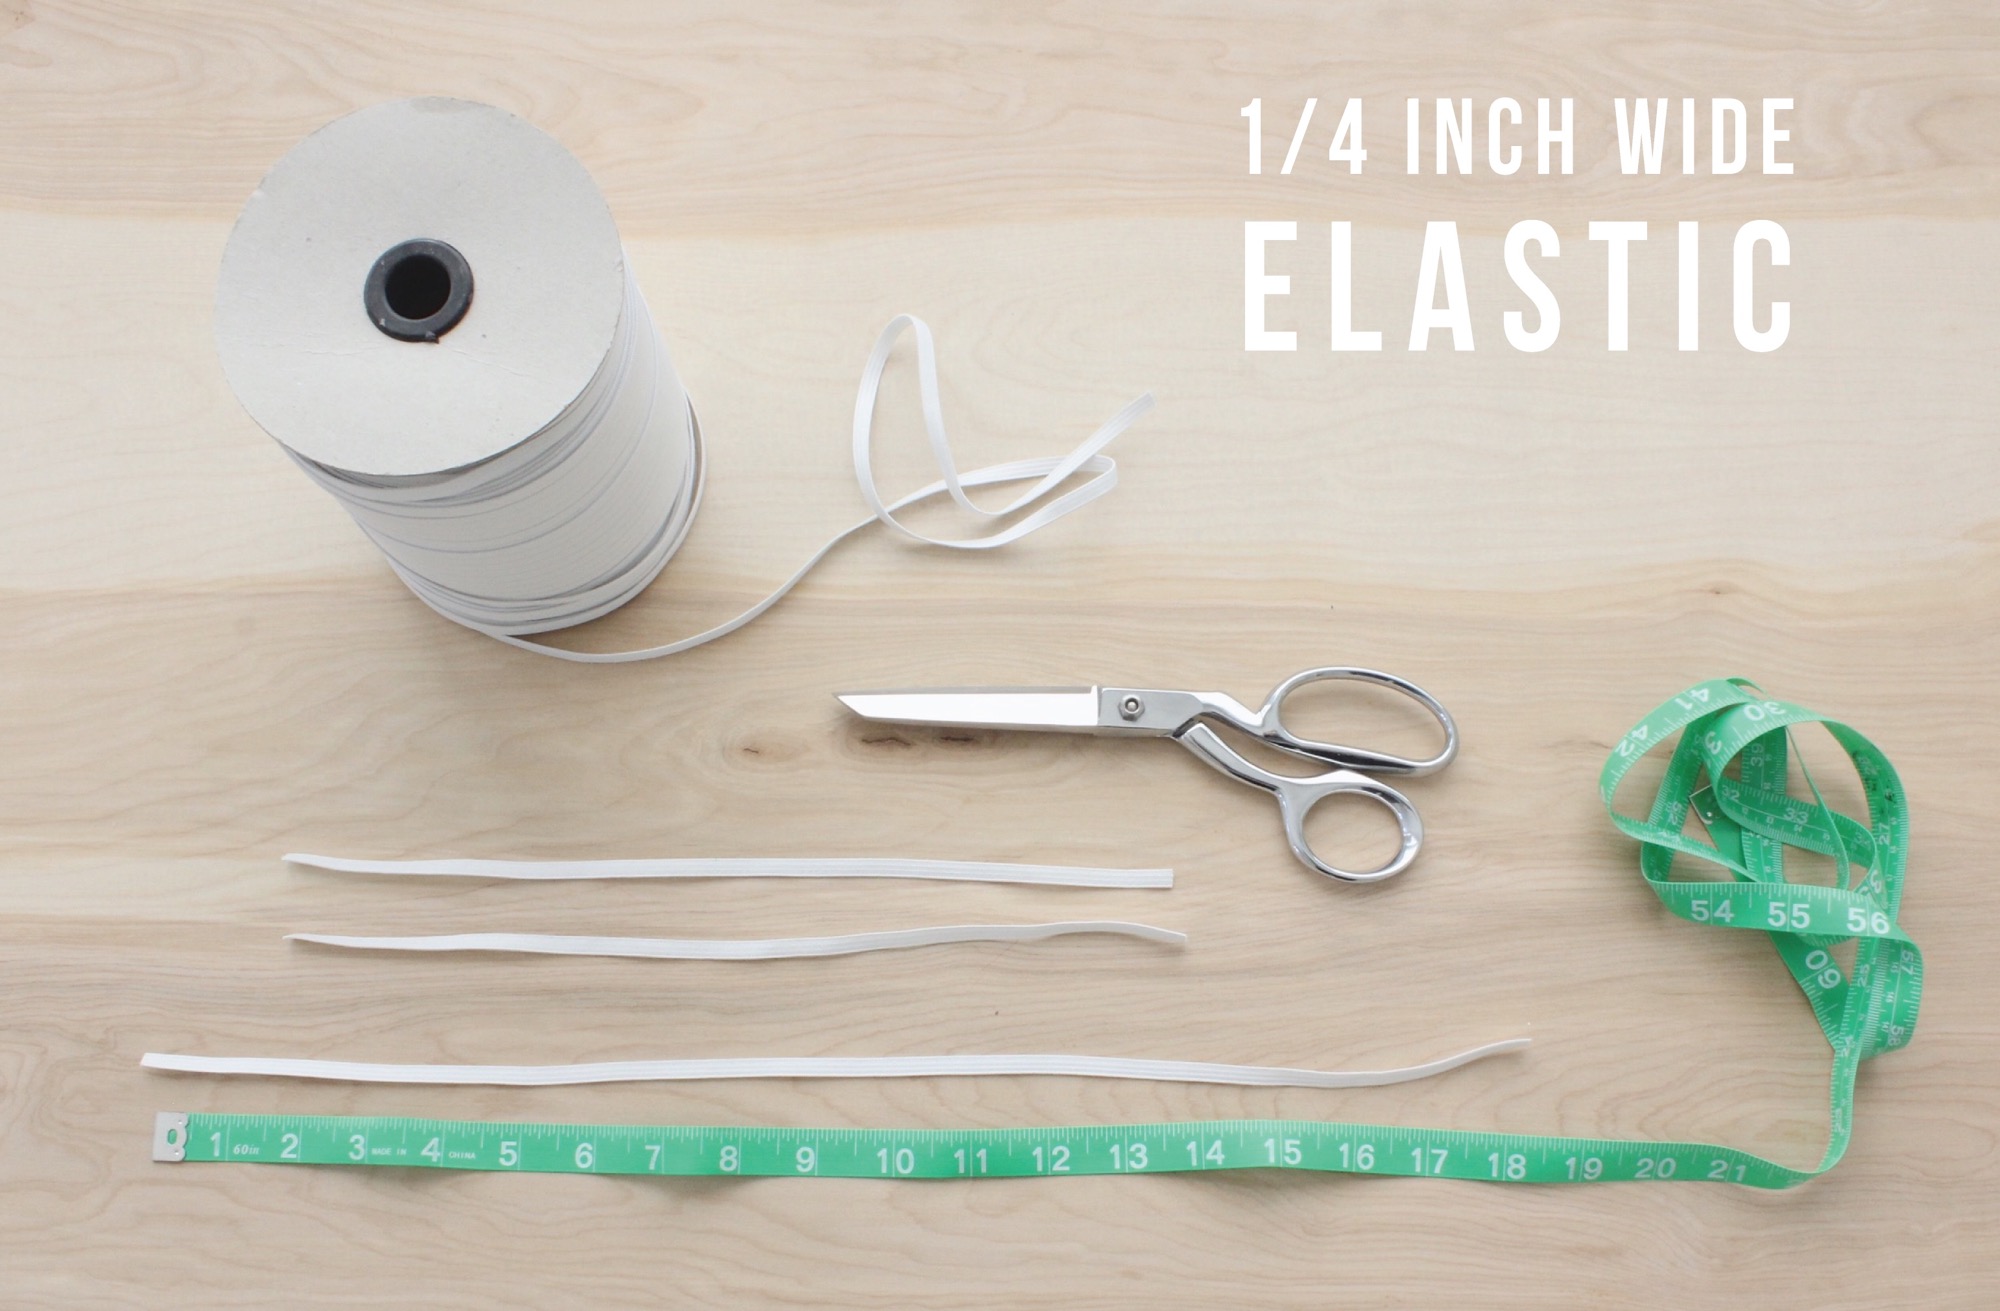
Now grab your elastic!
We’re using 1/4 inch wide elastic, which can be purchased at any fabric store. It’s sold in small packages, or by the yard, or you can buy a monster roll like I’ve done here, so you have plenty for future projects (I purchased this large roll on ebay for about $15. SCORE)
• Cut two pieces of elastic for the legs, and one piece for the waist (the amounts needed for each size are listed on the pattern pieces)
NOTE: if your child has extra chunky legs (meaning: extra adorable) you can always increase the length of the elastic. These sizes are based on average sizes for each age, similar to what you would find in a retail store.
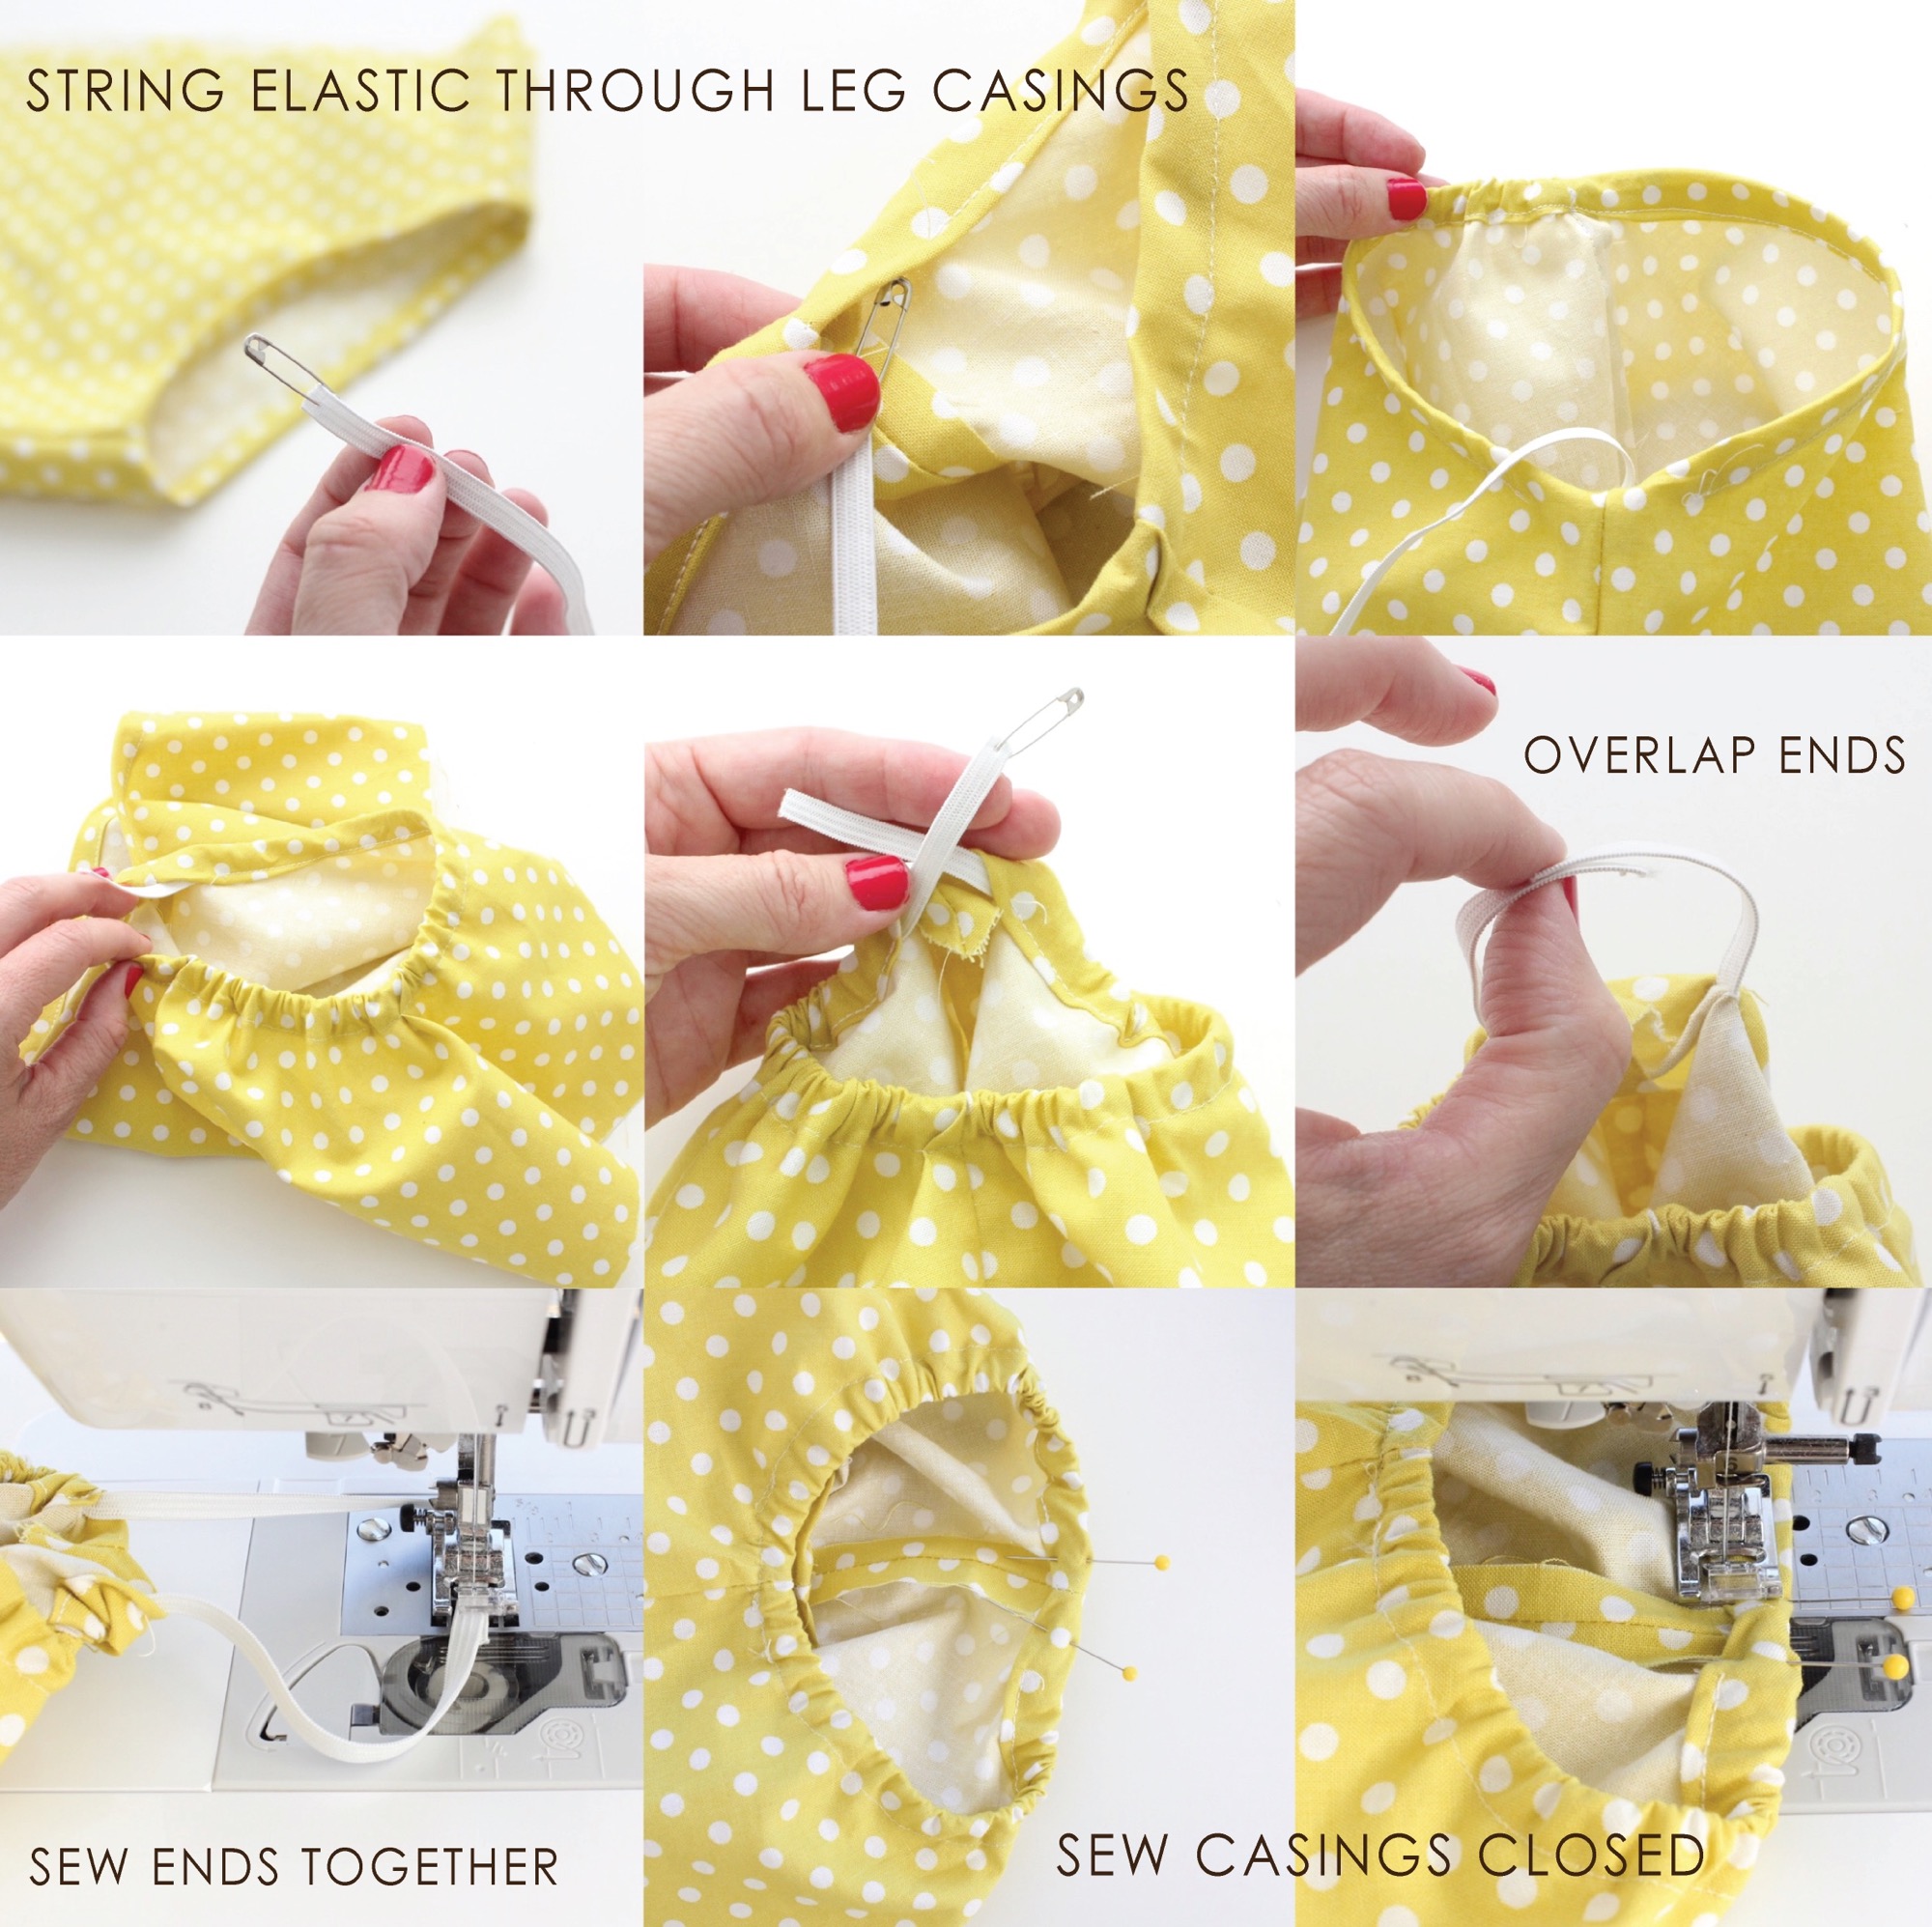
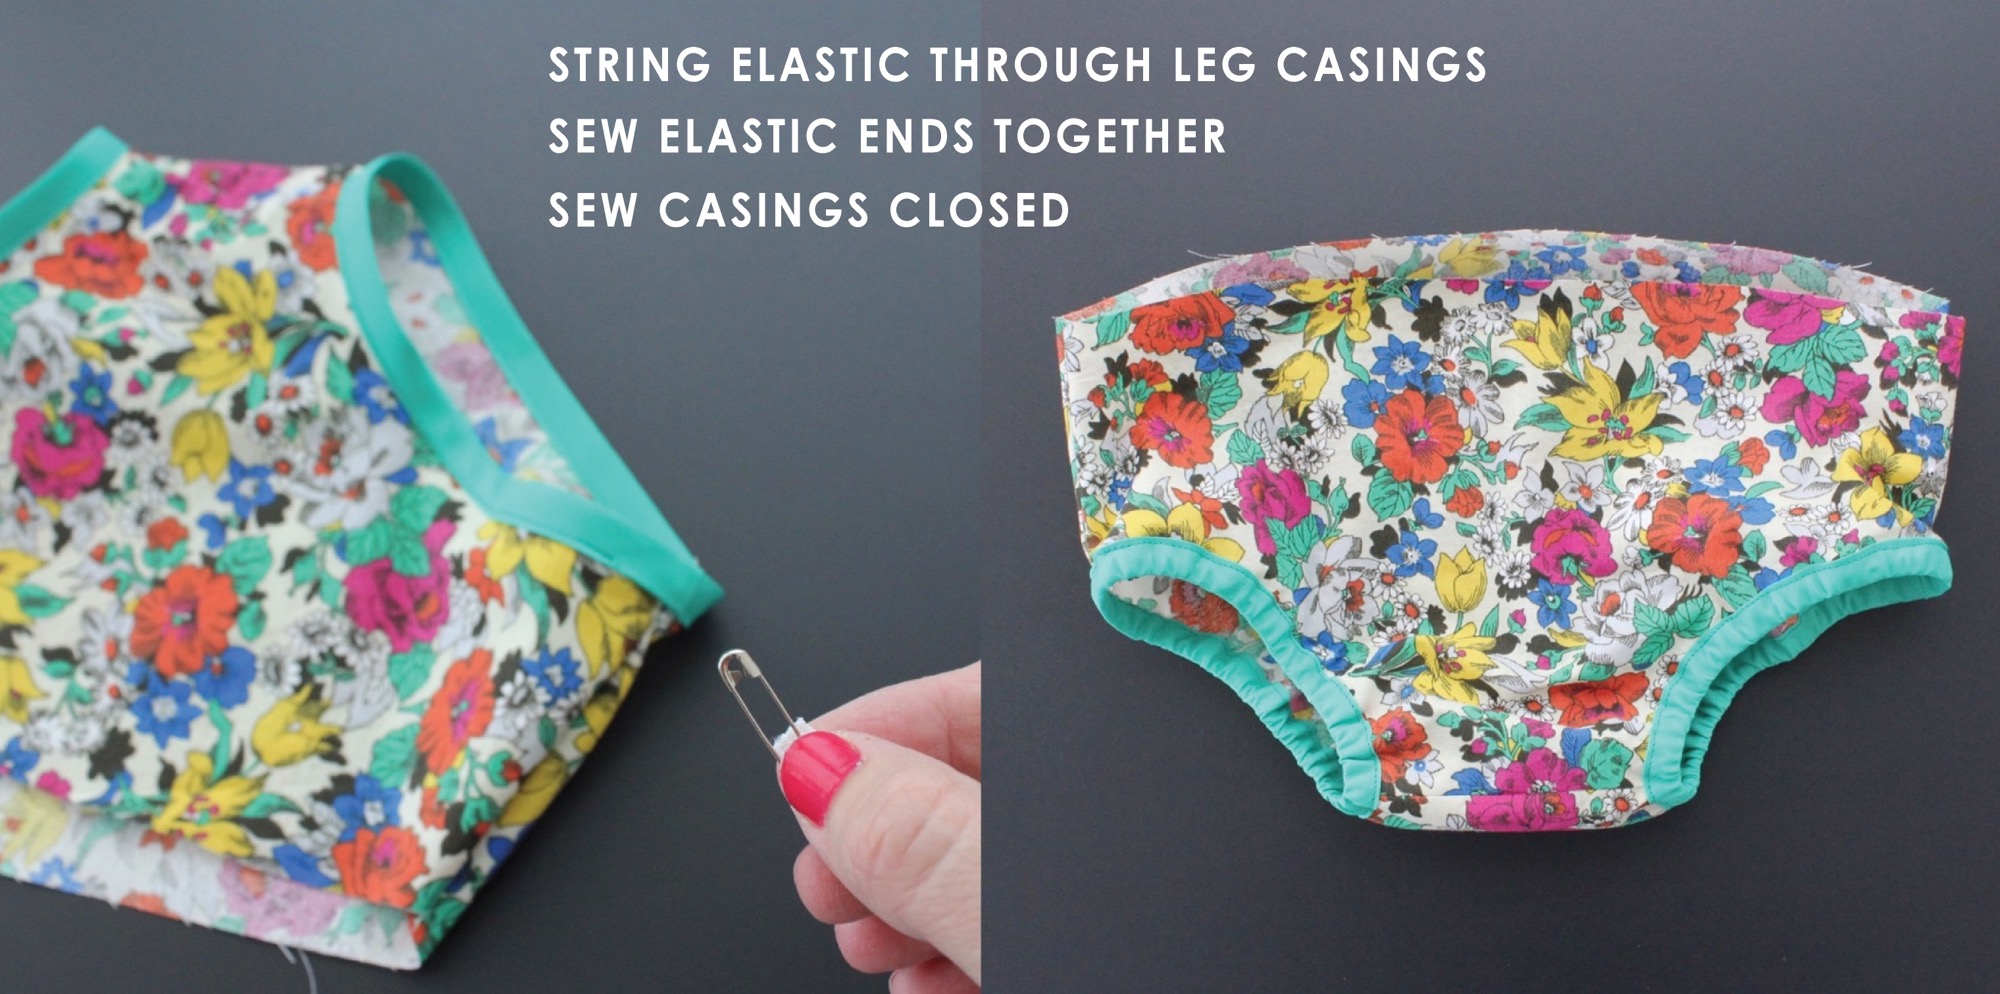
• Attach a safety pin to the end of the first piece of leg elastic. Place it in one of the leg casings, and string it through the first leg till it comes out the other end of the opening.
• Overlap the two ends of the elastic about 1 inch (do your best to make sure that the elastic is not twisted inside the casing, though it’s hard to tell sometimes) and sew the elastic ends together with a zigzag stitch (so the elastic can stretch with the stitch).
• Sew the casing closed.
• Repeat these steps for the other leg.
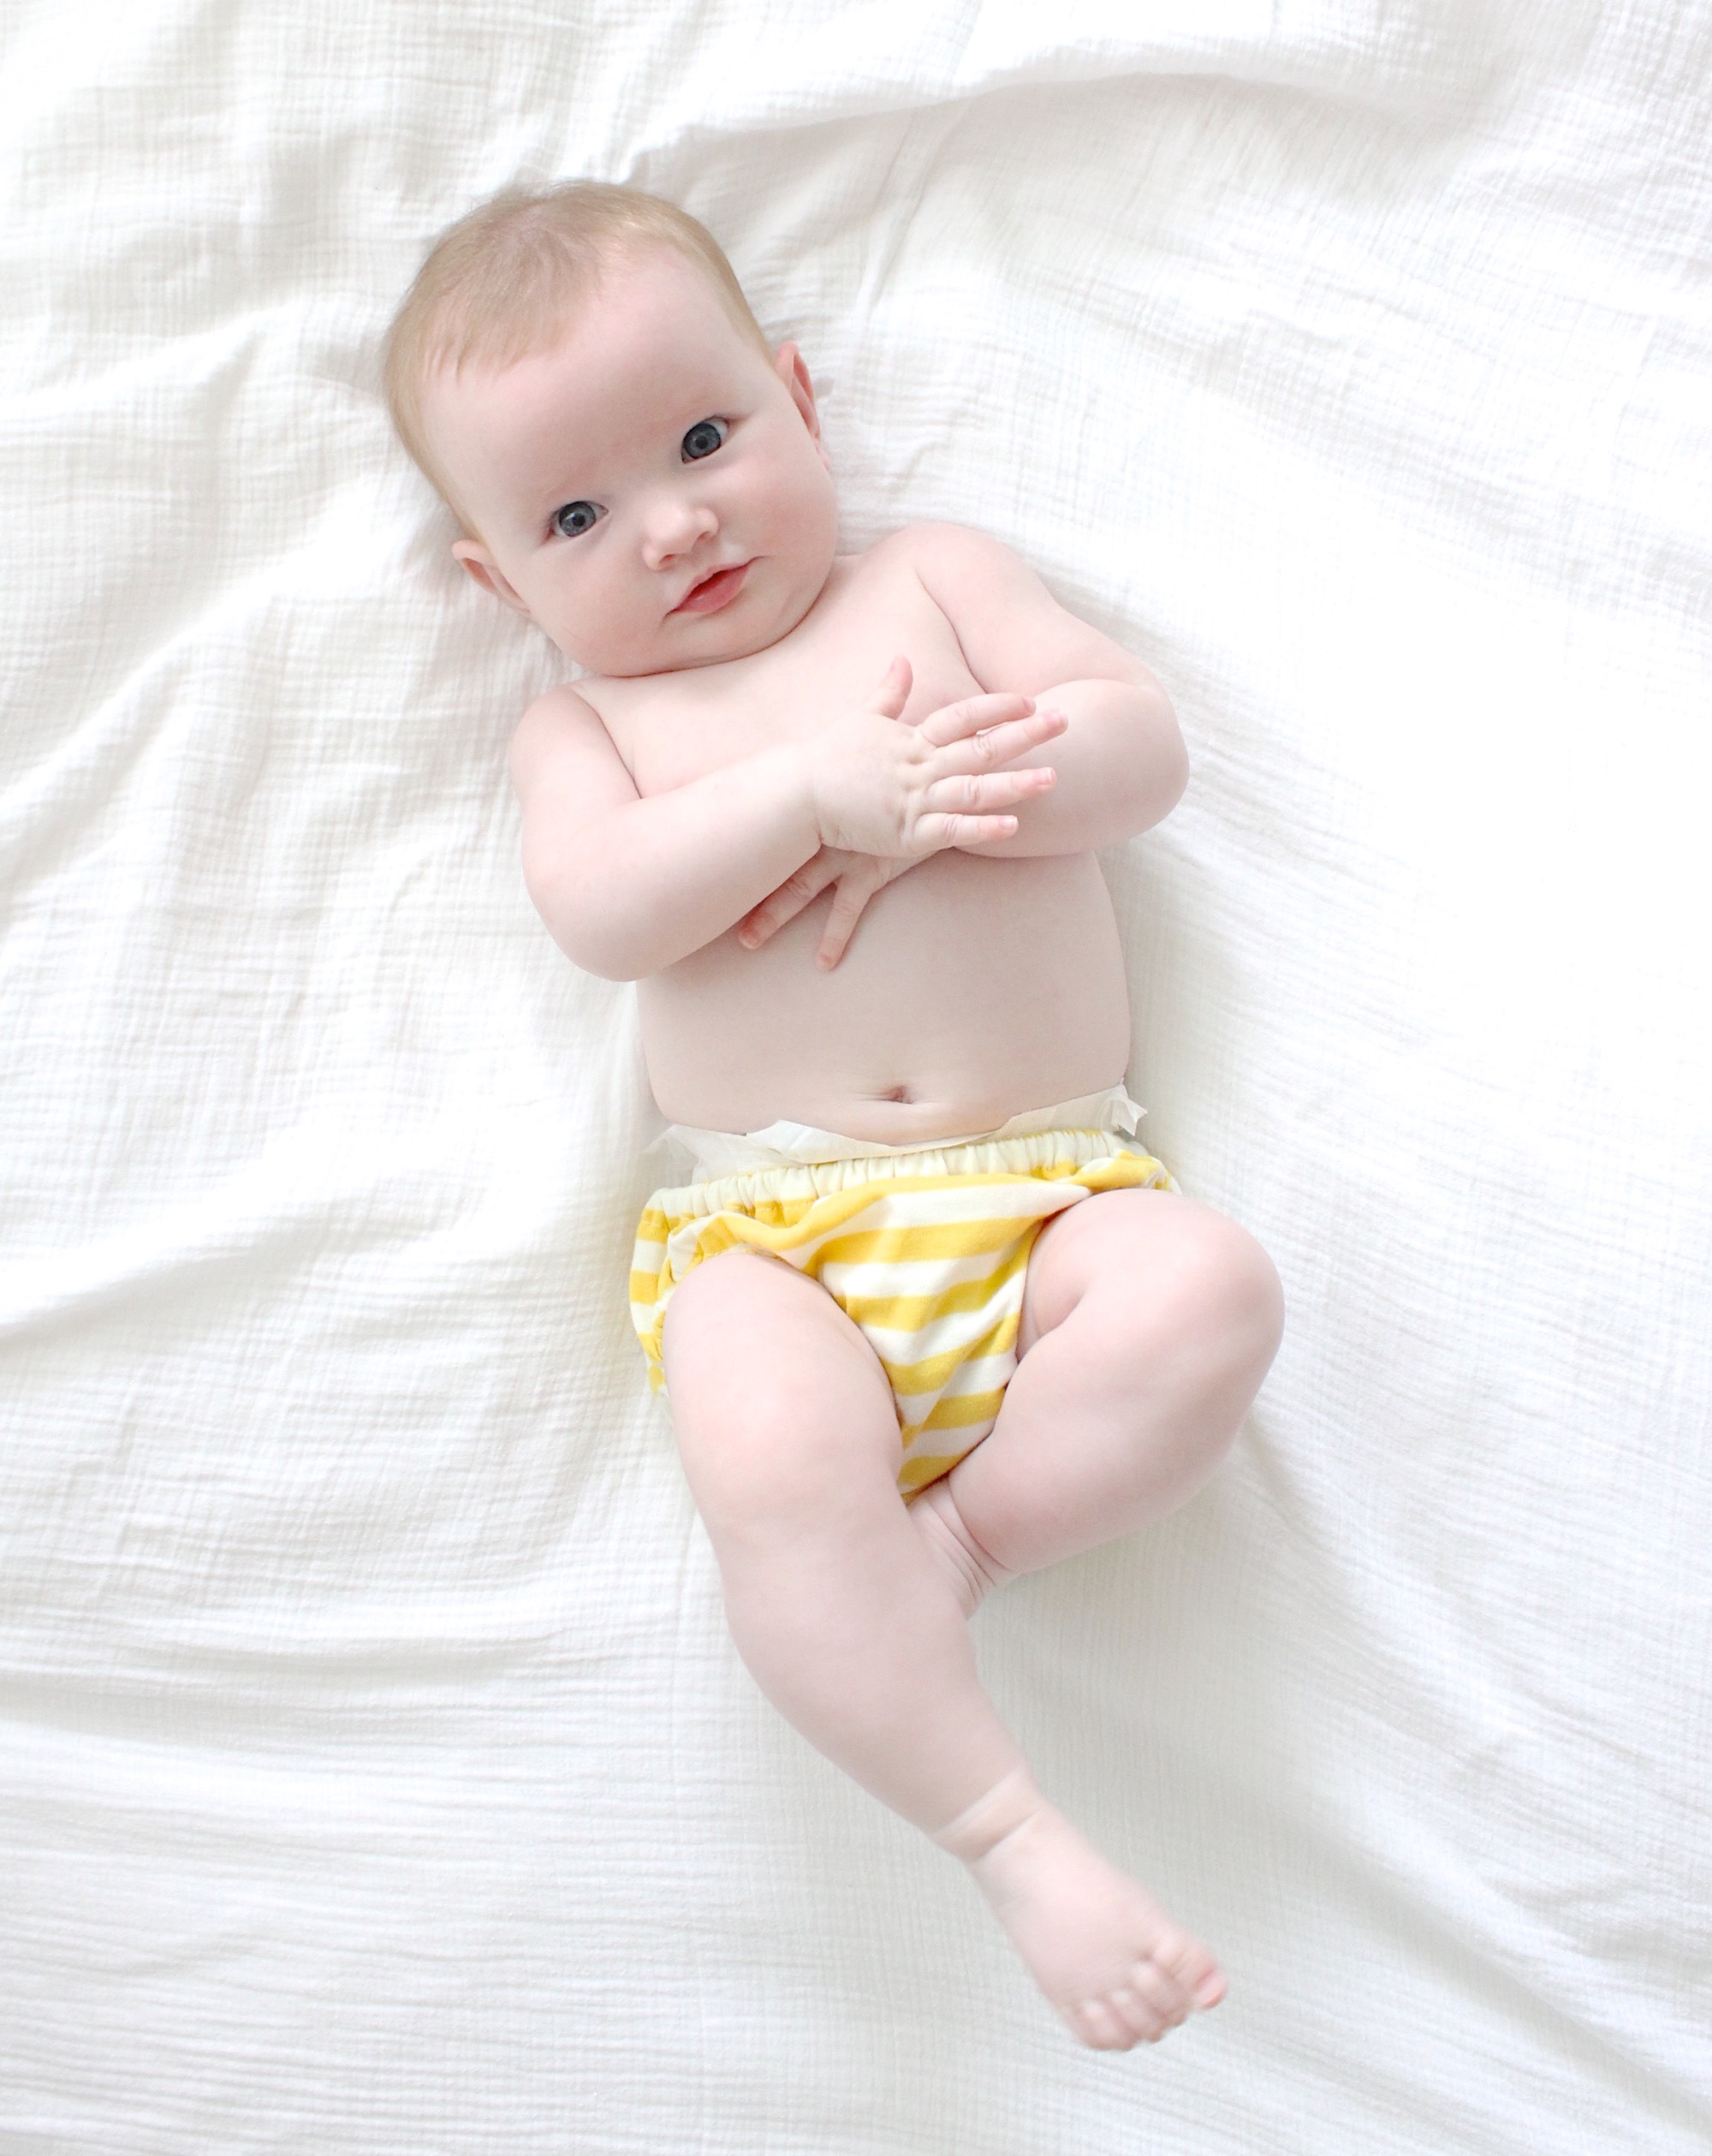
At this point your cover should look like this….an itsy bitsy teeny weeny yellow polka dot bikini:
We’re almost done!

Sew the Waistband
• Iron the waistband in place just like we did with the leg holes. First press it under a 1/4 inch, then press it under a 1/2 inch.
• Sew the waistband in place, leaving a small opening in the back for the elastic. Sew about 1/8 inch from the edge of the casing.
• String the elastic through the waistband, overlap the ends, sew them together with a zigzag stitch, and sew the casing closed.

And you’re done! One adorable diaper cover.
Perfect for any baby, for any occasion.
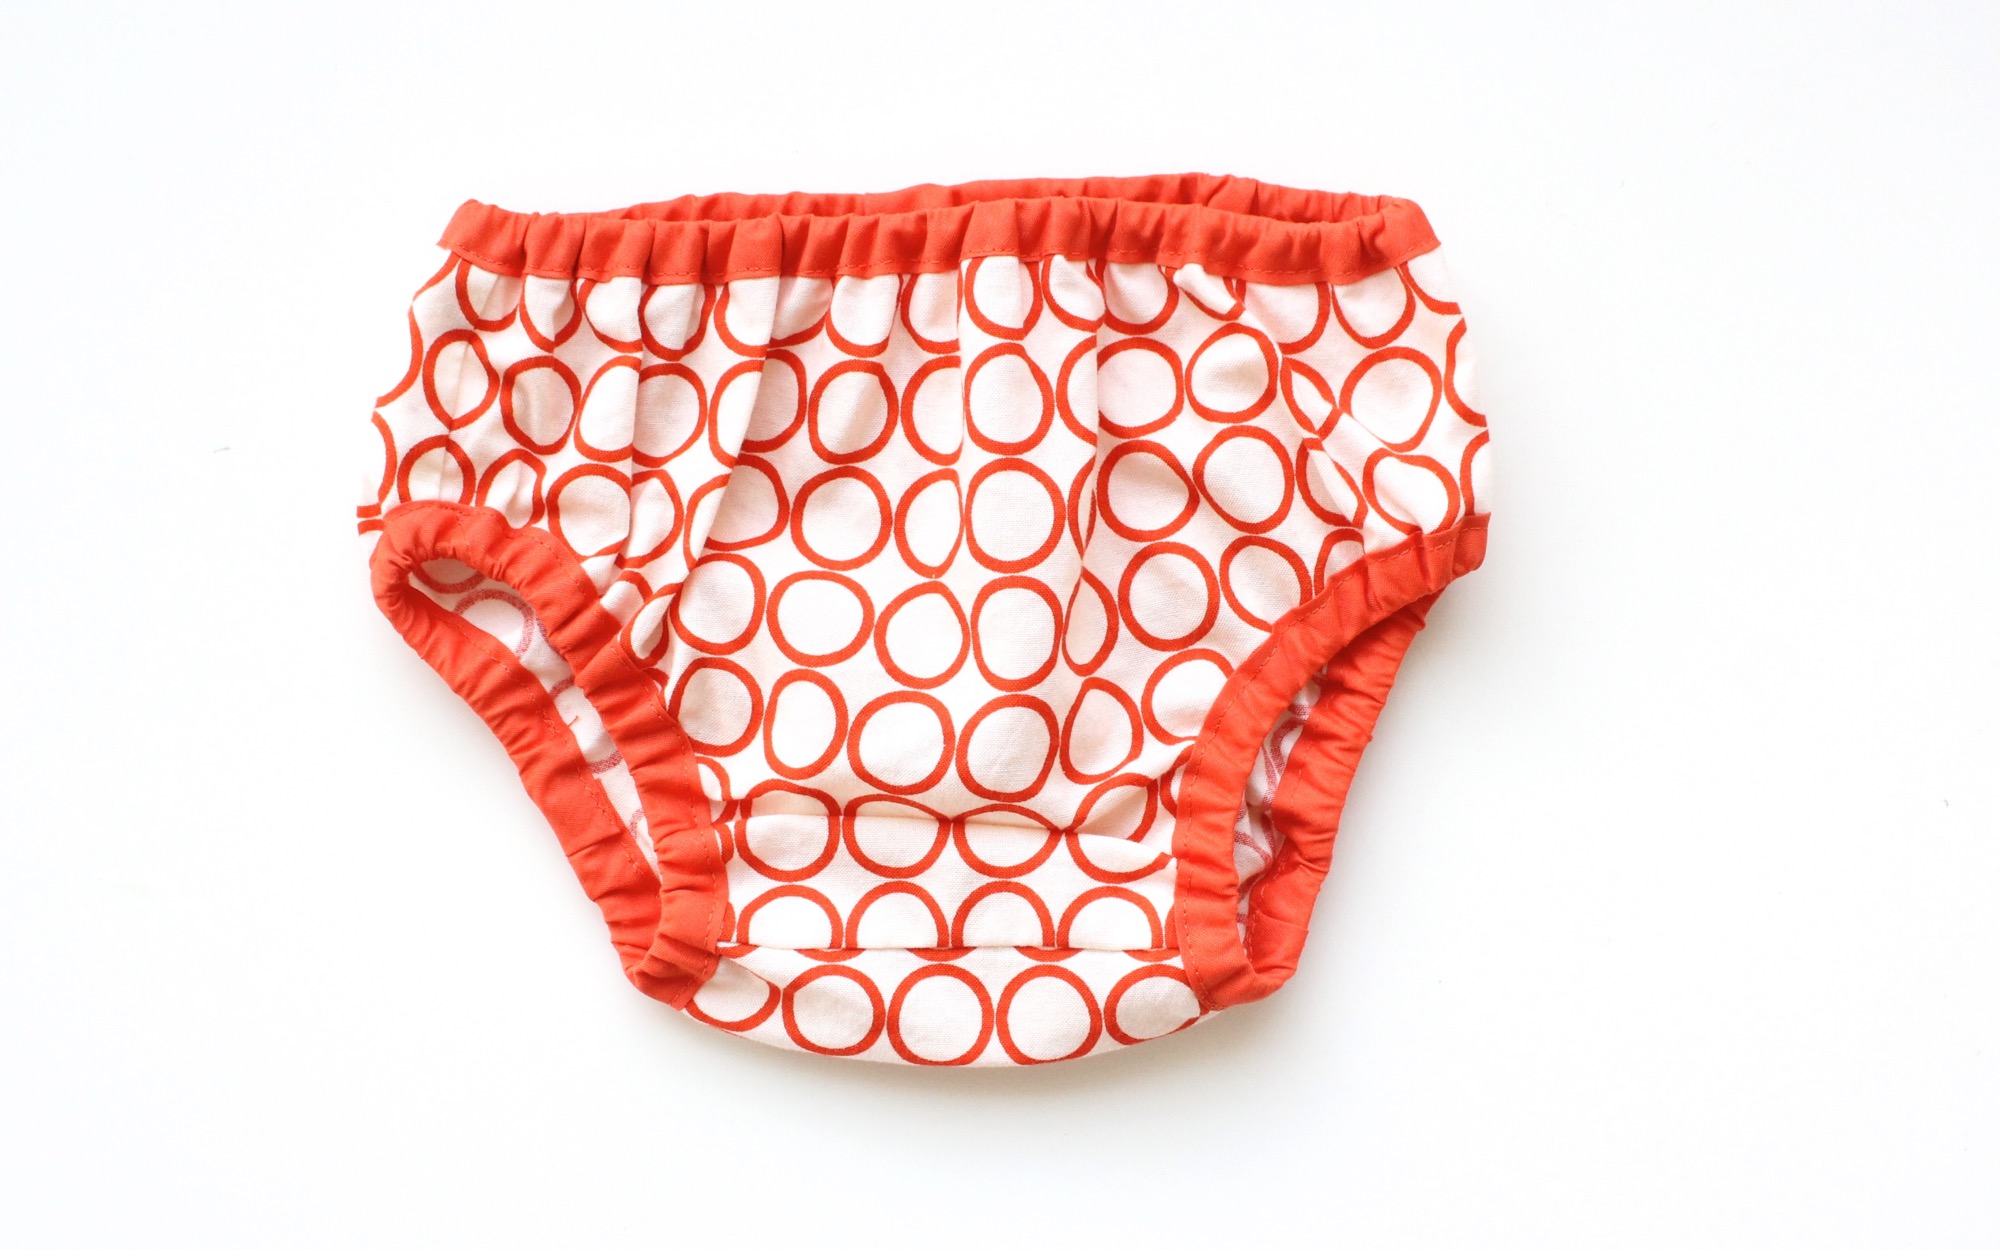
BIAS TAPE BOUND COVER
Now let’s mix it up and add a pop of color and contrast to the diaper cover, using my favorite trim—Bias Tape.
If you’ve never used bias tape before, it’s a fun little trim with tons and tons of uses.
You can buy it at the fabric store, and you can also make your own!
I have a post here and video here explaining all the details.
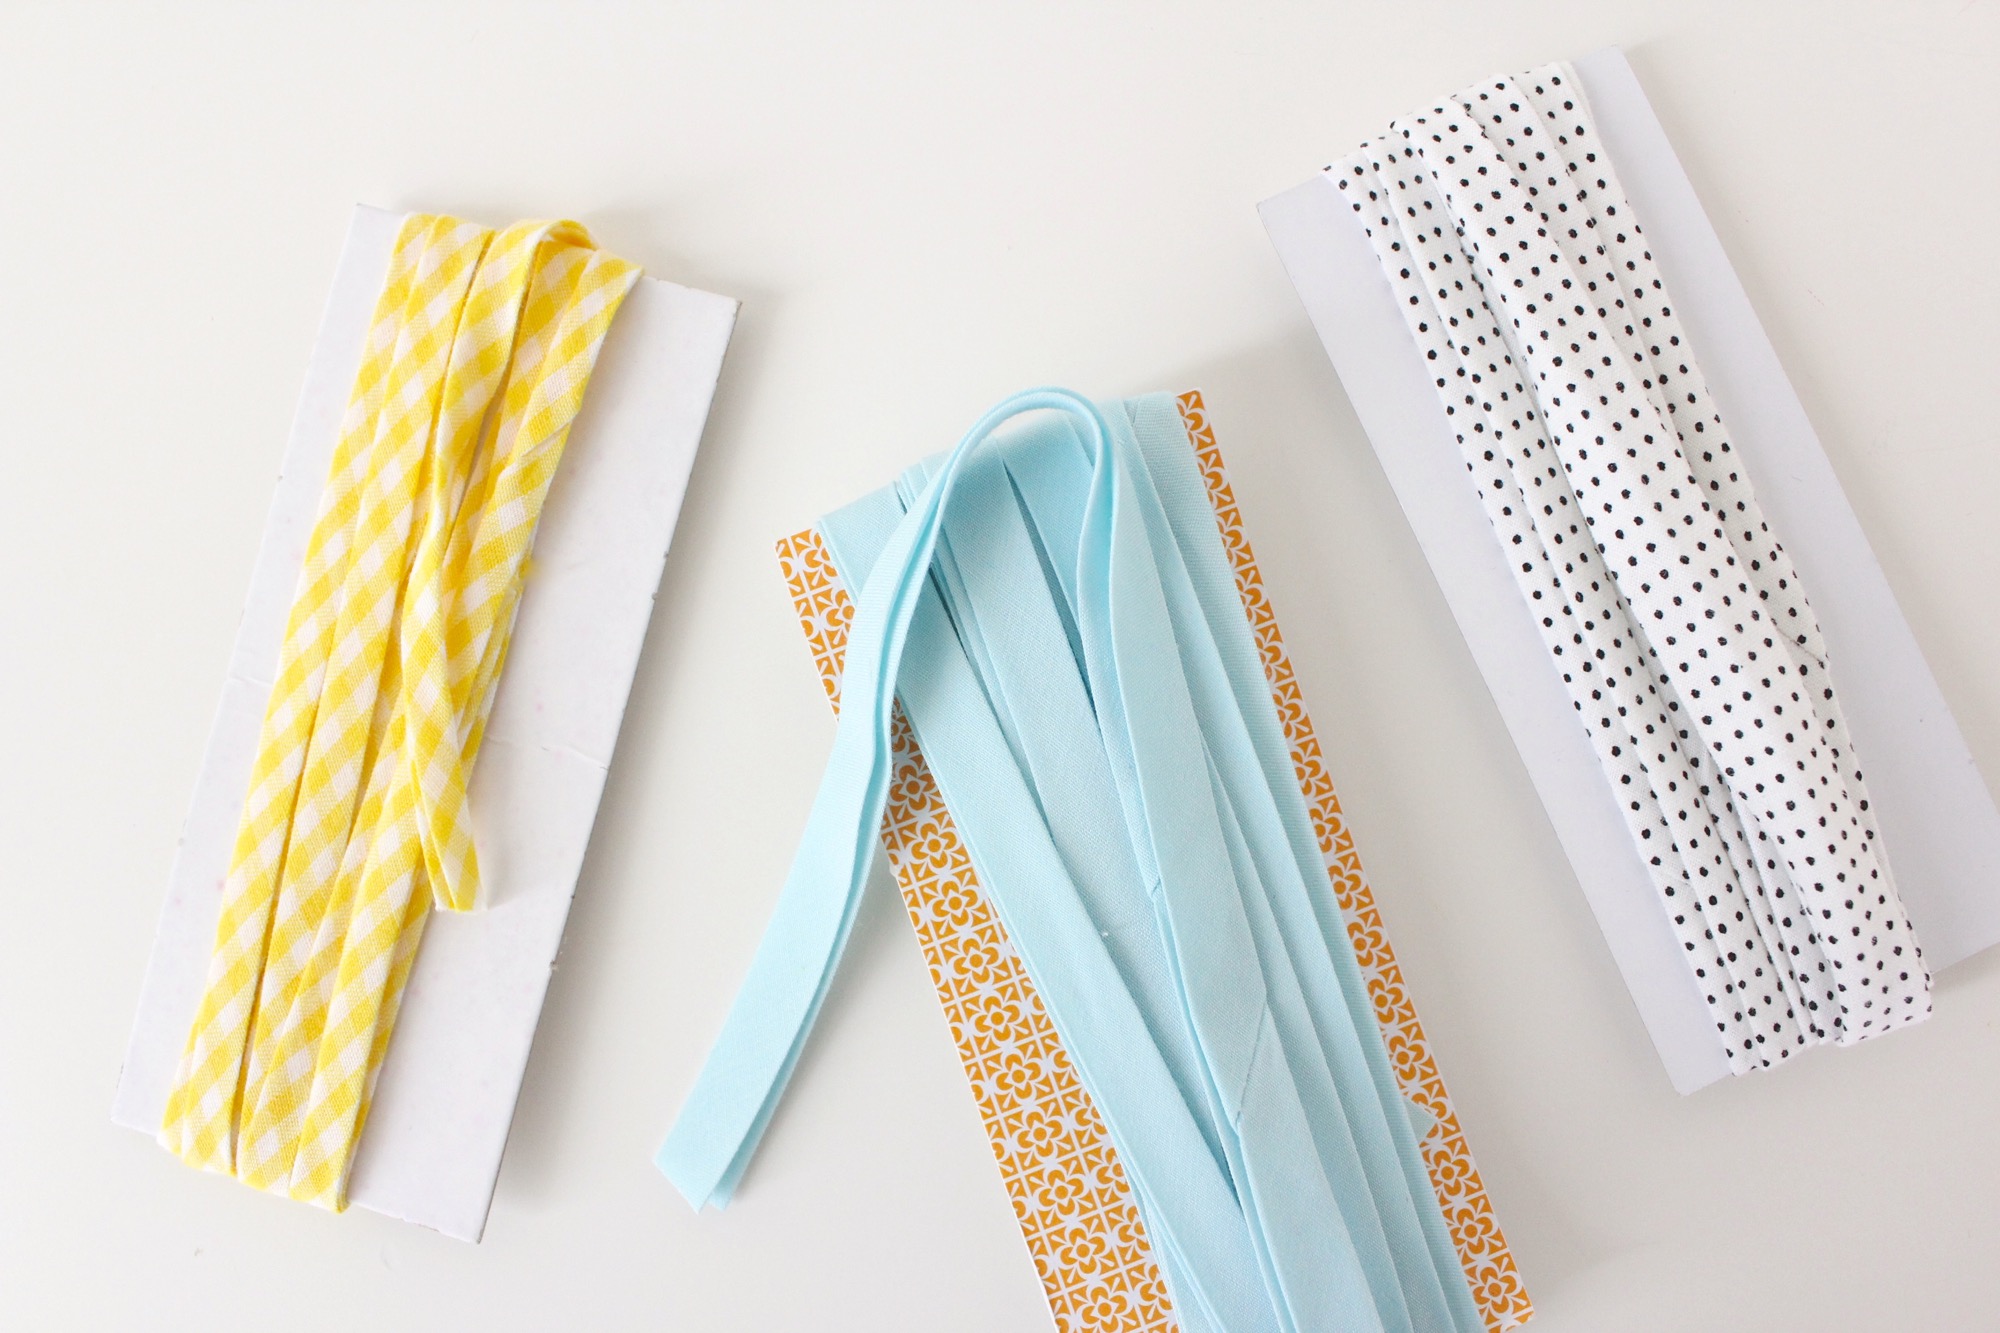
Bias tape comes in Single-fold and Double-fold. What we want to use here is double-fold, so it will bind the legs and waistband, and create casings for us. So let’s start cutting…
• Grab the same pattern and cut your fabric the same way.
The only change we want to make here is to trim away the fabric edge that would have been pressed under to create the casings. So…
• Trim 3/4 of an inch from the legs and from the waistband. Use a ruler to measure and then just do your best; it doesn’t need to be precise. Doing this will actually cut off those tabs.
• Sew the Front and Back together at the crotch (with right sides of the fabric together—just as we did in the previous diaper cover).
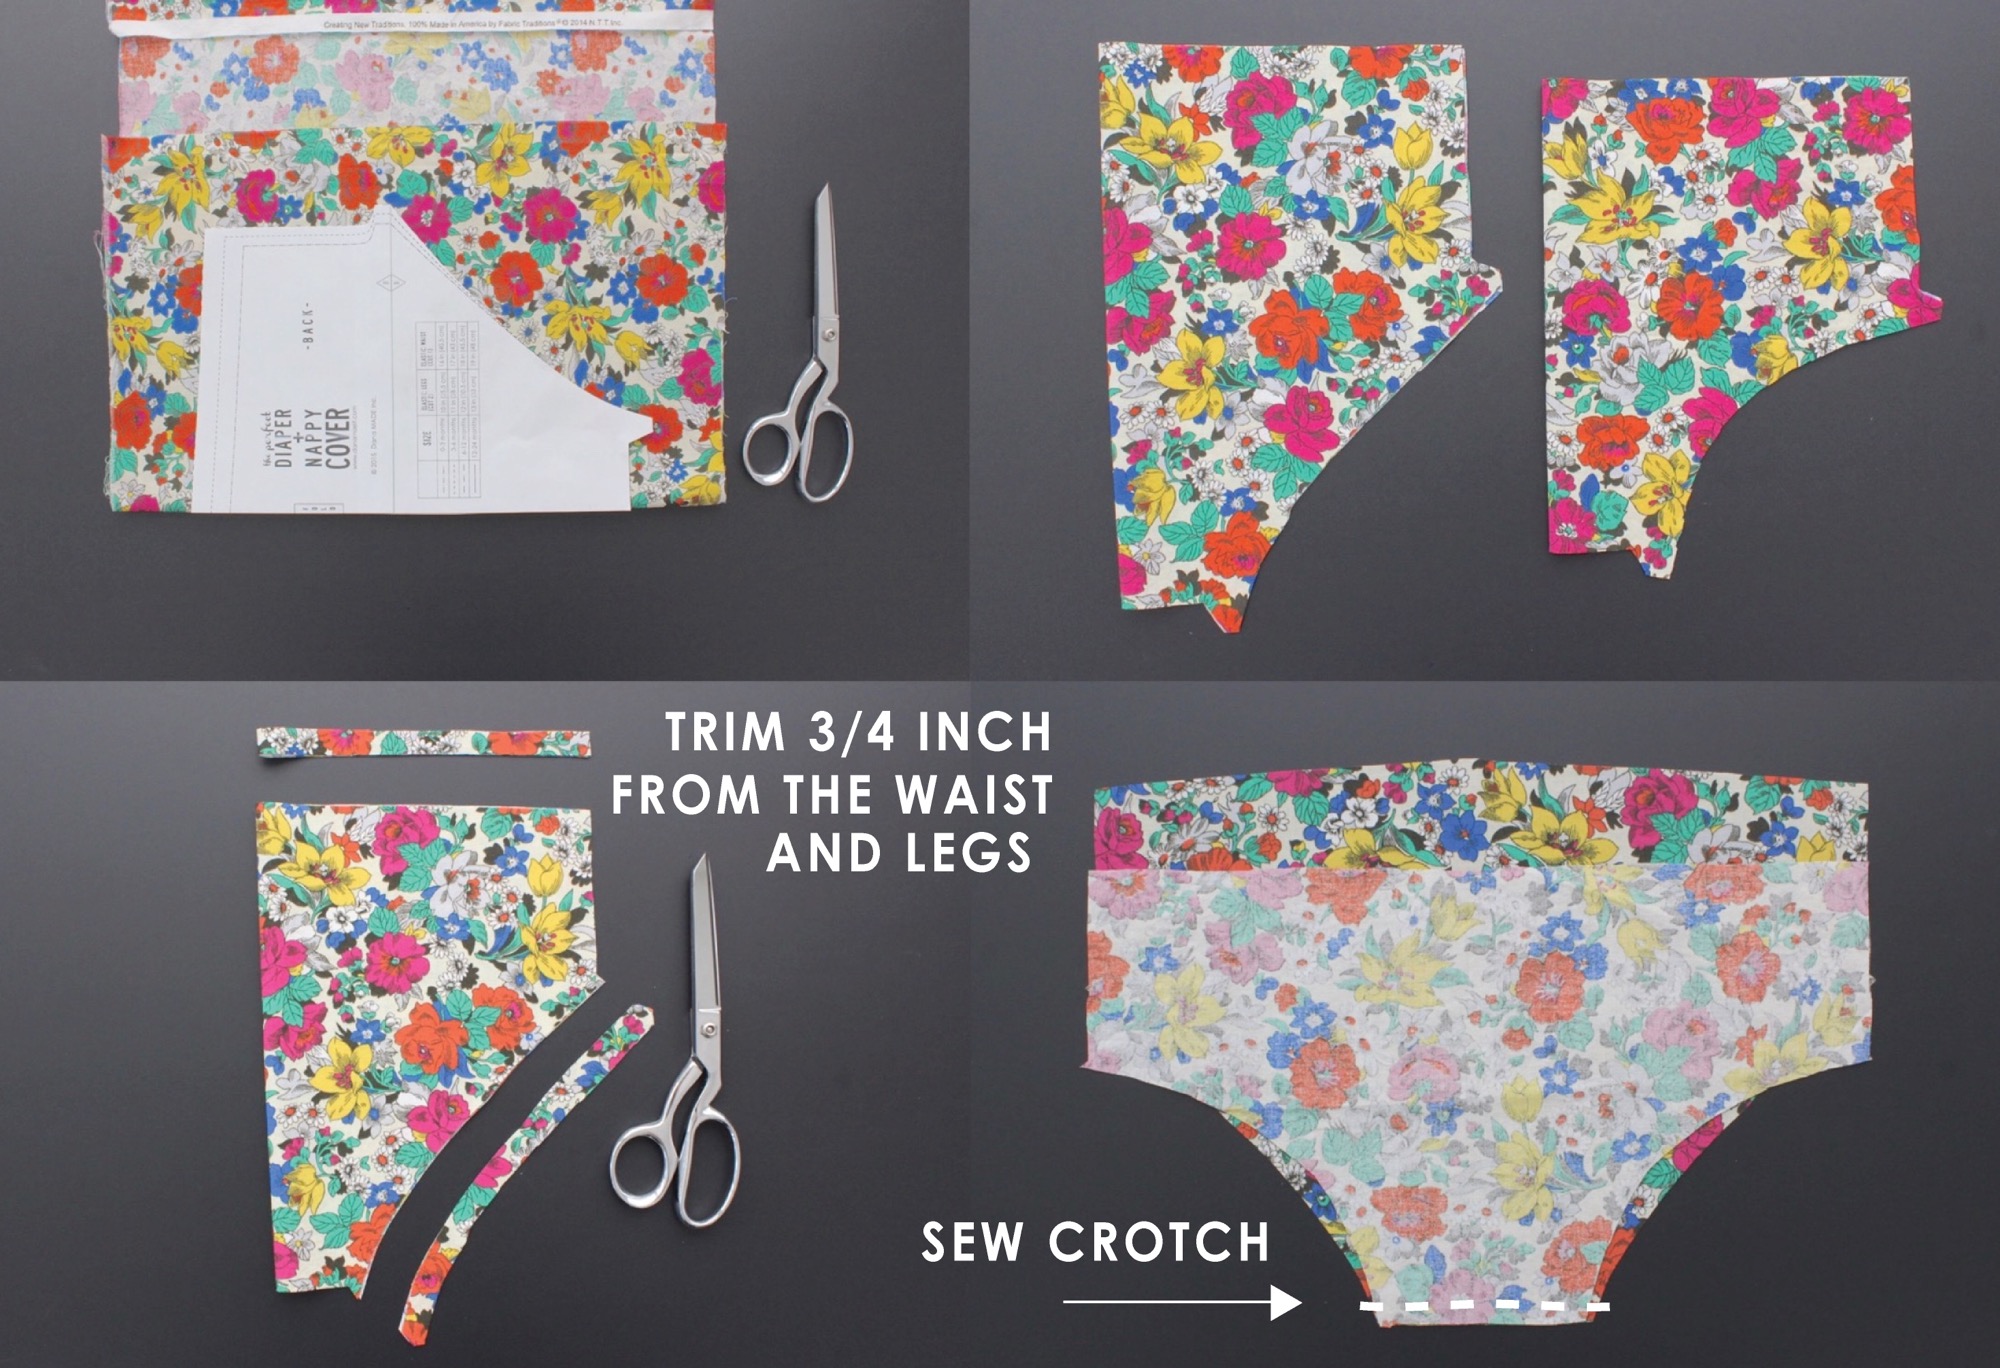
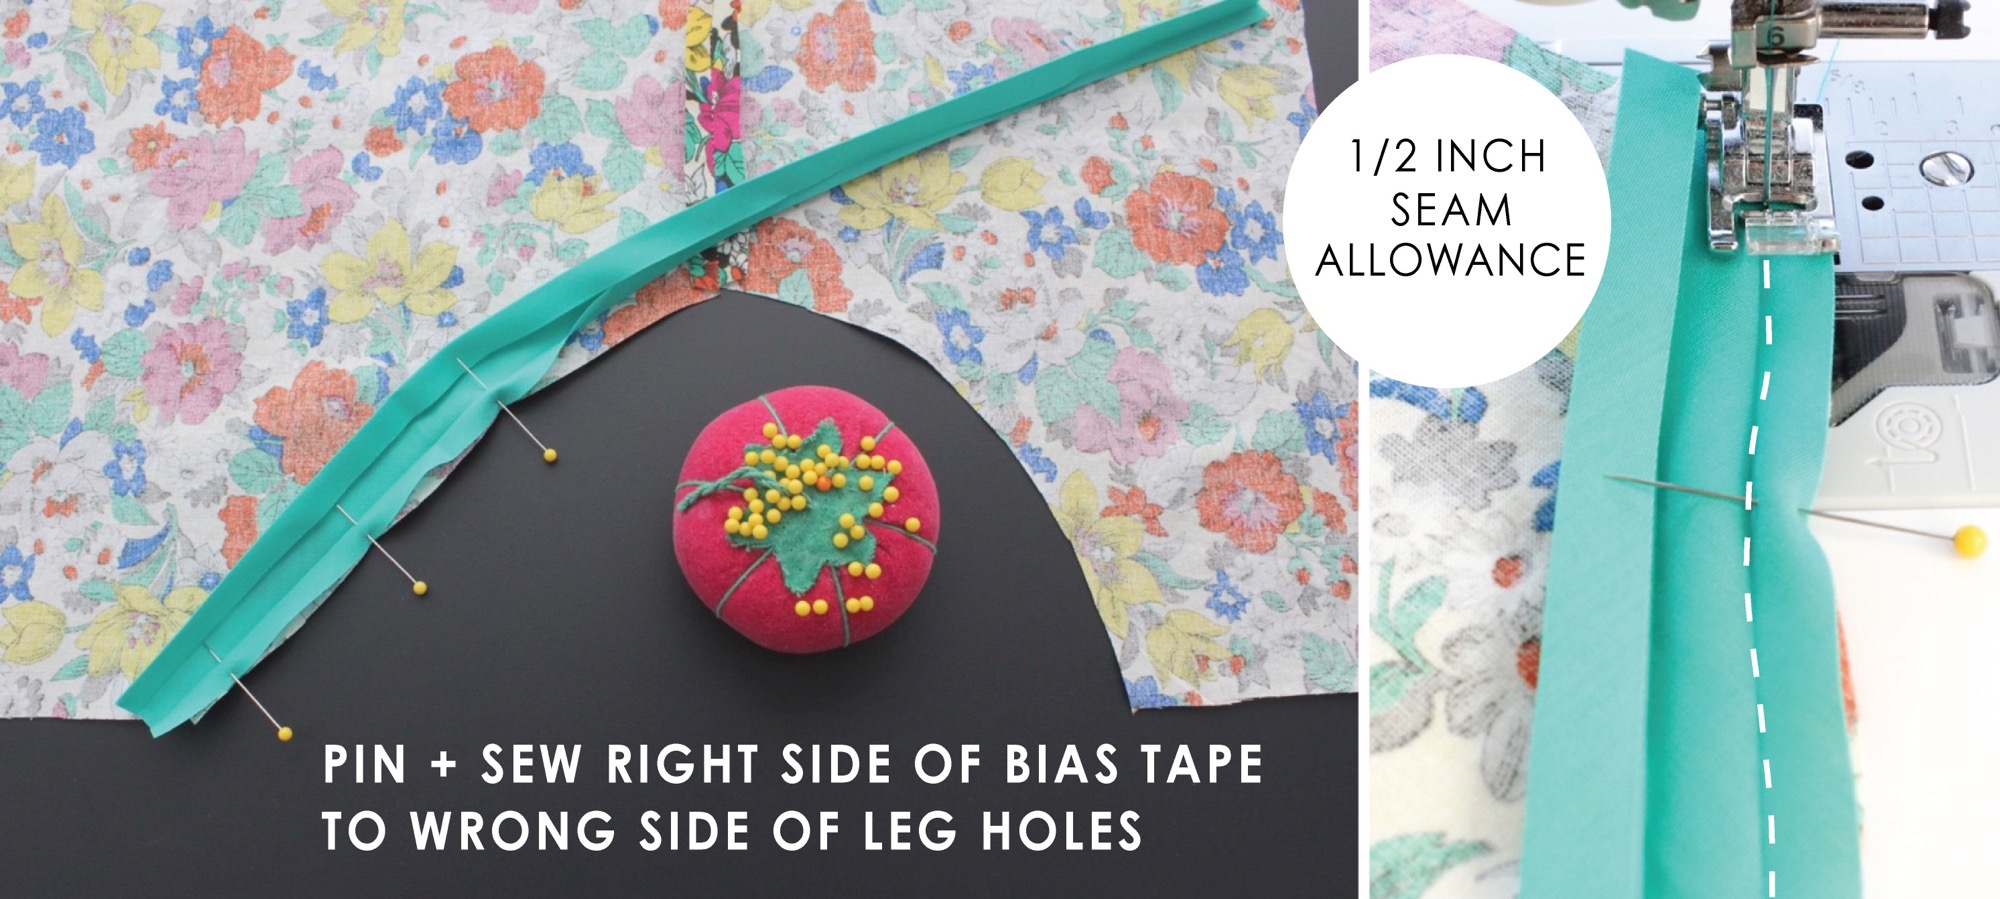
Attach Bias Tape to Legs
• Cut two pieces of bias tape that are a few inches longer than the leg holes. Again, doesn’t need to be precise, but it helps to have some extra length to overhang and give you wiggle room.

• Unfold the bias tape and pin the RIGHT side of the bias tape to the WRONG side of the leg hole fabric. I know this will feel weird to pin a right with a wrong, but trust me, it’ll work. Leave a little tail of bias tape hanging over the ends of the leg hole.
• Then sew the bias tape in place using a 1/2 inch seam allowance—which is the same thing as sewing on top of that first folded crease in the bias tape.
• Repeat these steps for the other leg hole.
Sew the Side Seams
• With right sides of the fabric together, sew down the side seams (as we did earlier, with a 3/8 inch seam allowance) BUT stop sewing about 1/8 of an inch before you get to the bias tape. Don’t worry if this leaves a small gap in your seam allowance, it will be enclosed in the casing when we fold the bias tape over (see the arrows and the X in the photos below).

Now you’re probably wondering why we don’t just sew the side seam and bias tape at the same time…but if you do that the raw edge of the bias tape ends will show when we fold it over. I know it sounds (and probably looks) confusing in the photos, but it will make more sense as you go. So….
Sew the Leg Casings
• Sew the ends of the bias tape closed. To do this, unfold the ends of the bias tape and flip them so that RIGHT sides of the bias tape are together. This means that the creases are touching each other.
Pin them together and sew them together—remember that we left a bit of a tail on the bias tape (so we had room to work with) so, you will use more than a 3/8 inch seam allowance. You want to sew it close enough in so that the bias tape will lay smooth all the way around the leg (photos below). Trim off any excess bias tape from your seam.
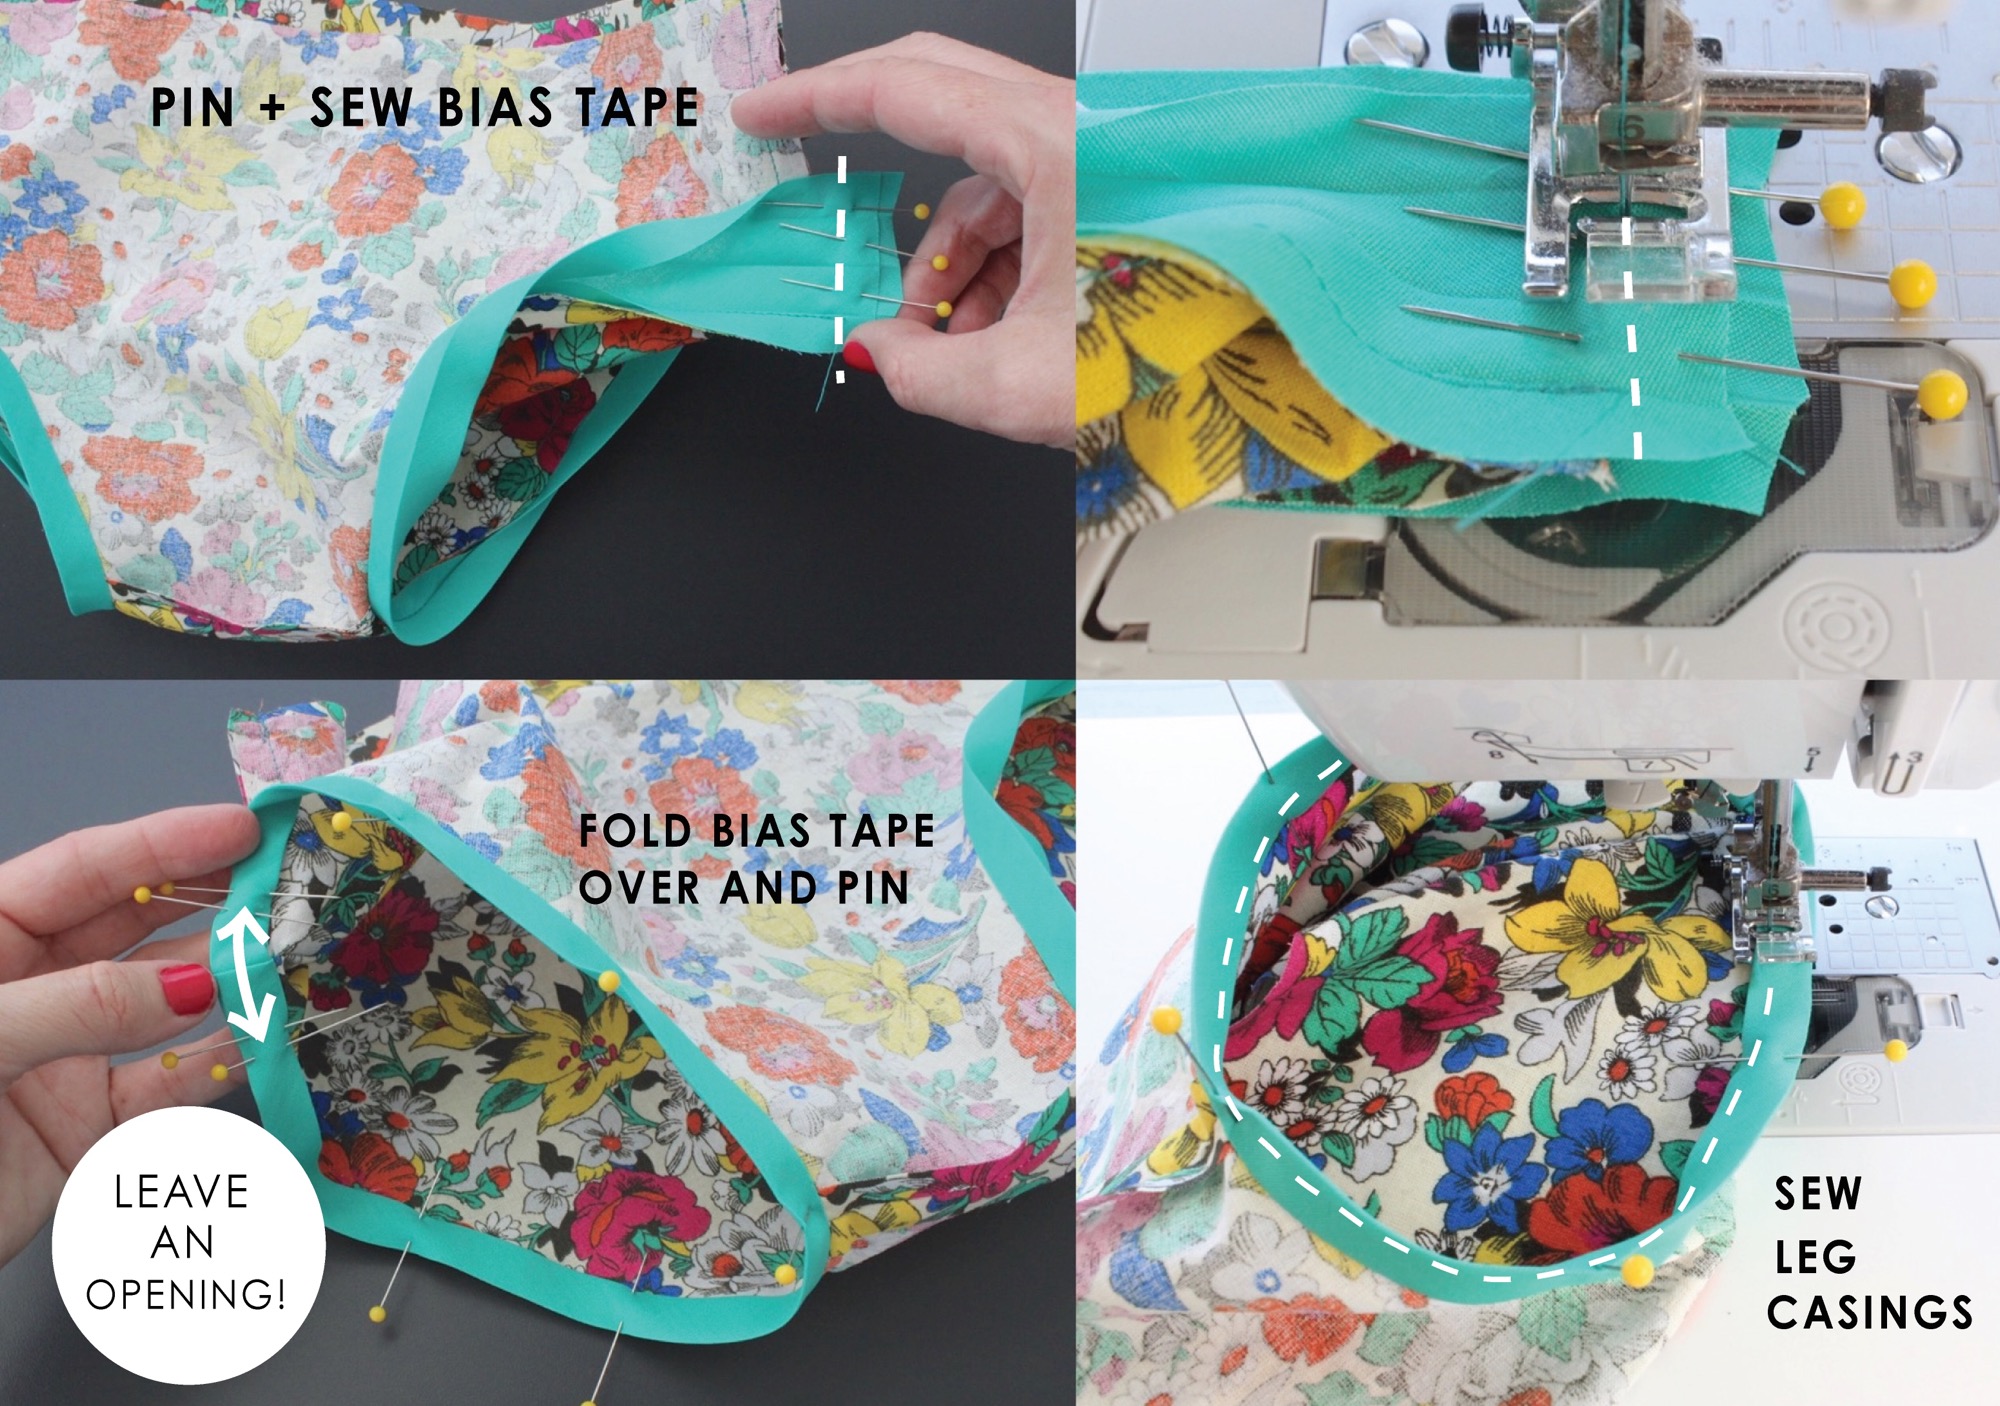
• Then fold the bias tape around to the Right side of the diaper cover leg hole and pin it in place, leaving an opening for elastic to come in and out.
• String the elastic through and sew the casing closed.
Follow all these steps for both legs.
Sew the Waistband
This will be done in a similar was to the leg casings.
• Starting in the back middle of the diaper cover, pin the RIGHT side of the bias tape to the WRONG side of the diaper cover fabric. Leave a small tail at your start point.
• Pin all the way around the waistband and when you get back to the start point, leave another small tail (photos below)
• Join those two ends together to determine where the bias tape should be sewn together, and sew the ends together so that the bias tape lays flat, and fits around the entire waistband.
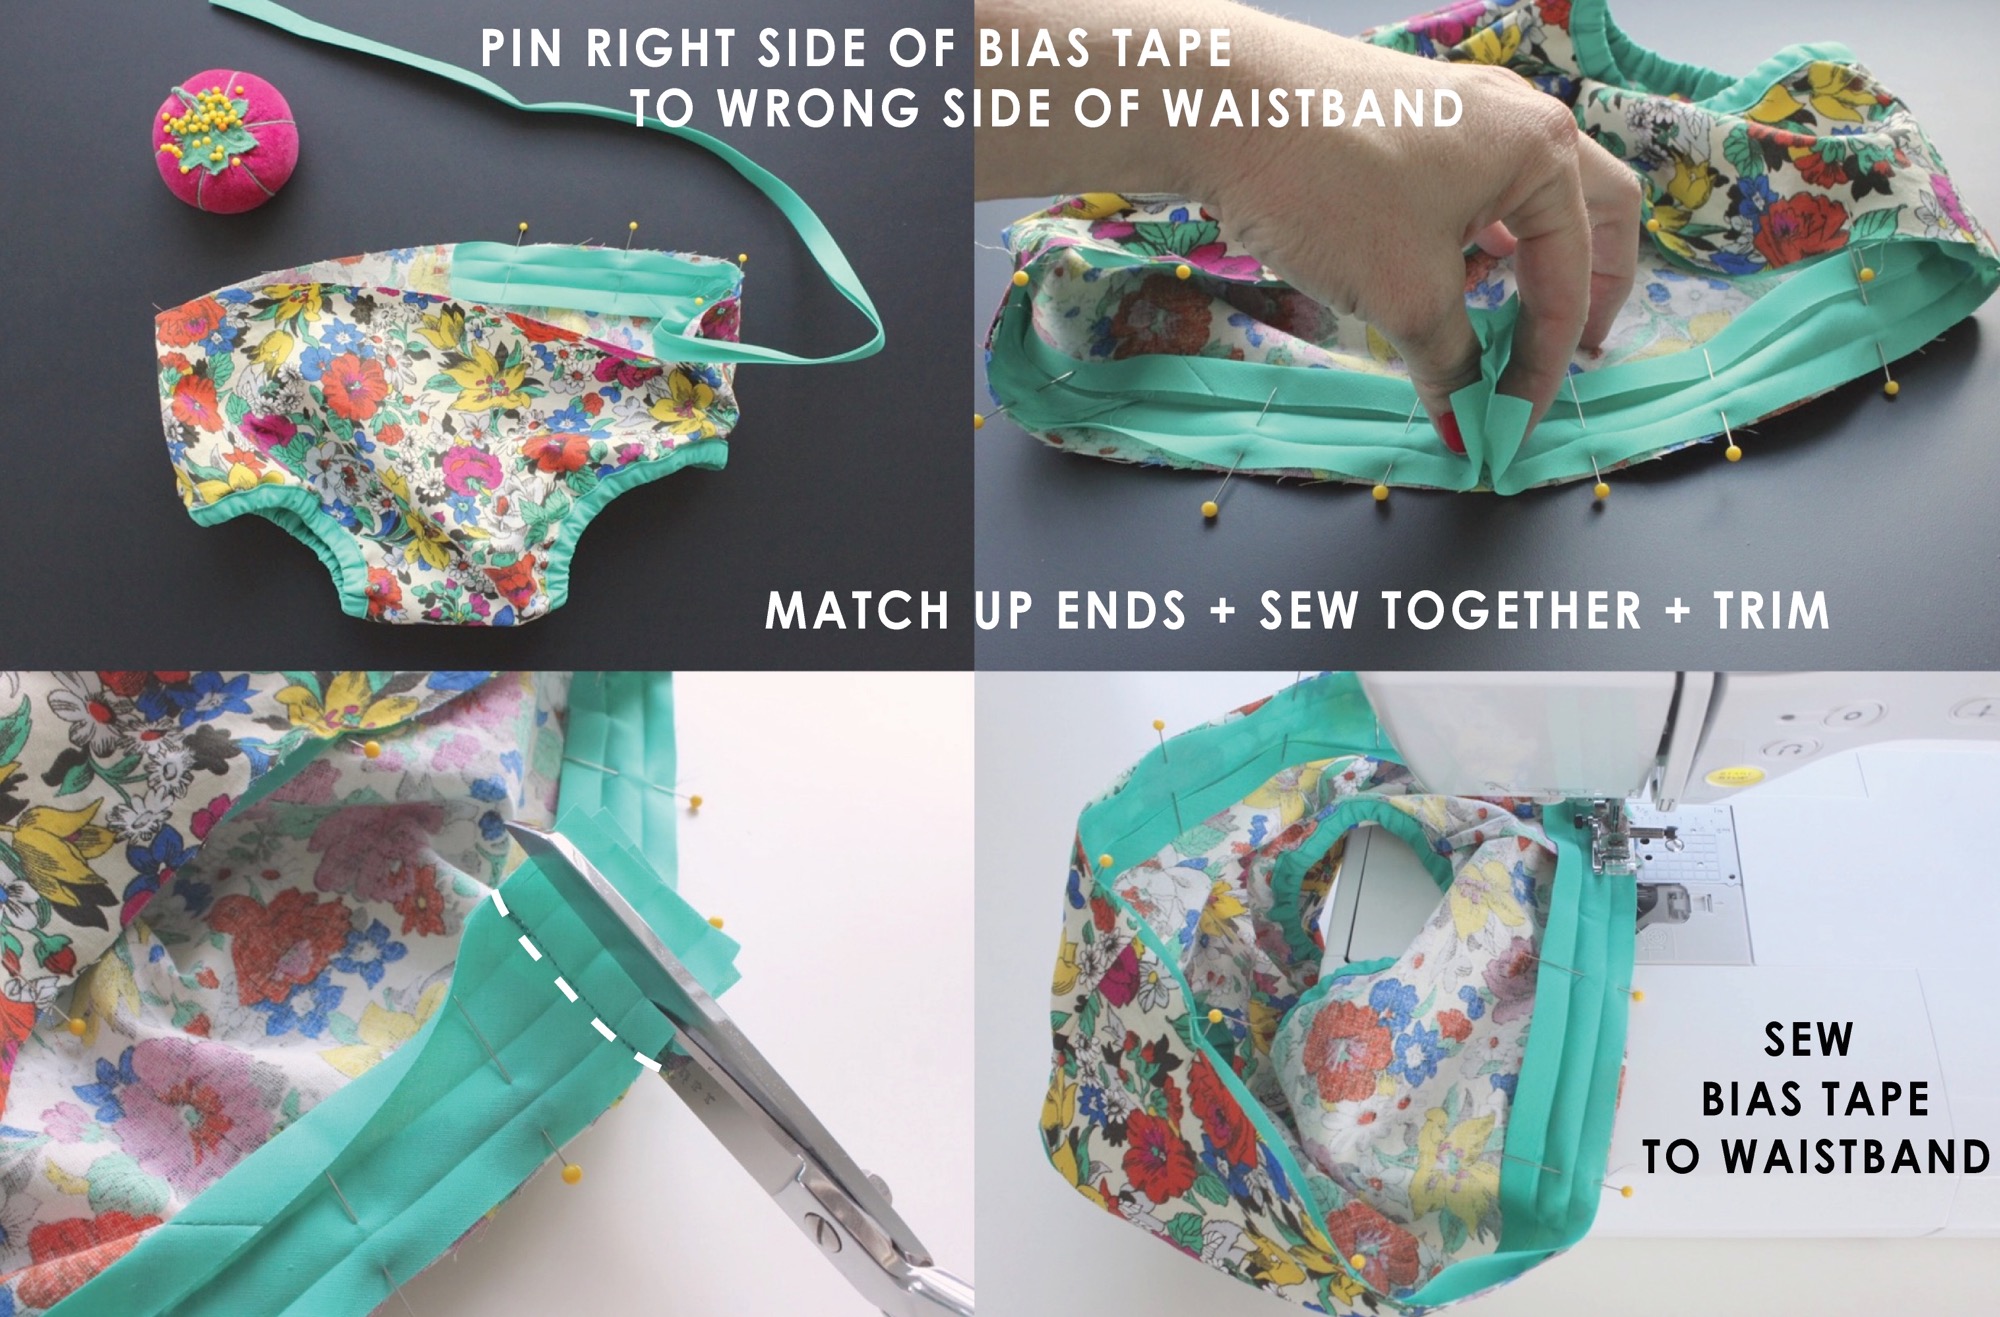
• Sew the bias tape in place on the waistband, sewing with a 1/2 inch seam allowance (or by sewing along the first crease in the bias tape.
• Fold the bias tape over to the Right side of the fabric, pin it in place, and sew it in place, leaving an opening in the back of the waistband for elastic.

• String elastic through the waistband and sew the casing closed.
And…you’re done!
Yay!
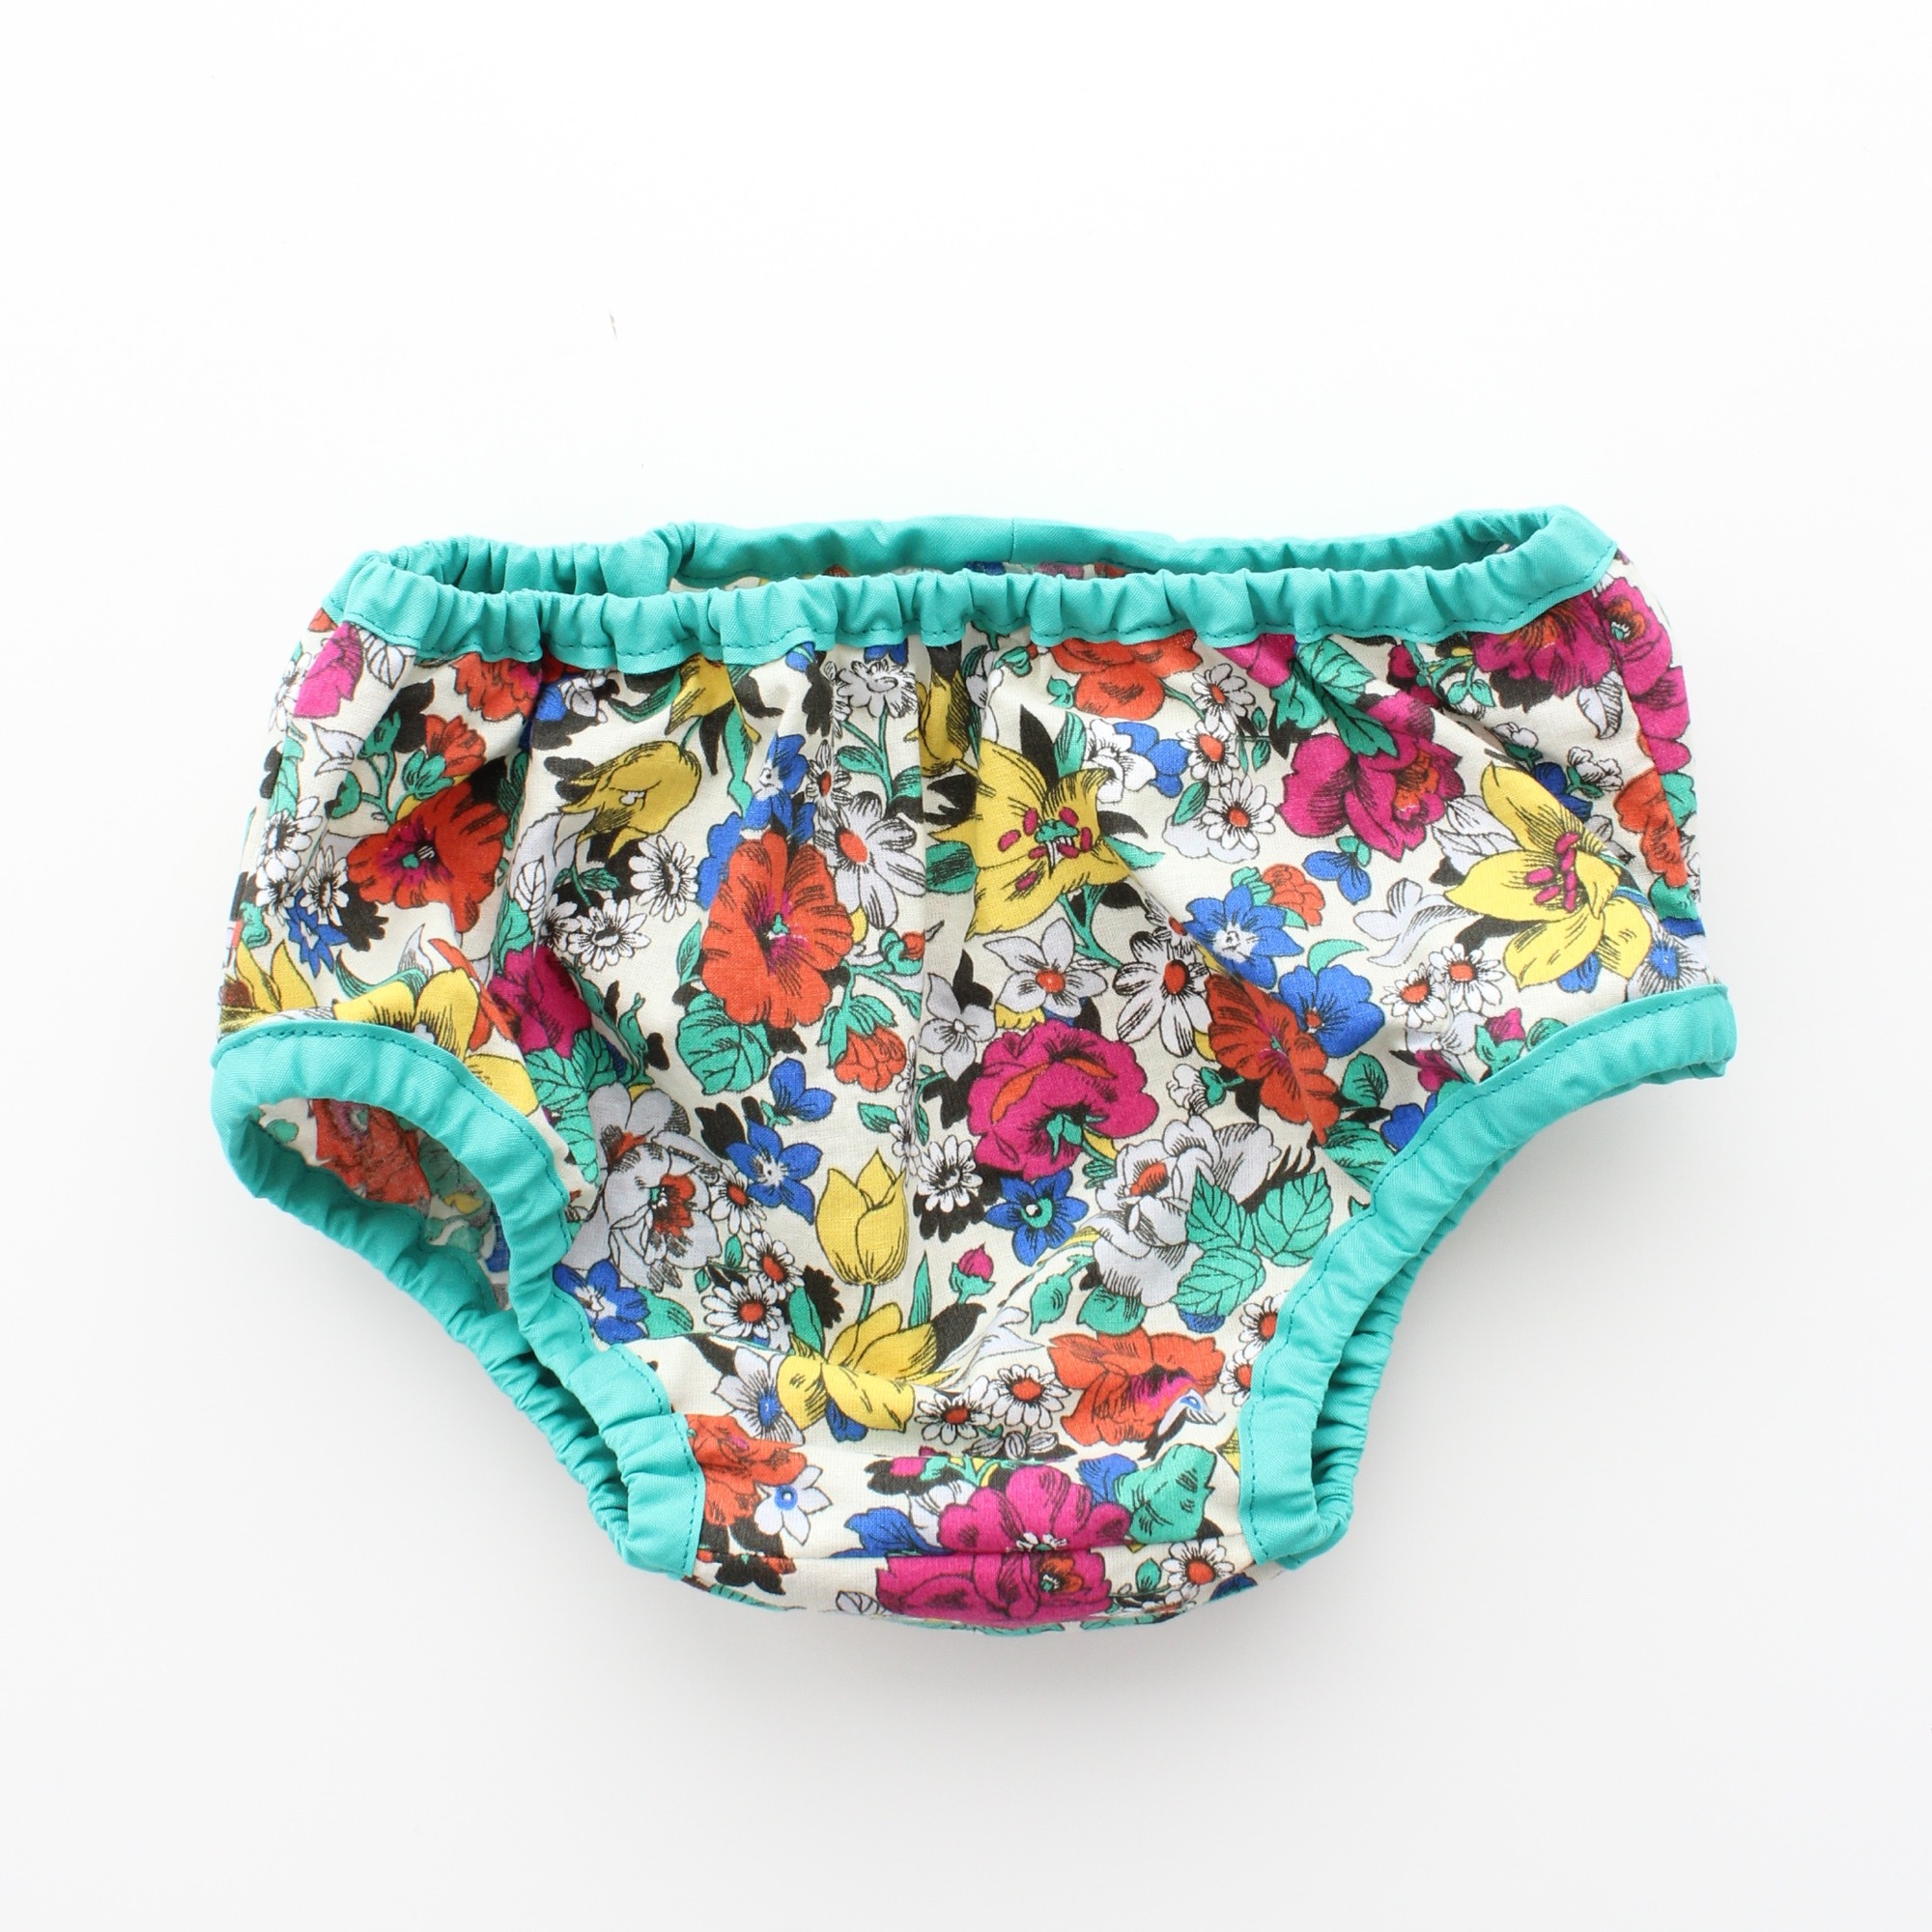
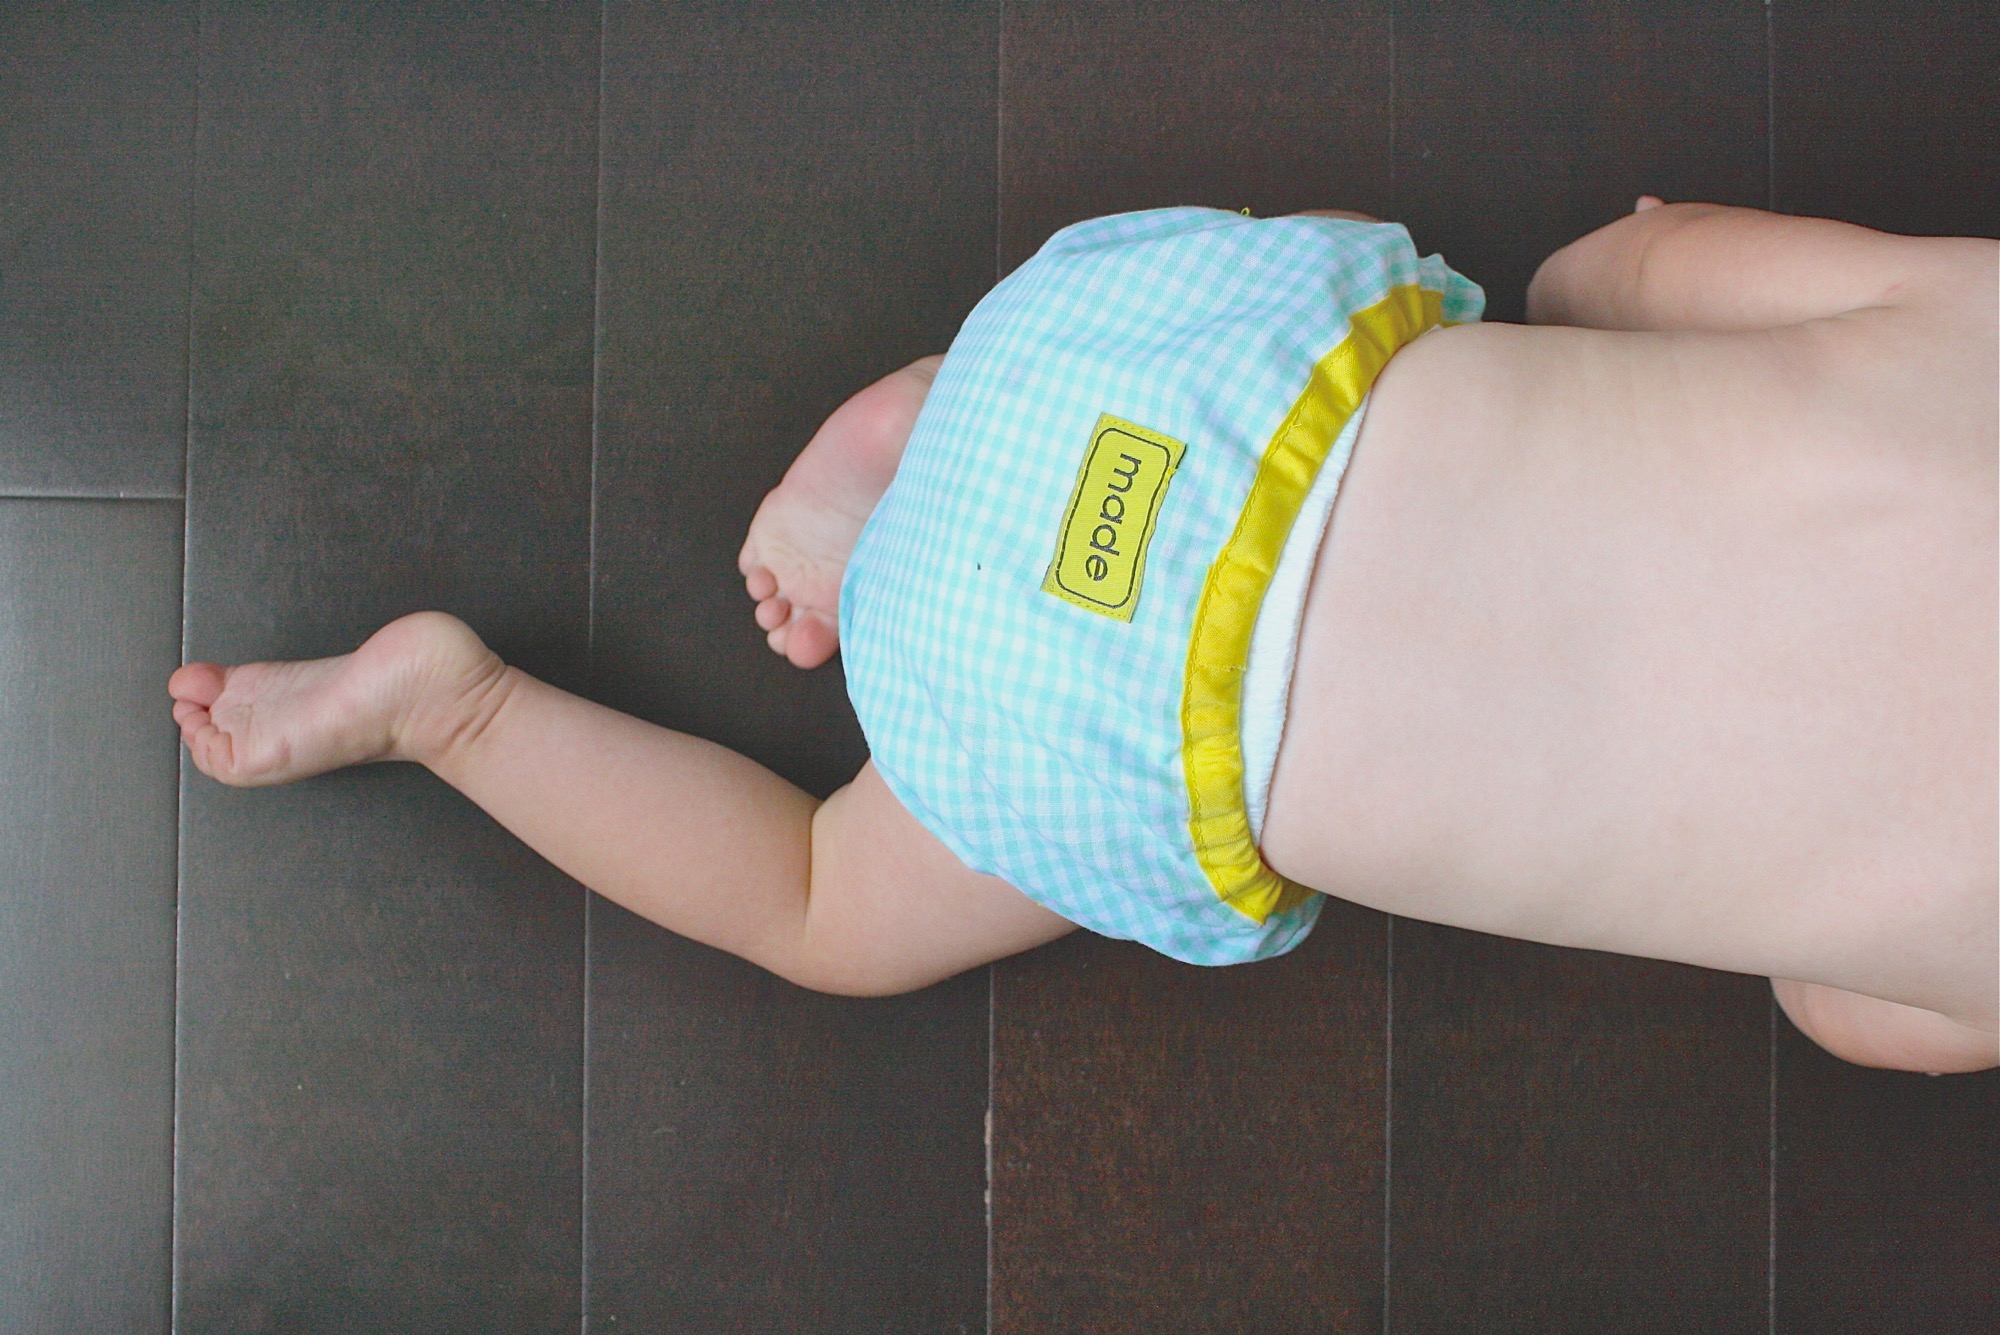
For added pizzazz, sew a personalized label to the back (read more about my labels here).

And then, start going crazy!
Add ruffles to the bum, maybe different fabrics on the front and back? And definitely some fun appliques…
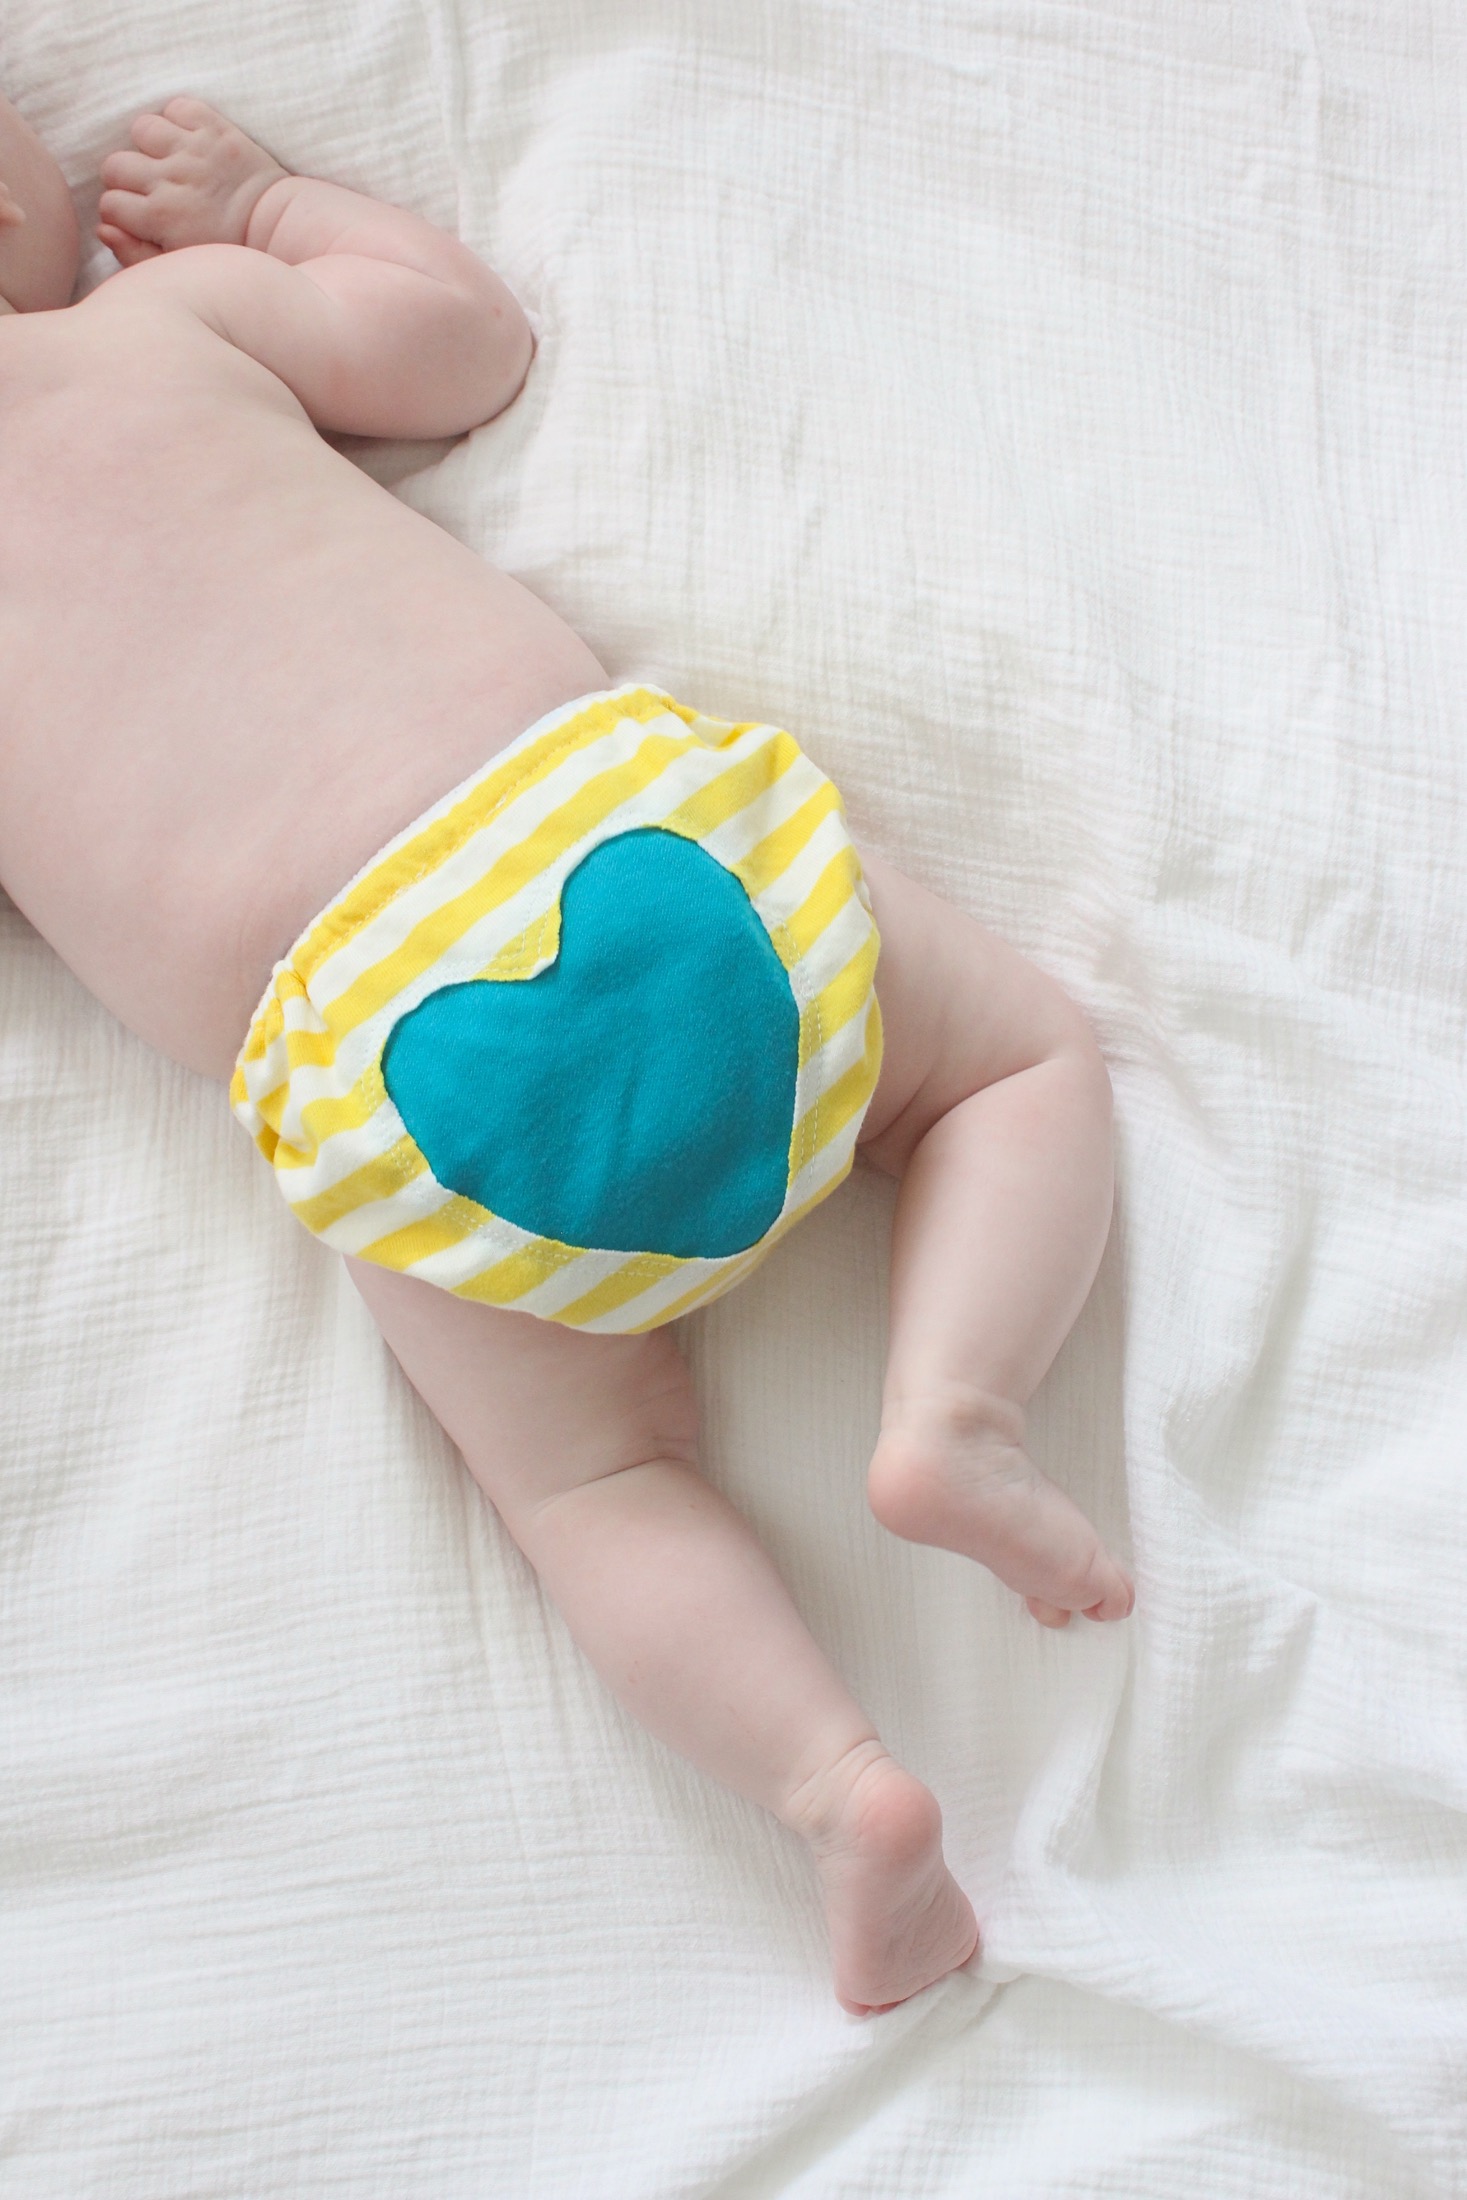
This is actually a reverse applique, meaning that I cut OUT the heart from the diaper cover to create negative space, and then sewed a patch of fabric to the wrong side of the diaper cover (rather than sewing a heart on top of the diaper cover).
I also used knit fabric for all parts of this cover, so the raw edges of the heart won’t fray.
When doing this…
• Be liberal with your pins so everything stays in place
• Go slowly around the curves of the heart and stop periodically, leave your needle down, and lift your presser foot to allow the fabric to relax and bounce back.

And just like that, you’re a pro at the secrets of diaper covering.
Your baby will thank you one day.
But for now, she’s escaping….
Happy sewing friends!


Love these diaper covers, so cute! Thanks for the detailed pattern and tutorial! I love Seventh Generation diapers, they are plain white, I’ve never had a blowout, and they are better for the environment! 🙂
Ah! I’m totally out of the diaper stage now (as of this week! :)) but that’s so great to know about Seventh Generation Diapers. Thanks for sharing Audra!
I have been using 7th gen diapers for about 7 1/2 years now and I too loved how they were plain. They just changed them though 🙁 so dissapointed with all the new artwork on the diapers!!
I’ll have to make a bunch of cute covers to hide them!!
What fabric do u think would work? What kind of cotton? Stretchy one or what?:(
Do you use metric or imperial units.
No further complaints…LOL!
I LOVE adding ruffles to them. Could be a Southern thing 😉
I didn’t have the cut lines across the BACK for the height so I had this monster sized back (NB size) & a smaller front. It was cute racing the clock. LOL!
Alls well. I survived & the ruffle bottom cover was PRECIOUS!
Haha. Fantastic!
One of these days I’ll do a tutorial for adding ruffles to the bum 🙂
Hi Dana,
Just wondering if there is a tutorial somewhere on your website of the ruffles on the bum? 🙂
Yes please do asap I would love to know how! 🙂
No matter how I try, I can’t get the leg casings to lay even somewhat flat.
Thanks so much for updating the pattern. I love this cover. I made a few for my daughter when she was a baby. I just had baby number 2 and he defiantly needs his own.
As a side note, seventh generation diapers are completely white. They’re a bit stiff, but they are white!
No way! Good to know thanks!
Thankfully, I’m pretty much done with needing diaper covers – I”ll forward this to my sister when she has her next baby. Just wanted to jump on here really quick to ask if you’ve seen the new issue of Stylo – I noticed that your First Day dress is in there at least twice, and I’m not even halfway through yet. http://www.stylomagazine.com/magazine.html
Hi Dana – LOVE your diaper covers! I have the original pattern that I’ve made over the years but am looking forward to making the new revised edition!! I want to sew new baby gifts for two babies I know of coming this summer and I am now inspired to stop procrastinating and start sewing for them! This pattern will be great and so (or sew!) much fun, both to make and to give. Thanks for blogging – you truly ROCK the sewing world!! Have a good day……….no, have a great day!!!
hahah. Thanks Penny!
Have a great day as well!
really gorgeous! both babies and covers!
This is so great…I was looking at the old tutorial the other day (looking for baby shower gift ideas) and now I’ve got this new one! So cute and thank you!!
I made these before and going to make some more but the only issue my DIL had was that she uses cloth diapers and needs the waist to be higher to cover the diaper. Otherwise very cute! Thanks for the update Dana.
I also sew for the Indian Reservation in SD and the moms love them as use disposables. Holds the diaper on and they like how cute the fabrics are. Thanks
Thanks Carol!
Yes, if you’re making these to go over cloth diapers, just add an extra inch to the top of each pattern piece.
If you make a cover for a cloth diaper, make it’s made from PUL (PolyUrethane Laminated) and make sure it doesn’t leak at the elastics.
All-in-one diapers don’t need a cover, they are usually nice enough without.
yeah! New tutorial! I used the new pattern on the old post last month to sew two diaper covers for flower girl dresses I made. Love the new tutorial though. I’ve been out of diapers for more than two years, but we are going back as we are adopting from China in two weeks…. ahhhh excited for baby, not for diapers, but maybe diapers will be more fun if I whip up a few covers ;o)
thank you. i ll make some soon. they re so cute.
I love looking at all the beautiful, colored fabrics you have! They make any project and post so fun! Excellent tutorial! 🙂 Lisa
Great tutorial! I’m curious if I make this out of PUL fabric, would it work for cloth diapers? Hmm, I might have to try.
Sure! Give it a try!
I cut out the fabric a few weeks ago with the original pieces. I cannot access the old instructions. Are the allowances the same?
Yep! Everything is the same. Sew it with the same steps….it will just be a little harder to iron the leg casings under than it is with the new pattern.
Ok, idk what I did wrong, but the back of my diaper cover goes up higher than the front. Was that supposed to happen?
Yes, the back goes up a bit higher than the front to accommodate big baby bum….and also so that the diaper cover hangs better below their baby belly (for comfort). However, the two pieces (the Front and Back) will match up perfect at the side seams.
Thank you, I must not have printed them wrong because they dint match at all 🙁
if you used cloth diapers you would have no need to use a diaper cover as they are fab and cute on their own! and last but not least they are (unlike their plastic cousins in the article above) breathable!!
I use cloth diapers and still LOVE diaper covers! Yes, the cloth is cute on its own, but how adorable it is to have a matching diaper/dress set! They’re just so fun and I love seeing a sweet little cover peak out when she bends down or topples over. Ruffles are always a good addition, too. 😉 I’d love to see your take on how to add them, Dana!
Hey Amber, do you know if these diaper covers fit over cloth diapers?
Thank you so much for this revision. I’ve been using your old pattern for over a year now and made lots of nappy covers (as we call them). You can see them on the posts on my blog. I also use the pattern to make a romper suit – see this post: http://newgrandmawantstosew.blogspot.co.uk/2014/12/romper-suit-from-danas-diaper-cover.html
However, you are right that on the old pattern the legs are fiddly. I’ve got round this by mostly using a double fold bias trim as the elastic casing. So I will definitely have a go with your new pattern. I’ll let you know how it works out.
Just made this diaper cover for my grandson….we only have Joanne’s Fabric in our area and I couldn’t find any cute plaid fabric for the diaper cover. So, instead I headed to our local outgrown children’s store and found a large older boys shirt in a cute plaid and cut the fabric from the old shirt – came out looking very fashionable! Cost was less than 1/2 yard of fabric. Free if you are lucky to receive hand-me-downs! Thanks for sharing the pattern.
They are so nice!
What kind of fabric do you use? I couldn’t find it in the text.
Love to get started.
You can use standard cotton, or knit fabrics, or denim….you can really use almost any fabrics!
I am making this pattern as part of a baby gift for a friend, but am having extreme difficulty turning the leg seams under at the tabs. Any suggestions or have I just done something wrong? Other than that I am super excited to see how it turns out because it is already looking super cute. Thank you for the pattern!
I’m having the same problem, doing size 6-12 mo size and for the life of me I cannot get them to turn so I have any room for the casing, esp at the seams. Let me know if you figure it out.
Getting the leg casings turned in os really stressing me out. Thought I’d have it whipped up in a couple of hours instead it’s been thrown across the room agh!
I had the same problem. Someone else suggested using basting stitches to hold down the side seams. Had to tear out stitching to do that, but got the elastic through on the first try after basting the side seams. Then once the elastic is through just pull out the basting stitches. Thankful someone had that idea!!
Hi DANA
I also just wanted to say MASSIVE thank you for this pattern and instructions.
I have already made 6 and baby hasn’t even arrived yet 🤪
I am also struggling with the tabs a little, I kind get it but it never seems to go right 🤦♀️ Should the seams match up? Do you start from the centre or back/front when ironing/sewing, it’s the middle tab at the crotch that I struggle with the most. I’ve tried watching the video on slow mo but I just can’t seem to catch the bits I struggle with.
I wonder if there’s any chance of a close up video/tutorial of this part because if I could just get it I think I’d be boshing these out night and day 🥰🥰🥰🥰
I had a hard time with those tabs so cut them off and the casing folded over easily. I also like to do a basting stitch as a folding guide.
Dana, thank you so much for your tutorials and everything!!! It’s sooo refreshing to see someone giving information instead of charging a fee. You are refreshing n selfless. I live outside of Nashville and love to hear you talk. I can’t imagine where you’re from. Thank you again for making such a difference in “a sewers life”!!! Linda
can’t download the pattern 🙁
Thanks a million for the pattern and tutorial. I love the step by step photos. Made one this evening and cant wait to make more.
I just love this pattern! Thanks for sharing! May I ask what the name of the cute floral fabric is that is in your last pic? It’s just what I’ve been looking for. Thank you! Jayse
I made a diaper cover for my daughter when she was a newborn, but I’m so excited to try your new pattern! She’s a skinny 3 year old who needs “bloomers” under her dresses (since she will ONLY wear dresses right now) and they don’t sell them with dresses at her size. 🙁 Since I’m still using the ones that came with her 18-24 month dresses, I bet your pattern will fit her, especially since they don’t have to cover a diaper.
Thank you for this pattern – I’m wondering if you could help with a request. I don’t have grandchildren yet (someday, I hope) but I have friends where grandchildren are popping out left and right. I’d love to make ruffles on the rump of the girls diaper covers – any suggestions on how to do so? I understand that it can be done with slicing open the back and putting in the ruffles, but I”m a bit uncertain as I’ve never made these type of things before….
Lovely pattern. I just made the first one and looks gorgeous!! And I think it’s addicting! Go crazy to the second one!! Thank you very much.
Awesome! I love addicting sewing projects 🙂
Hi!
I am going to make this for my daughters first birthday outfit, for under her dress.
Do you have a tutorial on the ruffles yet?
Thank you!!
Thanks for sharing this great pattern! It’s adorable! And may I ask where did you get those bias tapes? I’ve been sewing for a long time and I’ve never seen those colors before.
Having now made two pairs without bias tape and one with bias tape, I have to say I find bias tape easier for the leg holes, and no tape easier for the waist. So I guess I’ll be making hybrids!
The genius of this pattern for parents is that it can be done bit by bit over many days. I have a five-month-old son, and I find that some days he’ll only let me do one thing — iron the waistband or pin a leg hole or sew a side seam. No one part of this take longer than five minutes to do. Perfect! Thanks!
Awesome! Hybrid projects are are totally cool! 🙂
Hey Dana! I love your patterns and am about to make a teeny diaper cover for my friend’s new baby! If I am using knit fabric, do I need to use a zig-zag stitch throughout, or straight stitch like you showed in the video? Thanks!
well, either would work in this instance because the fabric is gathered together with elastic….but typically, I try to use a zigzag type of stitch with knits just in case it stretches, so your thread doesn’t break
Thank you for the speedy reply! 🙂
Any suggestions for making one with a serger instead of having to double fold it all?
You could trim about 3/8 inch from the leg and waistband, serge the edges, and then just fold/iron everything over once to create casings….similar to the bias tape version.
I cant get the pattern to open. Any suggestions?
While I have sewing experience, want to compliment you on your great tutorial for the diaper covers. I happened on this pattern last week and decided to make one to include with a baby shower present. So, I never used the old pattern but I did have some difficulty with the notch for the casing – think I would just prefer and totally circular pattern for the leg openings like for a sleeveless armhole. I found the extra fabric at the notch bulky to tuck in and I had difficulty getting the safety pin to slide through the casing at the seams of the leg openings. So, when I did the waist casing, I basted the seam allowance down loosely before making the casing which allowed the safety pin to slide right through an them I just pulled out the basting. Would be interested in the old pattern without the notches added for the casing.
Thanks for the feedback Nancy!
You can always trim that notch off the pattern piece if it bugs you. That’s really the only change from the old pattern!
It’s great pattern. Had no trouble following your instructions. Just made two standard covers for my 15 month Eva. She loves it, lifting her skirt showing it to everybody. She’s so cute. Thank you for sharing!
Awesome! Thanks for sharing!
– Dana
What about a liner for those of us using cloth? My grandson is in cloth and he has the skinniest legs ever. Any thoughts on what to line it with?
Thanks
Virginia
Thanks for the updated pattern. I am going to make them as part of a Robin costume for my 18month old. I just loving seeing his little legs!
Could you use fold over elastic instead of casings? Thanks for the great pattern.
Yes. That would work. I did a similar thing with FOE (fold over elastic) here:
http://www.madeeveryday.com/2013/01/sewing-with-spandex-for-the-little-gymnast.html
At what step would you add the ruffles? I was thinking before sewing the crotch together. Or should I finish the whole bloomer before adding the ruffles?
Hi Jessica
It is way easier to add the ruffles prior to sewing the whole bloomer. When you have the back piece flat you can pin the ruffles and then sew. When you sew the side seams of the front to the back you can trim away any excess ruffle back to the s/seam if that makes sense?
I found your pattern last week and have since made three diaper covers. I used a mans dress shirt for one of them (this provided ample fabric for this project), at t-shirt for another and yardage from my stash for the last one. Each one came out perfect. Thanks so much!!!
Thank you SO much for this tutorial! This is my first “garmet” sewing project. I am making a Pebbles Flintstone constume for my 1 yr old daughter and had NO idea how to make the “bloomers” for it. My stitching isn’t perfect, but it will work! Thanks again! I look forward to finding more projects on your site!
Awesome! That’s really great to hear!
Have fun sewing 🙂
Amei o tutorial….obrigada…
I totally recommend this bloomer pattern it is so easy to make! I feel so grateful that you posted this pattern and it’s available for anybody to use.. how sweet is that! Thank you so much for sharing and your creativity! this pattern is fabulous..
Mary Campa Reid
I read where if you want to increase the size it’s easy to do by following the amount increased each time … if I need to make it a preemie size do I decrease the same way?
Just wondering, I want to make this out of a different fabric and itll fray, how would I go about serging this pattern?
Hi Dana, I love you your patterns and tutorials. Thanks for making the free. I just made the diaper cover for he first time. It turned out well except the back fit perfectly, and while the front fit, it seemed quite puffy, like a little too much fabric. How would I adjust the pattern to avoid that. Cut the rounded part of the front leg holes a little higher and reduce the length of the side hem so it’s a bit shorter it the front? Maybe it’s because the sit under her belly so the fabric puffs out more..
I have tried this pattern and instructions twice….neither one is working. There aren’t good enough pictures here of how the tabs should be folded for the elastic around the legs. I have no idea how you are folding your seams…are you just folding once or are you folding twice to make a finished edge? There isn’t enough room in the pattern for a finished edge. I am SO frustrated over here.
Sorry about your frustration, Yes, I am folding it under twice to create a nice smooth casing.
If you’d like additional help, I have a video version of the tutorial here:
https://www.youtube.com/watch?v=A2PIQDtMpt0
Or you might try binding it with bias tape instead. Then you don’t have to fold anything under!
I used this tutorial to sew a furry diaper cover for my baby boy’s He-Man costume last Halloween. It turned out wonderfully, even with the challenge of working with faux fur. Thank you for sharing the lesson, I wouldn’t have been able to make his costume without your help!
Hello! Do you have measurements for each size or does it size match ready to wear clothing? Thanks
They match ready-to-wear sizes that you find in the store.
I got the pattern But I an’ seem to copy the instructions on making the diaper covers. My niece just had twins and
I would like to make her these covers. Hope you will help me out. Thanks
thank you so much for the pattern. I printed it out and my printer only prints in black so all the additional sizes don’t appear. I traced them over the computer screen but you may consider doing all lines in black which would still be easy to follow.
thanks again,
These tabs are a nightmare for me. Once I get the sides sewn up They never seem to line up to where I previously ironed the 1/4in and 1/2in folds (for the leg casing). Is there anyway way someone, or better Dana, can clarify this part for me please . The YouTube video and this step by step picture tutorial never really seem to clarify how to properly match/sew up the tabs so that I will actually be able to sew shut the leg casing once the sides are sewn. Also the one time I was actually able to match it up and get the leg casing sewn I ended up having to cut open the side seam any ways to get the safety pin with the elastic through that part because there was so much fabric from the tabs. Is there any tips on how to make this easier for me to understand, which way should I fold/gather the tabs once I’m ready to fold over the leg casing to sew??
The tabs are there to help you but definitely not to frustrate you! Sorry!
Just cut them off if you want to, and press the casing under as outlined in the tutorial.
Would this work if made with a layer of pul to go over underwear? I am starting to potty train and I hate the pull ups so I want to put her in underwear but for accidents was thinking this would work.
I haven’t used you tutorial yet, but thank you, last night I wrestled with a pattern just for diaper covers that I paid over $10. It was awful. I can tell by reading your that you hit all the points they missed! Thank you again.
I just made the simple diaper cover tonight. I am fairly new to sewing and I just got a brand new machine so lots of new going around. Your video was easy to follow. I had some issues pressing down the edges for the casing and also sewing straight but that I guess will get better with practice. Thank you Dana for the free pattern! Thank you for your hard work in getting all this out for us to sew! I appreciate you! I’ve been watching other videos like the circle skirt which is on my to do list next 🙂 Finally getting some projects done for my daughter!
Since I am a seamstress, I’ve read many, many tutorials. Your’s is the very best. Great job!
Hi.
I have downloaded this beautiful pattern, but I don’t seem to be able to find a pdf for the instructions. Is there any way I can get the instructions in a pdf form so that I can print it out so that I can have it on hand when I start to make these please?
Kind regards
Yvette
<3 <3 <3 THANK YOU FOR THIS PATTERN AND TUTORIAL!!!! I am an expecting FIRST time momma and we just found out we are having a baby girl in November. Being from Arizona these are PERFECT for our weather! Super cute and excited to attempt to make these! Thanks again! 🙂
Thank you for this! I’ve made two pairs – one old pattern, one new – and they both came out adorable. I didn’t struggle with folding the tabs but they gave me trouble when I Went to push the elastic through. I guess it was the way I tried to fold them in to hide them. I had to rip the seam there and push through, then resew but it was fine.
What I REALLY wish I would have realized beforehand is that the seam edges at the sides and crotch are unfinished in the end. It would look so much neater if they were folded in or serged or finished somehow. Would have taken a second in the serger to whip them through! Maybe something to think about for an update?
I sew these up using French seams. 1/8″ wrong sides together and then 1/4 rst
Hi Dana. I so love your stuff. I am wondering if I could just use FOE around the leg holes and waist on this to make it easier. I am going to be trying a swim suit when I get about 15 hours to myself 😉 and am using it for that. Wondering if I can double up and use it here too?
Hi Hun, can you make these nappy covers water proof by ironing on PUL to the fabric?
HI! I love this pattern. Looking forward to making a few baby gifts with this pattern. Quick question, what fabric do recommend for this? I have a cotton lyrca stash that I would love to use, but i think it may weigh a little heavy on this pattern.
Thank you for this tutorial!! Even for a complete newbie like me, it was very easy to follow! 🙂
Muito obrigada por esse tutorial. Muito bem explicado! Agora me sinto capaz de tentar fazer uma dessas calças.
Beijos
I love the straightforward way that you explain and illustrate how to assemble your patterns. I’ve just made my first pair of bloomers for my granddaughter with great success. I agree with Lori (89) about the raw edges at side seams and crotch, so I oversewed the edges, pressed the seam to one side, then stitched it flat….but it would have been good to have realised this at the start. However you now have a keen follower in the UK. (although I can’t get used to nappies being called diapers 🙂
I have tried this pattern twice and have run into the same issue both times….the tabs at the crotch just seam to add to bulk fabric along with the back doesn’t line up with the front at the top of the leg hole, so when you press the front under 1/4″ the back would need to turn under 1/2″????
I have the same problem as Sandy. I don’t see how the “tabs” at the side and crotch are supposed to help. They just get in the way when I try to fold the leg casing. Thanks for a good free pattern and great instructions though. The sizing and shape is right, I’m just going to cut those tabs off next time!
BONJOUR je suis totalement incontinente et j’aimerai avoir vos culottes couvres couches pour cacher mes changes jetables !!!
accepteriez vous de me coudre vos culottes adaptées à ma corpulence s’il vous plait ?
je viens de découvrir les couches lavables et je passe de plus en plus souvent mes nuits en sécurité !!!
accepteriez vous de me faire des culottes comme celles que vous faites mais avec un pul étanche que je puisses les porté en journée beaucoup plus discrete que mes culottes plastiques blanches (plastics pants ) et me dire en conséquence combien je vous devrais !!! je ne parle pas l’anglais escuse me thanck you good bye Lina
I just made 1 newborn size my newborn photography! I wish I could lead up a photo, I added 3 ruffles on the bum.
If i am making these to go over cloth, what fabric would you suggest is best?
Thank you so much for this tutorial. My best friend is having a baby in a month or so and I have been struggling with the idea of what to make her baby. This is definitely on the top of my list.
All the best!
Tereza
http://www.terezastastna.com
Thank you! It’s amazing and super-simple! Your instructions are the best 🙂
Do you have any videos on how to make the diaper cover?
The waist does not have the dotted lines for the 0-3 month front and not at all on the back …I’m assuming it is supposed to be “shorter”. Please look at the PDF pattern. i
Hi Michele,
Maybe try saving and opening the pattern again? Or try it on a different device?
I’m seeing lines for all the sizes.
Thank you for this!!! I am a photographer and have a cake smash session tomorrow (for a one-yer-old). The parents were concerned about having the diaper show, so I whipped up one of these form your pattern and VIOLA! We’re all set for the session 🙂
AWESOME!
I hope the photo shoot went well 🙂
Hi
I’m a little confused by your instructions. It says to press the crotch seam out flat and shows this in the pictures but in your video you don’t press it flat before folding the hem. Which is it? Flat or not? Im having trouble with mine and its ironed flat
Im quite frustrated with your instructions. The written instructions differ from the video tutorial. First off it states 3/8in seam allowance yet in the video you use 1/4in for the crotch and 1/2 in for the sides. It also states press the crotch seam flat yet in the viedo you appear to fold it to the back. I guess i should use the instructions in the video as the written is to hard to follow and not working as it should
Hi. Not sure if you ever figured it out. I’m having trouble too. Just wanted to point out that although she says 1/2″ SA for the sides, she sews the sides with 1/4″. 🙂
Michele Kelly is correct, when you print the pattern full size, there are missing lines on the back side for all sizes and for 0-3 months on the front. I can see all of the lines on the screen, but not when I print. I was only able to get it to print all the lines when it is fit to page, which throws the sizing off.
HI THANKYOU FOR THE PATTERN I MANAGED TO MAKE THE DIAPER COVER BUT GOT VERY STRESSED OUT TRYING TO SEW THE LEG CASINGS I HAD TO CUT OFF THE TABS IN THE END THERE WAS TOO MUCH FABRIC THERE AT THE GUSSET .P.S .EMAIL IS ALL LOWER CASE.
HELLO
TO PRINT THE PATTERNS I PLACE IN PAGE SIZE A4 OR LETTER? Thank you
These print to Letter size paper
I need to have this pattern so bad and I am clicking on the HERE link to get it so I can print but it’s not going anywhere. Please send to me! I have a 10 week old baby girl that I have started making skirts for and I need to make diaper covers to finish her look! This is the first pattern I’ve found where I don’t have to enlarge it! Please please
I’ve made two of these and the front seems like an excess of fabric, making it look big and poofy. I’ve been sewing for 5 years but when it comes to clothes and making them fit is over my head. What can I do to make it fit better in the front? Little girl is 3 months and I am using the 3-6 month size, thank you for your help so much! Awesome tutorial and super easy to make!
Be sure to unfold the legs before sewing the sides or you won’t be able to get the elastic around the legs…my mistake. Oops. Try again. 🙁
Ha, I can tell I’m significantly older than you because when I was growing up /babysitting ALL diapers were plain white, whether disposable or cloth, and I thought it was so amazing and fun when someone realized they could make them colorful/cute! 🙂
Thanks for the pattern! I’m trying to make one right now. I ran into a hiccup with pressing the leg casings under and I noted that other people did as well. I just watched the video and noticed that in the video you say to use 1/4″ seam allowance for the crotch while on the written directions it indicates 3/8″ seam allowance (at least that’s my understanding). Maybe that’s why it’s challenging? I’m going to try it with the 1/4″ and see if that helps 🙂
Hi! I love this! Do you have any tips on how to size up? My friends daughter is in toddler sizes already but needs these! I’m wondering how to size up to a 2,3 and 4 t
Thank you for the pattern, I’ve included it as one of my top twenty free patterns for babies and children
(https://newgrandmawantstosew.blogspot.co.uk/2016/12/my-current-top-twenty-free-baby-and.html), as I used the old version A LOT. I’ve now printed out the newer version as well, but it seems much bigger all round – not just the tabs, but the sides and length are at least an inch more on the pattern. Is that deliberate? Have they been made to be much more baggy? There isn’t a one inch square on the original, so I can’t compare them. The original fitted on two pages not 4, so I assume it must be smaller?
Merci merci merci! (from Brussels!)
Thank you for taking so much time and energy to make this entry and pattern. I printed 3 other bloggers’ patterns, tried and failed two of them and then stumbled on yours. Clear, concise and the results are PERFECT! Thanks!! Perfect gift to match a little dress I made.
Awesome! I’m so glad you like the pattern. 🙂 Happy sewing!
Amazing pattern and very easy to follow thank you
I cant seem to download the pattern. Is there somewhere else I can get it?
The pattern is linked here in the tutorial, but you can find it here:
http://www.madeeveryday.com/wp-content/uploads/2015/05/the-Perfect-Diaper-and-Nappy-Cover.pdf
Have fun sewing!
– Dana
Dana,
Thank you so much for taking the time to draw & grade your pattern digitally then create your wonderful tutorial and share it all for free!
I work as a garment techican and found both pattern & instructions excellent! The little tabs at the sides are helpful and made total sense once I began turning up the leg edges. It creates a lovely stitch line at the sides once you sew the casings.
I have just completed a black/yellow striped pair as part of a bee costume for my nephew. So happy. Following your blog now! Xx
Hi, as other have mentioned it is very boofy in the front that it just looks awful on, with all this excess fabric sitting at the front. Is there something I’m doing wrong or is there a revised pattern without the boofyness
Otherwise it is a really good pattern and tutorial.
You can go down a size if you’d like….or just trim some of the excess from the top pattern piece.
Thanks!
I’ve made it a bit smaller and wider waist band which has helped a lot. Otherwise it is a great pattern, easy to follow, thank you so much for providing! Friends are having babies and they’re all set for the Australian summer this year
I’m disappointed I didn’t read the comments before attempting this pattern.
Those notches at the crotch are a nightmare and not necessary.
I will be making another one but will cut the notches off.
tad confused as the pattern directions says 3/8′ seam allowance, except where noted. and the video tutorial says 1/4′ crotch seam and 1/2′ side seam. not sure what which seam allowances i should be using. Thanks for any info/help
Thanks a lot Dana! I love these especially how to get the leg holes neatly, I isually have difficulties there so I’ll definitely try ironing ???? and I’ll try with the bias too. They all came out beautifully.
I made the simple diaper cover and found it really difficult to fold in the leg pieces for the casing. The extra tabs made it so hard to thread the elastic through that I had to rip the seams out to pass the pin and elastic through and then stitch the opening by hand. Any suggestions as to how this could be done easier. I’d like to make more. Thank you
Hi Vickie,
Sorry you’re having trouble, any time you make a casing in a round like that (where the circumference of the fabric is changing on you as you fold under, it can be finicky. If you don’t like the tabs, just cut them off! The concept with those is to create more fabric, to make it easier as you press the casing under.
If you find that the project is frustrating, I HIGHLY recommend making a basic pair of shorts! They’re even easier to make, and I started making them for my daughter when she was 9mos-12mos old. You can see my pattern here: https://shop.madeeveryday.com/products/kid-shorts
Reply
When you say overlap the elastic by one inch, is that one inch from each end or 1/2 inch from each end? I always wonder that on a pattern and can’t wait to find out the correct answer! Thanks!
Yes, you will overlap the two ends of the elastic by 1 inch on each end….meaning, the amount of space that is overlapped is 1 inch.
Loved the pattern and tutorial I’m a bit of a beginner and I even managed to add ruffles so pleased the the finished result I’m going to make more Thank you dana xx
I just found a few if you were to tutorials on Pinterest and I love your style, quick & to the point. I am curious however, why you typically do not finish the edges before sewing all of the sides together? For example why do you not finish the elastic casing edge until after you have already sewn the sides of the baby diaper cover together? My thought process is that it would be easier to so the hem before sewing the sides of the diaper together? I noticed this in your skirt to Tutorial as well. You see the skirt into a loop before finishing the bottom edge and the elastic edge. I’m just curious if there is a reason for this?
Hi Katie,
This is so you don’t have exposed fabric edges at the side seams. Enclosing all of that in the last step when you fold and sew the casings in place, keeps it nice and polished.
Hi!
Love the bloomers???? I’m planning to make some within few days. How do you think it will turn out in linen fabric? Any experience on this?
Thanks for sharing all these lovely patterns???? So easy to follow your instructions.
Linen would be perfect! And adorable! And so cute.
Hello,
I have my pattern all cut out, ready to sew my first diaper cover 😀
Do you have a printer friendly version of the tutorial?
Will post a link to pics once my cousin sends me some of her little man in his birthday outfit
I MUST be doing something wrong. Even with the new pattern and the little tabs…I had the HARDEST time with the leg casings. Is it just a matter of practice (this was my first go), or am I doing something wrong? I don’t know how you could help…but HELP! Haha! I don’t know if I sewed the side seams right, or what? You make it look SO easy in the video…I guess when you’ve made scores of them, it gets easier! =)
Sorry you’re having trouble, any time you make a casing in a round like that (where the circumference of the fabric is changing on you as you fold under, it can be finicky. If you don’t like the tabs, just cut them off! The concept with those is to create more fabric, to make it easier as you press the casing under.
If you find that the project is frustrating, I HIGHLY recommend making a basic pair of shorts! They’re even easier to make, and I started making them for my daughter when she was 9mos-12mos old. You can see my pattern here: https://shop.madeeveryday.com/products/kid-shorts
Curious, is there a download of just the sewing instructions? I transferred your pattern pieces to clear plastic sheets (cutting “board” mats) so I can use the pattern indefinitely. I’d like to include a set of written sewing instructions.
I’ve watched your YouTube tutorial video multiple times- excellent assistance.
Looking forward to making dozens and dozens of diaper covers for grandchildren and gifts.
Thanks!
Sorry. I don’t have download instructions; just the tutorial here. You could try to copy and paste the text into a word doc and print that?
Love these. But what about the bigger babies? I need to make them big enough to fit 36 months and up! My friends son isn’t even 2 yet and he wears 2t and 3t clothes. How would I go about making them bigger.
You could trace the pieces out a bit on the sides and at the top. Use something your child already has to gauge your sizing on that.
But in all honesty, at that age, it’s easier to make a basic pair of shorts! You can check out my pattern for that here: https://shop.madeeveryday.com/products/kid-shorts
Thank you so much for the pattern and instructions. I can make my own diaper covers now for my grand baby instead of buying them!! 🙂
Made these for my lg who loves to pull up her dresses and show off her nappy at every opportunity. As a novice sewer I was a bit concerned how they would turn out but I needn’t have worried! I’ve just started a blog and have credited to this site 🙂
omg the pattern is wrong! I’m super upset and made me wasting time to correct pattern.
Thanks anyway. Beginners, don’t follow this. Diaper cover is super easy, no need to hustle.
Sorry you were frustrated! I’ve had many people enjoy the pattern, so I hope you find something better that works for you.
Dana
Hi,
In the video tutorial, you say 1/4” seam, but the directions say 3/8” seam… which one should I use? Would love to figure out how to add ruffles but I’m thinking thats hard to do. Lol. I am a somewhat beginner sewer, on a tight budget, so I really so very much appreciate he time you take to share things with us at no cost.
I should clarify, you say 1/4 seam atbhe crotch and 1/2 seam at the sides. But the directions say 3/8. Confused at which seam allowance I shoukd go by.
Hi Sorry about that.
I made these at different times, so it’s possible I found that a 1/2 inch seam worked better at the sides. It’s a very small discrepancy if you use either 3/8 inch or 1/2 inch, since this is a very loose-fitted item.
Sorry for the confusion!
Thank you for this. A friend at church asked if I could make her a diaper cover out of her husband’s uniform and have his nametape on it also. After several practice covers, I had a cute camouflage diaper cover. She and her husband loved it. Now I have a gift to give to expecting military families here. Thanks a bunch!
Awww what a fun idea!
Thanks for sharing with me 🙂
Hello!
Did you you these covers with the cloth diapers? If so what kind of waterproof material did you use? If not would this pattern be fitted enough to prevent leaking? I’m expecting my first and am interested in cloth diapering, but have no idea where to start.
Thanks!
You could sew the covers with PUL (it’s a waterproof liner kind of fabric). I would do a google search for that.
I’m sure there are tons of ideas about that out there.
Good luck!
Does NO ONE seriously have trouble navigating those tabs?? I find myself fighting with them forever and I can NEVER get them pressed/sewn right! I thought with repeated making of the pattern it would get easier…it just seems to keep getting more and more frustrating. I wish there was a video of her ironing/sewing those things down in slow motion! 😖
Sorry you’re having problems with them! You can just cut them off and go without. No big deal.
Hiya – just wanted to say thank you for the pattern and tutorial. I am new to sewing and have started making simple dresses for my granddaughter – I will have a go at these tonight to match the dress I made yesterday – your tutorials are very easy to follow – thank you 🙂
Awesome! Thanks Sally for sharing! Have fun sewing 🙂
These are so cute, and Dana, I love your tutorials. They are polished and professional. I too had trouble with the tabs; I found they were more hindrance than help so I just cut them off. I also had no luck getting the elastic through the seam parts, even after not using tabs… I had to un-sew and to get it through and then sew up again, which makes for a somewhat sloppy look. Hoping this problem will disappear with the bias tape version, which I plan on trying next. Thanks again for the great tutorial!
Inge
Hello,
Just want to say that I was thrilled to find your pattern. I live in a remote rural area that doesn’t supply patterns.
I have made 2 pairs of bloomers. Thank you so much.
Chris.
Thanks for sharing this. It was very easy to make and goes perfectl with the dress I made for my baby niece.
Is there any chance you have a pattern for larger sizes? Like maybe a 3T? My daughter is only 2 and still wears diapers
This is one of the worst patterns I’ve ever followed and the sizing is awful. The tabs were totally confusing. Once I mastered that and finally got to the end I tried it on my baby and it was HUGE. He’s going to be 1 year so I made 6-12m. I can’t even imagine a 6m baby wearing this. I have to start all over.
Thank you for sharing your talent!
If I am reading your tutorial correct, overlapping the elastic 1″ means the finished measurements will be 2″ shorter. Is that correct? I assume the waist is done the same way? Please help!
Thank you!!!
Great Pattern, very clear instructions, love the way you’ve illustrated the stitches by drawing on top of the photos. I found that the side tabs don’t seem necessary after you’ve sewn the sides up, and often I cut them down or off to make threading the elastic through easier. Thanks : )
Absolutely LOVED this and your site as a whole! Expecting my first grandchild in a couple of months and I couldn’t have “met” you at a better time :-). Thank you for this! ill subscribe on You Tube as well.
When our son was 12,we decided to adopt a daughter so our family would be complete.So we adopted a girl who had just turned 14 from an orphange.Her profile said that she was never baptized as an infant,so two months after she got settled in,we made arrangements to have her baptized at mass on a sunday morning.A cousin of ours offered to make her a baptism gown and matching bonnet to wear,so we took her up on the offer.Three weeks later she had the gown and bonnet done and it was gorgeous!The gown had bouffant shoulders and lace down the front and the bonnet had the same lace on it also.We got her a white tee shirt to wear under the gown as her top,then got a cloth diaper and white,adult size rubberpants to go over it,then lace anklets and white patent leather shoes.The cousin then made her a white diaper cover with six rows of ruffles across the back to wear over the diaper and rubberpants.The morning of her baptism we dressed her in the outfit and she looked very cute and gorgeous in the outfit!
Our daughter is 13 and in puberty that is causing her to wet the bed at night.It started about a year ago and she wears a thick cloth diaper and rubberpants to bed every night.She finially made her First Holy Communion last month on June 6th with the 7 year olds.Her great aunt took a pair of her white rubberpants and covered them with white nylon and did six rows of pink ruffles across the back,with a white bow in the middle of the ruffles.She wore the cute ruffled rubberpants under her communion dress all day and all of her female relatives who saw them thought they looked adorable under her dress! She is going to be in a wedding the end of august and will wear the ruffled rubberpants again under her dress in the wedding.
When our daughter was bedwetting in puberty she too wore cloth diapers and rubberpants,When she was 13,she was the flowergirl in her nieces wedding and she wore a ruffled diaper cover over her diapers and rubberpants under her dress.The diaper cover was white and had siz rows of ruffles across the back.
To Corrine J.-My two nieces who are 13 and 12 were just baptized at mas last sunday.They both were dressed in identical white,poofy short sleeve,knee length baptism dresses with the matching bonnet,lace anklets and white ballet slippers.Under their dresses they had a white tee shirt with their cloth baptism diaper and plastic lined ruffled panties.A cousin of ours got two pair of white rubberpants and then covered them with white nylon and sewed the ruffles across the back.The ruffled plastic pants looked very cute and adorable over their baptism diaper.
I just wanted to say thank you so much. I have a 12 year old son with special needs and as a result he is still in nappies. Not surprisingly you can’t buy nappy covers for 12 year olds so I have had to make some.
Obviously I have had to adapt your pattern to fit my son but the pattern and instructions were so easy to follow it was no problem. Thank you again, all the way from New Zealand 🙂
Dana,
I am new to sewing and found you while searching the web. Because of you, I am loving sewing. So far, I made burp cloths, t-shirts, PJ pants, and now diaper covers.
Thank you so much for the tutorials, free patterns, and your step by step instructions.
Kathy
Hi there, great tutorial and pattern, thank you.
I’m a beginner, and would love to make these.
I’m trawling through online fabrics (here in the UK), and wonder how much fabric I need for these?
I see you say “1/2 yard”…but what would the other dimension be, please?
We can buy something called ‘fat quarters’ in the UK, which measure 50x55cms, approx.
That’s approx 18 x 20 inches.
Would those work for these diaper covers?
It’s just that I’ve fallen in love with a fabric…but can only get one piece of it as one fat quarter!
Hope you can help.
Best wishes. So glad I found your site 🙂
I’m having trouble with sewing the sides and the elastic. Am I supposed to sew the sides all the way through the casing we unfolded or stop sewing the sides when we get to the beginning of the casing?
I’ve tried it both ways and I can’t get the electric through the side seam because it goes all the way down and when I stop sewing at the mark from pressing the leg holes it is incomplete where I pass the elastic through. Can you guide me please!
Hi! I cannot find the pattern for the 2 separate pieces. Whenever I download it, it saves the one single piece pattern. Can I find the other pattern somewhere?
Hi there, great pattern I have made a few already. Also makes a great romper by adding 2 rectangles to top of the cover and sewing elastic to the inside waist on the join and top.