
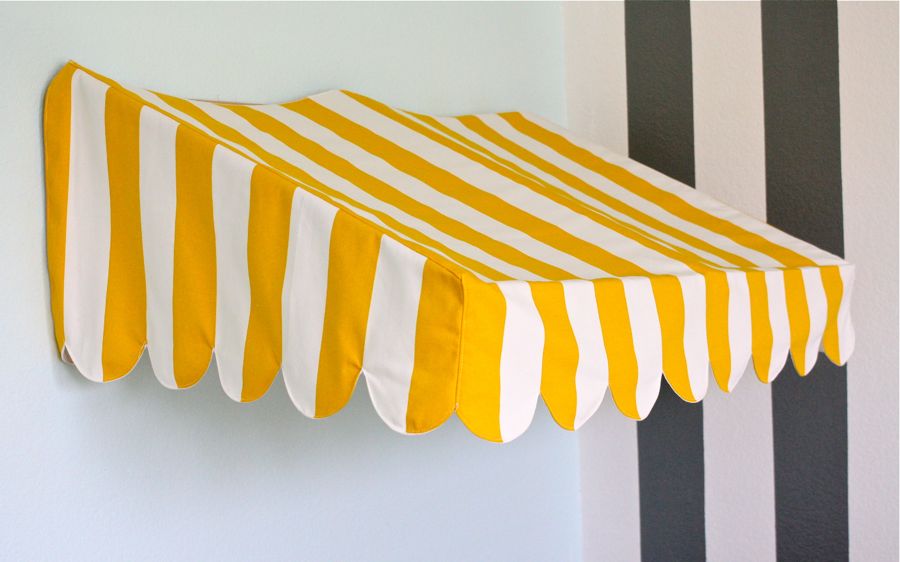
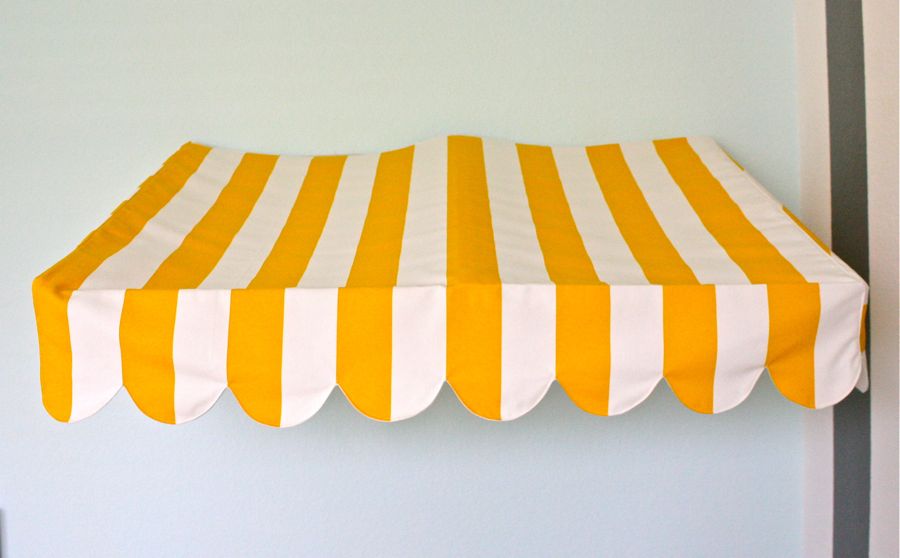
Many of you have emailed asking about the Bistro Awning from Lucy’s room makeover:
 I wish a lengthy one to share. But honestly, I was making it up as we went and wasn’t really sure it would work out. Thankfully it did! So instead of a full-blown step-by-step, we’ll call it:
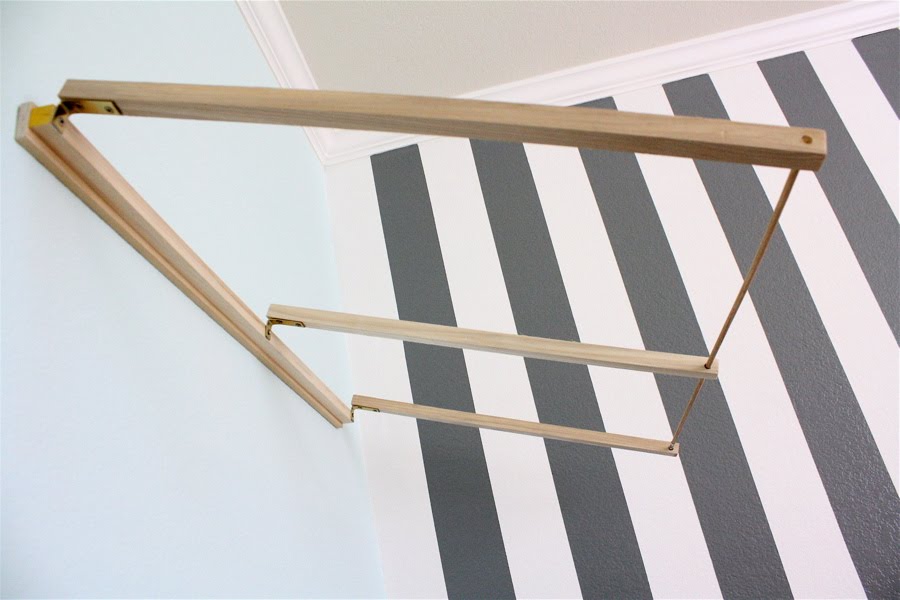
 and here’s the skeleton underneath:
 I couldn’t find any real tutorials online for making a small awning so I looked around at store/shop awnings in our town to get a feel for the concept. Basically, there’s a flat piece in the back with bars that slant down and fabric over the top.
We wanted it to be lightweight so it would hang easily on the wall….but not too light, or the wood might break. I just needed a simple frame to hang the fabric over. It couldn’t be that hard. And really it wasn’t!
We went to Home Depot and looked around. In the window molding aisle they have a nice selection of dowels in many sizes.
We used:
* 3 long rectangular dowels for the slant
* 1 rectangle dowel for the back
* 1 flat piece of wood for the back for added hanging support
* 1 skinny round dowel for the front
* 3 metal angled-brackets (not sure if that’s the real name)
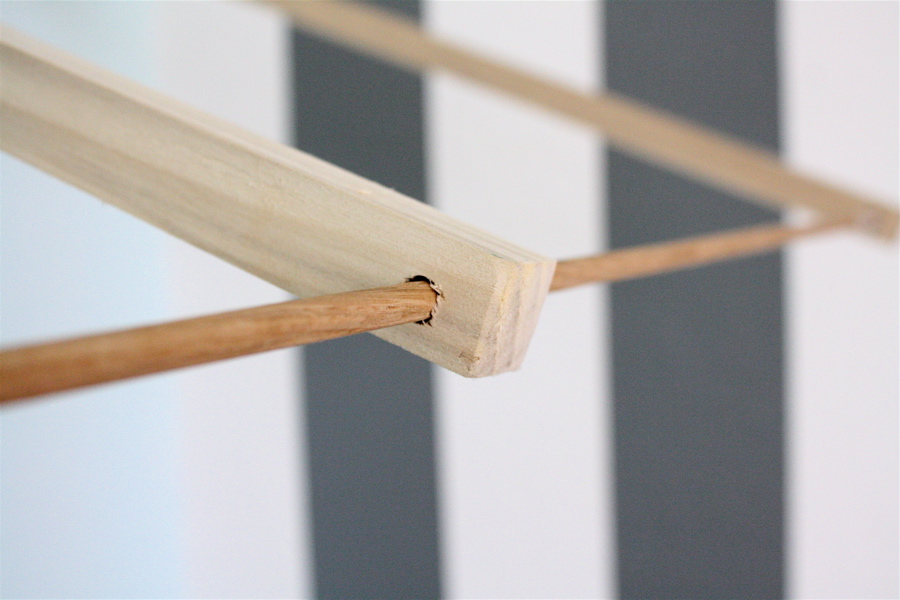
 We started by drilling holes through the 3 rectangular dowels, threading the round dowel through, and gluing it in place on the ends.
 Then we attached the three rectangles to the back rectangle with angled brackets. This step required a bit of tinkering. Normally these brackets come at a 90 degree angle. But the metal is easy to bend, so we bent each bracket slightly till we found an angle we liked and made sure that all three brackets were bent to the same degree (roughly; we didn’t measure).
 Here’s another angle:
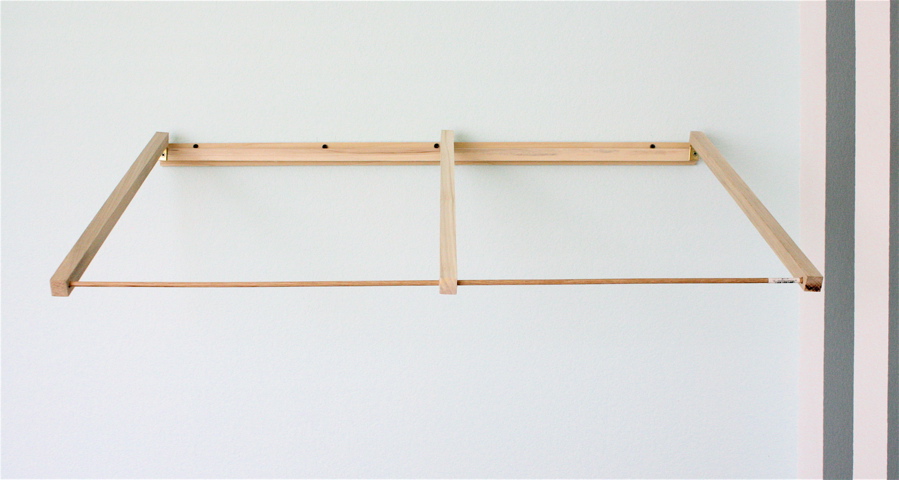
 Then lastly, we screwed the frame right onto the wall (those little black dots below are screws)
 and I threw a cover on top!
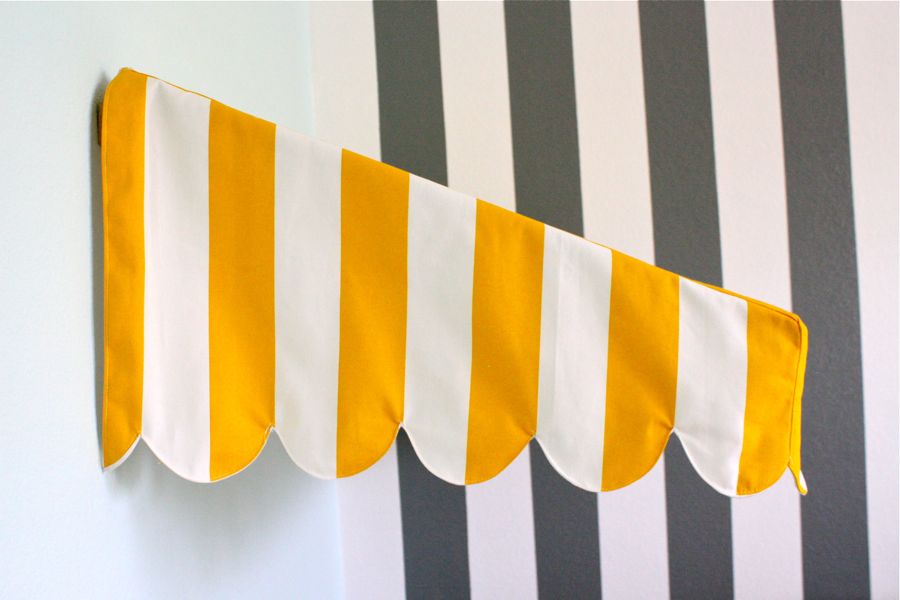
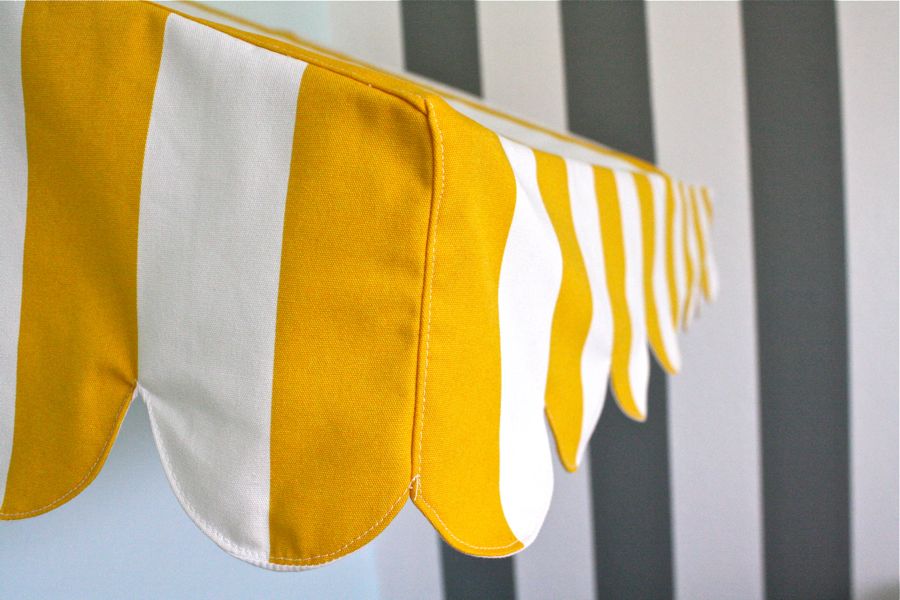
The cover is made up of three pieces: the top (which slants down and hangs over the front) and two side pieces. I first laid my fabric over the top and measured how wide it needed to be and how far down I wanted it to go (make sure you add extra for seam allowances). The petals that hang down are part of this top fabric. The fold you see is not a seam. It’s all one long piece of fabric that drapes over the front and hangs over. I pressed it when I was done to create that line where it lays over the dowel.
 To make the petals, I traced the edge of the fabric using a bowl or cup so that they all had the same arc. Then I cut a matching amount of white fabric to go underneath (I used white because it was cheaper and had I used stripes, they would have shown through creating a nightmare for matching it all up. So, just use white cotton). This step was necessary to make the curved edges of the petals look polished when sewn.
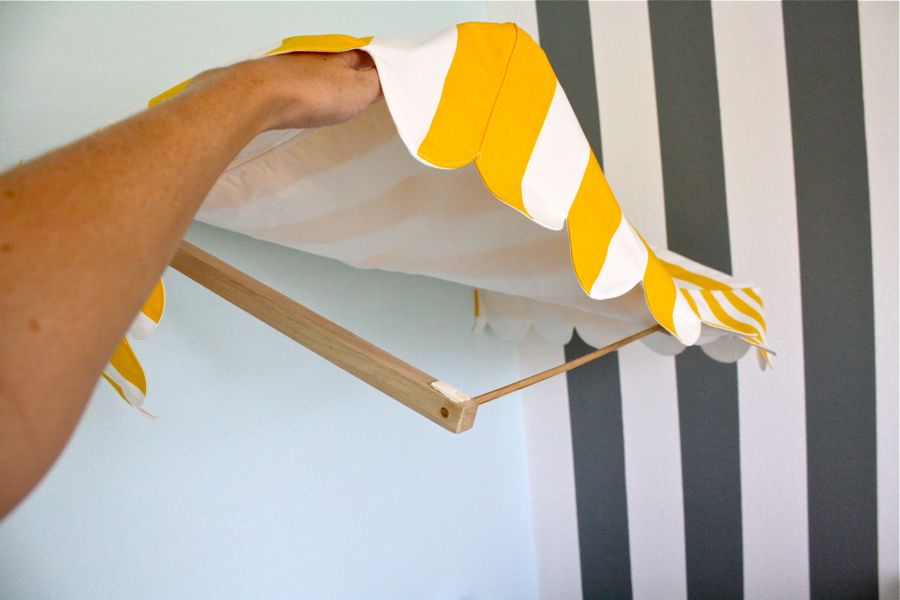 Here’s another underneath shot.
With right sides of the fabric together, I sewed the matching Top pieces together, turned them right-side out and ironed it out.
 Now this was the trickiest part of the whole thing….figuring out the side pieces. It wasn’t “hard” but I was crossing my fingers the whole time; hoping that I measured correctly.
Since we weren’t exact with our angles and I really didn’t feel like doing complicated math, I just laid my fabric over the top again with the stripes hanging vertically. Then (accounting for seam allowances all around) I took a pen and traced right down the slant of triangle below and on the edges as well. It wasn’t exact but it worked out pretty well.
 I cut out matching white pieces to go underneath, sewed them similar to the Top piece, and then sewed the side pieces to the top. And….I hung it on! I used double-sided tape in a few spots to hold it in place on the skeleton but that was it. The cover is made to fit and really just hangs by itself over the wooden frame.
* For added charm, you might attach some very small lights underneath, near the wooden frame to make it feel even more like a marketplace shop. But, we’ll save that for another time.
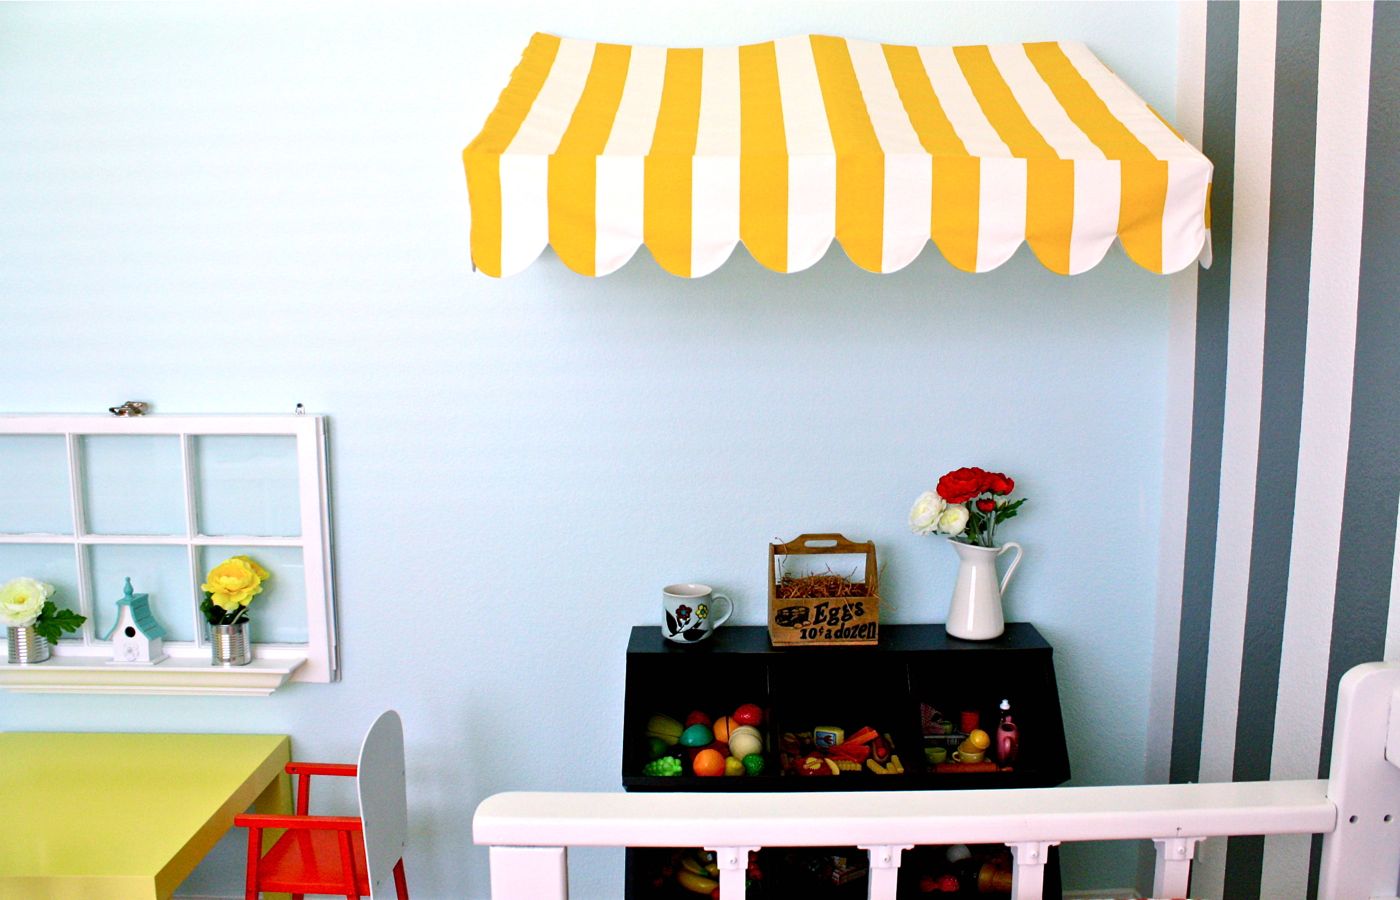
And there you go! Sorry no measurements or dimensions. But hopefully you’re armed to tackle the project yourself. It really adds a sunshine personality to the room.


I’m curious about the bins you’re using. What is it and where did you find it? Thank you so much!
I found it at a thrift store. I think it’s from Brookstone though.
Sorry I don’t have better info!
http://www.landofnod.com/storagepalooza-grey/f17769
i believe they are from Land of Nod..
I made one for my grandkids. The bins are the same. Picked up at a yard sale, but they are Pottery Barn.
This is adorable! I am thinking of doing it for my granddaughter’s playhouse. How much striped fabric did you use? What width?
Would you be interested in making me one if I gave you the measurements I need? How much would you charge?
Hey Dana-thanks for the step by step instructions. Easy to make and perfect for what my wife wanted. She is very happy with her new awning. Just about $10 for the wood materials. Tad
Such a charming look and great directions. Would be cute in a kitchen too. Nice job!
I think it’s phenomenal! My future mini roomboxes will need these. You are awesome!
Hi!
I love this! I was looking all over the internet to find one that is pre-made and couldn’t find anything that comes even close to this! I’m a terrible sew-er, so I know I couldn’t make the top, even if I wanted to.
Do you sell these?
Thanks!
Sorry I don’t sell actual items…I just share ideas!
But maybe you could look on etsy.com for either a pre-made awning….or for a sewer who will make one for you?
I have no idea how that works, but it might be an option
you could use a peice of tin
Yes, or Home Depot sells corrugated roof materials, not expensive, easy to cut with a dremel cutting tool.. good luck
You are so clever!!
Do you have a rough idea of the size dowels you used? There are a lot of options on the Home Depot website.. I am trying to work on this while at my moms without having the wood here– I know this seems silly but its my only option.
http://www.homedepot.com/b/Building-Materials-Moulding-Millwork-Dowels/N-5yc1vZaqif
I’m extremely interested in the storage stand. Where can I either buy it or make one? It goes perfectly with the adorable awning. Please!!! Let me know.
Thanks!
I think it’s for organizing nuts and bolts?? Something you might get at Home Depot?
But I found it at a Thrift store! Sorry I don’t have better info 🙂
Thank you so much! I was trying to think of a simple and inexpensive way to make an awning for above my daughter’s closet…MY Lucy will have a little clothing boutique soon (if I get my act together). I found a pink and white oil cloth table cloth on summer clearance at Michael’s. It was just what I was looking for! Thanks again!
I’ve been all over the web searching for awnings for a girls room and my daughter’s sweet 16 party! No luck at all! Thank you for this amazing diy! Love it! You’re a life saver????????
How much fabric did you use for your awning? I need to make one that is 6 ft long and 24 in deep.
I made an awning almost like that for my dogs
I am so thrilled to find your tutorial! First found it pinned on pinterest. I’m doing a little coffee bar and wanted to give it a café feeling, and I was planning on doing a pvc frame but this looks easier and less cutting and less expensive. I don’t sew so I’m going to do felt for the lining with fusible web and a cute coffee themed fabric fused on top of the felt, thank you so much for the idea about the bowl/cup tracing for the petal edge, that’s awesome! and I’m going to do some little white lights inside! EEks! Can’t wait to get started on this!! Thanks again for sharing! I’ll blog my project and link to your blog!