
Ready for Easter?
 If you’ve got a Sunday morning brunch up your sleeve…..
 Don’t forget the PEEPS!

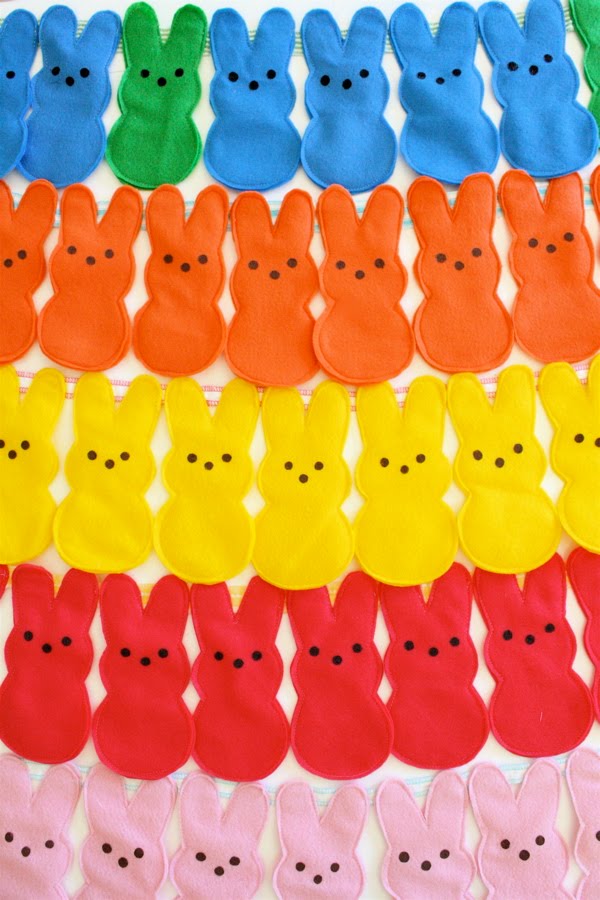
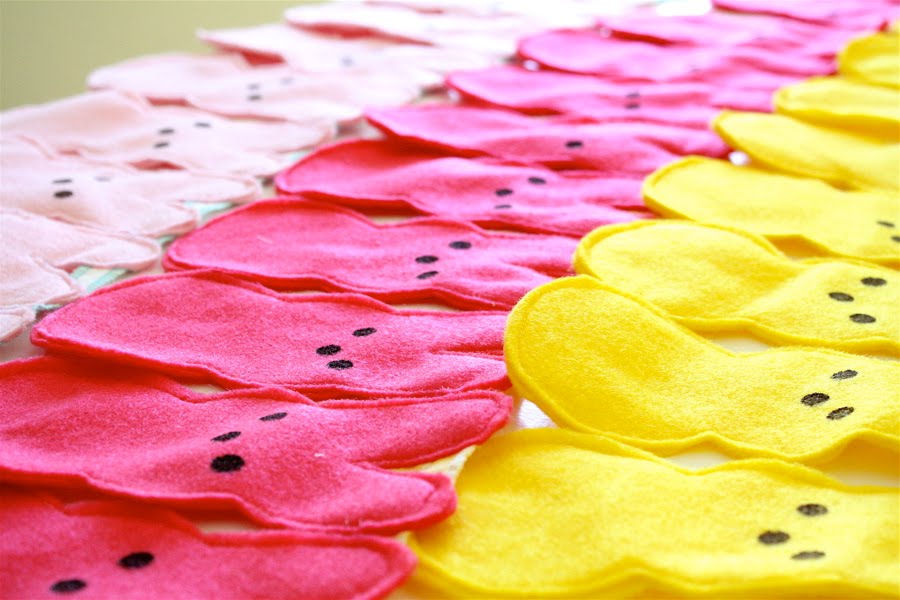 Nothing says Easter like a bunch of colorful bunnies.
 And since buntings are festive any time of the year, I took a spin on the traditional flag look and mimicked a childhood favorite in our family…..Marshmallow Peeps.
 Pick your favorite Peeps color (or make up your own!) and find a similar FELT color at your local craft store. Then, keep it super simple with Bunny Door Hangers:
 or really give-in to your sweet tooth…..
 And let’s get bunting!

Skill Level: Any
Needed:
* 1/2 yard or less of felt (doesn’t need to be anything fancy)
* brown fabric paint
* pencil (or other round object)
* ribbon/fabric for bunting
* sewing machine
First, cut out your pattern. I’ve created one here for you. If you don’t have a printer, just put a piece of paper up to your computer screen and trace the image right on top!
or…..
You can copy the Bunny Bunting Pattern TWO ways:
1. Click on the image below to enlarge. Then “save as” to you computer. Open it in a Word doc and insert the picture so you can adjust the size for your needs.
2. Grab the PDF pic by clicking HERE.
 Okay, with your bunny pattern printed and cut out (I usually print on paper and then trace/cut an additional pattern out of cardstock or from a file folder. MUCH easier to trace around a stiffer bunny over and over again).
Fold your felt in half (because each bunny is a double-layer). You can make them single layered if you want the cheap/easy way. But it’s less polished looking and a bit see-through. So I recommend double-layers.
Then trace and cut out as many bunnies as you’d like. The pink bunting has 18 bunnies. The small yellow bunting has 9:
 Time to decorate their faces. You’ll only be decorating the front bunnies (the back bunnies are left plain). You’ll need a pencil eraser or something round. And brown fabric paint. I prefer Tulip brand, Matte, Chocolate. Its cheap, $1.50 at most craft stores.
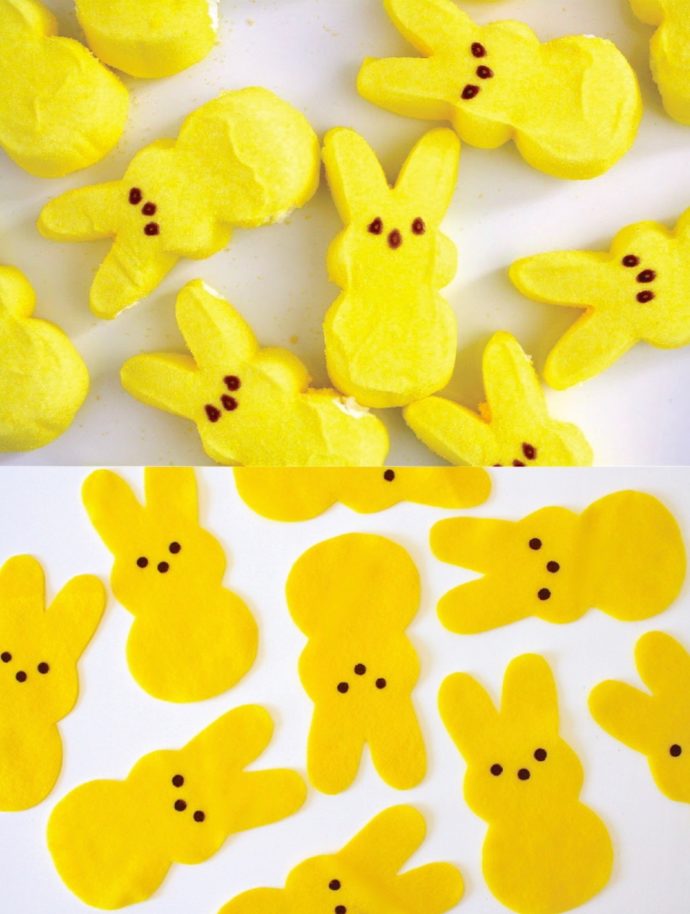
 Dip your pencil eraser in the paint, and dab it right onto each bunny. The beauty of Peeps is that they’re far from perfect. If you look at a box, each face is slightly different. So don’t worry about being precise or even symmetrical! If you want them to look like the real Peeps, space their eyes very far apart. It will feel strange. But their eyes are far apart and their nose if very high-up, close to the eyes. Look at the photos above of the real peeps for reference.
Make sure you place a piece of paper under your bunny because paint may seep through to the back.
 Starting to see a resemblance……?
Let your bunnies dry for a hour or longer. If you’re antsy, you can speed up the process by drying them with a blow dryer, but be careful that they don’t fly all over the place!
While you’re waiting for the faces to dry, prep your bunting ribbon. You can use fabric, ribbon, rope, colorful twine (THIS stuff is totally cute). My favorite method for making “ribbon” is to cut strips of fabric (I used double-layered white muslin in this case), sew the strips together to make a very long strip, and then I serge the edges. Perfect for wrapping gifts and in this case, for making a bunting. Each finished “ribbon” is about 100 inches long but that was much longer than needed.
 Time to sew on your bunnies.
If you want the quick and easy way, grab a bunny back and a bunny front and sew that double-layered bunny to your ribbon and keep on going till you’re bunnied out.
But if you want the slightly longer method that I did (it only took a bit longer)…
I sewed each bunny back on to the ribbon while the faces were drying. Just lay one down and sew across the ears:
 Then grab the next bunny back and repeat:
 Sewing the backs on first makes the bunting a bit stronger, the bunnies are likely to be straighter, and it’s more polished looking. After sewing the back bunnies on by their ears, you sew the front bunnies on top, sewing an outline around each one.
(Okay, okay…so I was just bored and couldn’t wait to get started while those blasted faces were drying! Either method you use, your bunnies will look great.)
 Here’s where I laid the front bunnies on top of the back bunnies and sewed all the way around each one. Repeat this step till all your bunnies are on!

 and, you’re done!
 Enjoy your party!
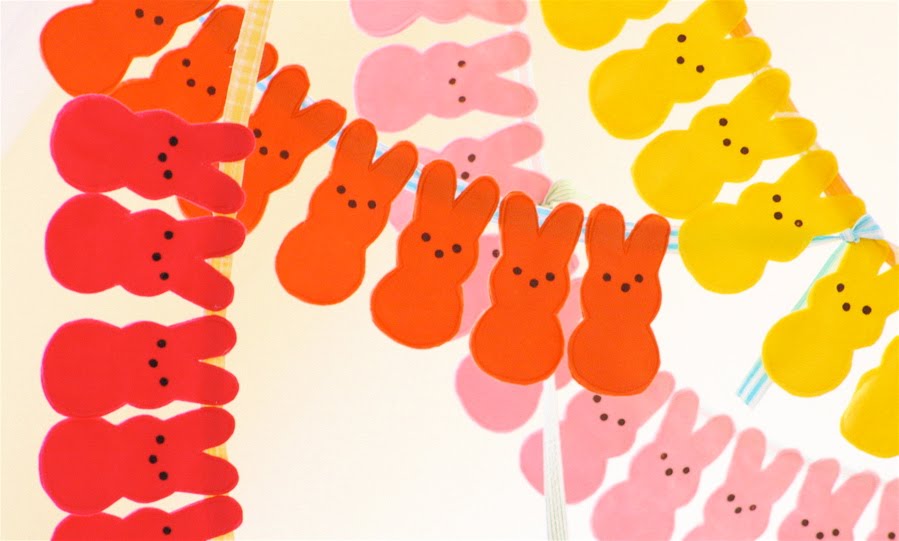
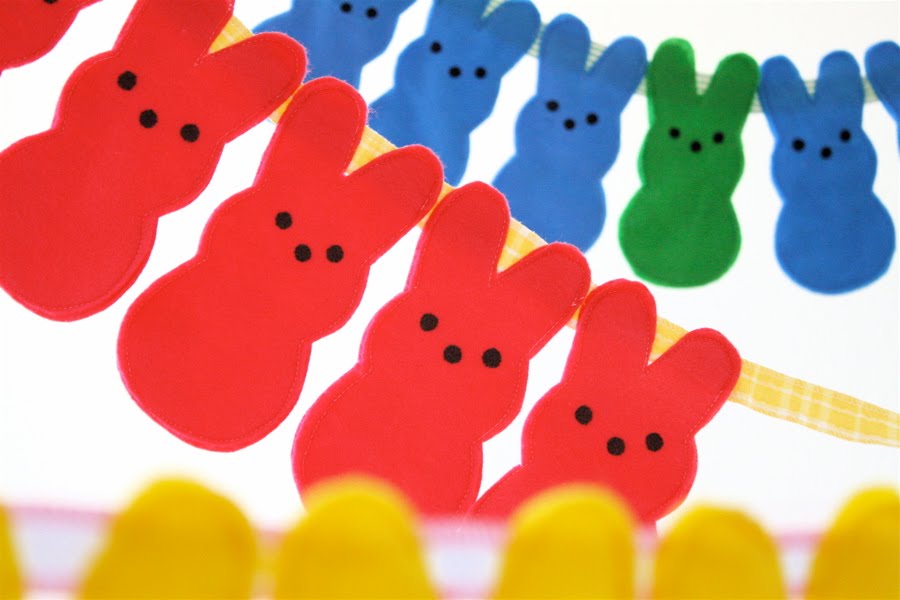
 Try your buntings in vibrant colors also. Makes me want to throw confetti and eat cupcakes:
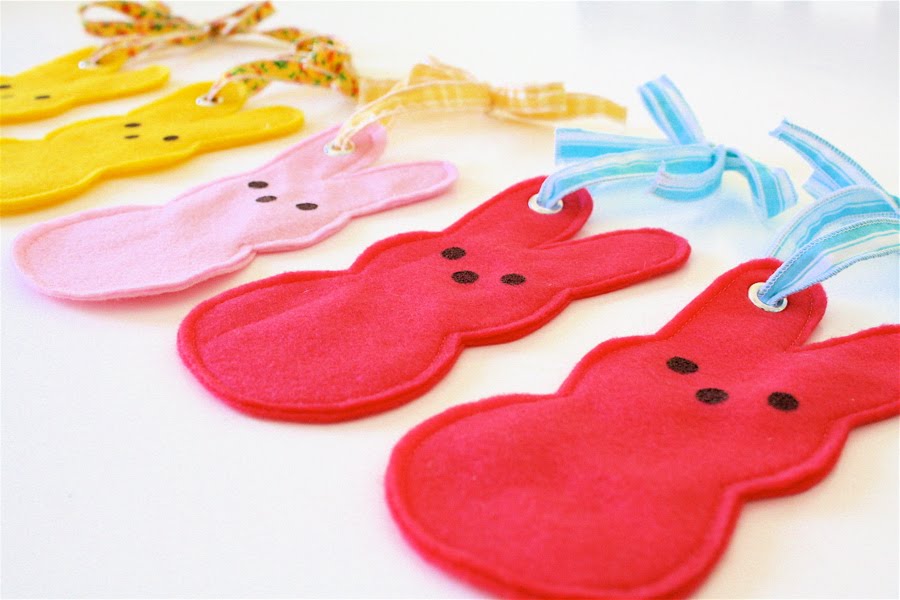
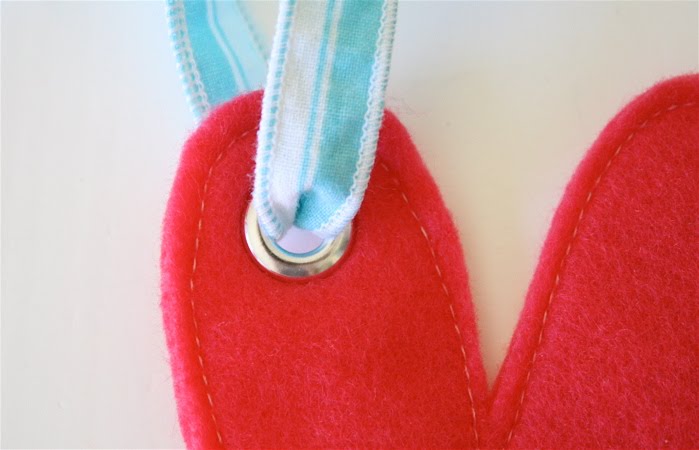
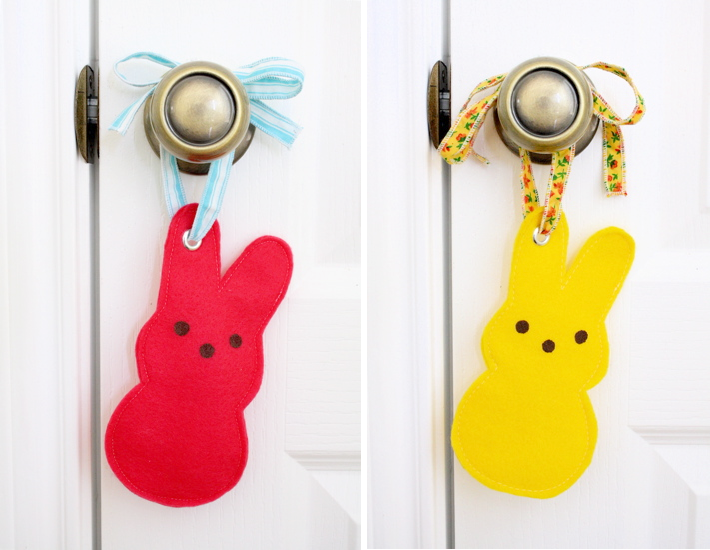
 Or make Bunny Door Hangers! Perfect gift for a teacher or friend:
Just add a metal Eyelet to the ear and a cute homemade ribbon (if you’re not sure how to do Eyelets, they are super easy. Check out the Split Pea Shamrocks Tutorial for all the info):
 And hang them up!
 Happy Easter!


Those are so cute. I’ll have to go look for some felt in fun colors to make these.
this will make a fun project with the granddaughter. I rather see there than the real ones. These don’t promote tooth decay.
These are oh so cute! I can’t sew but I am an excellent “gluer” 🙂 Gonna give these a try – I think my sweet baby girl will love them! Thanks!
Cute project. I made these today. I didn’t have any felt so I made them with scrapbook paper. Not as permanent but still fun!
I shared this on my facebook fan page today!
https://www.facebook.com/pages/Keepin-it-Thrifty/107871535948408
XOXO Andrea
I just cut the bunnies. I wonder what if i fill them.
Hi again Just found an old vinyl table cloth good shape yet , Easter Patterns, I might try that ?? How I can fill a few jelly beans & not distroy bunny?? Possible to stich & leave area open at bottom to fill & close up with valcro & white tail (pom pom) // crazy. Not too hard?
Thanks so much! I haven’t had peeps in years (I don’t live in the USA). I’ll make some bunting instead now. Perfect.
Hi! I featured this Easter blog post on my blog today!
http://www.buildingabetterpeach.com/2012/03/my-top-5-most-favoritest-easter-crafts.html
xoxo,
Peach
I made this today!! It was fun. My first real sewing project I’ve done. Nice Easter decoration for the years to come!
Thank you, thank you, thank you for sharing the template! I used it to make a headband for my daughter and blogged it here with a link back to you: http://happycakecrafts.blogspot.com/2012/03/peeps-headband-and-craft-fail.html
That bunting is adorable! If I ever figure out my sewing machine I’ll have to give it a try. 🙂
These are sooo stinkin’ cute! I have a question though: your peeps felt looks so nice. Did you use the wool felt and not the cheapy stuff? Thanks! 🙂
nope. I used the cheap stuff off the bolts at joanns!….about $4/yard?
So very, very cute! I’ll have to try this tomorrow. Thanks so much!
Those are absolutely adorable and I LOVE Peeps!!!
I am a Peepsaholic so I had to make these. Wouldn’t they be cute as name tags, using puffy paint on their tummies?
Dana – I’m currently making my bunting… is there a trick to sewing around the edge? I keep having to stop, lift the presser foot and turn the two layers of peeps to keep them from bunching up. If that’s normal, then I’m ok with it. Just wanted to make sure I wasn’t missing a trick.
Hi Dana, I’m doing an Easter link up today over on my blog…http://rustsunshine.blogspot.com. Would love to have you join us with any of your super cute Easter ideas! (But only if you can tear yourself away from that sweet little nugget of yours! She’s so adorable!!!)
I have yet to make them but oh I will. I just wanted to tell you that every time I see them(everywhere!) they make me smile!
I do tray favors for the hospital each Holiday and I am aways looking for something easy since I make 60 of them and these Bunny Peeps are perfect for my Easter Project. Thank you so much.
Adorable!! I would love for you to share this at our HOPPITY EASTER Craft Party!
Just follow this link……http://sew-licious.blogspot.com/2013/02/hoppity-easter-craft-party.html
xoxo, Marti
anyone got a matching chick pattern?
I love these & wish my craft room wasn’t packed up (just moved & don’t have room to unpack it yet). I was thinking this would be adorable for a baby’s room!
I LOVE these and wanted to make some for Easter this year, but…. yeah…. I came up with a variation and shared it on my website: http://dandelionave.com/2013/03/22/welcome-spring-and-a-printable-freebie/
Wonderful! My grown daghter loves Peeps so with the Easter basket for my grandaughter I sent a little present for the girl!!
big
I just made these and they’re adorable! Thanks for the great tutorial.
Hi! Thanks for sharing this tutorial with the world! I just wanted to give you a head’s up that I’ll be linking to it from my blog (http://sewlindsaysew.wordpress.com) in a post about my ten favorite Easter-inspired projects! Happy Sewing!
ADORABLE! Thank you for sharing your idea. I’m always in a hurry so I put the eyes and nose on after the sewing was completed.
These are the most creative and cheerful banners! Love ’em!
So fun and happy! I might make a “no sew” version of these super adorable Easter bunny bunting! I featured this craft on my blog today. Thank you for the inspiration! 🙂
Literally good enough to eat!
thanks for that article, great advices for new users. i’m following most of the mentioned tipps thanks.
He managed to defend Albania from the Ottomans for 25 years before he died and eventually Albania was Anyone who plays EU4 knows he should be much