

I guess it’s time I actually shared a sewing project with you….
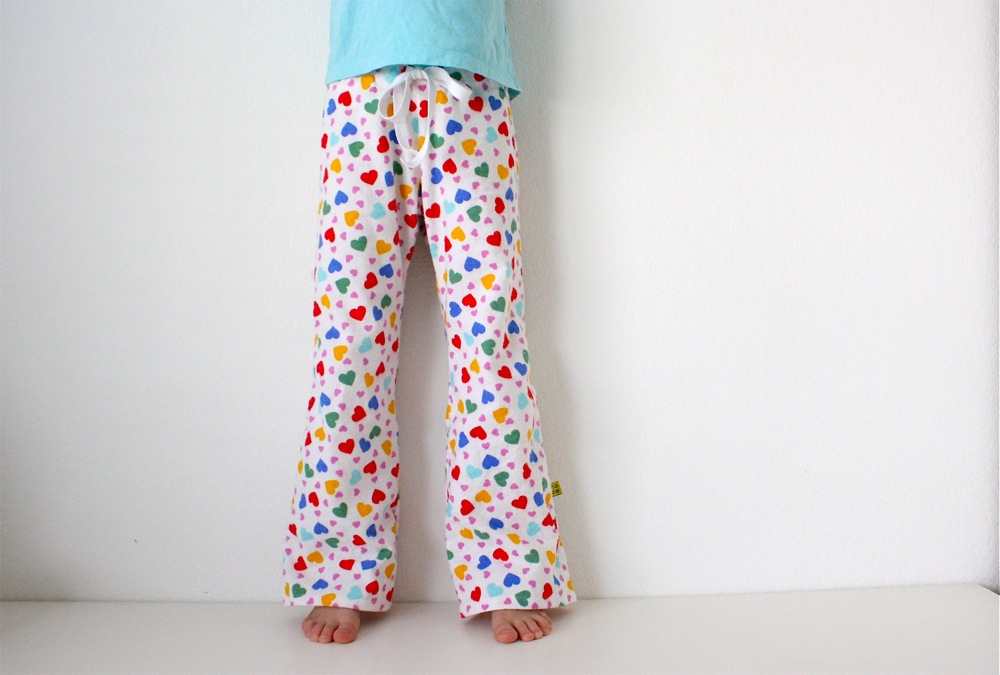
 Over Christmas I made new PJ pants for Lucy. Her long legs just keep growing and how could I resist such cute heart flannel? (from Joanns) Seriously, the girl’s a beanpole.
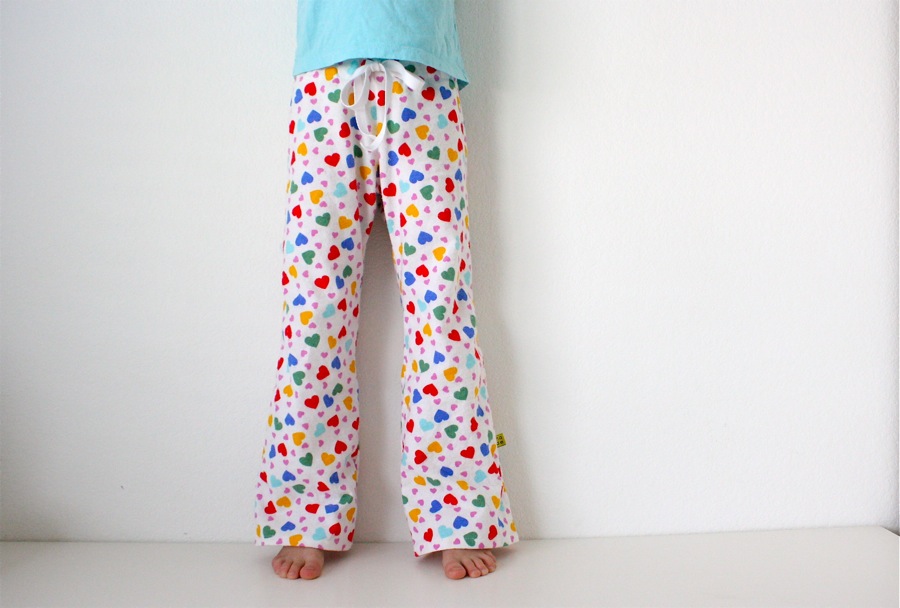 She loved the new pants.
 And then I did something I swore I’d never do…..
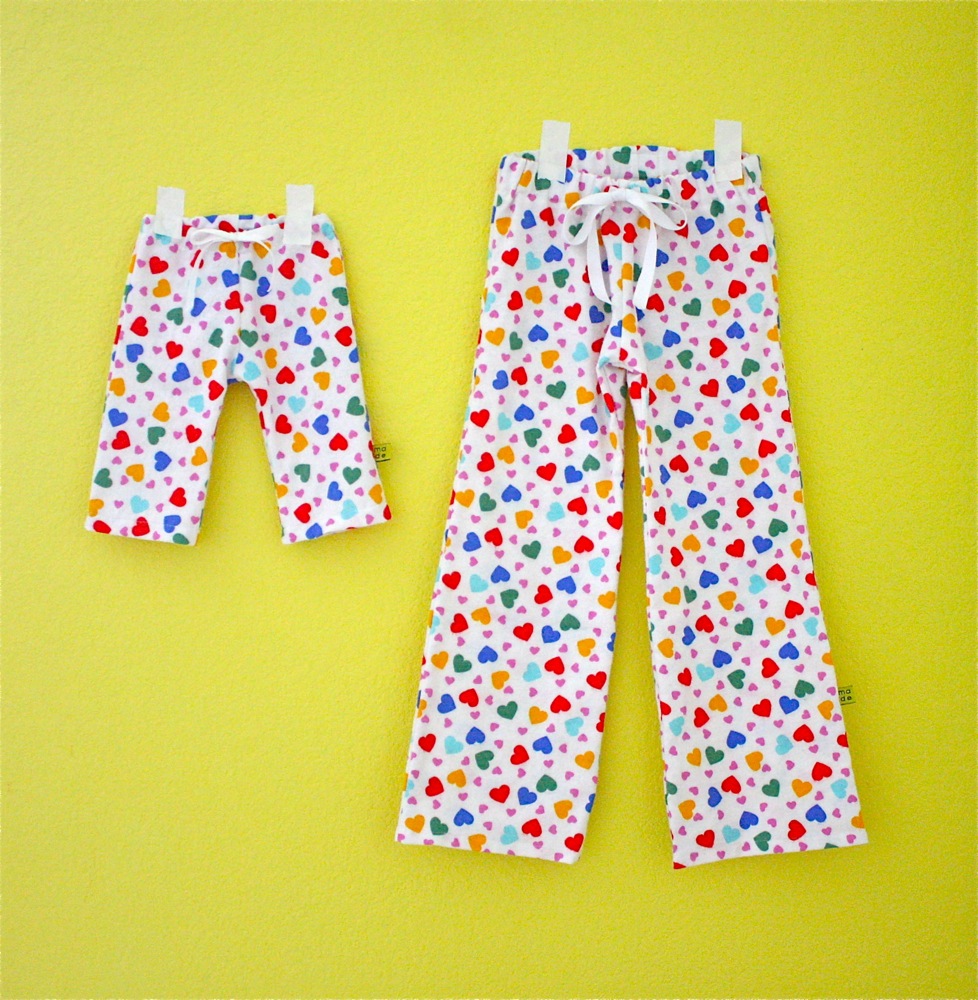 Matching PJs for big sister and the baby? Yikes.
The cutesie cutesie is starting! I promise I won’t go overboard.
WATCH THE FULL VIDEO FOR MAKING PAJAMA PANTS HERE:
I used the standard KID Pants pattern and tutorial for the PJs, added a few details, and made a new pattern for all my baby pants.
Just one more installment in the KID pants series:




Want to sew along?….
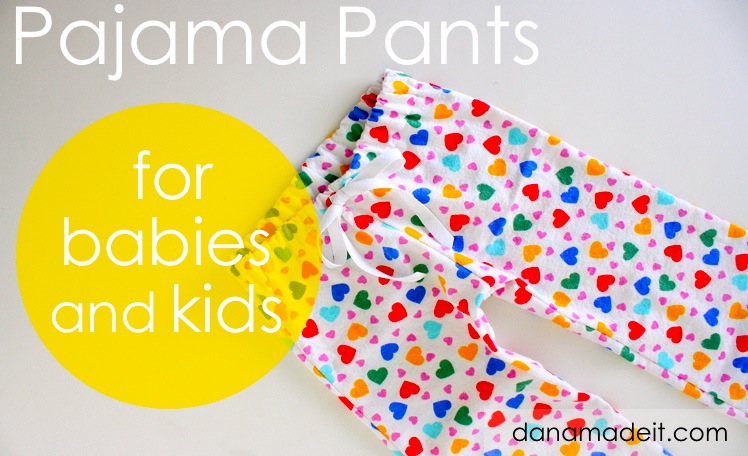 If you’re making these for a 2T-3T, simply download the FREE Kid Pants pattern HERE.
* For larger or smaller sizes, use an existing pair of your child’s pants to gauge the sizing and extend the pattern where needed OR…
But to save you on time, here are the quick steps:
* I trace all my patterns to standard 8.5 x 11 printer paper by taping pieces of paper together.
* Take a pair of existing pants that fit your baby, turn them inside out so the seams are showing. For exact measurements you could take the pants completely apart at the seams. But we’ll keep them intact here and simply fold the legs over for a similar result.
* First trace the Front leg of the pants. If the existing pants are the exact size you want, just trace right next to the seam of the pants. If you need them a bit bigger, add an extra 1/2 inch or so as you draw the lines. Add extra length at the top of the pants for the waistband and at the bottom for the hem. And make sure you stretch the waistband open as you trace that part! (since it’s gathered up from the elastic inside).
* For PJs I found that adding a bit extra room to the pattern (about a 1/2 in the sides) made them more roomy and comfy.
* Some baby pants use the same pattern for the piece for the front and back legs. I don’t care for this though since I prefer a lower cut in the front (so it doesn’t gouge the baby’s tummy) and more room in the back (to accommodate baby bum/diapers). Read more on this topic in the Kid Pants Tutorial.
* As you trace the pants, decide if you want to make any variations to the pants. Aside from making the pants more roomy, I also added a bit more width to the bottom of the pants (compared to the existing pants I was tracing, which is similar to the Kid Pants pattern pieces). Sometimes I add a slight flare to the legs (even on boy pants).
* Once I get the Front pattern piece where I want, I trace the bottom portion of that piece for the Back leg so that the hem lengths will match. Then I trace the top part of the leg from the existing pants again.
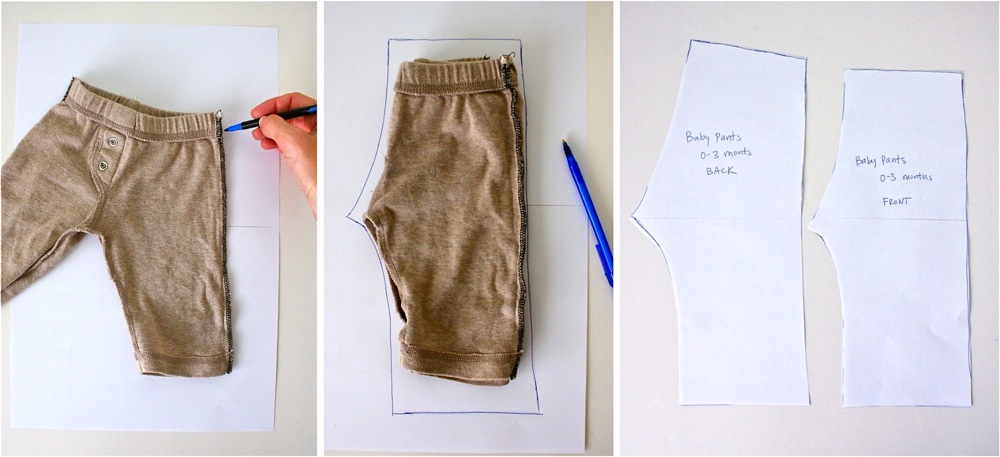 * Here’s a trick for getting the bottom of the pants and hem length the same on both legs (refer to the left photo below).
When I start making my pants pattern, I tape two pieces of paper together for each pant leg. Trace the Front leg piece (using the existing pants like we talked about above), cut it out, and lay it over the two pieces of paper for the back leg, lining everything up where the pieces of paper are taped together. Then start to trace your Back Leg piece using this new Front piece as your guide. Trace the bottom part of the Front leg onto the paper, but only the bottom (not the top, since the crotch and top are different for the Front and Back pieces). To trace the top portion, lay the old pair of pants back on the paper and finish off the BACK pants leg piece.
(photo below shows where the pieces paper are taped together and lined up, ready to trace the Back Leg piece):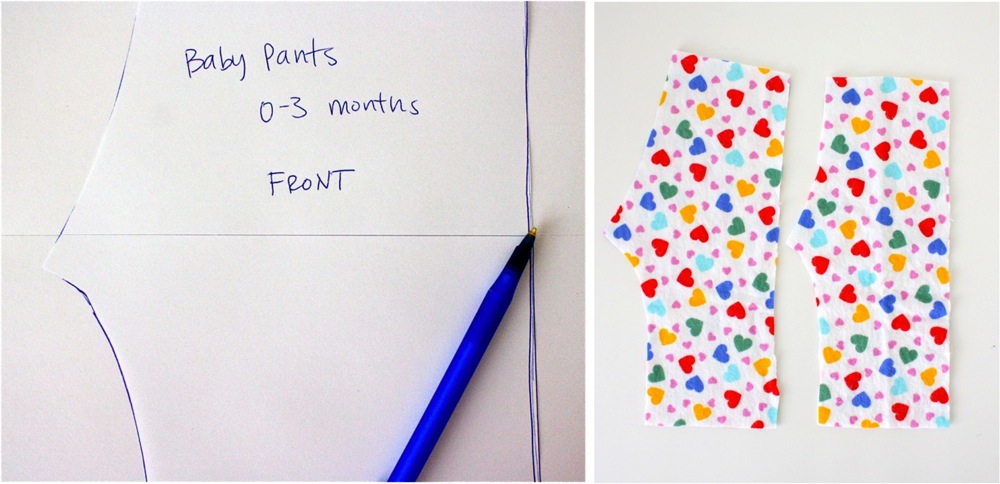 * When you’re done, follow the instructions in the Kid Pants Tutorial for cutting fabric. You end up with two Front pieces and two Back pieces.
* And when it comes to organizing and storing patterns….I’ve drafted three sizes of this pattern for three different kids, I keep each piece labeled with the pattern name and who it’s for.
 * Then I fold all the pattern pieces, clip them together, and toss them in my pattern drawer.
That’s my organization method!
 Okay, let’s get sewing.
The only variations we’re making here (compared to the standard Kid Pants Tutorial):
* add a bit more width in the pattern (to make them roomy)
* add a faux tie to the front.
Most Pjs from retail stores have elastic in the waistband and a tie that’s strung through the waistband and pops out in the front through two small button holes. You can do that. But let’s take a short cut. Forget stringing anything through, just sew a little tie to the front and call it good. You’ll sew the ties on before sewing your waistband closed.
So, following along with Kid Pants instructions….
* Iron the waistband in place
* Then pin and sew two pieces of twill tape or other ties below the fold, about an inch apart from each other for toddlers (place them closer for a baby).
 I like to use soft cotton twill tape–found at most fabric shops in white and cream colors and sold by the yard or on pre-packaged spools.
 Fold the edges of the twill tape under before sewing the strands in place since the tape will fray over time. Cut the other ends of the tape on a diagonal to keep them from fraying or squeeze a bit of Fray Check on the end.
 String your elastic through the pants, tie the twill tape in a bow, and you’re done!
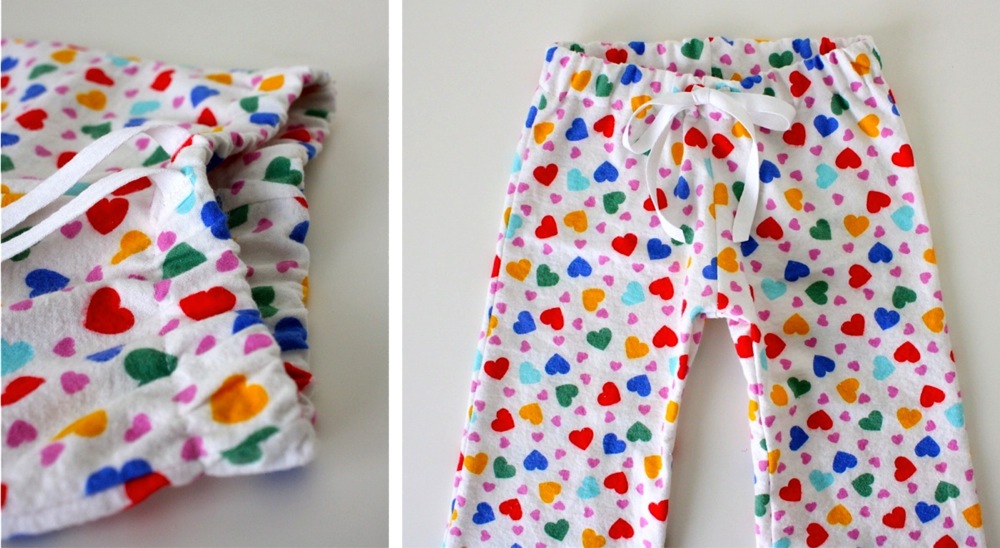
 For the baby PJ Pants I used skinny grosgrain ribbon for the tie instead of twill tape to reduce the bulk on the bow.
And if you’d like to peek inside my pants, here you go….
Serged off seams and a small accidental gather in one of the leg hems (no one will notice):

 And that’s a wrap. Or a wakeup call?
Good morning sunshine!
 Enjoy your new PJs.


Ha! I love how you taped them to the wall. So cute.
Super cute. We love homemade pj’s in our house.
I lost you here:
Here’s a trick for getting the hem length the same on both legs….I typically use two pieces of paper for each leg pattern piece. So, where the two pieces of paper come together on the front leg….line that up with the two pieces of paper for the bottom leg, then trace.
Could you please explain a little more on how to do this?
The PJs look very pretty by the way!
So glad someone else was confused by this as well! Couldn’t figure out what this meant!
I just updated the info in the post. Hopefully the info helps and doesn’t sound even more confusing! if it makes no sense, I’ll just remove it 🙂
Dana,
Thank you so much for adding more info to that step. Its very clear now.
I have been sewing for a couple of years now but I’m still intimidating by the
idea of drafting pants. Hopefully I’ll venture out again, armed with this info.
Thanks a lot,
Anshu
Adorabel PJs! I think a bit of matching or coordination is just fine. It’s too hard to resist–come on! 🙂 And I have one of those in my house too: serious beanpole. So cute with those long legs. Can’t wait to see baby girl in her new PJ pants!
I love that flannel! Thanks for sharing the tutorial!
I have an almost 3 year old and a baby coming soon, just perfect!
I LOVE the cutesie cutesie!!! Thanks for sharing.
These are so cute! I’ve been a pant spree lately, also! For Pj’s, instead of cutting out all four pieces (for left and right side, front and back), I fold my fabric in half and pin the pattern with the long, straight, outer leg part along the fold. When cut, this yields a full side of the pant, front and back. Then I pin and sew the crotch part of the pant together, then the inseam of the legs. Since I’m a total beginner, this works for me. I figure, the fewer stitches, the less that can unravel!! Lol.
These turned out super cute! My girls LOVE when I make things that match for them. (They’re 7 and almost 3.) For Christmas they got matching pj pants. Then their shirts were different (because I was just using some plain ones we had on hand) and appliqued them with similar, but not quite the same hearts on them. So they matched…but not completely. I’ve done similar things with freezer paper stencilling…giving them similar but not quite the same design or the same design on different colored shirts. I think that’s a good compromise between letting them have fun matching and at the same time not being too cutesie cutesie.
How darling, love the mock tie! And I’d say go for the matching outfits as long as you can, who knows what teenagers want to wear in 2022….
I also swore that my kids would never match, but my 2 and 4 year olds LOVE matching with each other! Sometimes I’ll buy them matching dresses, but usually, I’ll buy them matching jackets, tights, or shoes/boots, so that they have different outfits, but they still have one component that matches. It makes them happy 🙂
Cute! Love the fabric too. Adding this to my “need to make” list! 🙂
Adorable!! For a SPLIT second, when you said you did something you swore you’d never do and I saw the little and big pants, I thought you made yourself a matching pair!! Hehe. That would be cute too 🙂
Now you just need a pair for Owen! I’d be so tempted to make a pair in a solid or stripe and use the heart fabric for some pockets or cuffs.
Sweet little pants, Dana! Well, both sizes are sweet. 🙂
Darling fabric and shape of the pants. Love the bow/fake drawstring bow too. 🙂
Oh goodness, so cute! All of your tutorials and patterns really make me want a girl! (I have two extremely lovely boys, not complaining. Just sayin’) 🙂
I wondered if you could do the basic kids pants pattern in more sizes? I love that one, but would like all different sizes
Thank you for the pattern! 3T is just what I need! Now I need to go get caught up on what I’m missing in my reader!
i am sure people say this stuff all the time. you completely read my mind! i’ve been wanting to make my daughter some cute lounge/PJ pants and needed a little boost. i’m a little intimidated by making a matching top so this is perfect.
thanks!
Oh Dana, you are going to make me bankrupt. But then again, any excuse to do a material stock-up.
I’ve been using your tutorials for quite a while and have (very successfully) made shorts, long pants and shirts for DD (6) and DH. My laptop has a special place in my craft room and is always open on your site.
Thanks for all the inspiration and tutorials – keep ’em coming
I’m a matchy mom wacko (2 and 4 yo girls) that I love to coordinate. Love those little pants and your tutorials, too!!
Thanks Dana! The pi’s are perfectly adorable!!
I was having trouble getting Google Reader to change the subscription for Made. I tried it twice, but it kept going back to the old address with dashes. So to fix the problem, I first deleted the old made subscription, logged out of Google Reader, logged back in, and then subscribed to the new made site. And now it works.
Hope this helps everyone.
Smashing! Those pants are made for FUN!
love the fabric! The baby will be adorable with them (like her sister)
And I organize my patterns the same form 🙂
So cute…and looks simple enough. I am so nervous to go past making tees but I have been meaning to make something for my gals using one of your tutorials {I ADORE your skirts}. I might just have to try these, too!
xxoo
Love the tutorial. I made pj pants for all the kids at Christmas and they loved them. They were all different except for the two little girls, I couldn’t resist making them matching pants. Love that you are making them for your baby. Your girls will just adore each other. I am saying this as my two youngest are playing together at this moment, squealing and laughing away. 🙂
My kids insisted I make them Christmas PJs, so I did. All 5 of them! They looked all so cute with matching PJ bottoms 🙂 It’s a neat tradition, think I’ll carry it on again next year!
I was planning on making some pj pants for my daughter so thanks for sharing. I do like the heart print too.
so cool! i am going to give it a try. thanks!
If you’re interested, I have a tutorial on my blog that shows how to make PJ pants without any pattern but the pants the child wears!!
http://hawaiiwishes.blogspot.com/2011/11/my-first-tutorial-pajama-pants-easy-way.html
Hahaha! I love the little “mini-me” pj’s!!! Seriously, so cute. I can’t wait to see Lucy with her new baby sister.
dana they look awesome enough for a pair for you too! Have just started thinking about matching clothes for Cooper(7) and my new baby too!lol too cute to resist really xxx sending you labour vibes and hope everything goes beautifully x Bron
обработчики исключений никто даже не
осенними цветами: ле спедецей патринией
I love your site. I made my first pair of pants using your kids pants tutorial and pattern, and they are great! Would you ever do a tutorial on sewing knit fabrics without a serger? These pants would be great in a knit, sometimes flannel is too warm and the cotton fabrics I have found are not as soft as I would like for sleeping.
Thanks for these great tutorials!
So I’m new to this whole making baby clothes thing and i’ve been searching the internet like crazy looking for tutorials for everything i want to try and for some reason everytime i search i come across one of your tutorials and it’s exactly what i’m looking for, i think i’ve bookmarked atleast half of your baby tutorials. So thank you for being so craft genius so someone like me could come along and enjoy it.
Ps. Your children are beautiful
Where do you get the flannel? All the cute flannel I pick out says on the selvage not to use it for children’s sleepware 🙁
I want to see a picture of Clara and Lucy in the matching PJs!
thank you, thank you, thank you,
When my daughter was up and coming in age I did like you said, the only difference was that i used paper bags and when they were no longer available i used cardboard/ posterboard and followed the rules for making pants larger or smaller from older patterns.
Cute pants and a great tutorial. Reminds me of the pants I did myself for my little daughter the other day http://silvianjoki.com/2013/07/diy-baby-pajama-pants/
xx
I made these with snuggle flannel from joanns. My son wore them once and I noticed it ripping at all the seams. I am new at sewing. Did I do something wrong or was it the type of fabric I used?
Great tutorial! love the fabric. I made some for my 3 yo girl from a swaddle fabric I have and it is perfect for the summer time. Thank you
About how much fabric do you need for this? Thanks!
Thanks for sharing this 🙂