

Tired of baby losing her binky? Making a pacifier clip is easy!
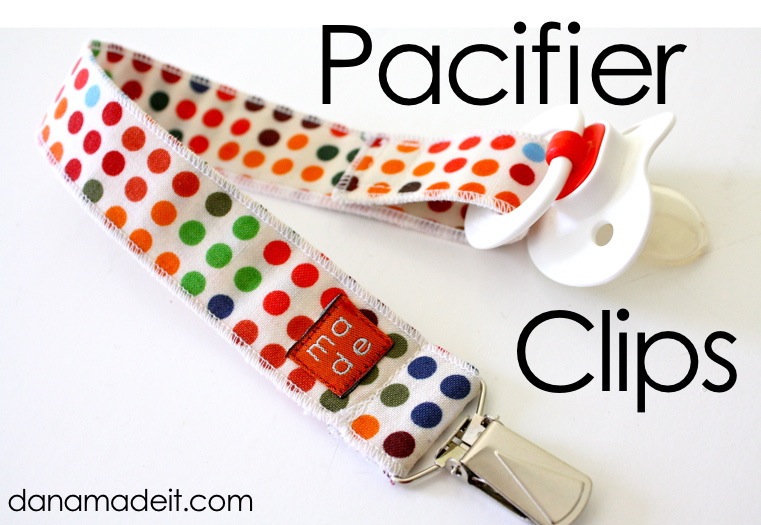

And once you’ve made one, you’ll want to make 20. They’re the perfect accessory for any baby shower gift. The clip easily attaches to a carseat, shirt, or stroller.
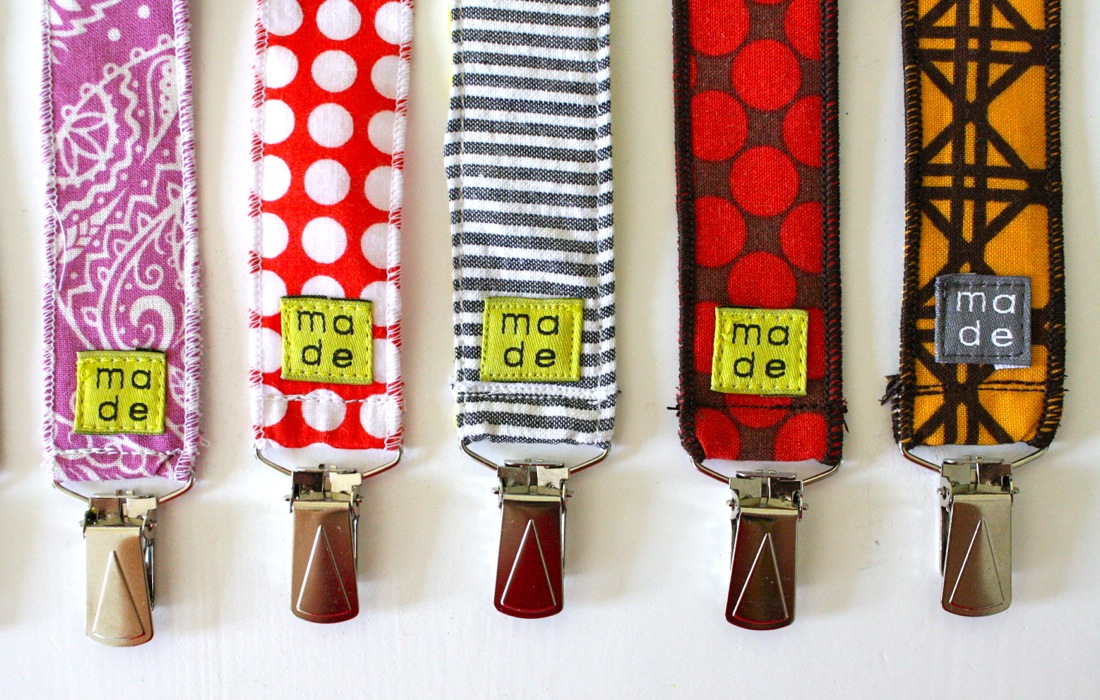

And the pacifier pops right into baby’s mouth.

Life just got a whole lot better.
Let’s get started!
You can easily make pacifier clips using existing ribbon, twill tape, or canvas trim.
But today we’re using fabric and we’ll show you two methods: with a Serger and with a standard machine. * Don’t fret if you don’t have a serger! Both ways look cute and tidy.
SUPPLIES:
• Rectangle of fabric cut to size 14 x 2 1/2 inches (14 x 2 1/4 inches if using a serger).
Cottons work best – simple cotton, seersucker, corduroy, denim, etc.
• 14 x 1 1/8 inch rectangle of interfacing (sew-in type, standard to lightweight, nothing too heavy. Iron-on adhesive can be used but you’ll need to improvise the cutting/ironing steps a bit)
• Small piece of velcro
• Suspender/mitten clips (like these)

SERGER METHOD
–Even if you plan to use your standard machine, read these instructions first–
• Cut fabric and interfacing rectangles. If you’re using a
heavier cotton or corduroy, omit the interfacing. It simply adds
thickness and strength to your fabric part of the pacifier clip.
• Your fabric rectangle should be 14 x 2 1/4 inches. It will eventually
be folded in half to make a 14 x 1 inch long ribbon. The interfacing is half that width and will only be a single layer.
Now, instead of cutting the interfacing piece separately, Ive found that this is the easiest method…
First cut your fabric rectangle. Then cut an interfacing rectangle larger than the size needed. Fold/iron the fabric in half, sandwich the interfacing inside, then trim the excess interfacing from the edge of the fabric.
Now you have a fabric sandwich with a single layer of interfacing inside. Perfecto.
• Place your serger on a “roll hem”. If you’ve never done one it’s very easy! Look in your manual for the settings.
• Serge down all four sides of the fabric with the roll hem, trim the tails, and dab a bit of fray check on the corners to keep them from unraveling.
• Separate your piece of velcro and sew one part to the end of the fabric. Then sew the other part about 3 inches down (wide enough to hold a pacifier inside when folded and velcro’d together.)
NOTE: You will see the bobbin stitching on the outside of the fabric, so use a thread color that blends in.

Now attach the suspender clip.
• Thread/loop one clip through the other fabric end (the end without the velcro).
• Fold it over about 1 inch and sew the end in place.


And you’ve got some cute looking clips.

Now churn out 20 more and your gift pile is stocked!


NOTE: If you’re having deja-vu-tutorial on this….yes! I shared it two years ago on Sew Mama Sew but never shared it here on MADE. So this is the new and improved (and consolidated) version. I’ve added it to the Celebrate Baby archives page as well.
Enjoy!










Oh man, this is just about 17 months too late! 🙂 I always meant to make one when Oliver was born but never got around to figuring it out and now I figure what’s the point? Those pacis sure disappear like crazy though!
I remember this from sew mama sew! This would also be a great way to attach toys to blankets, or even make those nursing straps. Neat tutorial!
I love them!
You can also make these very easily out of grosgrain ribbon. It’s very strong and won’t fray along the edge, so there are fewer steps.
Whilst I don’t want to give the impression I am at all critical of your fabulous tutorial ( I LOVE your website), it is also worth noting that the longer the length of the fabric or ribbon, the higher the strangulation risk. So to everyone reading this: please don’t leave these attached to unsupervised or sleeping bubs. 🙂
What a good point Eliza! I have made a few of these for friends and had not considered the strangulation risk. I didn’t make them any longer than 14″ tho (before the fold at the end, so I guess closer to 12″) so hopefully they’re safe.
I love this tutorial! I’ve been making these since I saw it on Sew Mama Sew and I make these for every baby shower that I go to. It makes me happy to see the babies in my life actually use them, they are great! Thanks for your awesome ideas Dana!
Our baby doesn`t take pacifiers … but I will of course make some as gifts! Thank you very much for the tutorial! 🙂
Funny how we always forget that we can easily make so many overpriced things from the store! Super cute and I love the fabrics you chose. Pinning!
I like the way you make these Pacifier Clips but I am not sure the fray check is safe enough. The babies chew everything and the glue can be toxic.
These are adorable but strangulation is a concern. In Canada they are regulated and cannot be longer than 7 or 8 inches.
Thanks for this tutorial, I’ll do it for sure….. when I’ll have time !!!!
Marion
So cute! I made mine using ribbon & snaps because I love things that take me 60 seconds to make ahha
The second I read this yesterday I grabbed the supplies from my stash and made two. We always used something similar with my son when he was in the stroller. They were so important to make sure the binky didn’t end up on the ground or floor of some gross store. So easy! Thanks for the tutorial!
This is actually the tutorial that lead to discovering your blog!!
Que bonitos Dana. Las telas son maravillosas.
Gracias por compartir el tutorial.
Besos.
Lola.
I made some for my son using various types of ribbon. He loves to stuff his binky strap in his mouth…and I found they got stinky when I used fabric for them…ribbon can be easily rinsed out and dries pretty quickly! I’ve used grosgrain ribbon too but found it can be stiff if you double it up (which I prefer to do) so I found some really cute 3/4″ satiny ribbon and he loves it and I was able to sew it together and it’s still really flexible. Because he likes to stuff it in his mouth I also had to shorten mine so he wouldn’t choke on it but over all, easiest thing ever to make and super cute. I even made some for my niece and she loves hers too. Thanks for the great tut.
Are these clips the same ones as what you use to clip the corners of bottom sheets together? Would they be cheaper (sold in set of 4, 2 clips on each) for about $12 here.
how cute are these? I just love your choice of fabrics and that they’re so useful!
I finally made some of these for some friends who are having babies. They were super easy and cute too.
14″ is a Strangulation risk! Finished product must be under 12 inches to minimize strangulation risk in children under 3 years of age. A good tutorial, but please keep safety in mind, especially if making these as gifts.
If you look at the instructions they do not end up being 14 inches long after you attach clip and take in account the velco.
Thank you for this! 😀
SO cute! Where do your purchase your fabric from??
These are adorable! Where/how did you make your little MADE tag? It’s adorable!
This is such a sweet idea along with a burp rag tutorial I saw that you made. I have a question though, do you wash the material before cutting and starting the project?
Typically yes, but with a project this small, it won’t really matter.
Have fun sewing!