Growing up in a large family, specialty foods were rare. So for Christmas each year one of our gifts was a food item…..and we didn’t have to share it with anyone. Dreamy.

The zippered pouch concept is simple. I added a few twists/embellishments which will be shown in the tutorial here. But if you’re looking for the basics, just leave it simple and omit the ruffle, pleather fish, vinyl, etc. Then fill them with candy, toys, or even snacks for the movie. Little zipper pouches are easy to make and once you get going, you may become addicted.Skill Level: Beginner
Needed:
* Two fabrics (2 rectangles of each, cut 8×6 inches or 10×6 inches – or any desired length)
* Zipper: 7-inch or 9-inch
* Vinyl (optional)
* Pleather (for fish)
* Additional embellishmentsThe two pouches explained in this tutorial are:
* The Ruffled Pouch * The Fish Bag

Ruffled Pouch:
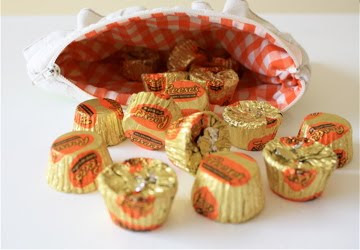
Filled with Reese’s Peanut Butter Cups, this bag is just my flavor and style. I left the inside of the pouch simple (without vinyl) but added a girly ruffle to the outside:

Let’s get started! Pick two fabrics and pick a zipper color. The length of your zipper will determine the length of your bag. The bag can really be any size you want, but the length of your pieces should be the same length of your zipper from one end to the other (SO…. if your zipper is called a “7-inch zipper”, your bag pieces should be appx 8-inches long. This will run the entire length of the zipper from end to end).
The ruffled pouch was made with a 7-inch zipper. The Fish Bag was made with a 9-inch zipper.
Using a rotary cutter or scissors, cut two rectangles of both fabrics (in this case, 8×6 inches for each piece).
 I recycled a ruffle from one of Lucy’s old pillows. Make your own ruffle, use some ruffled quilt binding, or just leave your pouch plain:
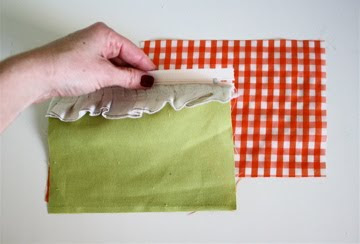
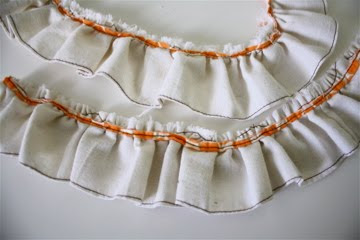 If you choose to make a pouch without a ruffle, lay your INSIDE fabric right-side UP, lay the zipper on top of that and lay your OUTSIDE fabric right-side DOWN, like a sandwich:

 If you’re going to add a ruffle, sandwich it right inside, on top of the zipper:
 and pin everything down:
 Change your standard Presser Foot to your Zipper Foot. Mine looks like this (looks like the normal presser foot with half of the foot missing):
 Sew all the way down, keeping the foot as close as you can to the zipper inside (so everything is nice and tight):
 Use your fingers to pull it tight the whole time:
 When you’re done, the bag should look like this, with the ruffle and zipper stuck in the middle:
 Sew a few lines down your ruffle to help it lay flat. I sewed about 4 lines (spaced about 1/4 inch from each other). The lines are for function and also for added decor:

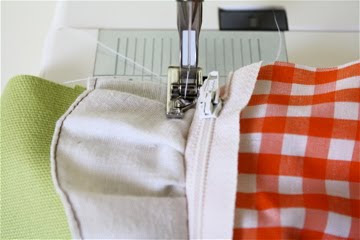
 Your pouch should be looking like this:
 Taking your sewn piece (just as it looks above), sandwich it between the remaining fabric pieces (just as you did in the first steps). Don’t forget to add your other ruffle piece in there:
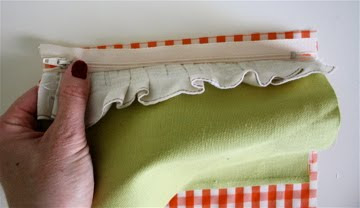 Pin and sew it all down:
 Sew a few lines of topstitching (as shown above) to keep your ruffle laying flat:
 It should look like this:
 For the remaining steps, make sure your zipper is 3/4 of the way zipped OPEN (or you’ll never be able to turn your pouch inside-out). Line the zipper parts together (like this):
 Put both the Inside pieces back-to-back and put both the Outside pieces back-to-back and pin all the way around. You’ll need to leave an opening at the base of the inside pieces so that you can turn it inside-out. I like to pin my start and stop points with double pins:
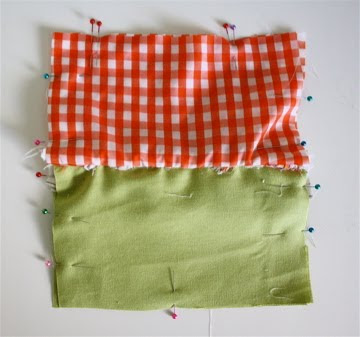 Go to your Starting Point:
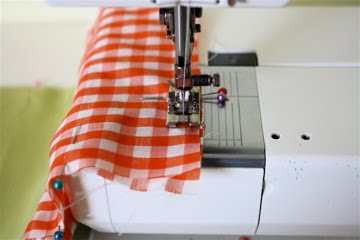 and sew all the way around to your stopping point:
 Trim the corners:
 You should be able to see all the way through your bag, like this….with your ruffle in the middle:
 Pull it Inside-Out and make sure to push all your corners out:
 Like this:
 Pin the opening on your inside piece closed:
 And sew it shut:
 Push the lining piece back inside and…..you’re done!
 Fill her up with treats and toys!
 ———————————————————
The Fish Bag:
Made for the Swedish Fish lover in your family, this bag is lined with vinyl inside so that sticky treats can easily be cleaned up. The real catcher though is the school of pleather fish sewn on the outside.
 Let’s get started!
Find a zipper length that accommodates your bag of candy. I used a 9 inch zipper and cut my rectangles to be 10×6 inches:

 Clear Vinyl can be found in most fabric stores. It comes in varying weights and usually comes on a large roll, with paper in between (to keep it from sticking to itself). You can buy it by the yard for fairly cheap ($1-$2/yard). I used a medium-weight clear vinyl and cut two rectangle pieces, the same size as my pouch:
 When you get ready to assemble your pouch (as outlined above in the Ruffled Pouch), just lay a piece of vinyl on top of your inside pieces and sew them together with the rest of the bag:
 NOTE: Sewing with Vinyl can be a bit annoying because….
A: It sticks to your presser foot and machine plate (so you have to TUG it through while you sew, trying not to break a needle).
B: It makes your bag a bit stiffer to work with as you turn it inside out.
But….it looks really cool when you’re done! I love my vinyl-lined pouches best.
SO….to combat the sticky vinyl problem, Ashley from Lil Blue Boo recommends sewing a piece of tracing paper on top of your vinyl (and then tear it off when you’re done). I’ve also read about sprinkling a small amount of baby powder in-between two sheets of vinyl. Check out 3 great tips for sewing with vinyl HERE.
To sew fishies on top:
Draw or print out a fish pattern. Trace your fish on to a piece of pleather, vinyl, leather, whatever you want! You’ll usually find the pleather in the upholstery section of your fabric store, on large rolls. Arrange your fish in order:
 and sew each one down with just a straight line:
 It’s best to sew your fish on in the FIRST step, before you start assembling your bag.
Then follow the instructions above for the Ruffled Pouch and create your Swedish Fish bag:
 YUMMM.
Other variations on the candy bag:

A knit ruffle on the outside:
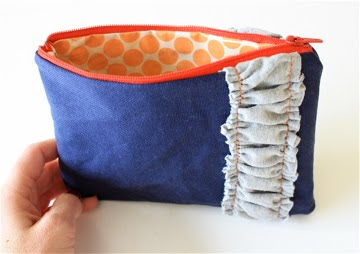 vinyl-lined dot fabric inside:
 and plenty of colorful licorice, of course:

Need a gift for Dad? How about a candy bag he can take to the office (for an afternoon snack)?

Also lined with vinyl, if the chocolate melts in his bag (and not in his mouth), the clean-up is easy:

Happy Sewing! (and happy munching)




Love this it is a great idea. I have a suggestion for you to try out the next time you sew with vinyl. I make matching diaper bags and changing mats for family whenever there is a new little one born and I like to use vinyl on my mats for easy clean up should there be a mess ^_^. I have found that if I put a piece of scotch tape on my presser foot it makes it smooth going over the vinyl. Working the tape so that it will not hinder your needle may take a little practice (I cut a small slit where the needle can pass thru) but it is well worth it.
veryyyyy niceeee
woa, great ideas.
Thanks for the tutorial, I made a couple of cute pencil cases.
I’ve been making these little bags for a long time, but never tried lining them with the vinyl. I just bought some, too – now I have a project to use it on! 🙂
I would be sort of squeamish about putting food in there unless it’s food-safe material.
Used this tutorial to make a big hanging wet bag that’s lined with PUL! It’s awesome! Thanks!