I’ve wanted to do this for a year. So I finally did.

I took the Beach Robe Pattern….

….and turned in into a cozy House Robe!


And Owen loves it. Remember his thing for soft textures? A sure win here.
Now you can easily use the Beach Robe pattern as-is, using bias tape to bind the edges. I even found some white fleece bias tape at Joann’s which would be super soft. But I wanted the robe to be more “finished” and look like a real House Robe.

So I adjusted the pattern pieces by extending the fronts, extending the hood, extending the sleeves and folding the fabric over to finish off the raw edges, giving it a nice chunky hem all the way around. Here’s how you do it….

We’re going to tape extra paper to each of the 4 pattern pieces and draw new lines (which might sound overwhelming but we’ll make it easy). When we’re done, the original pieces will look like this:

I’ll be working with the LARGE size robe from the pattern (you’ll need to purchase the pattern to follow along with this tutorial below). You can use the same steps to adjust for the other pattern sizes as well (you’ll just need to use smaller measurements for your adjustments)
Okay, start with the Front pattern piece since it needs the most tweaking (the other pieces are faster). We want to extend the entire front lapel so we can fold it under at the edges. So….

• Tape 4 pieces of paper together (left photo above), then lay the pattern piece over the paper and tape it down as well. This gives us space to extend the pattern (middle photo above)
• Using a ruler, mark 2.5 inches out from the front lapel of the pattern (right photo above), move your ruler up a bit and place another mark, then continue making marks 2.5 inches from the pattern edge all the way up until you get to the letter (A) on the pattern and stop. You’ve created a dotted line so that we can redraw the new pattern line.

• Draw a new line along the dotted marks until you get down to the bottom of the pattern piece (left photo above).
• Then continue drawing the line down in a shape similar to the pattern piece and square off the corner, rather than a rounded corner like the original pattern piece (middle photo above).
• Extend the length of the robe as well so it’s longer like a house robe. I extended mine 9 inches but you can do any length you like (right photo above).
Now let’s fix the top of the Front pattern piece:

• Lay the bottom of your ruler on the top curve of the lapel, measure out 4 inches and place a mark (top left photo)
• Draw a line out from the neckline to this 4 inch mark (top right photo). The line is going to angle up a bit. This is normal and will make more sense when we fold the edges of the fabric under in a later step.
• Finally, draw a line from the 4 inch mark down till it meets up with the other line you drew in the previous steps (they’ll meet up at the letter (A) (bottom left photo)). You want to curve the line slightly as you draw.
• You have a new extended pattern piece! Cut it out along your new line and the Front piece is ready to go (top right photo)
Now, tape 2 pieces of paper to the Back pattern piece, extend the length 9 inches (or whatever length you’ve chosen for your robe) and draw the side of the pattern piece down as well (left photo).

• Tape paper to the sleeve piece and extend the length 2 1/2 inches. I also chose to flare the sleeve out a bit more than the original pattern, maybe an extra 1 inch wider at the bottom (middle and right photos above)
• Cut out your new pattern pieces and you have a new Back and Sleeve piece!
Final step, let’s extend the Hood piece:

• Use your ruler to place marks 2.5 inches from the hood opening, creating a dotted line like we did above with the Front pattern piece (left photo). Start at the top of the hood and stop when you get to the letter (F) on the pattern.
• Then draw a slanted line extending the bottom of the hood piece 4 inches (middle photo).
• Draw a new line connecting the dotted line marks and angling it out to the 4 inch mark at the bottom (right photo).
• Also note how the top of the hood is drawn in the right photo and do the same.
Okay, pattern pieces are done!
Now let’s make a robe!
I’m using a very soft, fluffy, minky-like fabric from Joann fabrics. It’s a messy fabric with edges that must be bound or finished-off. You can also use Fleece fabric or other cozy fabrics you find. I’m using the plaid flannel fabric (from Owen’s big stick pjs) for the hood lining.

Follow the pattern instructions to cut out your robe pieces, using the new pattern pieces we created above. When cutting the hood lining fabric, however, use the original size pattern piece.

(Refer to the photos below)
• Sew the robe hood (as outlined in the pattern), then sew the lining hood, then place the lining inside the robe hood, pin both hoods together along the bottom of the hoods, and baste sew them together along the bottom. The lining hood will be smaller, leaving about a 2.5 inch border of robe fabric on the sides of the hood. This is normal.
• Continue sewing the robe according to the pattern, sewing the Fronts to the back, the hood to the robe, and the sleeves/sides of the robe.
• For a nice finishing touch on the hood, pin and sew a piece of bias tape along the exposed seam where the hood meets the robe:

Now let’s hem the Bottom of the robe.
• Use your hands to fold the fabric over a 1/2 inch, then fold it over another 2 inches to give the robe a nice chunky hem. No need to iron….just eyeball it.
• Pin the hem in place and sew it in place:

Hem the sleeve cuffs using the same method.
However, it will be easier if you sew the edges over a 1/2 inch first and then fold them over 2 more inches, pin, and sew in place:

Your robe should look like this. Now we’re going to hem the entire edge and hood of the robe:

• Start at the seam where the hood meets the neckline. Fold it over 1/2 inch, then fold it over again into the robe 2 inches, covering part of the plaid lining and enclosing the raw edges of the twill tape we sewed to the hood seam, and pin it in place.
• Then continue doing this all the way around one Front lapel, around the hood edge, and down the other Front lapel.

You should have the edge of the fabric pinnned all the away the robe. Now sew it in place along the dotted line show below:

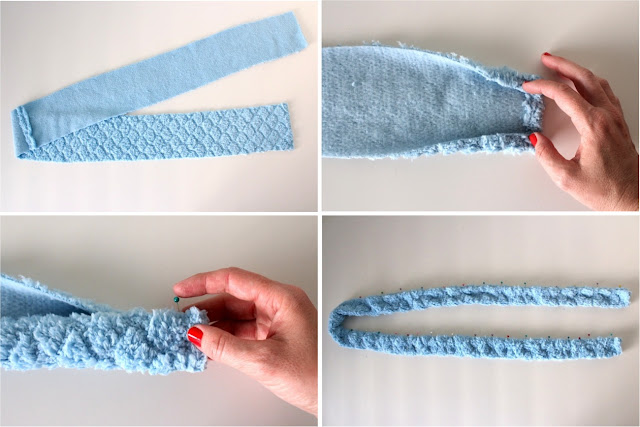
Lat, create a tie for the robe by cutting a 5 x 60 inch strip of fabric (or (2) 30 inch strips sewn together). Fold the ends over a 1/2 inch and sew them down. Then fold the strip edges over a 1/2 inch and fold the strip in half so the two edges meet. Pin it down the entire length of the strip and sew it together. Then sew it to your robe.
And you’re done!
Get cozy in bed reading the morning paper….(or checking your Angry Birds score).
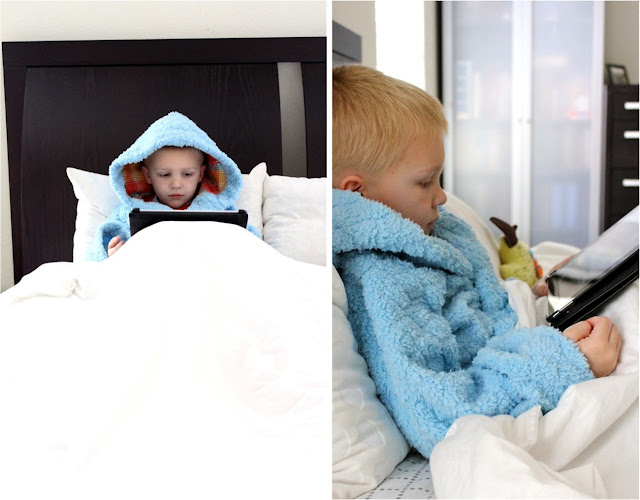

And you’ve got one happy boy who looks like a Muppet.
I love patterns that have multi-uses. Good for the winter; good for the summer.
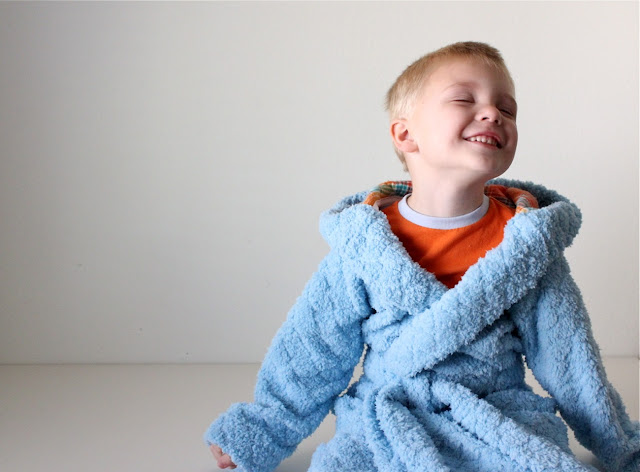
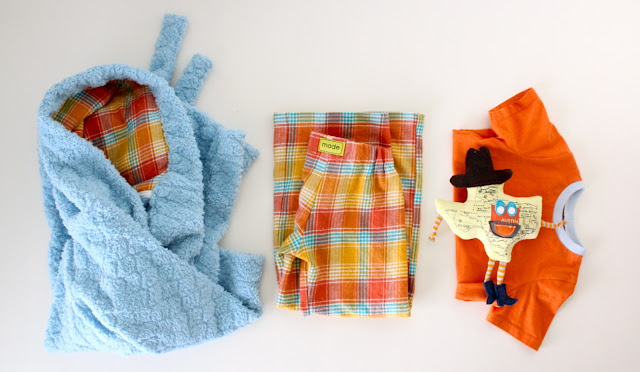
You can purchase the Beach Robe Pattern HERE. Then throw it together with some jammies and Favorite T-shirt Buddy and you’ve got an entire ensemble (or future gift idea!)
Now head over to Made by Rae for two BOY posts! First Say YES to Bold Prints and then some totally rad Tuxedo Striped Pants. Love!
————————————————————-

This is part of Celebrate the BOY, a series hosted by me and Made by Rae.
Here’s what we’ve done so far:
DAY 1: Dana: 5 Steps to the Basic Tee • Rae: Saffron Pants and Color Roundup
DAY 2: Dana: Pants Roundup • Rae: Little Bit of Color Hoodie
DAY 3: Dana: KID Pants with Back Pockets • Rae: Little Bit of Color Hoodie
DAY 4: Dana: 13 DIY Fabrics • Rae: Show your Stripes Turtleneck
DAY 5: Dana: Favorite T-shirt Buddies • Rae: Stripes Rule Roundup and Celebration Garland
DAY 6: Dana: Big Stick Pjs • Rae: Fox Tee
DAY 7: Dana: Beach Robe to Cozy House Robe, Pattern Remix • Say YES to Bold Prints and Tuxedo Stripe Pants
• Keep adding your own BOY projects to the CTB Flickr Group!
• And check out the Archives for additional projects





fun and fuzzy! love it.
Oh my goodness, that looks amazing. Can I have one? Lol.
That looks so comfy. I could use one of those robes to keep warm. Very nice.
how funny, was just looking at my sons dressing gown and was thinking i needed to make a new one, and ill go onto Dana’s website and look at her beach robe pattern!! too weird, now i defiantly have to make it! cheers Dana it looks ace!
Perfect timing! I was just thinking yesterday about making a new robe for my son. This would be perfect for wearing after his bath.
Supercute. Great post!
I love how cosy this looks! And Owen looks like he’s loving it too!!! 🙂
Darn, just finished making fleece robes for my darlings a few weeks ago. I kind of wish I had seen your tutorial first though, because I love how the chunky hem finishes it off. What a fun project!
Very cute!! Love the plaid!
Oh my gosh, I’m just obsessed with everything you do!! Can’t wait to try this out! I have big plans to make the beach robe for my daughter this summer! Thanks!
Oh my man. My boys so want a robe right now. I have been looking online…this one is so perfect for them…hmmm…not sure I should make this my first sewing project in forever on a new machine…but it would be so perfect!
This looks so cozy! I want one for meeee! Great job Dana and cool find with the fleece bias tape.
Really cute! You can tell how much he loves it!
Oohhh I love this! And even though I just made that corduroy robe, I’m thinking it might be awesome to make your beach robe fully lined with terry cloth for summer swimming! Maybe outer and inner are both terry cloth so it’s lighter than towel? Hmmmmm….you’ve got my wheels turning.
Super cute! Wow…you have been on sewing marathon lately!! Go girl!
I am IN LOVE with this robe! Do you ever sell the things you make? Do you have an Etsy page or anything like that?
Lovely! I really like that you lined it with the flannel that matches the pjs, very nice design. Your sewing is beautiful.
I was wondering….could I follow this tutorial (about adding the inches to the pattern) to make a bigger beach robe for my son? I bought the pattern, but I’m afraid it’s going to be too small for him. Do you think this would work, as long as I sew it according to the beach robe tutorial, using the bigger pattern adjustments?
I love the beach robe pattern! And this tutorial is great. My son likes to wear his beach robe in the mornings if he is cold, so I definitely want to make him a real house robe by the time fall comes and the house is *actually* cold in the morning.
And PS, I realized that if you made this pattern out of a thin brown knit and used a separate belt, you’d totally have a Jedi costume. Boom!
Love the robe! All of your projects are awesome to me. Wish I had seen this a week ago. Made my great granddaughter, 19 months old, a purple one with house shoes to match for her Christmas present. Never thought of making the front facing part of the front of the robe instead of a facing. For sure, will use this idea in the future since I have another great grandchild due in May. Thanks so much.
Hey I know this is off topic but I was wondering if you knew of any widgets I could add to
my blog that automatically tweet my newest twitter updates.
I’ve been looking for a plug-in like this for quite some time and was hoping maybe you would have some experience with something like this.
Please let me know if you run into anything.
I truly enjoy reading your blog and I look forward to your new
updates.
This what I was waiting for years looks very cute and amazin , I will make one for my grandson. Thankyou