
Remember that little ole house we’re building?
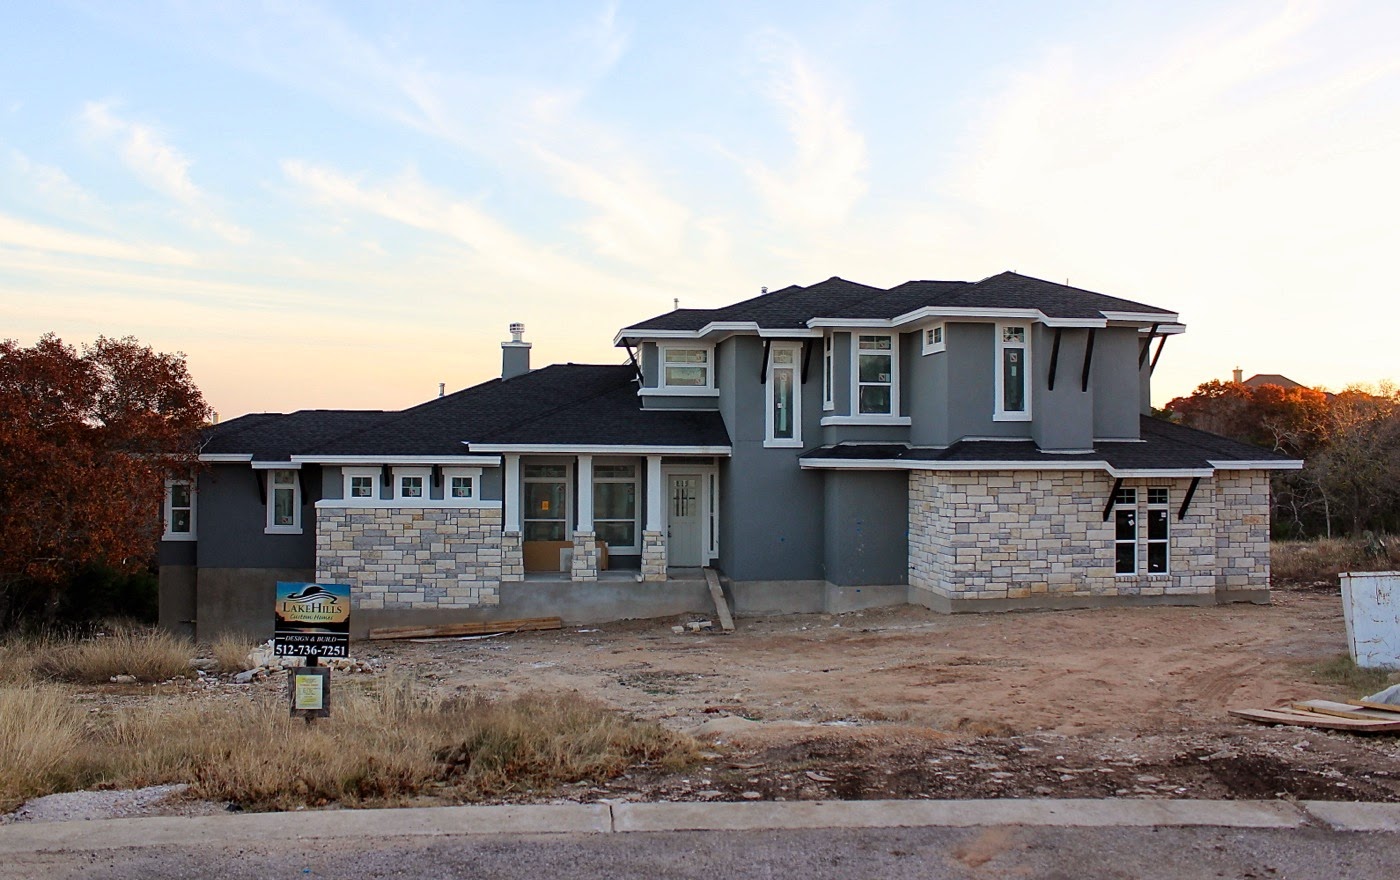
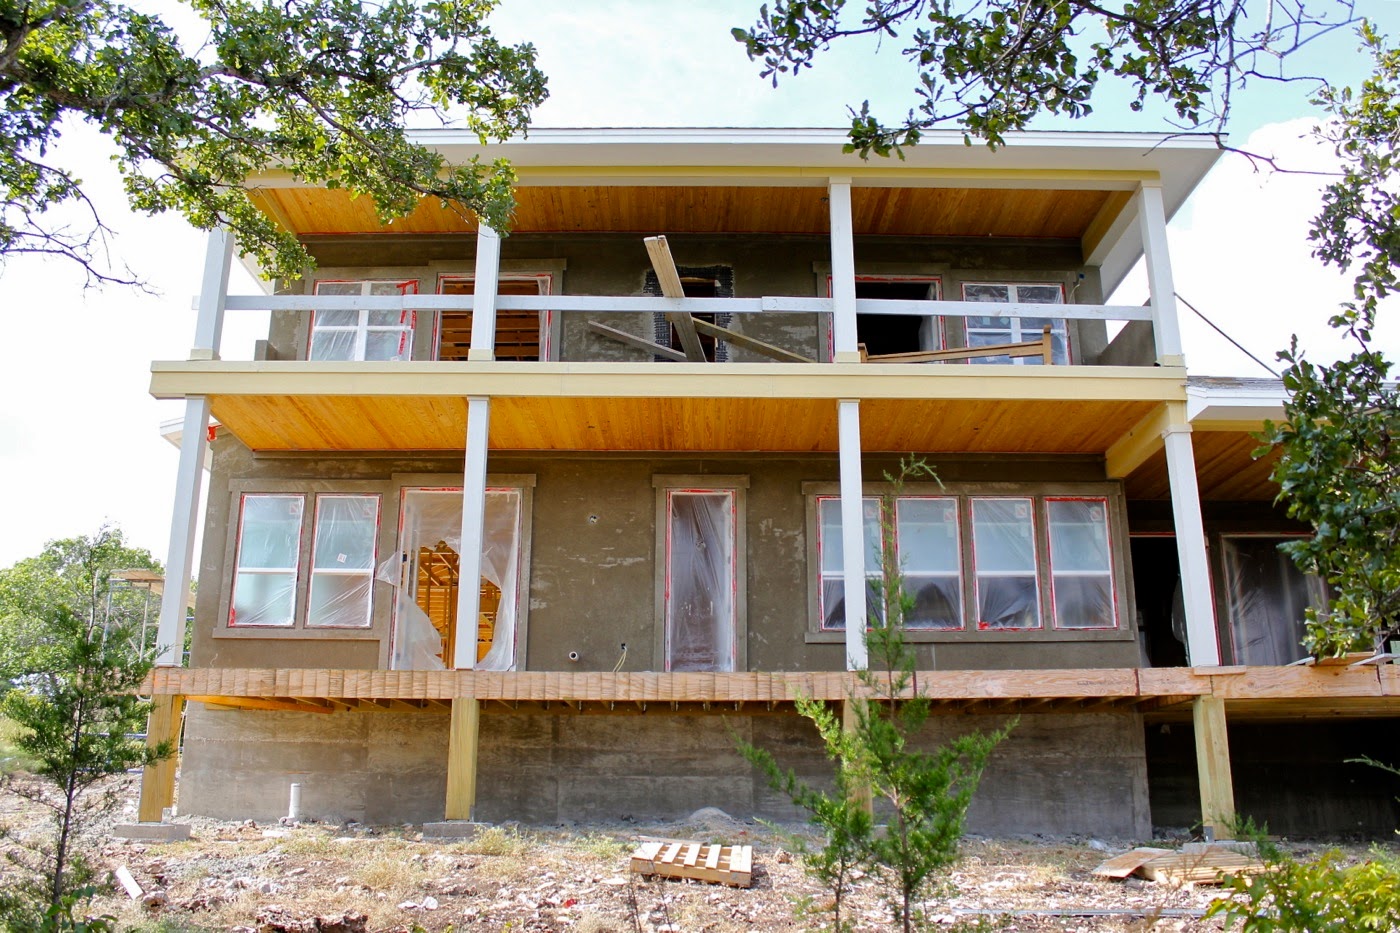
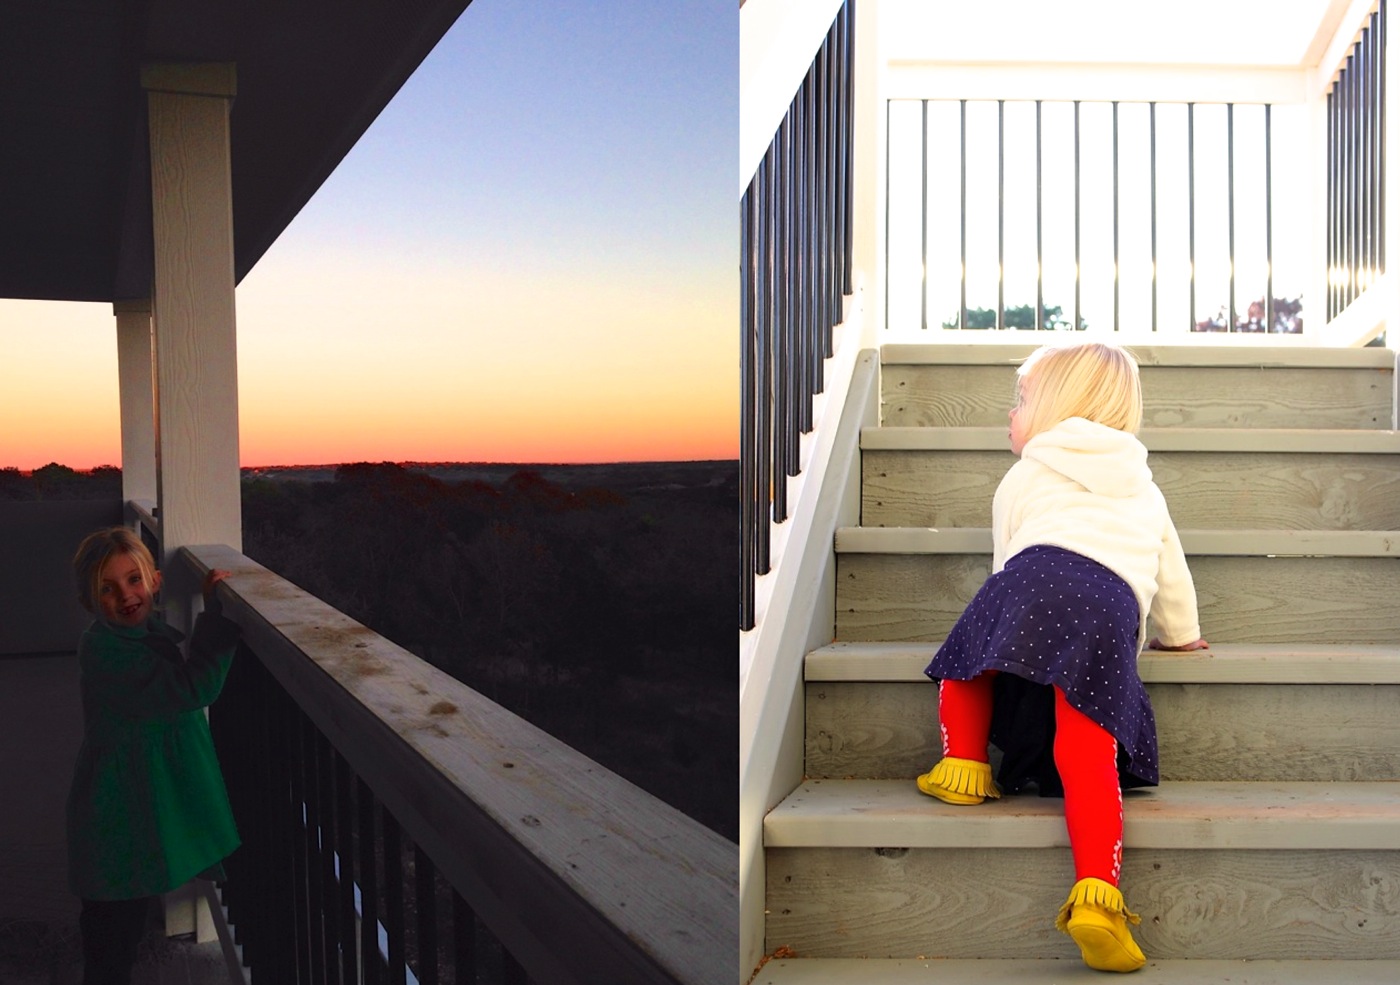
The one that looks like this at 5pm on a winter’s eve?
It’s almost done!
We should close in the next few weeks!
YAY.
I’d better hurry up and share the details.
If you’ve missed my other posts, our family is building a custom home in the Austin, TX area. We’re not physically building it ourselves—we’ve hired Lake Hills Custom Homes to do the hard part and we’re along for the decision-making ride.
Check out my 4 previous posts about the process:
We’re building a new home!
Groundbreaking Party
From foundation to frame
Stucco, shingles, and a pretty paint job
Today we’ll check out the backside and visit the inside as well.

And if you’re wondering why it’s taking so long to build a custom home…..there are a few factors in play:
Weather, making changes to the plan, mistakes here and there, unforseen issues, and coordinating a barrage of trades/workers for each step of the way. I’m always amazed at how quickly a week can go by when it’s been raining or a crew can’t come the day they were scheduled for.

I’ve definitely learned a ton through this process—from being patient, to being pushy, to letting go of every tiny detail. You can’t get it all perfect, even if it’s “custom”. And 99% of the people that stop by the house will never know the little things that didn’t work out as I had hoped.
And you know what, who cares? It’s an amazing house and an amazing adventure. I love this home!
Okay. Here’s how she looked when you stopped by last.
Framed, with windows, and a finished exterior.

Now we’ve got sheetrock, trim, and she’s ready for a paint job!
These are the windows in my new studio. Yum.

Carpenters trimmed out the dining and great rooms:

There’s now a kitchen in the works and they built us a mud room! Why are cubbies so cute?
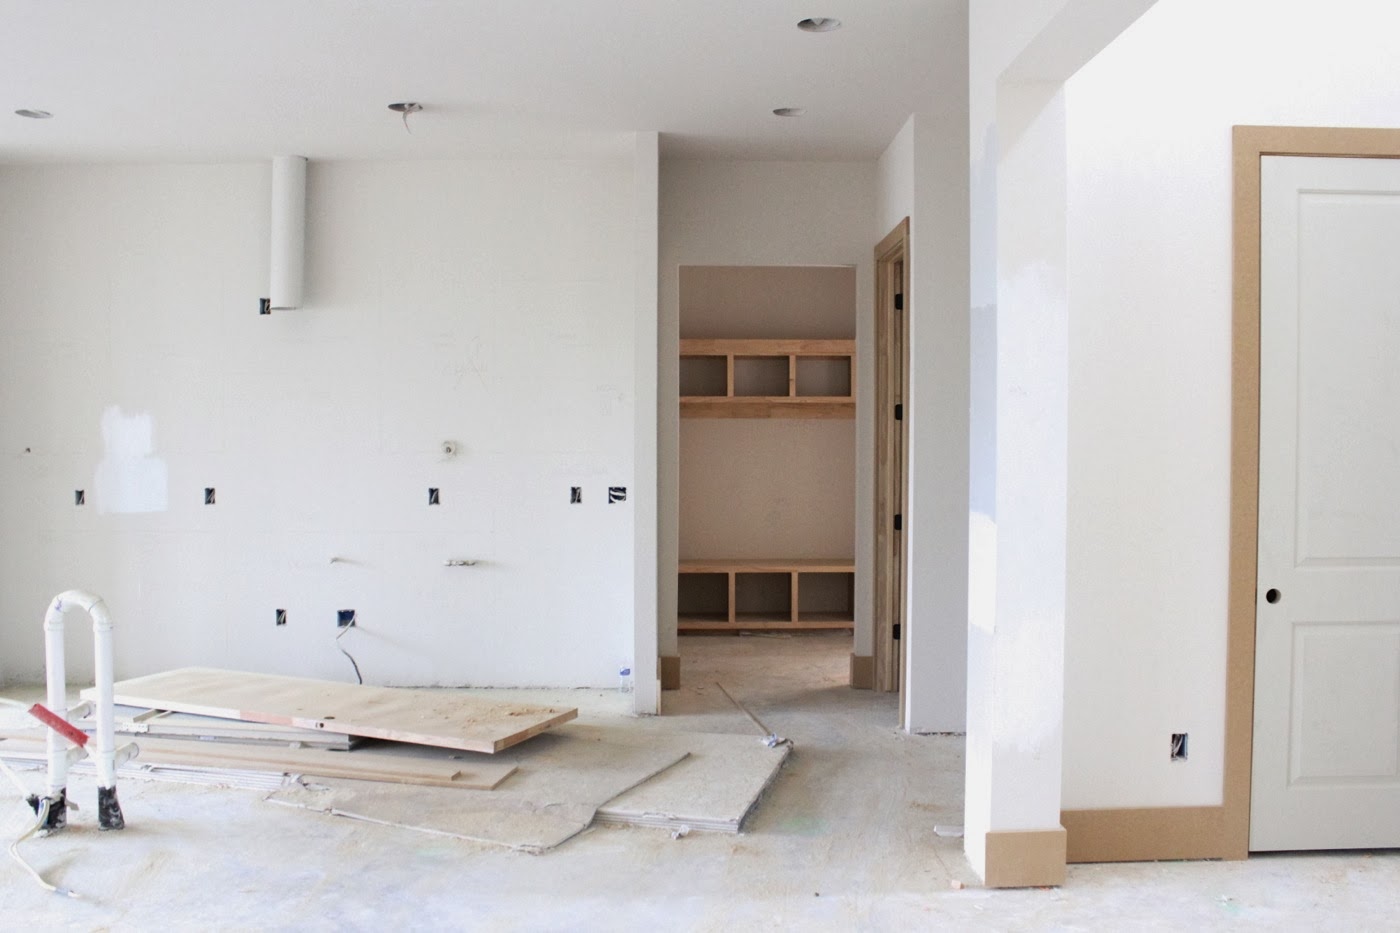
And why are rows of shelves so pretty? Um, this is the master closet….which I think will second as a piano practice room, because I honestly don’t remember it looking that big on the plan. Plenty of room for fabric as well (and Casey’s stuff I guess)

There are lots of doors and windows in the house which I really wanted—pretty natural light. In fact, almost every room has two ways in and out. So if there’s ever an emergency, we’ve got an escape plan! And if money flowed like a chocolate fountain I would have paid to have every single window cased with trim, because I just love those added details. But that will be something we work on over time. For now we paid for casings in the main living spaces downstairs.

And for zero cost we got all sorts of scribble scrabble, math problems, and notes on our walls. Bargain! It makes me smile to know that these are hiding under our wall paint, forever entombed in the house. Just little messages from the past that helped to create…..
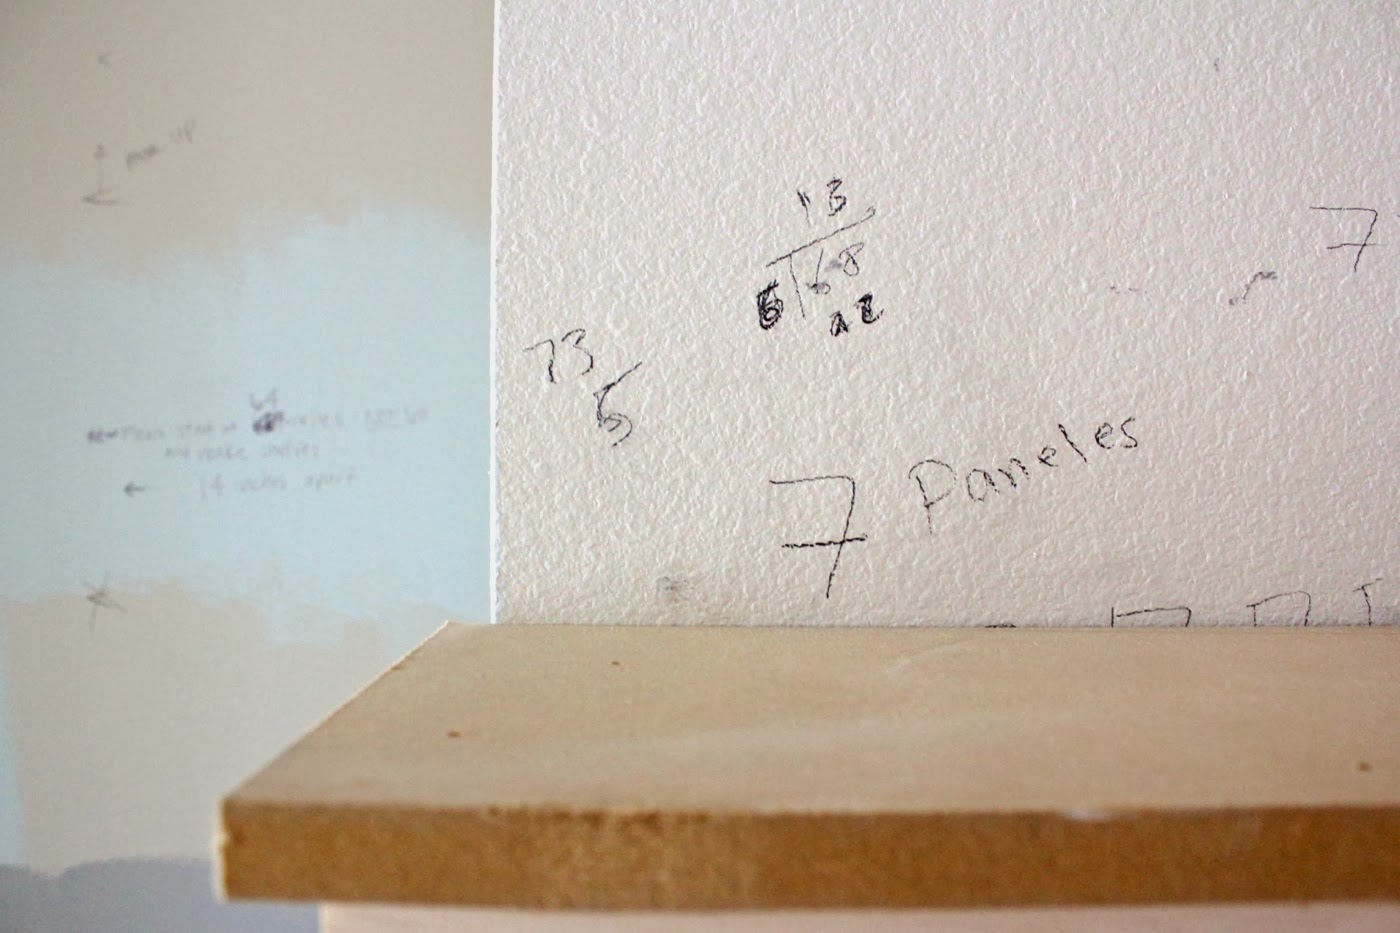
a fireplace and shelves!

The home building process really pulls you in every direction and emotion. You spend hours/months mulling over Houzz.com and Pinterest (follow my home boards here) to find the PERFECT look for the room…..and then one day the trim carpenter shows up and you have to quickly make a 5-minute decision about a huge feature like the fireplace. Um, well, let’s try this?…..
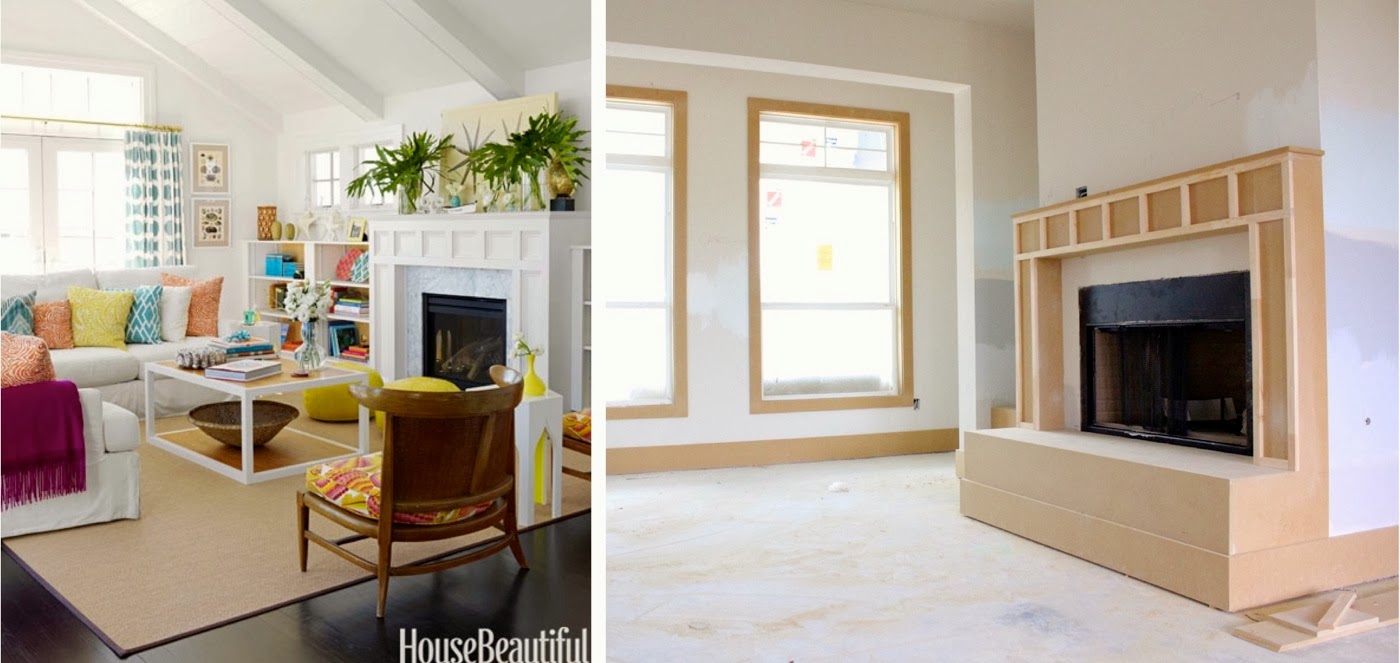
And it totally works out.
My inspiration for the fireplace was this gorgeous home on House Beautiful. Just click through all those photos. It’s fantastic.
Next decision to make….paint.

I must have painted 8 shades of gray and some pale blues on every wall in the house, to see it in different light and shadows.

…along with a few greens colors that I quickly nixed. I decided to stick with green on the front door (and for the tile in our bathroom. Yes! I have a green shower! I love it). And then I went with neutral shades on the walls so that I can accent with color in other ways—light fixtures, furniture, fabric, etc.

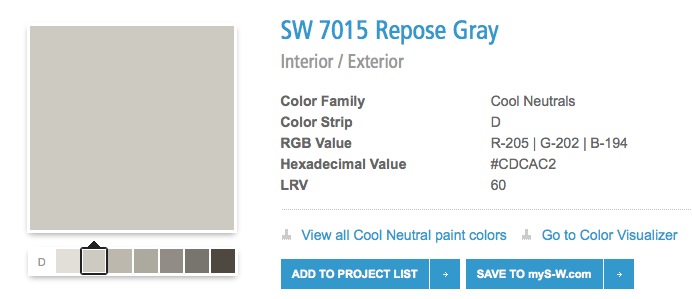
And after looking at SO many shades of gray, I have found my absolute favorite—-Repose Gray, SW 7015. This swatch below is probably my favorite color family in the entire store Check out all the shades on there. I’d use them all! We went with Repose Gray on many walls of the house because it’s subtle and soothing and makes the white trim really pop. I’m a new believer in warm grays over cold ones, even if you don’t use any brown colors in your home. The brown undertones in the paint just makes the house feel inviting.
We also used Dovetail on accent walls in the Master. And I regret that we went with a more blueish-gray on the exterior of the house (we used Cityscape, SW 7067). If I could do it again, I’d use Gauntlet Gray below. But. Let it go…let it go! (thank you Elsa)

All the trims inside and out were painted Pure White, SW 7005. And the beams and staircase were stained New Ebony, SW 3135. I’m so happy we went with the exposed beams; they add so much to the room.

And for a Final paint-photo of the room?….you’ll have to wait till next blog post because it’s been an ongoing process of painting and fixes.
So I’ll share the paint when I share flooring and tile.
In the meantime, let’s go outside!
I love pulling up to a pile of this at the house in the morning. It’s going to be a good productive day.

Last post the back deck looked like this:
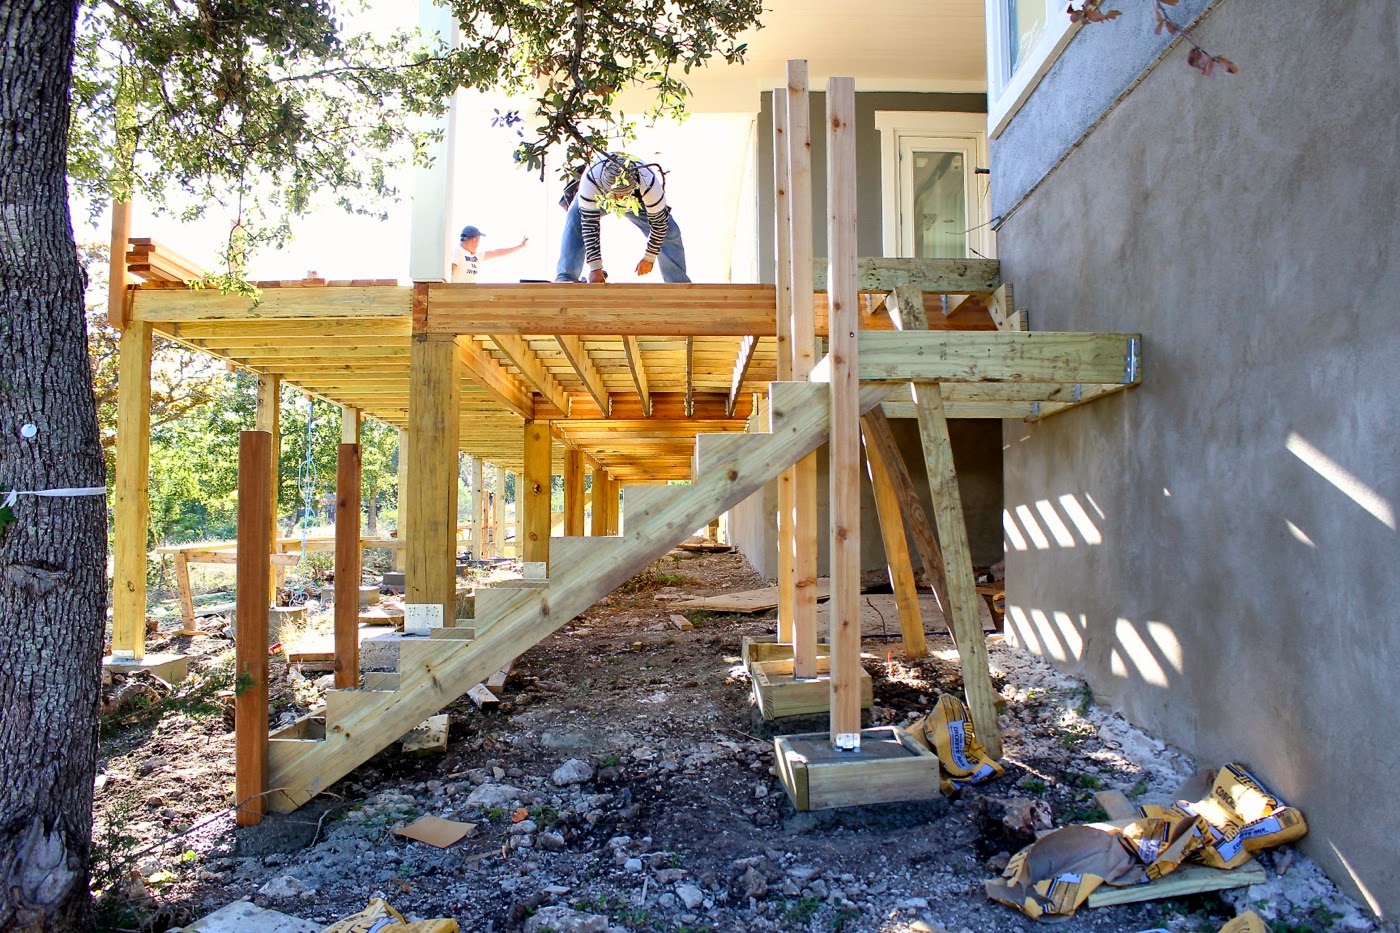
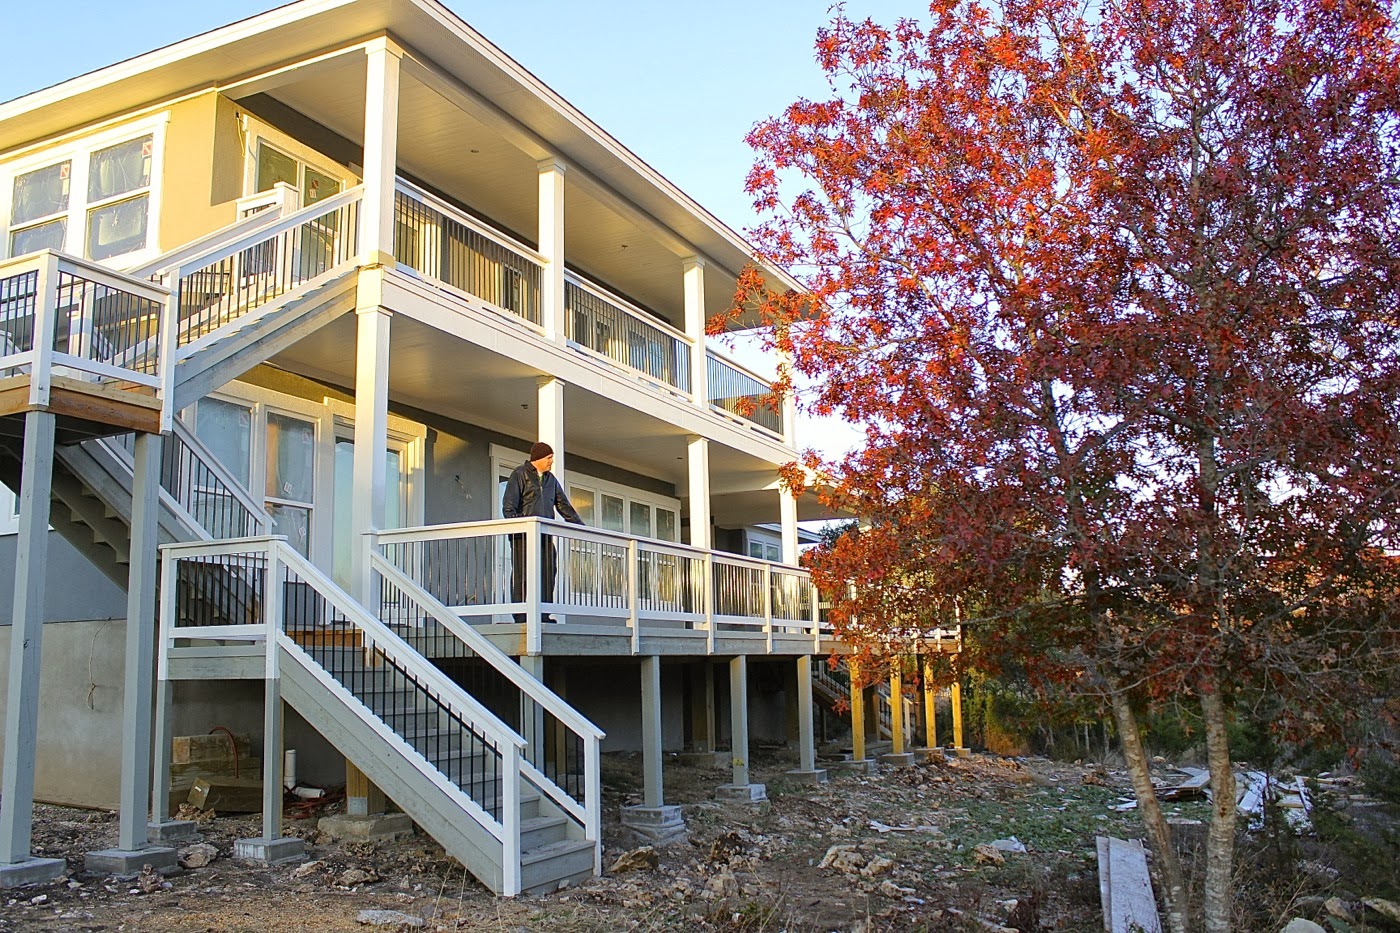
Somewhere along the building process we decided to change the deck plan and expand the lower deck to make it a more usable space, rather than a walkway. Our deck builder recommended nothing less than 12 feet wide, leaving enough room for a table and space to move around. So we bumped it out 6 more feet and the workers made it happen.
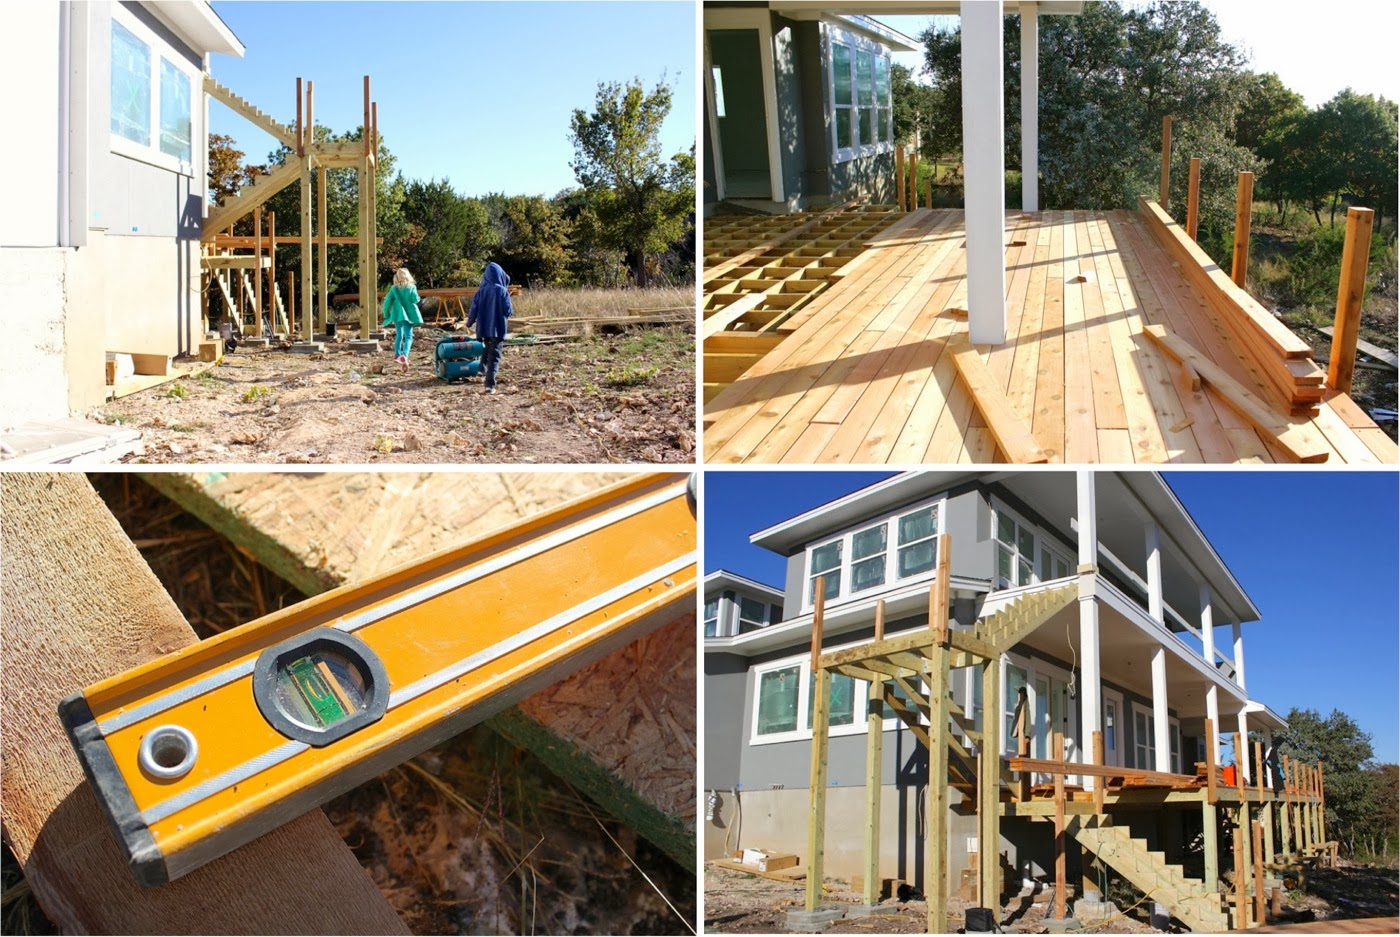
They built a large stairwell on the left side connecting the upper deck down to the ground level. And on the master bedroom side they built another set of stairs, leading to the unfinished yard.
…and they left plenty of play-things behind. Dirt, wood, and rocks. That’s all these kids need. Why did we build a house?

Next up….I had to make a final decision on the “Look” of the deck. I poured and pinned over photos for months.
I originally wanted an all-white, beach cottage-meets-southern plantation style deck. White balusters for sure. But then our Deck guy talked me into black balusters. He pointed out that black allows your eye to see thru the bars and focus on the view beyond, while white makes you stop and focus on the bars themselves. Very true.
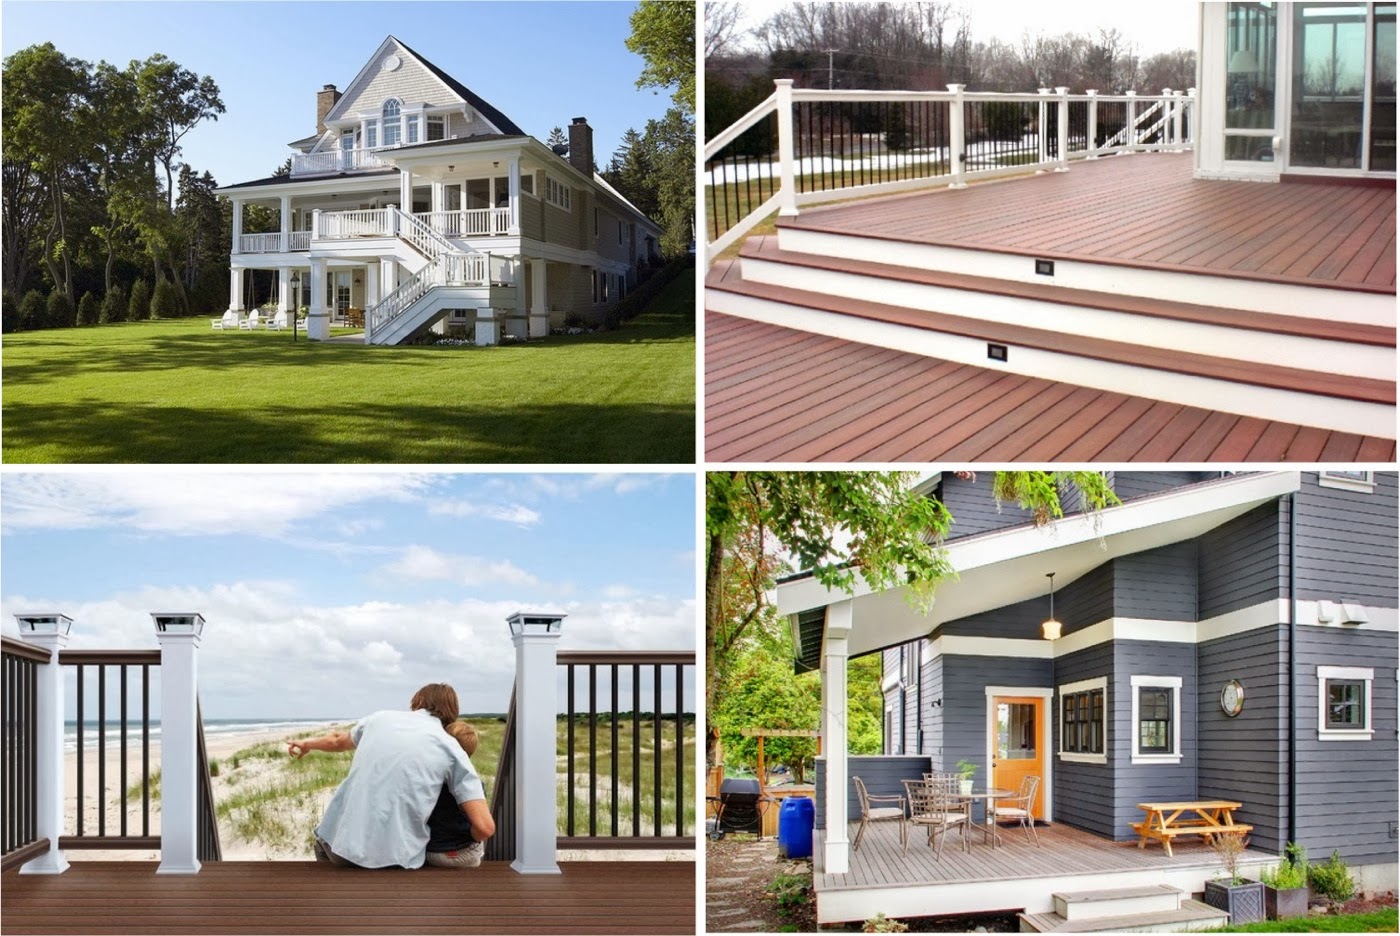
(Top photos here and here. Bottom photo source here and here. And if you live in Seattle, check out this builder that made the gray house. Very cool stuff. Wish I could use them)
So we went with black! …..with white rails, and tongue-and-groove slatted ceilings. Perfect spot to launch parachute men.

As for the deck material itself, we went back and forth over wood vs. composite (like Trex or Timbertech). We liked the idea of composite wood because it’s low maintenance. But the cost was double our budget. And to be honest, I love how warm and cozy real wood looks on a deck. So we went with treated cedar, which cost more than treated pine but will have a better life-span in our very hot climate. Then we selected a solid “paint” stain in….gray! Shocker. We used Woodsmoke Gray, SW 3010 which is also a warm gray tone. All the exterior white trim is the same Pure White, SW 7005 we used inside as well.

And just like that our deck went from this:

to this:
We just need a few ceiling fans installed and it’s done!

We’re so pleased with how it turned out. And I have to credit Casey for the overall vision and pushing to make it happen. I was on the fence and didn’t know if the upper deck would get the use we wanted. But Casey’s family had one growing up and they loved it, and they used it. So we went for it! And by bumping the whole thing out to give it more space, and adding the large connecting stairs, it really came together. I know this deck will have a life of its own.

Both in daylight and dusk, waiting for those big Texas stars to shine big and bright.
And that my friends was a long-needed update.
Thanks for following along.
Next time we’ll talk cabinets and flooring!
And Casey’s worried that I’m building a white house. Please…..


Everything looks lovely! Congratulations on your new house!
Oh, Dana, it’s just lovely! I wanna come back to SA to visit my twin and then come to Austin to sit on your deck and watch the sunrise/set, the sky change over, and the stars come out. And maybe pick up some sewing pointers as well. 🙂 Looking forward to finishing posts and move in/decorating rooms edition.
You will love Repose Grey. We trimmed ours with Urbane Bronze…a grey/brown/khaki green gem.
Wow. This house is a dream – – so amazing & peaceful looking. Congratulations to your family!
It is huge! And it looks great! So curious to see the painted rooms!
Dana! Everything is absolutely beautiful!! I love your advice on the gray paint and I am definitely going to look in to it for our home. Thanks for sharing!! I love all of the windows and light everywhere. And I could live in your master closet!! I can’t wait to see everything else come together. It is hard not to stress about the details so much but I love what you said about everyone not knowing what did and didn’t work out. We should definitely enjoy the process!! I will definitely be singing “Let it go!” a lot more around my house now!! I wish I could see your house in person! It’s beautiful!!
Grays are hard, aren’t they?! I went through a number of samples before finding one that didn’t look blue or green with the light in our house. I did end up with a cool gray, which is good because our floors are a very warm oak-look laminate from the previous owners and I wanted something to cool it down.
Gorgeous gorgeous gorgeous!!!!
I can’t wait to see the finished space and all the memories you make in it.
So so exciting Dana! Love the porch – looks so fun! And I totally agree about the black balusters. Perfect. Can’t wait to see what’s next!
So so fun!
I don’t know if you’ve painted or not, but something we did that was fun and meant a lot to us was write Bible verses that pertained to each room on the walls before they painted over them. Kind of like God blessing the house. Just do it in pencil and not sharpie like we did (found out it bleeds through paint and we had to use oil based primer to cover it up… oops!) Anyway thought I would give you the idea! 🙂 Blessings on your new home. It is so much fun!!
That looks so great. we are just finishing up with the painting at our new house. we are doing most of everything our selves. its defentantly a labor of love. but i cant wait to see your and mine to finish and finally get to use the space. love your deck. we are living in canada so we have to wait until spring to do our deck but i cant wait. good luck and love the updates. so exciting. katie
Looks huge! I love the decking area. We are just starting to plan our dream home with not a step in sight! Cannot wait ! Bron
Oh my goodness, it looks amazing! Thanks so much for sharing. My husband and I are hoping to build in the next year or two so it has been a blast seeing the process here.
Oh man, what a dream house. I hope it gets finished up quickly so you can move in and enjoy!!
Wow! The kids must be thrilled to be seeing their new house being built. Do they get to chose how their new bedroom will be?
Stunning! And I love a white home!!! Knowing you once you move in you’ll add lots of vibrant colours! You’ve got a great eye.
Aww! When my parents built their house, they painted a huge heart with their initials and handprints inside it on the floor, right before they laid the flooring, the picture we have is super special, and when we remodeled, they added all the kid’s handprints to it!
Thanks for the update! It’s amazing how exciting it can be to see someone else’s house come together. It helps that I just love your design. All the windows will be so amazing and that deck looks awesome.
Your home is amazing! I LOVE everything about it. The decks are exceptional and the advice about the balusters being black vs white is like finding a treasure. TFS.
It looks beautiful! I was actually just thinking how quickly it is all going up. But even if it was going up twice as quickly it would probably feel like forever when you’re waiting to move in to something that beautiful. We mostly build brick where I am because of Termites, wood houses can be problematic, so it takes a bit longer. I’d love to have a deck like that and the view from it is amazing as well. Hope the rest of the build goes smoothly for you!
You’ve had a great vision for it and I can see it coming through 🙂 The house is truly beautiful and a real family home. Bumping out the deck was a great idea – imagine the fun the kids will have on it 😀 Love the fireplace surround – just like that photo you based it on – do you get cold temps in Texas in winter? 🙂
Aw Dana its gorgeous! I’ve been following along and your build marries up nicely with our reno. With some VERY similar details! So I completely relate!! Right now my husband and I are discussing deck railing too, we started at the same point as you and have come to the same conclusion! We still want to see our yard! Whenever my husband says ‘yeah we’re building the white house’ I make sure I point out all the grey…thats a colour right? haha. What colour is going in your sewing room? I’m tempted by yellow (as usual) but my kitchen is already full of pops of it and they’re right next door to each other. Cant wait to see all your posts with this house as the back drop! Good luck.
PS I have Totally pinned and saved on Houzz so many of those RW Anderson homes! Gorgeous!
I am so excited for you. It’s looking so beautiful.
I remember mauling over faucets and light switches, trim and door knobs! At the moment, every detail seems like the most important one! The beautiful thing is that the moment you move in and get settled it will feel like HOME! I’m so happy for you. Thanks for sharing the journey! It ALMOST makes me want to do it all over again…almost! 😉
Excellent blog post. I absolutely love this site.
Keep writing!
Your house is soo soo amazing – I’m in love 🙂
Good luck with the final touches !
Luhuhuvvvvv the mud room and deck! Pretty! Pretty!
Gorgeous deck! How fun to pick all your own colours…so much work, but so worth it in the end. Congrats!
LoL! I painted my entire new house in the same grey! It is the BEST color ever and you will not regret your choice…it looks SO good with white trim and dark stain (my kitchen cabinets are dark) Good luck and here’s hoping you have a smooth and uneventful closing!
What fun!! You have great taste Dana…….your house is beautiful!
Thanks for sharing your paint colors. I am in the process of updating rooms of my home and was also trying to decide which gray shades I like most; now I can check out yours as possibilities for my home. And also, your exterior paint color is gorgeous; please don’t regret your choice!!!
So very excited for you guys! I cannot wait to see that house! I can only imagine how gorgeous it’s going to be! congrats again hun!
This is a fantastic home! Congratulations!
Bright and spacious … a dream!
I have a hilarious story for you. Last night, I had a dream that you and poor Disney from Ruffles and Stuff were killed (obviously that is not the hilarious part). I legitimately was crying my eyes out and really really sad for both of y’all’s families, and then…the main other thing I worried about was seeing the end of this house adventure you are on! I truly was worried about never getting to see your finished house because you wouldn’t be blogging any more. Also, somehow I ended up at your house and met your husband and Clara knew my first and last name somehow. I thought that was funny. Have a wonderful day, and “be safe and don’t die” as my best friends and I would say. :]
hahahah. This is the funniest thing!
Oh man, I love this story.
Please rest assured that we are still alive….and as far as I know, Disney is too :). And I promise to continue sharing the whole home with you!
It is so exciting to get another update! It is coming along beautifully. I find the whole process completely fascinating. I am thinking of building for our next home in a couple of years. Thanks so much for sharing the process. I can hardly wait to see it all painted and finished! Just beautiful!
It looks beautiful! Congrats! Can’t wait to see it all finished.
This is like a dream! How wonderful for you! I am sure it can be a headache at times, but how blessed you and your family are to have such an opportunity! You are an incredible family and all deserve this great thing! :). Congrats again!
wow!! gorgeous!! I live in a small apartment and dream of a house with great light someday ;o) EMily
Hey Dana,
We built our house and it was like birthing a child. So much work, but my husband was ready to do it all again after about 6 months. One word of advice that I am sure you and your builder have already discussed, the porch fans. We learned the hard way (because I was dead set on them and my builder didn’t stop me) that were we are, there is too much wind already and the blades of the fans all got bent or torn off the first good gust that came along. Just something to think about if you aren’t past that point.
Dana,
I don’t check in often, but Diane told me your home is gorgeous, so I had to check it out online. Perhaps, we’ll pay ya a visit sometime during our next trip to Austin.
-FM
I love you and your candour so much, I hope you guys have a very happy life in your new house.
What a dream! Gorgeous home! Love your style.
Repose Gray fan here too! So random, a friend recommended it to me for our dining room – it looks perfect with bright turquoise, hot pink and citrusy colors, which I know you love too.
Goodness your home is beautiful! What a lucky house to have your family in it. 🙂 We bought a little place down in Port O’Connor that needs some love. There are tenants in it now who are moving “in a month or two” (that was last August) but until then, I tell hubs that they are just contributing to my Home Remodel Fund each month. I’m totally stealing your style, color scheme, and decorating ideas if you don’t mind. Thanks for providing the SW paint color numbers because I’ll need them as begin doing exterior remodels before they skedaddle. ‘Course, I don’t want to make it too nice…they might stay.
Great post Dana.
Thank you for the paint family recommendation! I have some IKEA bare wood cabinets that I’ve been wanting to paint grey, but hadn’t found a shade that spoke to me. So I just decided that since I’m a fan of your style, I’ll trust you. I picked the Dorian Grey shade from the family you recommended and I LOVE it.
I love your blog and home! Can you post final pictures of kitchen and paint. I thinking about Repose gray as well