I love sewing for babies.
And I love sewing baby gifts.
They’re just so easy and only take bits of fabric.
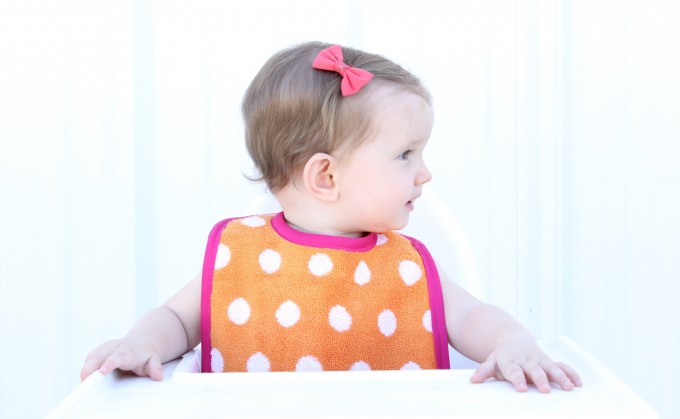 My favorite way to give a gift is the semi-homemade approach, mixing handmade with store-bought products. Best of both worlds.
So when JOHNSON’S® asked me to partner with them and their newly designed bottles, it was a polka dot match-made-in-heaven.
These bottles! Too cute, right??
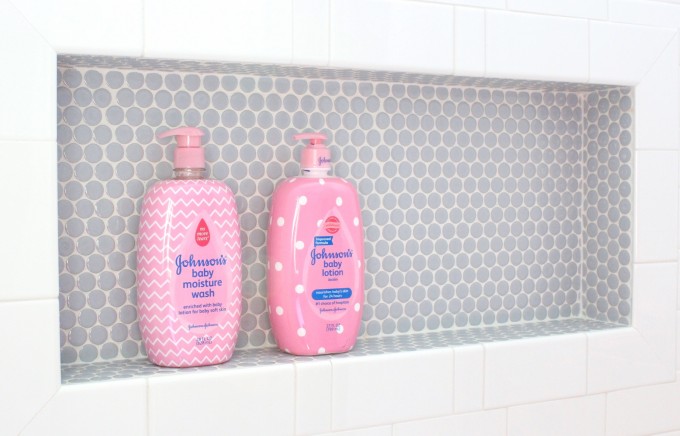 Ahhh. I love this stuff. And I love it even better with chevrons and dots—cause I’m a total sucker for cute packaging (seriously, check out the whole line of colors…coral, blue, yellow) And the stuff inside is just as great. All my kid have used it.
Hey, I even use it!—I have a travel-size bottle of JOHNSON’S® baby lotion I take on trips because it’s one of the few lotions that doesn’t feel sticky on my hands…and I just love that fresh baby smell.
So I was asked to create a DIY project inspired by the new bottle designs of JOHNSON’S® baby lotion and JOHNSON’S® baby moisture wash, sold exclusively at Target stores and Target.com.
 So I did what any of you would do.
I went to Target.
And bought every bright-colored towel I could find!
I knew exactly what I wanted to share:
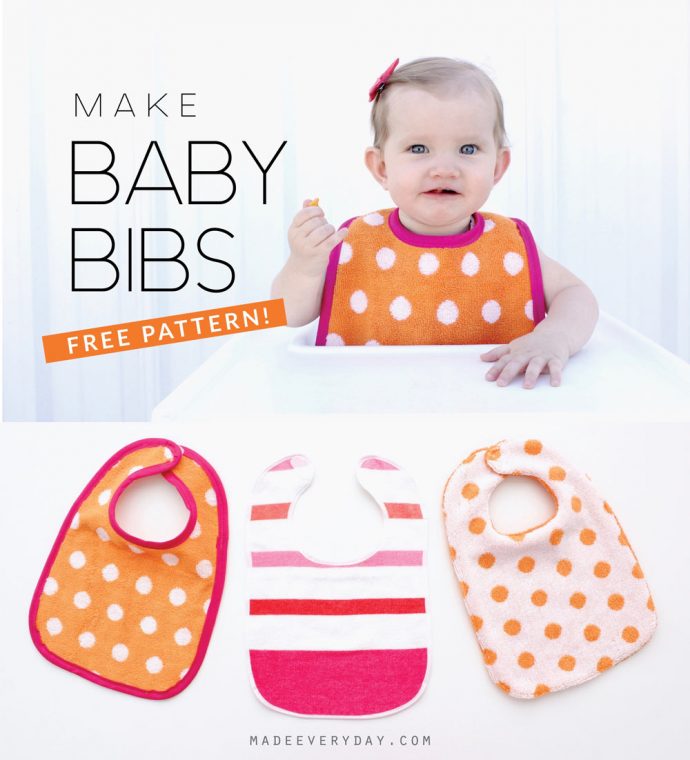 Bibs!
Bibs!
They’re so easy to make! And they can double as a burp cloth, drool wipe, whatever you need.
I’ll show you two cute version using terry cloth towels.
Then package it all up with JOHNSON’S® baby moisture wash + JOHNSON’S® baby lotion….and it’s the gift that keeps giving, from snack time to bed time.
Because kids get messy. And kids get clean. And the cycle never ends.
 And your friends will be all like, whaaaat?
You made this for me??
 Yes! That’s what friends + polka dots are for.
Okay, let’s get started….
I’ve shared the Placemat Bib Pattern before, which I still love. But this pattern is great because it fits any size head with a velcro closure in the back.
First, print the FREE PATTERN HERE.
There are two pages.
• Print at 100%. Do not “scale to fit.” Check the 1 inch or 1 cm box to make sure you’ve printed to the proper size and adjust your printer if needed.
• Cut along the top pattern piece on page two and match it up with the bottom pattern piece on page one (at the black triangle). Tape the pages together.
• Cut out the appropriate “size.”

Now this pattern is sort of a one-size fits all.
So the two different “sizes” refer to a single-layer bib and double-layer bib.
• The single layer is finished off at the edges with bias tape.
• The double-layer is sewn together around the edges and turned right-side out (with a 3/8 inch seam allowance).
So grab your pattern and a fun towel and I’ll show you both methods.


DOUBLE-LAYER BIB
I can’t decide which bib is easier to make–the single layer or double layer—it’s a toss up.
Of course the real fun of this pattern is the fabric, or the towel you choose. You can use many types of fabric for these bibs: standard cotton, knits, laminated cotton, diaper rags, terry cloth (towels). Or you can mix it up with a towel on the back and a cotton on the front. Many options.
When making a double-layer, choose towels that are not overly bulky or it will be hard to topstitch around the seams. I found all these towels in the bath section of Target. You can also use beach towels!
And just a note on terry cloth—it’s messy. There’s no way around it. There will be little bits of towel on your clothes, table, and floor. But it’s a quick vacuum clean-up when you’re done—so let your OCD simmer as much as you can till the end.
 Refer to the photo below.
• Cut out a front and back for the bib. Fold the towel in half, place the pattern “on the fold” and cut out your first layer. Then lay the first piece on your other towel and cut out the second layer.
• With right sides of the fabrics together, pin the two layers together, leaving an opening on one side, big enough for your hand to get in and out (see black dotted line)
• Stitch around the bib with a 3/8 inch seam allowance, leaving an opening (just use a standard straight stitch).
• Trim some of the bulk from your seam (but do NOT trim the area with the opening, or it will be hard to turn under)
• Turn the whole thing right-side out, and really use your hand inside to press all the seams out.
• Pin the opening closed.
• Sew the opening closed with a 1/8 inch seam allowance and continue topstitching around the entire bib.
 • Now cut two small pieces of Velcro to create a closure in the back. I like to round off the edges and trim each piece into an oval shape.
• Sew one velcro piece to the back neck area, and sew the other velcro piece to the opposite side, on the OTHER layer of the bib (in other words: sew one piece to the front layer, one to the back layer)
 And you’re done!
One soft, cozy, absorbent, reversible bib!
 SINGLE LAYER BIB
Some towels look awesome on both sides—like these polka dot ones. So a single layer is another great option. PLUS we get to use bias tape, which I love! (Read all about it and watch my video here.)
You can use store-bought double-fold bias tape, or make your own. 1/2 inch-wide bias tape will be easiest to work with, but I really like the look of 1/4 inch-wide tape as well.
 • Using the “single-layer” pattern piece, cut out one bib piece on the fold.
• Grab double-fold bias tape and sandwich it around the raw edge of the towel. No need to pin anything in place…
• Sew the bias tape in place, using a thread color that matches your bias tape. Use your hand to continue sandwiching the bias tape and sewing portions at a time.
• When you get to the curves, go slow and just do your best. It helps to lift your presser foot periodically (leaving the needle down), to readjust and to get the bias tape snug around the fabric edge.
• When you get to the end, fold the edge of the bias tape under and lay the end right over the start point and sew it in place.
 This method of sewing bias tape is sort of the quick-and-easy way. For a more proper method, check out this video and this tutorial.
Now sew the velcro pieces to the back and you’re done!
 One single layer, reversible bib.
And with all those leftover towels….you can easily make 4 more, right?
Cause we know every mom can use them.
 Now kick up your feet and relax, cause your baby shower gift is done!
 And when things start getting messy….
 Mama knows the beloved baby bath is just one step away.

 Mmmm. I can smell it now.
Thank you JOHNSON’S® + Target for sponsoring this post. You can purchase the newly designed bottles of JOHNSON’S® baby moisture wash + JOHNSON’S® baby lotion exclusively at Target and Target.com.




Cute bibs and cute new bottles!
Thanks 🙂 I know…there are so many cute bottle colors. I really love the coral colored ones!
How do I find/get the stencil for the baby circle skirt?
The last time I sewed with terry cloth was for a baby shower gift, too. And my OCD certainly was in full swing… I found little pink pieces for WEEKS afterwards! But it really is awesome for baby bibs, isn’t it? Adorable, as always, Dana.
haha. YES. I usually use the mini vacuum when I’m done—takes about 10 minutes and seems to get most of it. But yea. Terry Cloth is always a love/hate relationship that way!
Can you imagine working in a towel factory? Haha
Oh, no. I’d never survive that kind of stress. Lol.
Yes! Thank you for including a 1cm box on your pattern! This will make my sewing life infinitely easier. Definitely will be sewing tons of these bibs for my daughter and Baby No2. Never thought of using towels to make bibs before. Brilliant.
haha. Awesome! You’re welcome 🙂
These bibs are so cute ! Thanks for sharing 😉
Hi Dana,
Thank you so much for sharing. I always get so excited when I see that you have put a new tutorial up. I now love sewing thanks to you. I used to be so scared but you honestly have the easiest instructions and the patterns are so easy to follow. 🙂 Thanks again all the way from QLD, Australia.
Is Flannel ok to use?
The bottles are sooooo pretty! I hope they come to NZ…please!
Dana!!! can you be any cooler!! I always think, ‘not’, but, then you go and do even more amazing stuff!!! HOW COOL TO BE ASKED BY JOHNSON’S to create a DIY project!!! Even they (and Target!) know how cool you are!! These bibs are adorable – love the polka dots – love both versions – I will be making some this week to go along with your burp cloths (love those, too) for a baby shower this weekend.
I can hear the ooh’s and ah’s already! Thank you, again and again, for writing your blog and sharing your great creations and inspiring all of us. Have a great day, Dana. Thanks for perking up my day! YOU ROCK the sewing world.
I did this exact thing with the pink and white polka dot towels. My daughter needed over the head bibs for school so I cut a hole in the towel and added a binding. These are much cuter!
These are adorable. And you even make a non-sewing gal like myself feel like I could actually do it! Dana for the WIN!!
Aww so cute! Thank you for sharing the free pattern Dana. And I couldnt agree more when you said about giving DIY gifts. Nothing beats handmade. I have lots of new mommies in our neighborhood and these bibs are perfect add-on. <3 **Pinning***
I have not bought Johnson and Johnson products since I found out they support Planned Parenthood. Cute bibs, though.
wonderful diy project, thanks
Dear Dana,
Awesome bibs as everything that you do, but please search about Johnson &johnson’s products, I recently found out that they use a lot of chemicals that come from petrol that are even a cause of cancer and obviously not good for your body. I don’t have any interest in this, just wanted to warn you as I stopped using them a few months ago.
Thank you for sharing, love this! I am going to make some for my grandson. I love Johnson and Johnson baby products. I think it would be nice if they had some boy colors for the bottle though. It would be something different instead on always pink ( I love pink too) but it would be nice.
Thanks Sheryl!
Johnson’s actually sells these same bottles in blue and a seaglass green color!…and yellow They’re so pretty.
I just chose to share the share the girls colors 🙂
Thanks Dana, I am going to look for the blue and seaglass green and yellow for my daughter in-laws baby shower. I didn’t know they came in those colors (been awhile since we had a new baby in the family), thanks so much for letting me know I will be going to Target tomorrow. And… while I’m there I will have to buy some towels to make these beautiful bibs.
Hi Dana
Can’t wait to try these out on my machine. Would you have any suggestions though to alternatives to the Velcro closure at the top of the bib? I know my kids will most likely yank them off really quickly.
Thanks!
Amanda
Love the bibs and it looks like a project I could do, I am just a beginner, thanks for the pattern.
I just tried making these…. arghhhhh!!!! Nothing your fault – just circumstances. Let’s just say four hours later, I’m giving up.
First, my scissors wouldn’t cut through the double layer of towel. Thankfully, a nice sharp rotary blade did the job.
Second, my thread kept snapping and snagging, so I rethreaded my machine and swapped to a Gutterman’s polyester thread and that seemed better. My fault for using some cheaper stuff.
Third, I kept missing the binding and sewing the towel, which my machine doesn’t seem to like (it’s just a cheap Brother machine). I think I was ambitious using such a thin piece of binding for a first-time project. I’m going to have a go at making some tomorrow. I watched your video and bought the gadgets for DIYing. I’m going to make the thickest possible width and see what happens. Hahaha.
I will not be defeated!! Also, I might try walking foot / denim needle next time…. see if either of those help.
Thanks for the free pattern though. In fact, it was my first time using one! I’ve only ever made “rectangle things” before haha.
Never use cheap thread as it will ruin your sewing machine, I have my second Bernina, gave the first to my daughter in law who sews for the church they go to and give blankets to a hospital for preemies and also the crochet and knit caps. Try using the denim needle and walking foot but you might just try one layer the first time.
I love to sew and been sewing a long time, my husband purchased me a sewing machine when we went to California in 1956 we lived in Mission Beach before moving to Palmdale, after 5 years traveled with company he worked for, then we moved back to Missouri where I still live in the home we built. My first was a Singer which I sold and purchased a Sears which I used until I had problems and saved my sewing money and purchased my first Bernina. Happy sewing to you, quit when frustrated, then you will do good.
Hallo Dana… Thanks for the patterns.. As a newbie I appreciate everything I can get..
Q One : what kind of bias binding will be best on a bib made only of toweling (single layer)??? ( I only know cotton and satin) ???
Q Two: Can I use this “T/Shirt ” stips they use for crochet as n “bias binding???
Tx a mil 4 ur help….
Thanks for the pattern, I am 86 and planning on making some bibs for my #4th as she said she could use some. I have made some samples for a day care but never heard back from them, I love making and may make some from sweat shirt material as I then can put on items of my choice and will also look to see what I can find in materials as will make some small and other one larger so have them. He was a preemie but at 6 months is like he should be, God is faithful when we ask and pray for them. Thank you for sharing.
In this particular article you will get to know about babies polka dots a free pattern. It is a wonderful article. Here you will get to know in detail about the topic which is in demand. I enjoyed a lot while reading this article and would recommend other too.
Hi Dana
I just cut some but the neckline seems really tiny…does it fit around a baby’s neck? I used the pattern but in your pictures it looks a bit larger.
HI.. I LOVE TO WATCH ALL YOUR VIDEOS. EASY TO LEARN… THANKS SO MUCH FOR SHARING…