It’s January. And we’re in that let’s-tackle-ALL-the-home-projects mode. I think Casey likes it. Actually I know he does. He always wants to “do stuff”. He’s ready to start sawing away on wood trim, or chopping down dead trees in our backyard. He likes to get things done. And I do too. But…I’m usually the one dragging my feet to get back into home projects, when I’m in the middle of a sewing project, or fabric design, or quilt patterns, etc. Do you find it hard to shift creative gears too? That could be a whole other blog post.
So. The current project is to update Owen’s bedroom.
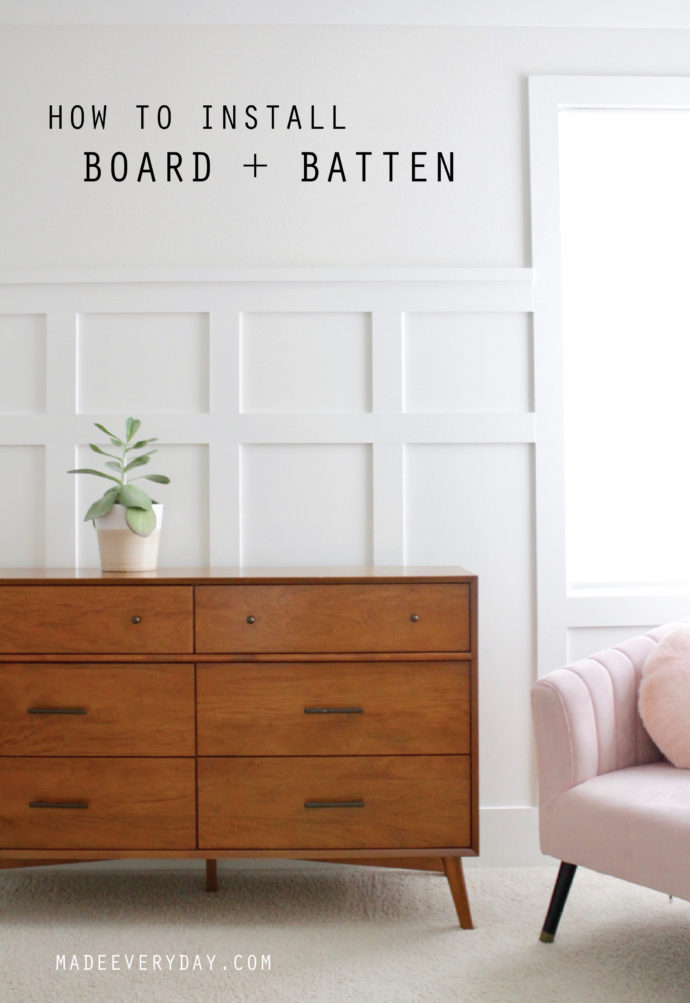
But first, let me show you the girl’s room makeover! The one that I promised to show you after we finished all the Board + Batten. That was a fun project (since Casey did all the work. Haah.)
Maybe I should retitle this post:
Casey does fun things to our house, one room at a time.
Okay. Enough rambling.
Let’s see pretty pictures!
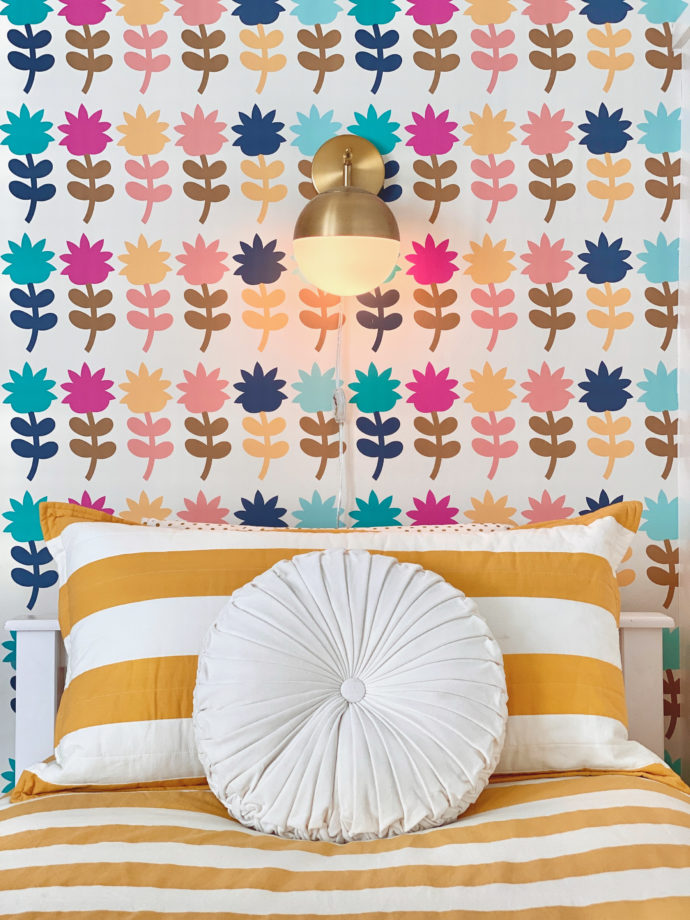
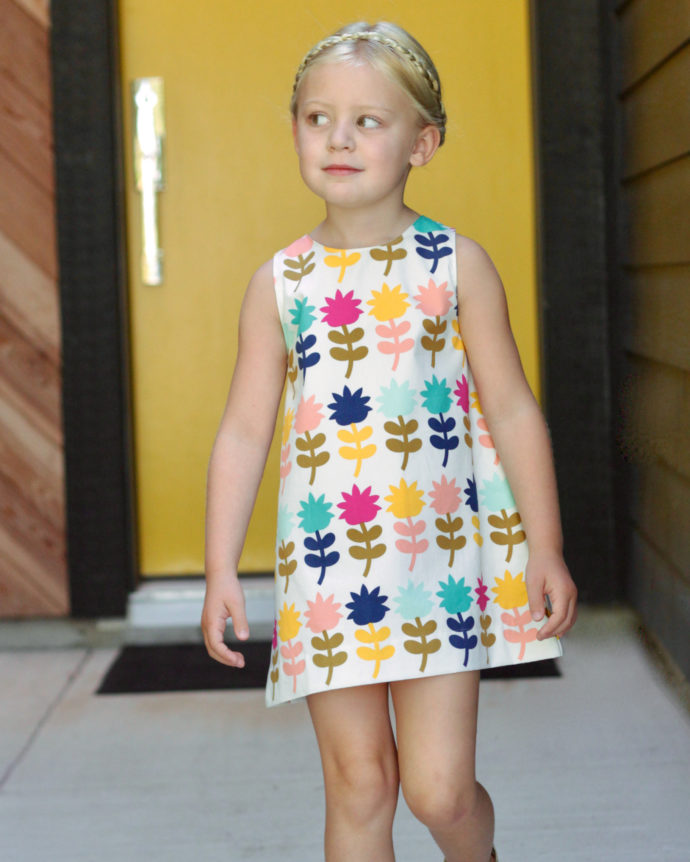
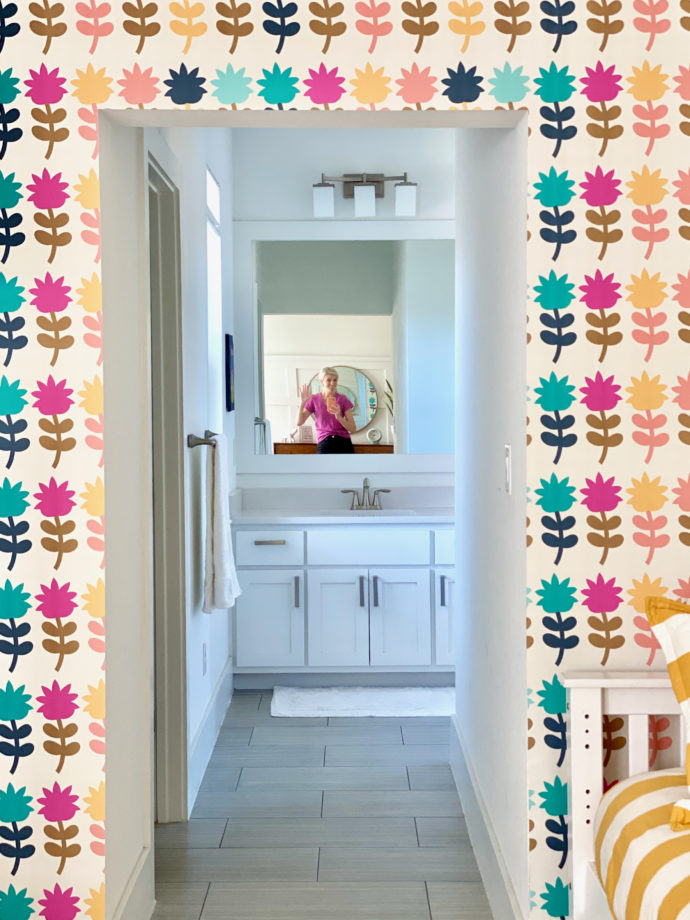
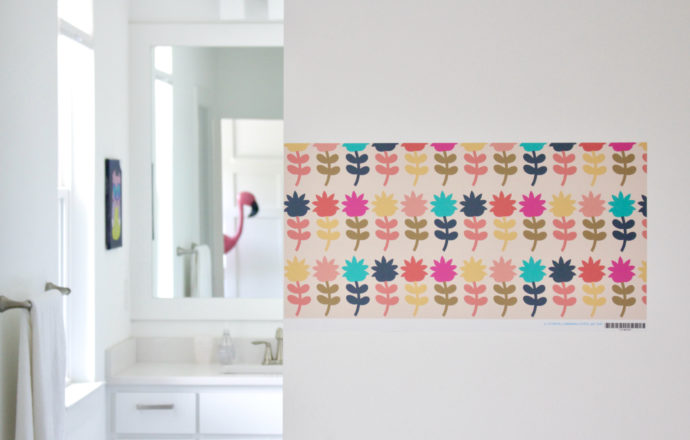
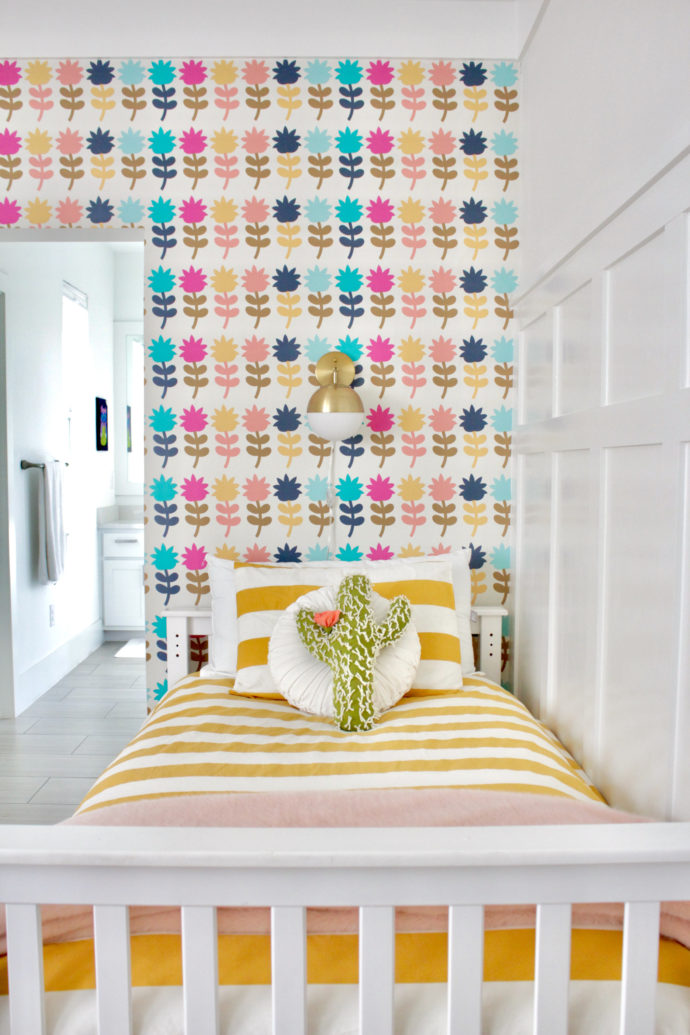
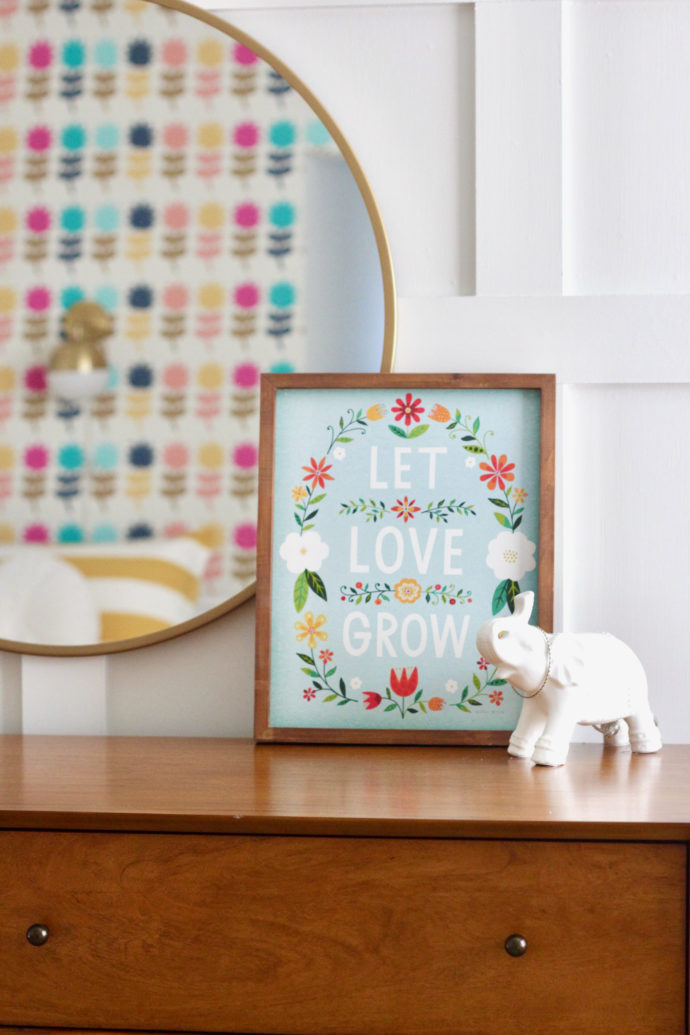
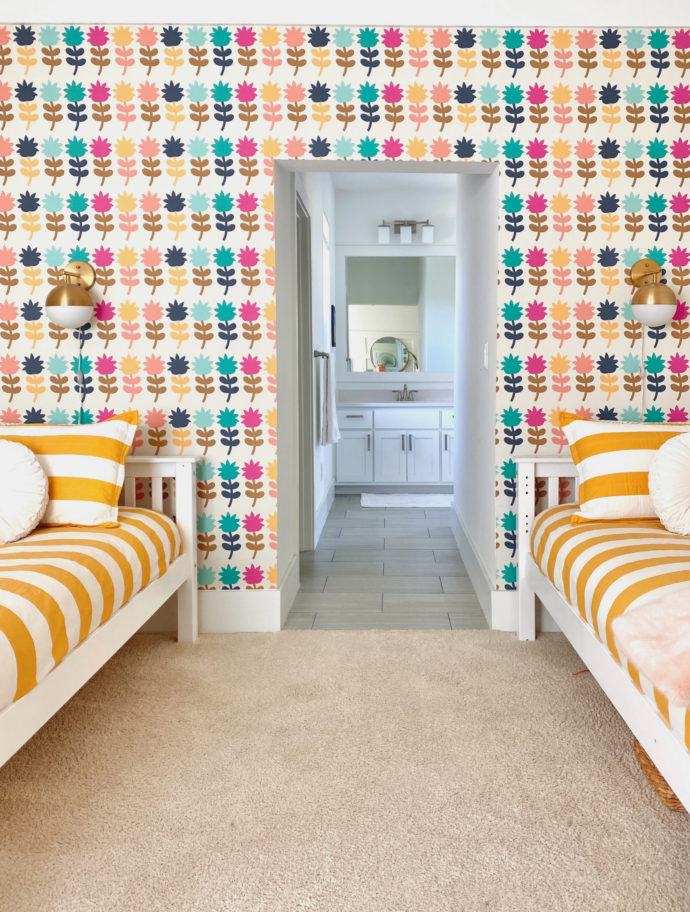
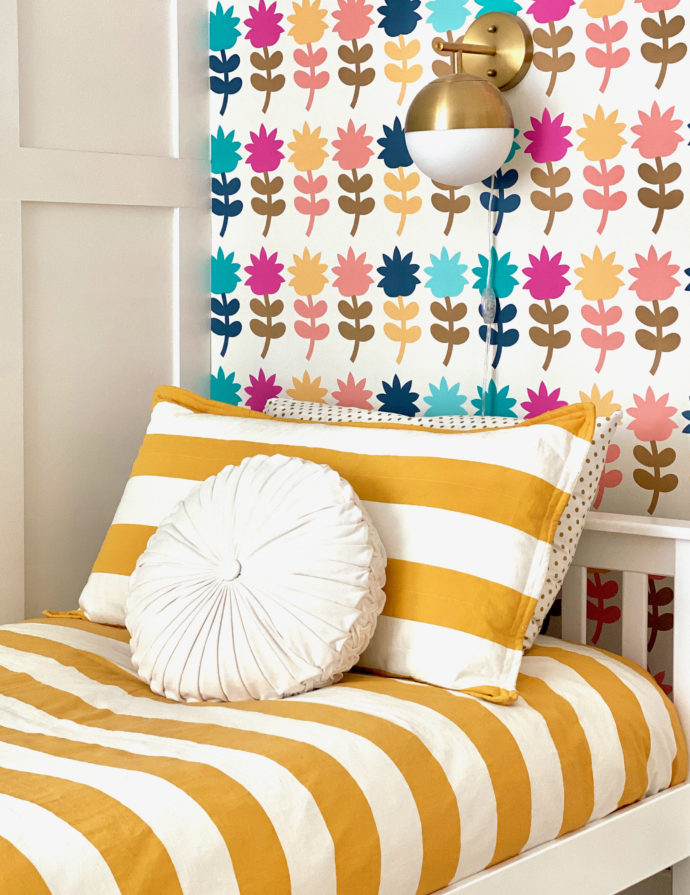
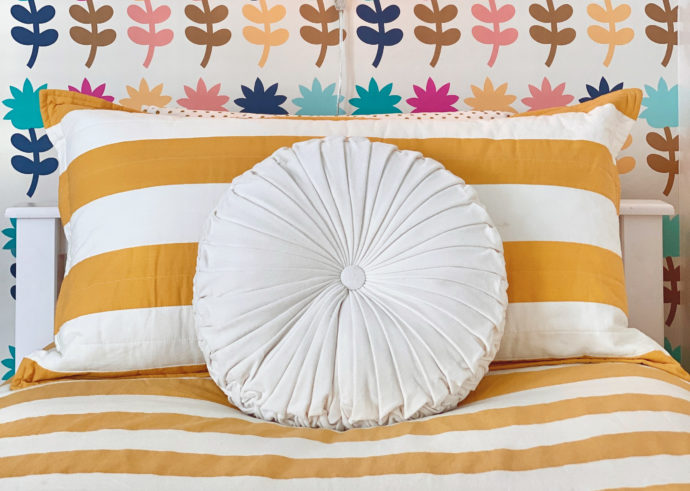
I love how the girl’s room turned out. The wallpaper really gives it some personality (based on my favorite fabric print in the BLUSH collection….which I used in the First Day Dress video. You can find that pattern here)

 And here you go!
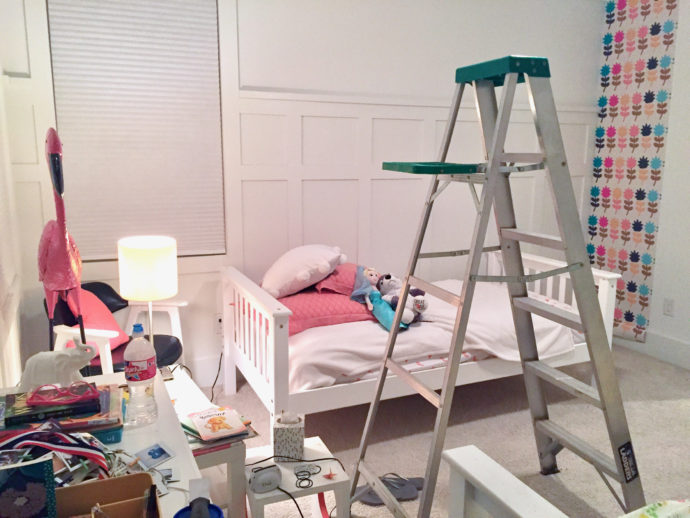
The BEFORE and AFTER.
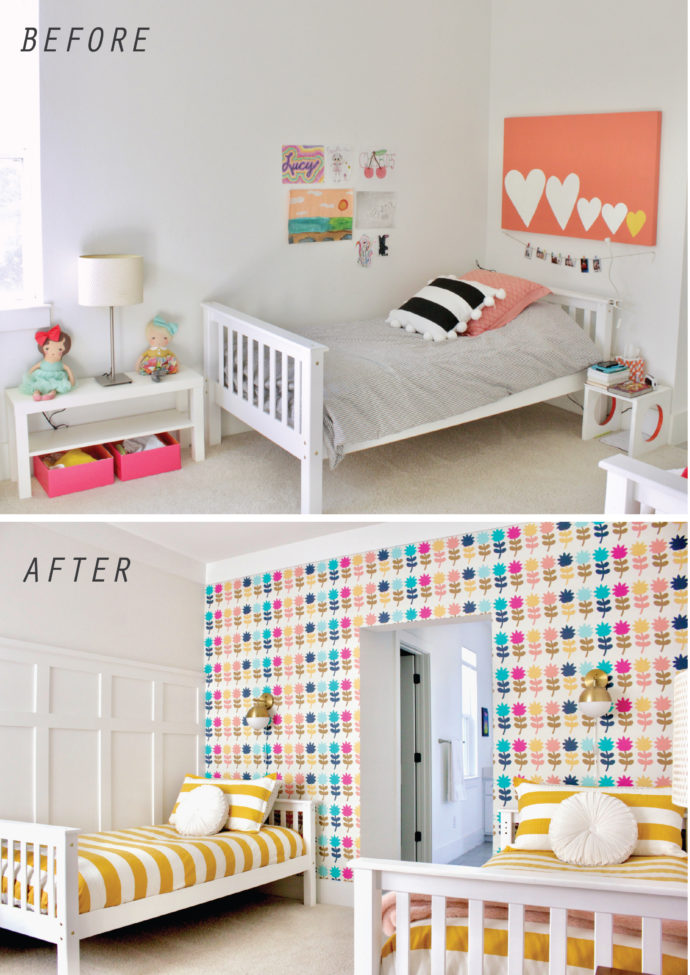
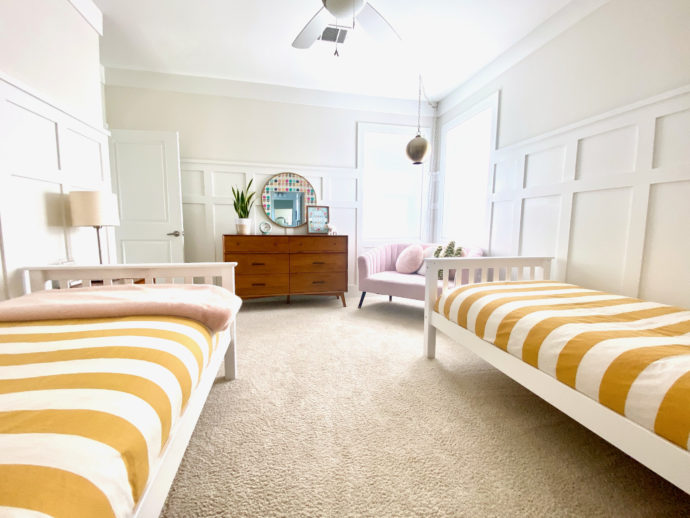 The room is still pretty simple. We could definitely do more with it (I totally need one more pink blanket on that other bed). But I really love it. I’m a bit minimalist (which is code for “I’m tired of decorating this room and want to be done with it”) So I love how the woodwork and wallpaper are really the stars of the show here.
BOARD AND BATTEN WOOD TRIM
If you want to add wood features to your walls, I highly recommend it! I’m not an expert, and before we tackled this room I looked at tons of ideas and info on Pinterest. But here’s my detailed post about our process:
HOW TO INSTALL BOARD + BATTEN
 WALLPAPER
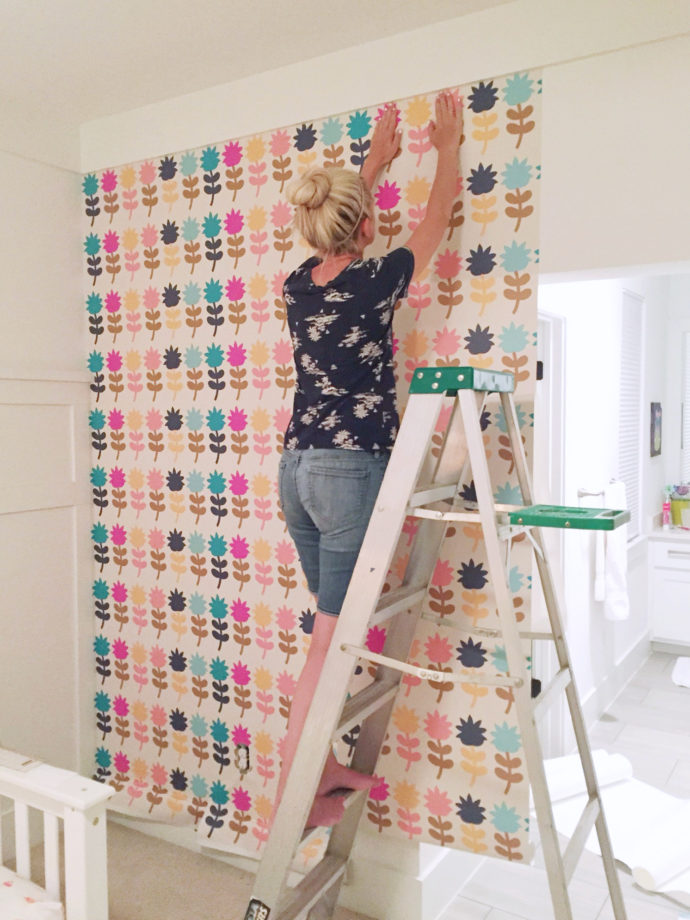
I wanted to use one of my own designs, and I wanted the wallpaper to be simple to install—different from the wallpaper in our dining room which required sanding off wall texture, and a professional to hang it. So I tried out Spoonflower, which was overall good. It’s cool that you can mock up your designs and see how it would look on a virtual wall (see the pics below). And I love that you can purchase samples. I got about 6 samples of my various designs in different colors and shades. Ultimately, I ordered the “Removable Woven Wallpaper” (you can see my exact design here) which is like a giant decal/sticker. You just peel off the paper on the back, and then stick it or reposition it as needed. For this one wall, we ordered 6 rolls.
 Technically according to the Spoonflower site, you are supposed to remove any texture from the walls….which we didn’t do because we just wanted to get started! And our texture is minimal (orange peel) so I figured we’d just go for it. I hung the paper, while Casey cut around the tricky spots.
(3rd alternate title for this blog post: Can your marriage survive hanging wallpaper?
Thankfully yes).
 (Real life scenes from the room—bad lighting mixed with all the cluttery stuff that my kids keep in dresser drawers).
And the next morning, we loved it!
 Until….disaster happened.
Can you see the wallpaper? UGH.
We went on a 3 week long trip in the summer (of 2018) and came home to Lucy yelling from upstairs, “Mom! I think there’s a problem with the wallpaper”!
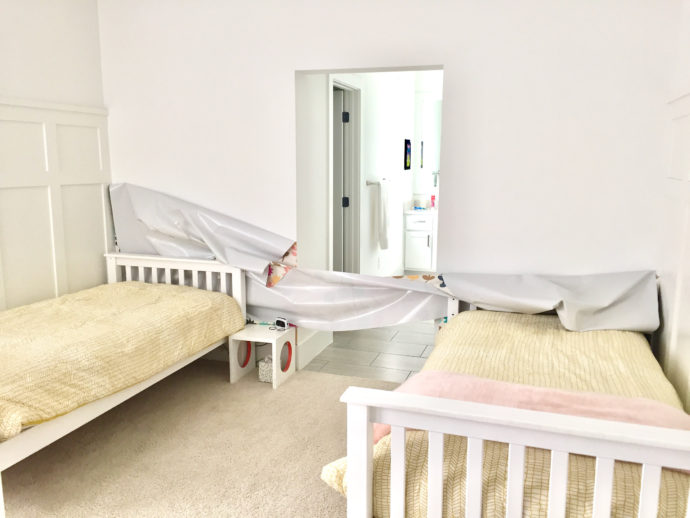
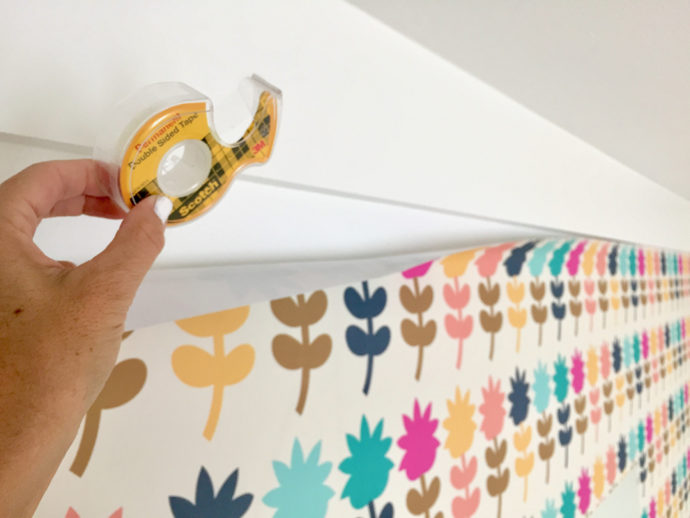
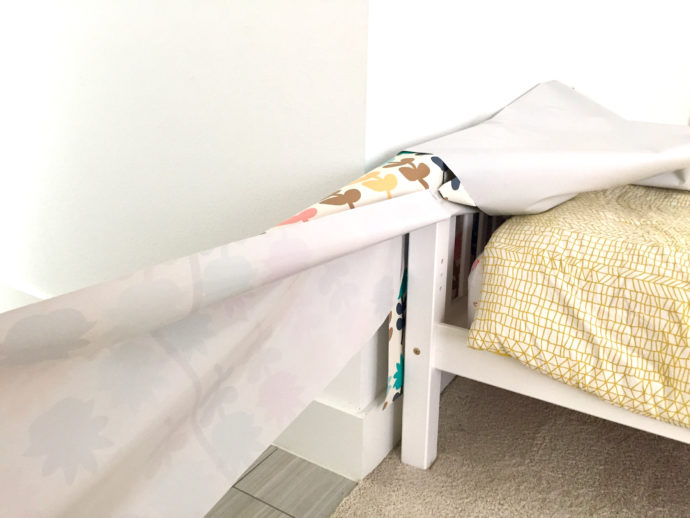 Haah. No kidding! It all peeled off while we were gone. I was so bummed. And I was worried that it was totally ruined. But surprisingly Casey and I were able to peel it off itself and smooth it back up on the wall. I was amazed that it wasn’t creased or torn. I added double-sided tape to the top of the wall to give it extra support.
But then….when we went on another weekend trip that month, it fell down AGAIN!
What. Is. Happening?
Make a fool of me twice, that’s on me.
Yes, it may have been the texture that we left on the walls. But I think it was actually the temperature we left our house at, while on a trip. We kept leaving the thermostat at 85 (in the summer) so our A/C wouldn’t come on as frequently. And I think that was affecting the wallpaper. Since then we’ve read that it’s not good for your walls/house to do that, so we’ve left it at a more reasonable temp.
And to really SECURE THE PAPER IN PLACE, I got 3M mounting tape and placed pieces at the top of the wall behind the wallpaper. It’s been fine ever since! For 2 1/2 years.
 LIGHTING
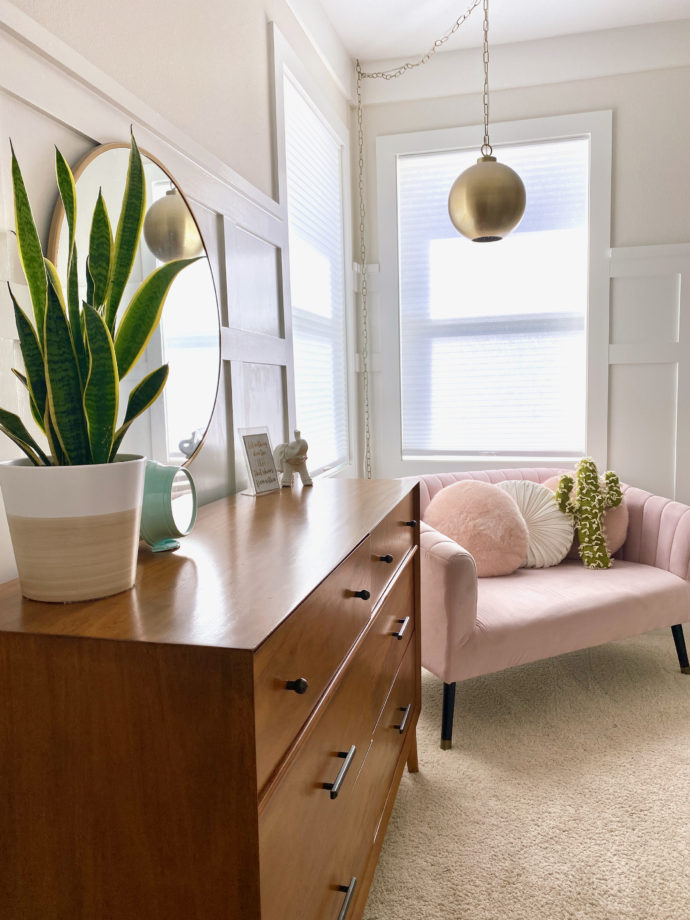
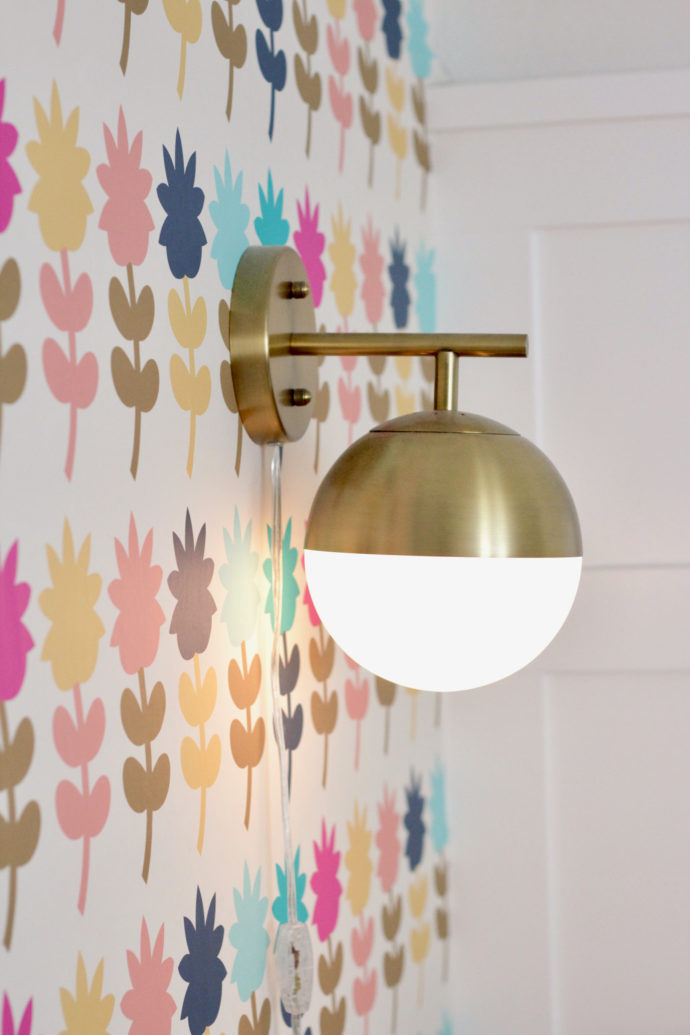
We added gold touches to the room with lights and a round mirror (all from Target). I thought it would look cute to have sconce reading lamps above their beds, and would have preferred wall-wired lights here (so you wouldn’t see the cords). But it just wasn’t working out, so I found these adorable plug in, mid-century lights on Target.com. They were out of stock for 5 months and I thought it was a lost cause, and then one day they had them back! Yay! Looks like they no longer carry them. Boo. But they’re technically called the Glass Globe Sconce Wall Light Brass by Project 62.
I put dim 25W bulbs inside so they give a calm glow when we’re reading together at night.
 Here’s another BEFORE and AFTER.
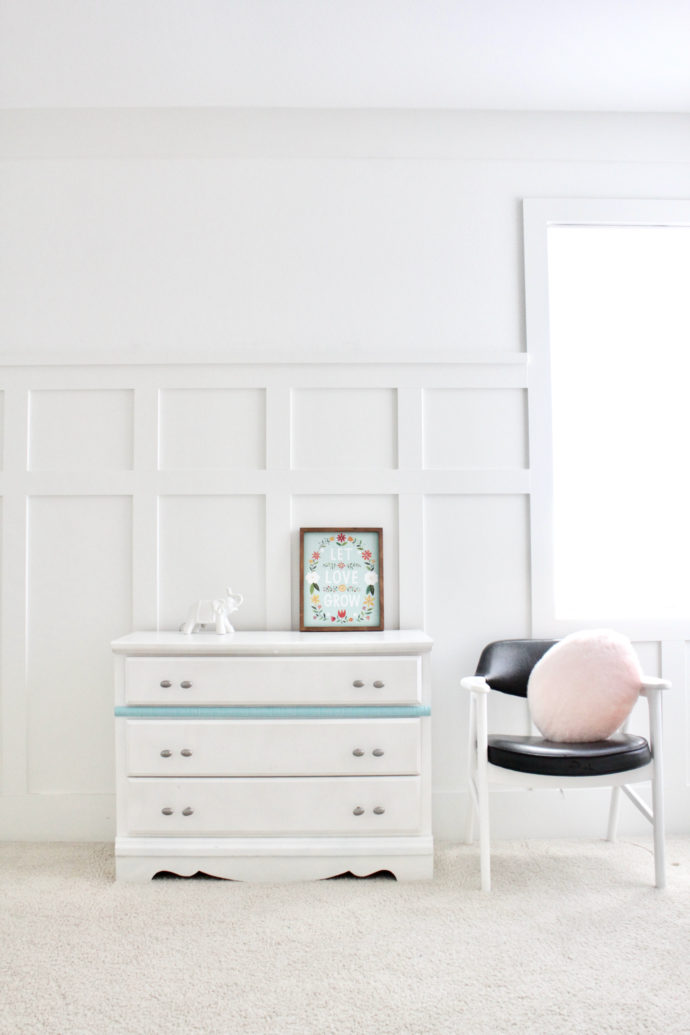
We added some new dressers from Living Spaces. That place is awesome. The Alton Dresser (and night stand) were half the price of the West Elm version.
The Bunk Beds are just from Amazon. Our exact one is not listed anymore, but something similar to these.
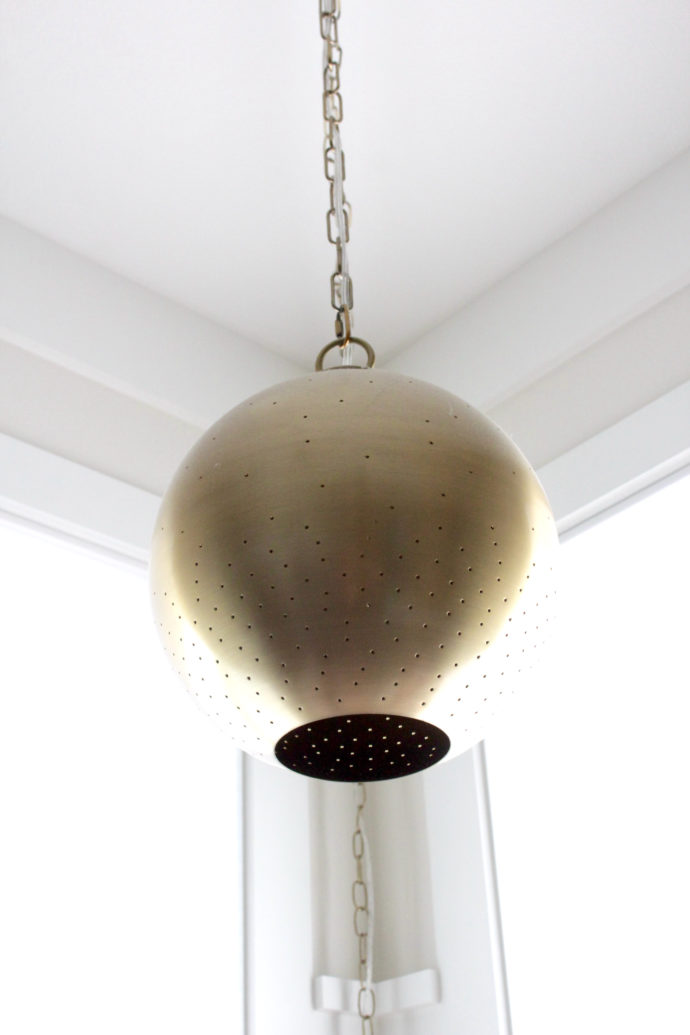
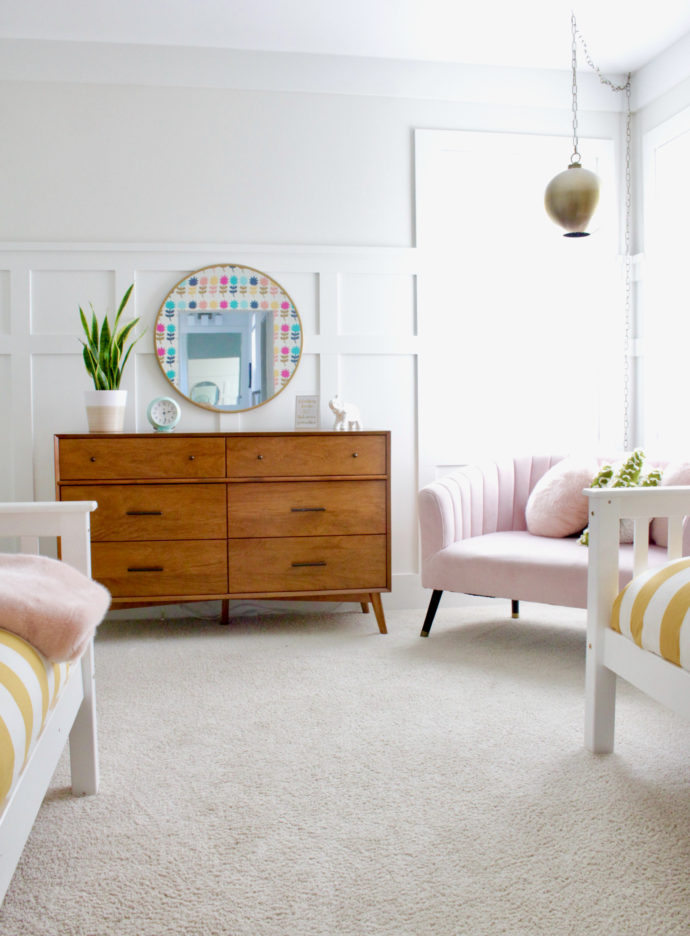 Also from Target, we found this gorgeous hanging lamp with chain. It looks cool the light looks at night, sparkling through the little holes:
 And for anyone who thrives on symmetry….yep. This archway is not centered on the wall. And it bugs me. There’s more room on the left side of the room, than the right!….which drives Clara crazy because she doesn’t have room for a night stand. Big problems here.
 BEDDING
A great design combo is floral + stripes, but I was having the hardest time finding just the right striped bedding online. I was about to make my own striped quilts (which inspired my new Stripey Quilt Pattern) But then I spotted these duvet covers on H&M (they also come in blue!) DONE.
And though it might not be “proper” for twin size bedding, I made King size pillow shams because it’s SO much more cozy to read a book next to someone when you’re sharing a King size pillow! The duvet set came with a twin size pillowcase, but since that wasn’t big enough, I bought an extra duvet set and used that as fabric for my pillow shams. I’ll have to share a separate tutorial for that.
 And that’s a room tour!
2 years after the fact…which is why this little girl had an exciting idea last weekend for the room….
 “Let’s put the beds back together as bunk beds! Lucy and Owen got to sleep in bunk beds and I never got to!” So we set them back up. And Lucy can barely fit on the bottom bunk without hitting her head.
Sooooo, now Lucy’s moving to the guest room and the house projects continue!


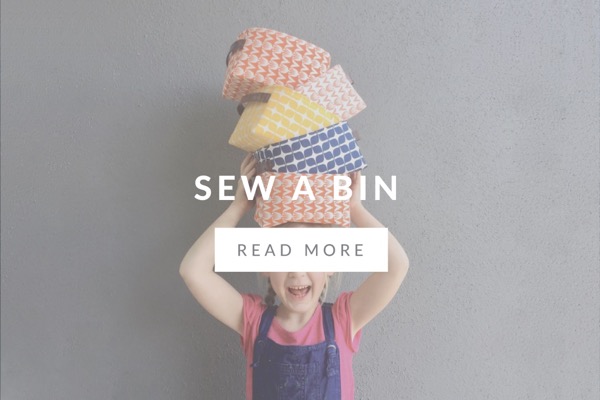


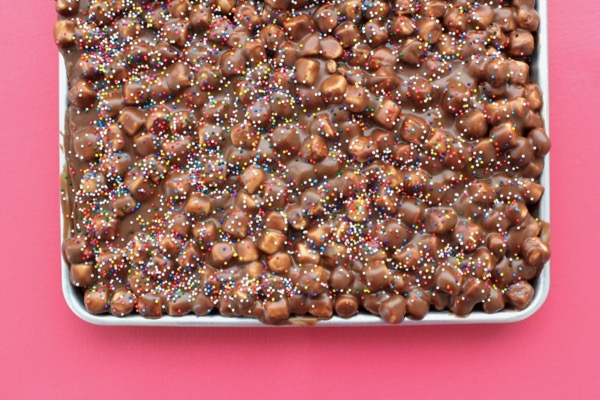


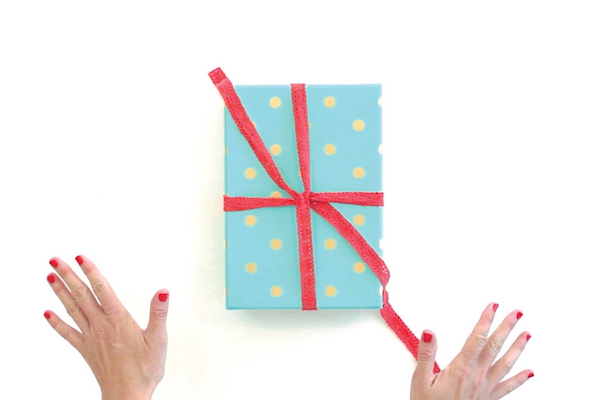


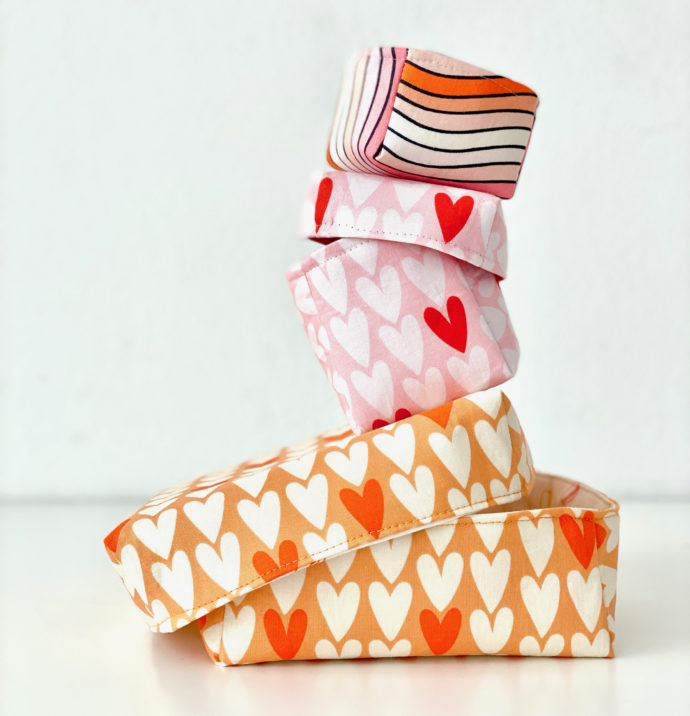
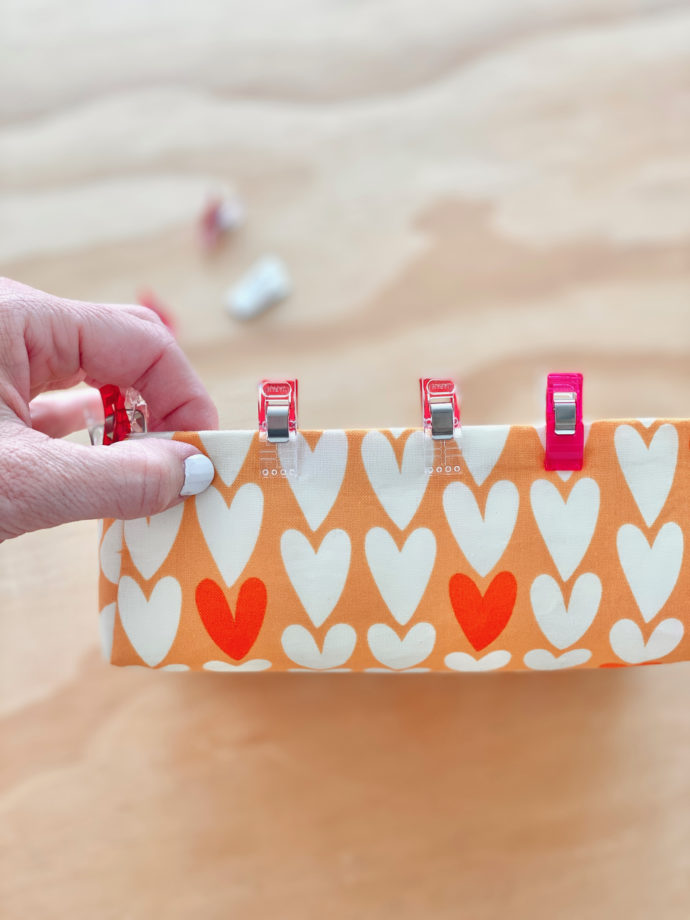
 I made something Valentine’s-y using my Hold it Bin Pattern + Squeeze Fabrics….Because it’s so fun to see fabric come to life when it’s sewn into a project. And really, I can’t resist making these tiny bins.
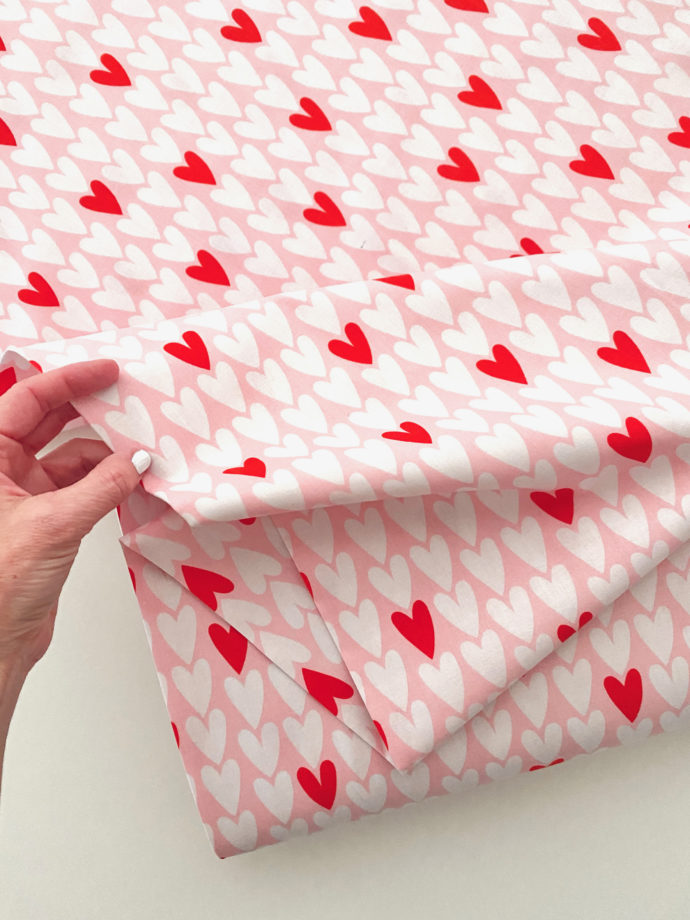


 And, since love is in the air….I’d love to see you make these too!
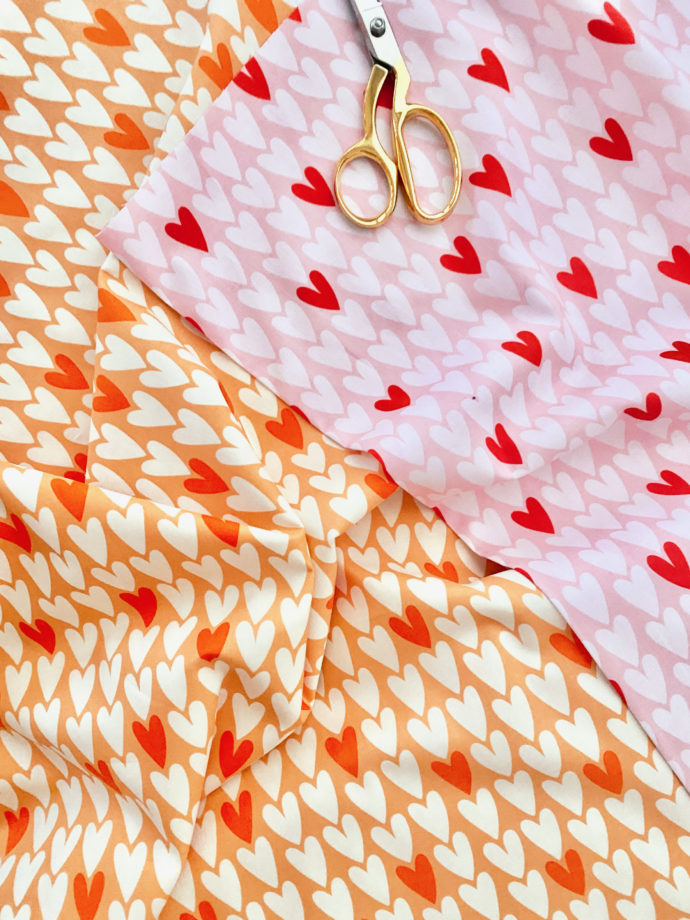
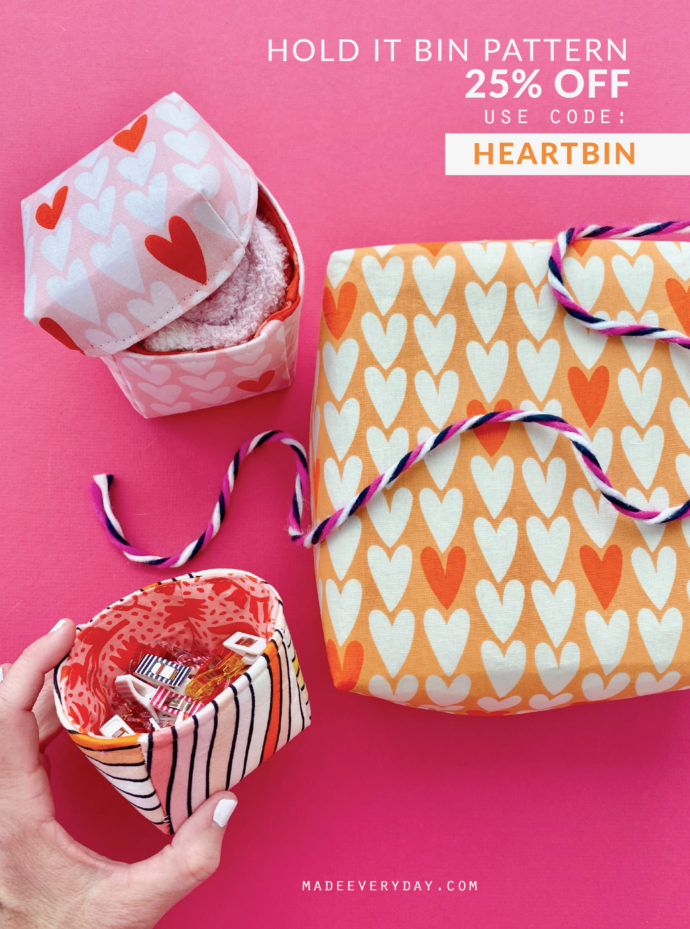
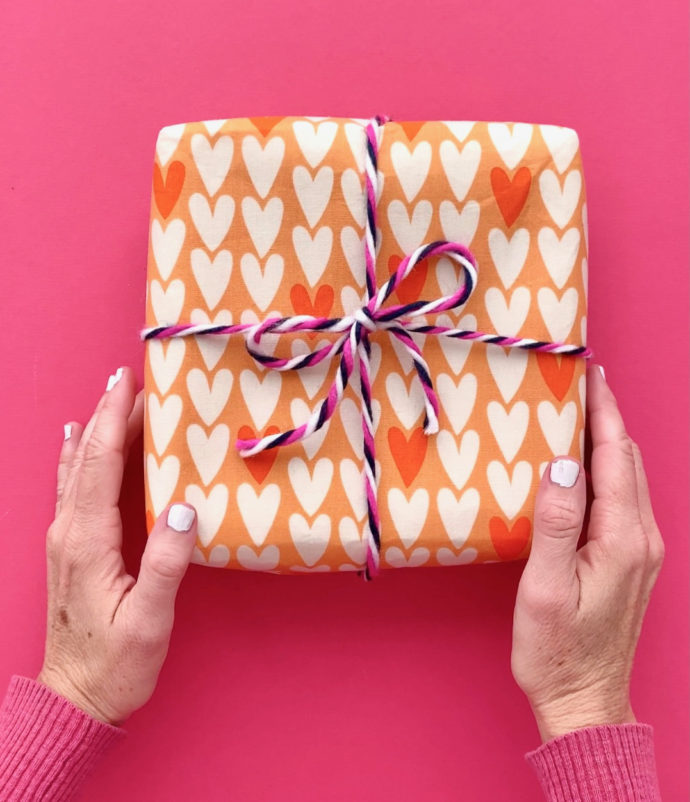
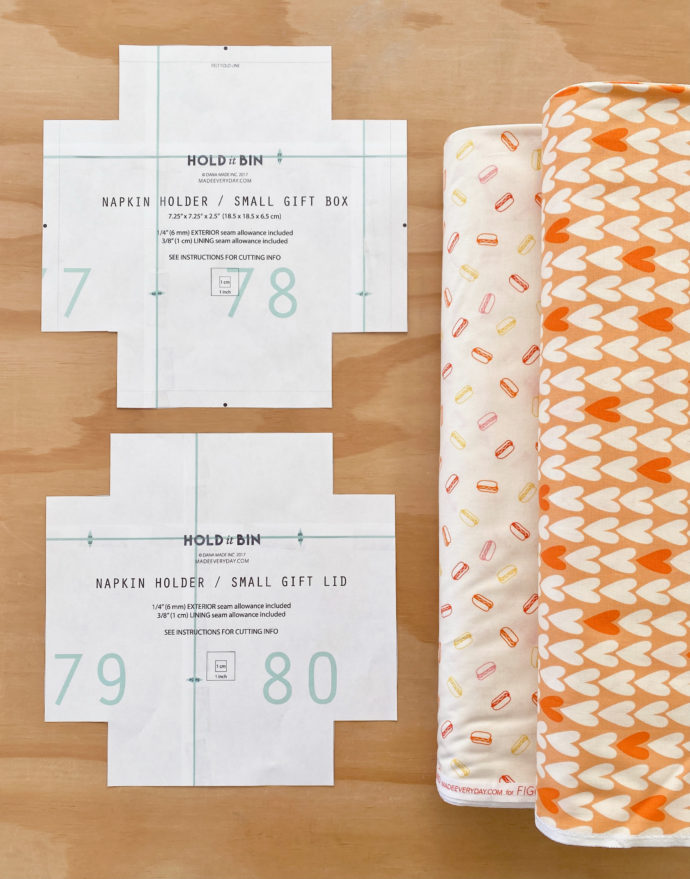 The project is all about the prep: fusing the interfacing, cutting out the pieces, the felt layer, etc. And once that’s done, the sewing goes really fast! And the pattern comes in 14 sizes. So there’s something for everyone.
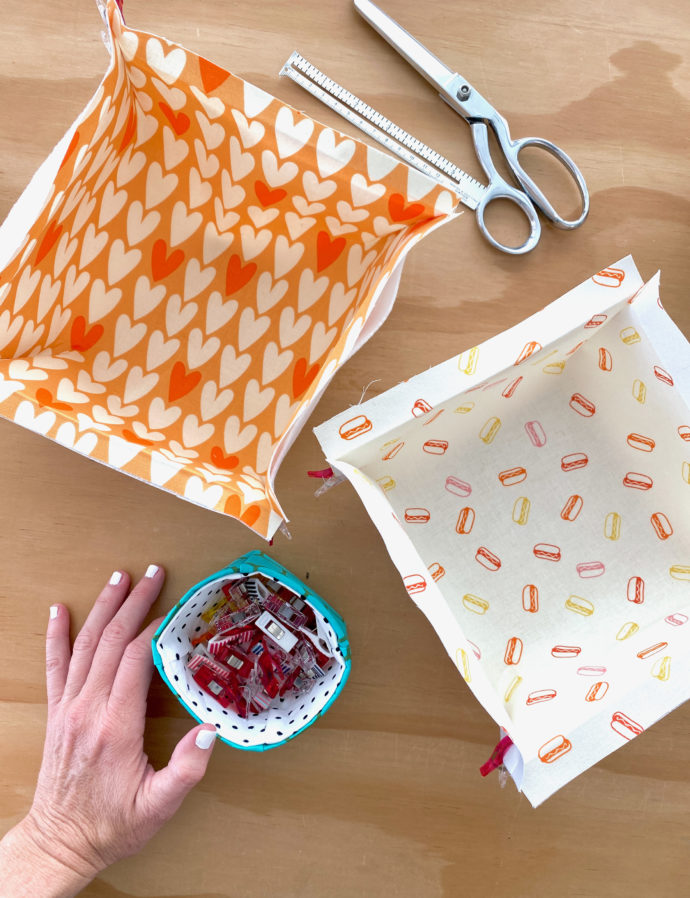
 Happy early Valentine’s Day.
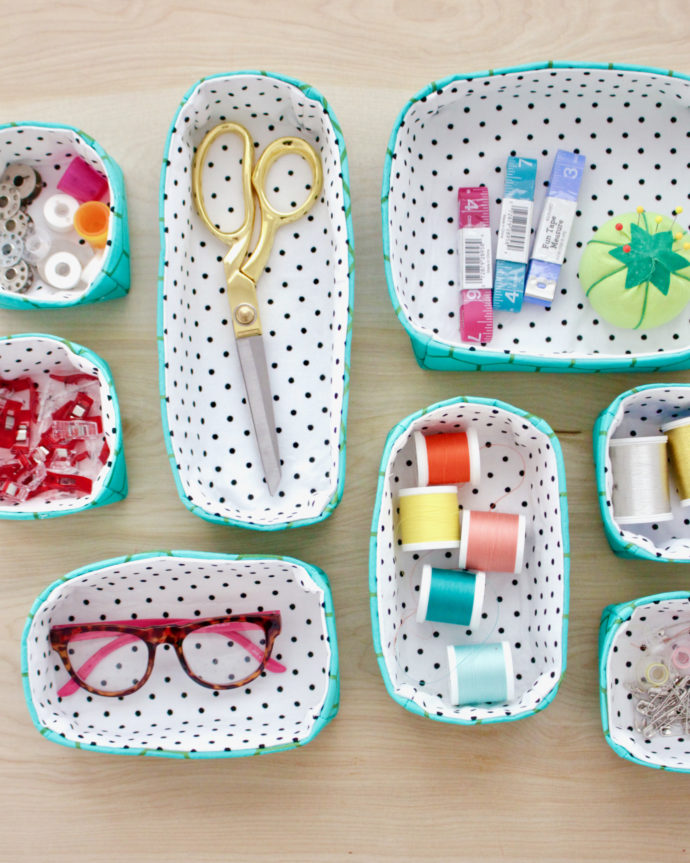
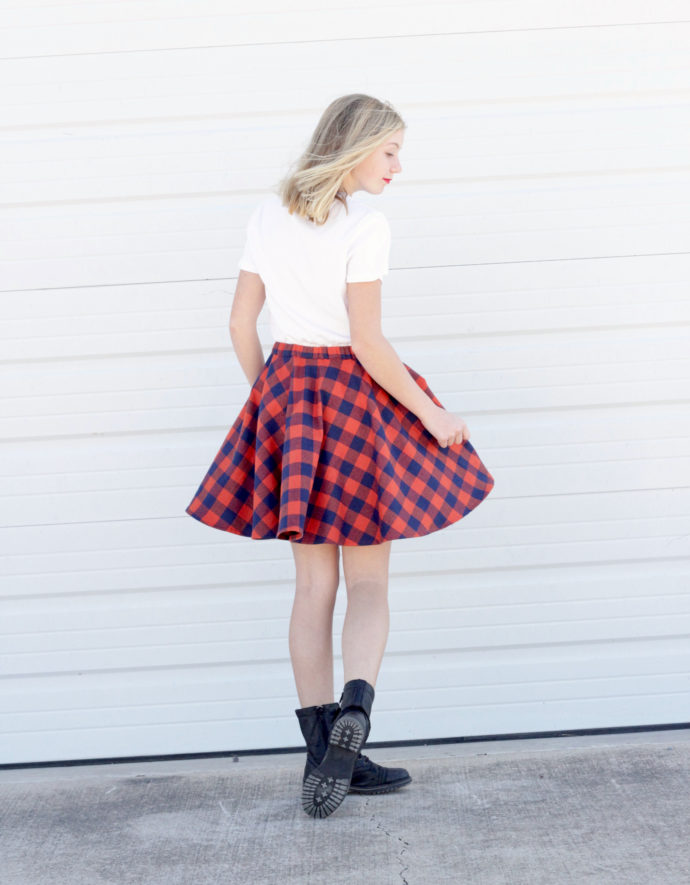
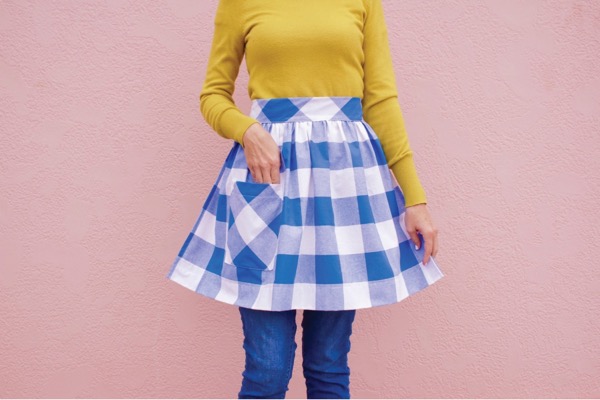
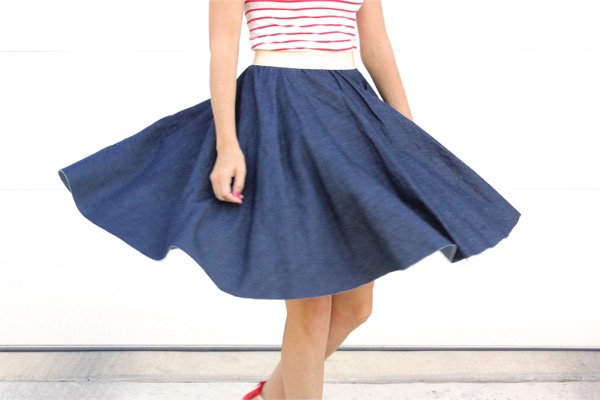
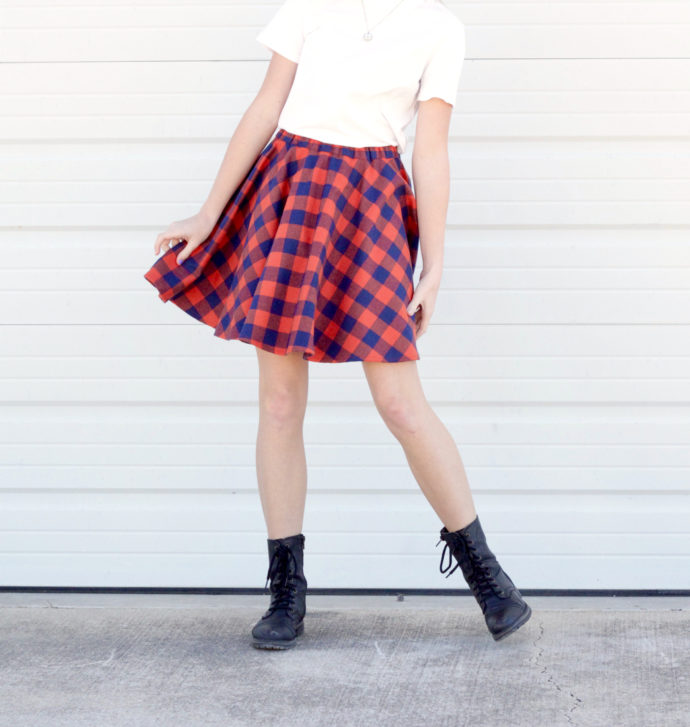 We’ve sewn A LOT of circle skirts together over the years.
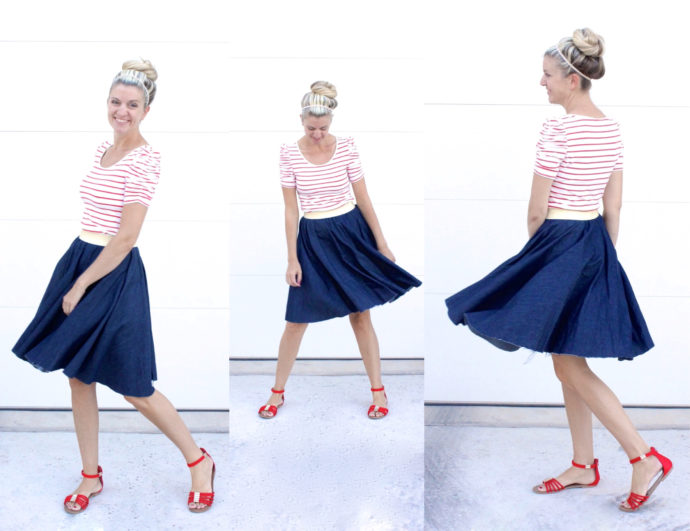
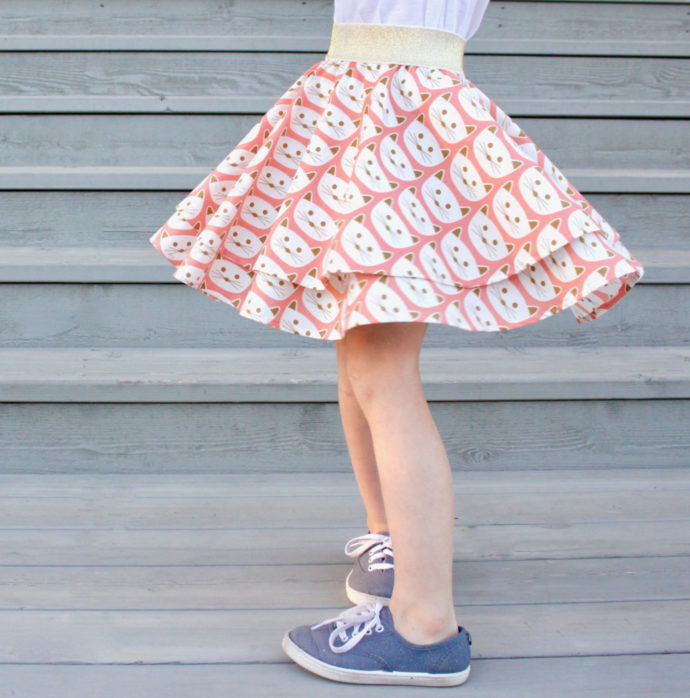 One of the most frequent questions I get is:
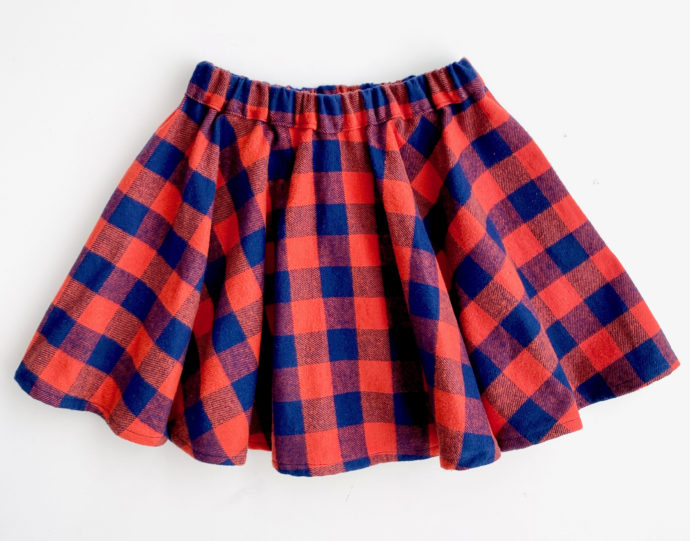
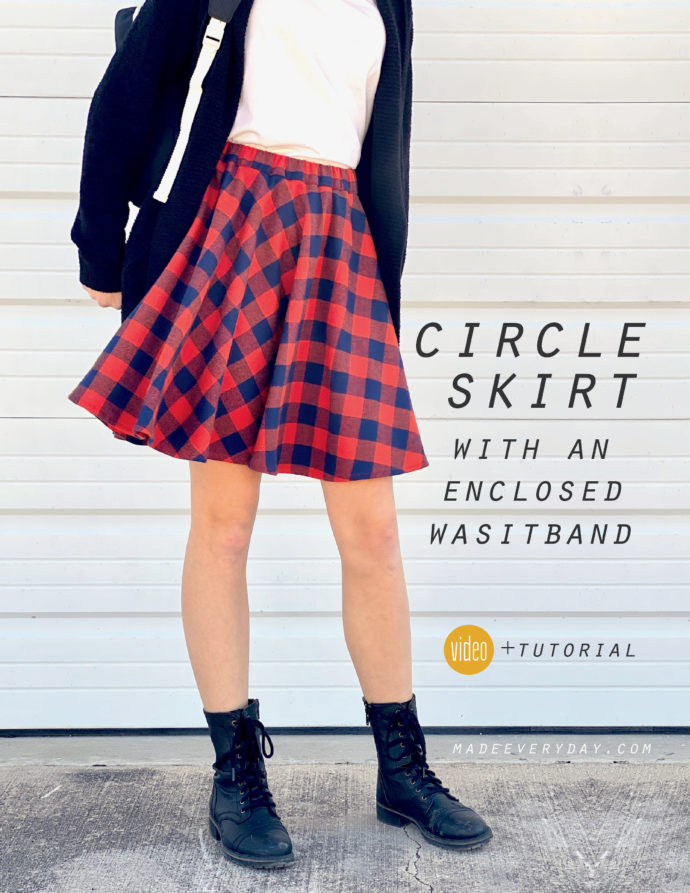
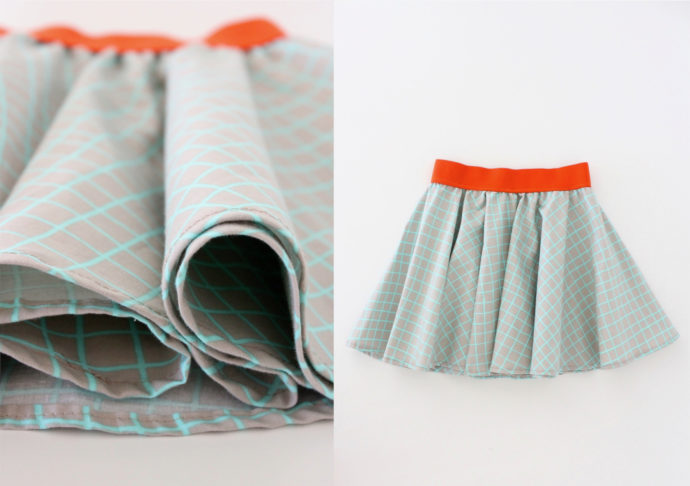
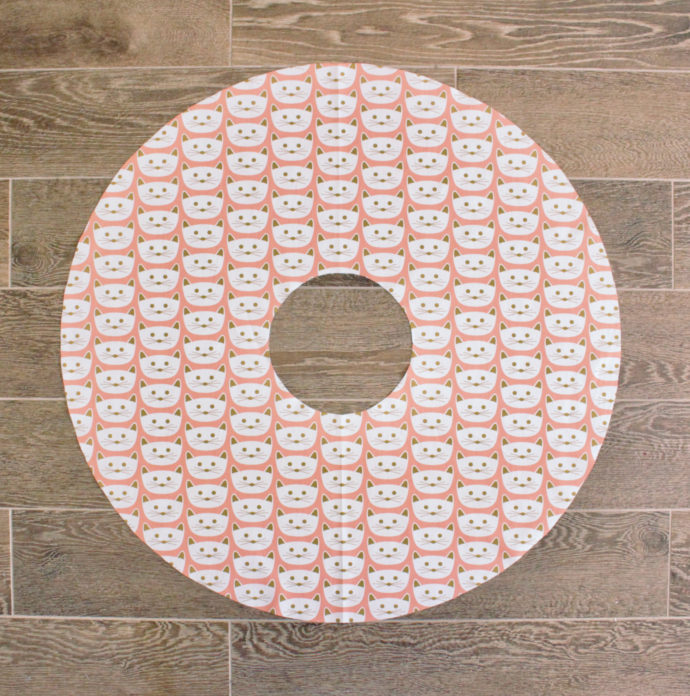
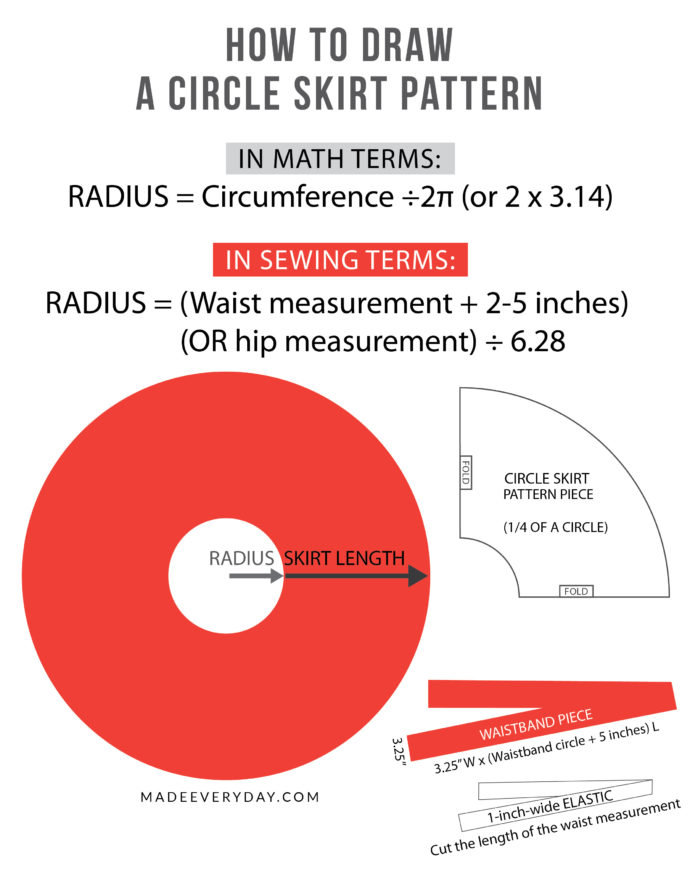 STEPS:
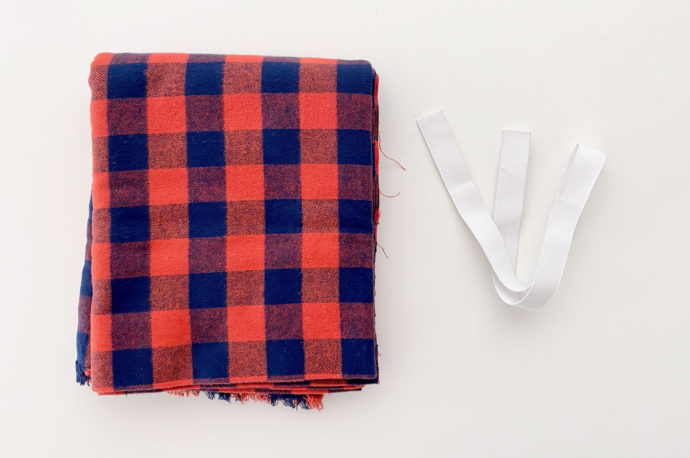
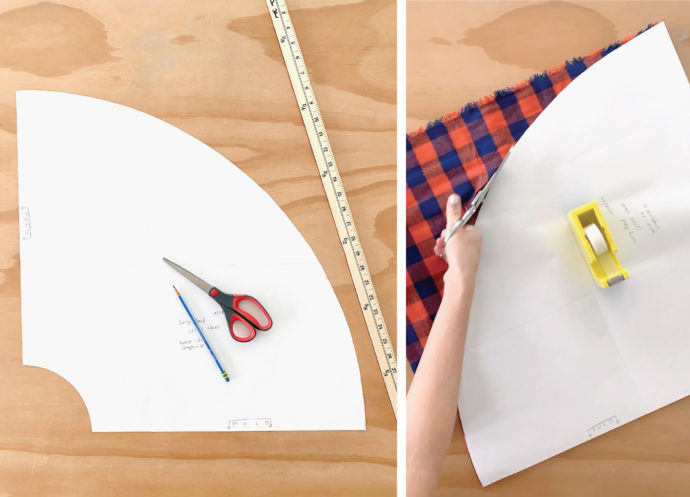 3. Cut out your Waistband Piece: 3.25″ wide x (the waistband circle + about 5 inches of tail) long We need to add a separate piece of fabric for the waistband, rather than simply folding the skirt fabric under (as we’ve done with a
 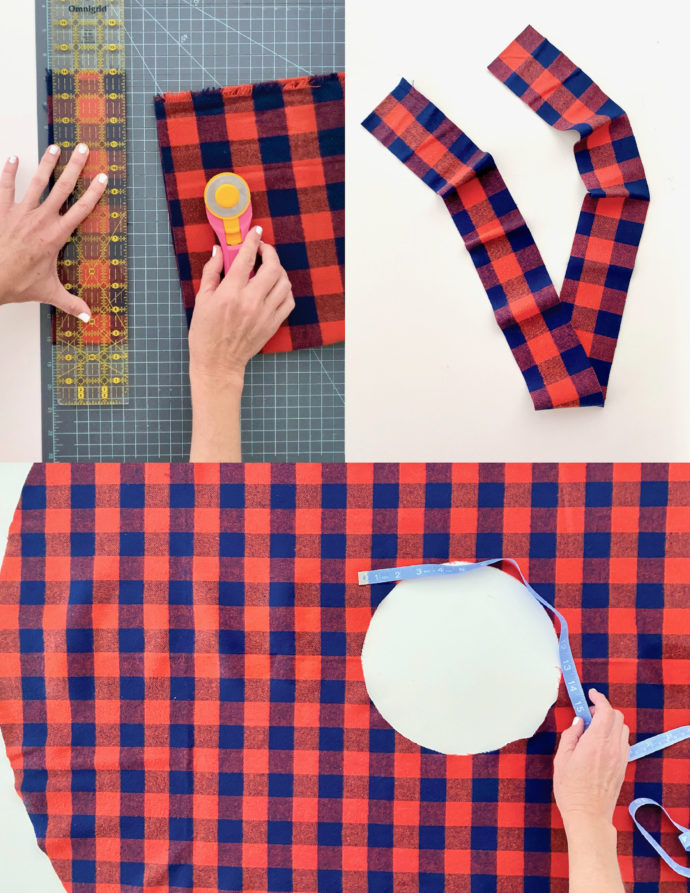 • Press the two long edges of the strip over 1/4″ to the wrong side of the fabric, then fold the whole thing in half, length-wise. And your waistband piece is ready to go!
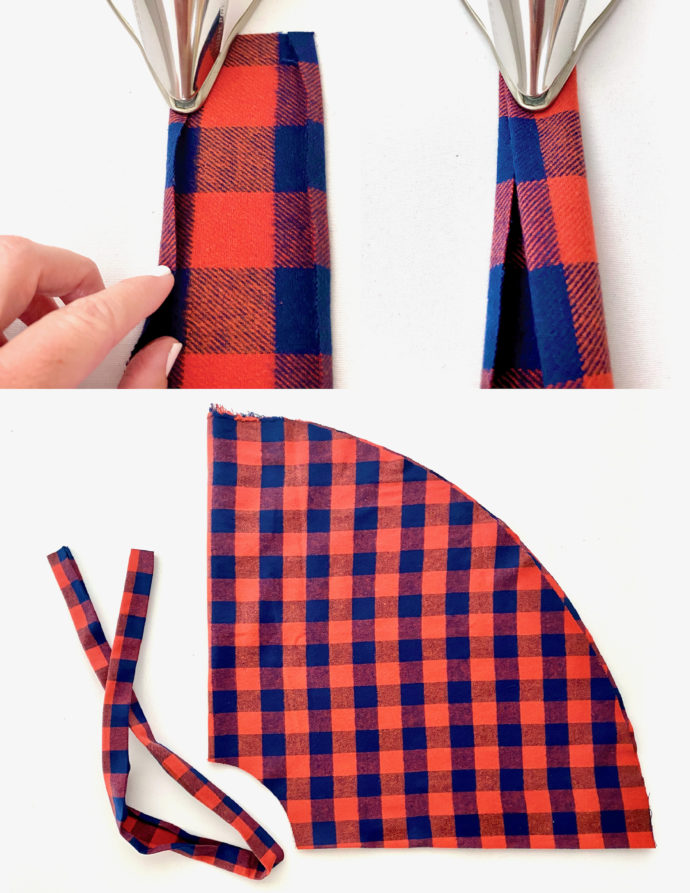 4. Attach the waistband piece. Start with the WRONG side of the skirt fabric, and the RIGHT side of the waistband fabric together (I know that sounds wrong in your head, but the waistband will eventually fold over to the right side of the skirt. Note: my fabric does not have a technical wrong or right side. But if yours does, pay attention to that detail)
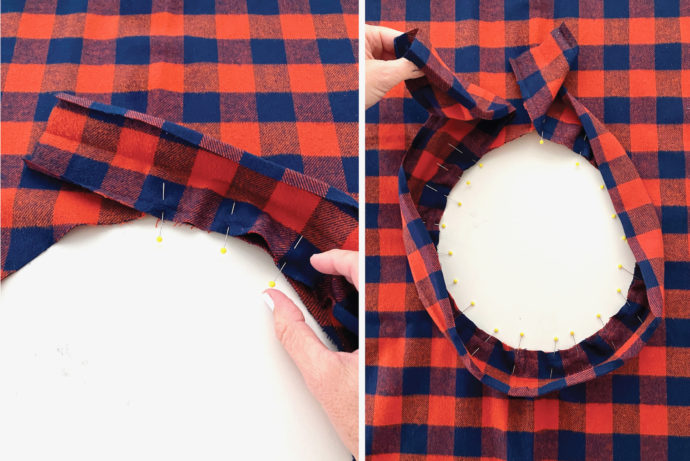 • Sew the ends of the waistband piece together. When the two ends of the fabric join back up, there will be a tail of fabric on each side. Match the pieces together and mark a line where we need to sew the waistband together (you can use a fabric marker, or place a line of straight pins to guide you). This will enclose our waistband piece for a nice precise fit. You can see this in-action in my
 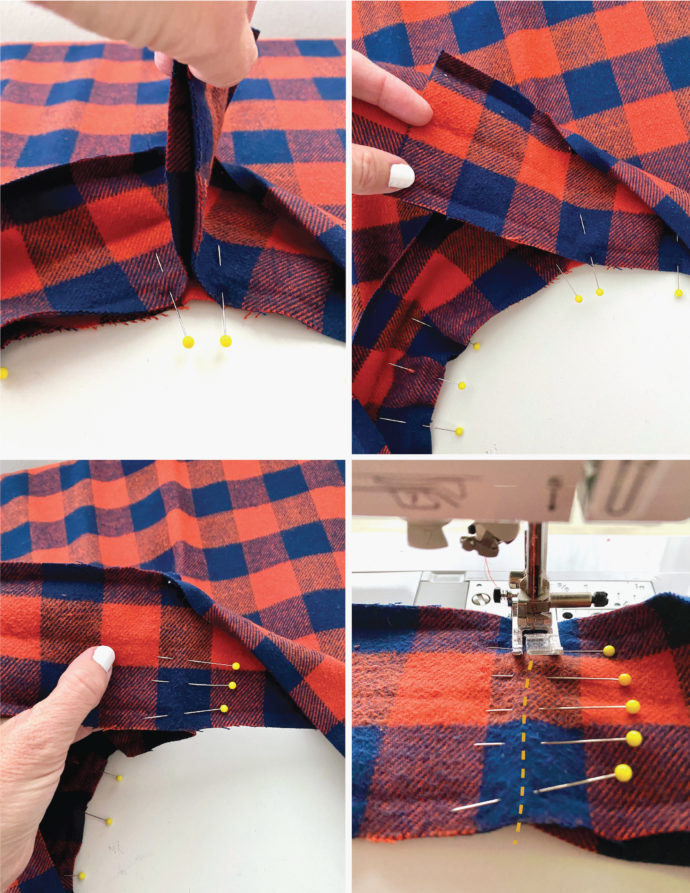 5. Sew the waistband to the skirt with a 1/4″ seam allowance. Sew right along the previous crease that we made, which gives you a 1/4″ seam allowance.
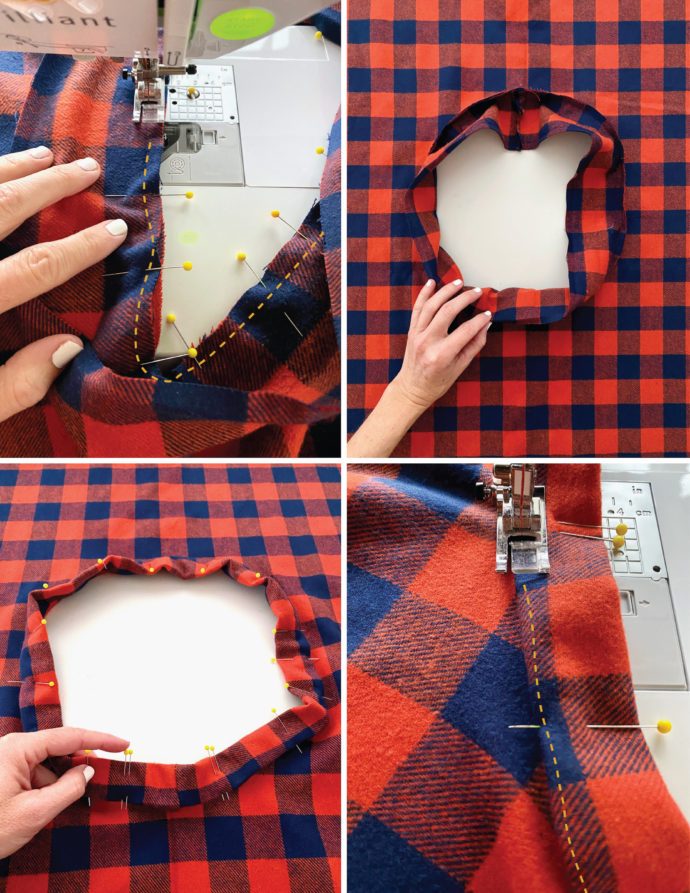 8. String elastic through the skirt. Attach a safety pin to one end of the elastic and push it through the waistband opening. Attach the other end of the elastic to the skirt with another safety pin. Push the elastic around the casing (careful not to twist the elastic) till it comes out the other side of the opening.
 11. Hem the skirt. Fold and press the edge under 1/4″, all the way around. Then fold it over another 1/4″. And sew it in place! If you’re having trouble with this step, watch my
 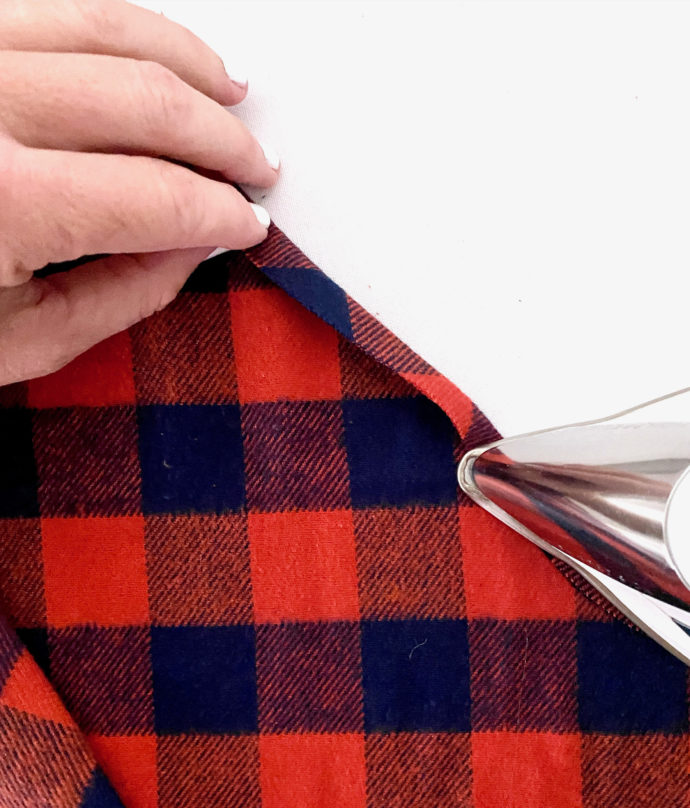 And you’re done!
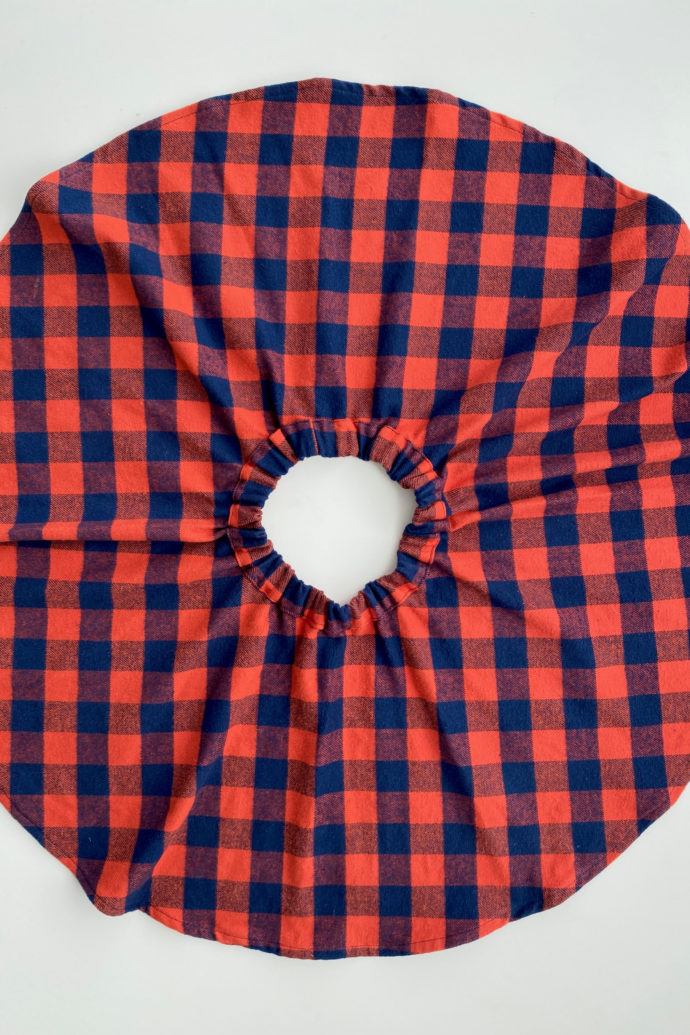
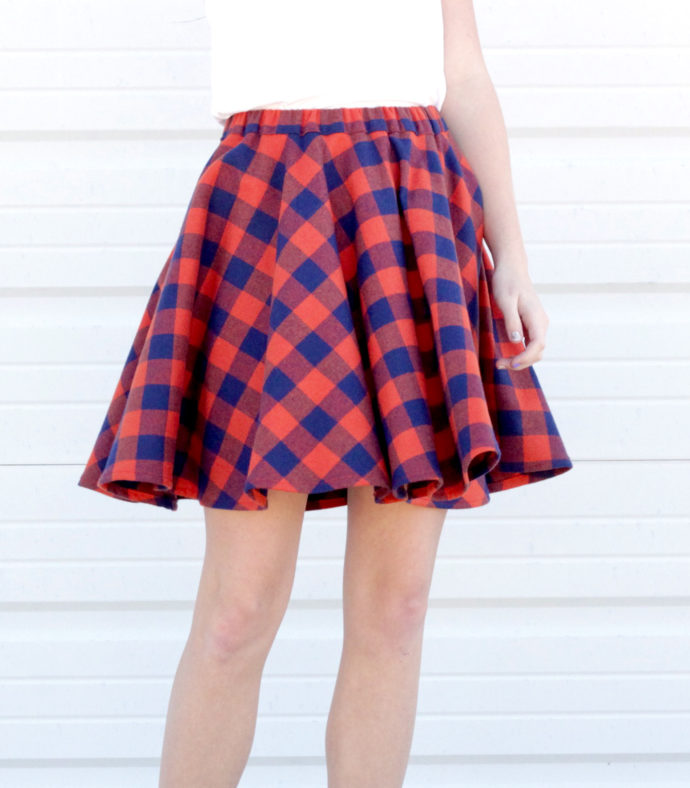 Enjoy your twirl!