
Good morning friends.
Happy Friday!
As I mentioned earlier this week, photography is probably my favorite aspect of blogging. And incorporating my photos into graphics is just as fun. It’s very easy to take a picture, crop it, add text over the top, and you’re done! Of course there’s so much more you can do by manipulating the color of a photo, layering photos, or creating a mosaic of pictures.
So let’s go to a photo expert and pick her creative brain for ideas. Say hi to Katie Evans! You’ve heard me talk about Katie before and her fabulous Photography ebook, The Key to Taking Photos Like a Professional Photographer.
 Well, today she’s going to share tips for creating a mosaic-type header in Photoshop Elements.
Now I know what you’re thinking when you hear the word “photoshop”….something like, I don’t have that fancy software! But guess what, Photoshop Elements is actually a watered down version of Photoshop and only costs $80! I’ve actually been meaning to buy it for years. I think now’s the time.
It’s fairly easy to use and keeps the quality of your photo header high.
So let’s hear from Katie…. ————————————————————————–
Hello MADE readers! I’m so excited to be here sharing a tutorial with you. Before we get into it let me tell you a little bit about me…I’m a professional photographer who recently came out with a photography book geared toward the beginner/intermediate photographer. I love to take pictures but in writing the book and teaching workshops I’ve found that the teaching and sharing side of photography has proved to be equally rewarding. So it’s fun for me to share this banner tutorial with you.
Are you ready to design a blog banner for the MADE header competition? It’s really an easy process. I’ll be showing you how to do it using PhotoShop Elements.

To start go to FILE–>NEW–>BLANK FILE…
from here you will see a screen pop up like the one shown below:
To make the banner the same size as the one on Dana’s blog use the amounts shown above. Width: 793 pixels, Height: 235 pixels, and Resolution: 72 pixels/inch.
Once you click “OK” you will see your blank banner all ready to design:
Obviously you won’t want to make your banner look exactly like mine but as I show you how I created it you can use these techniques to come up with your own design.
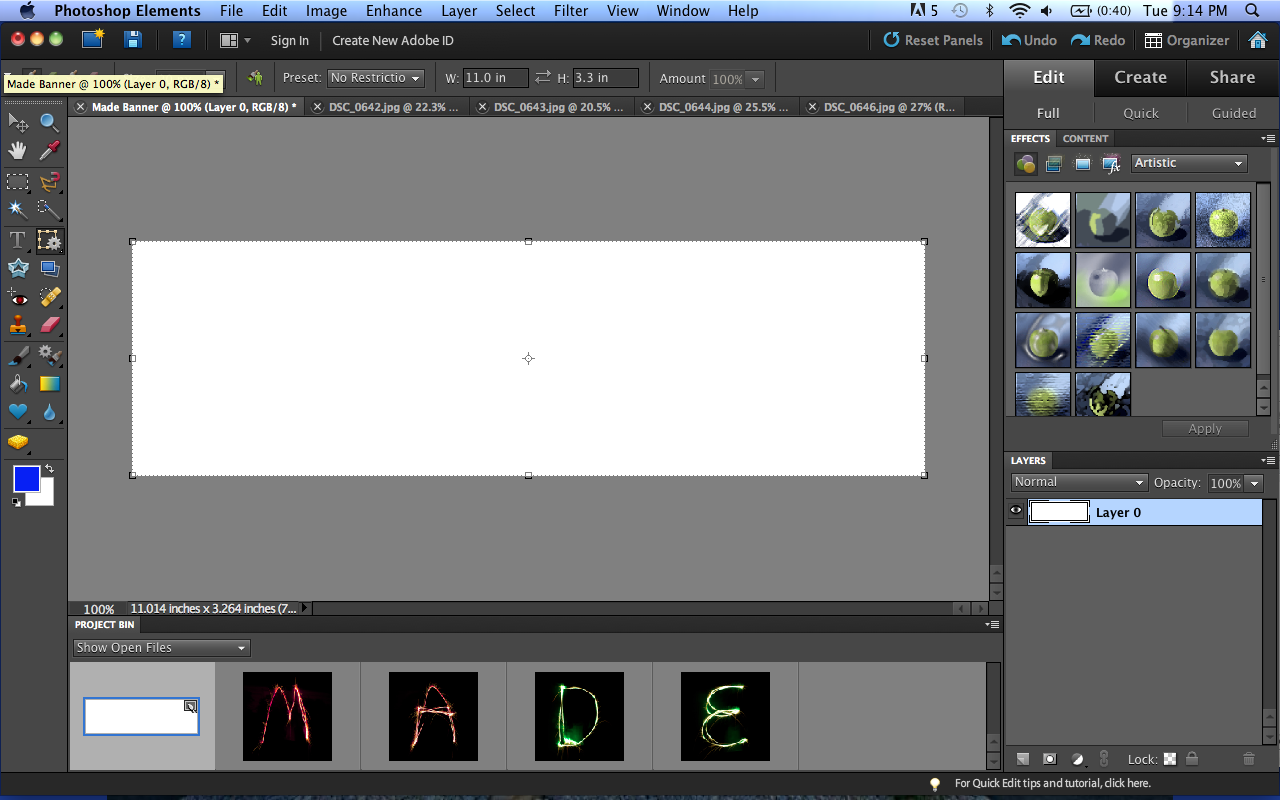
Now you will want to bring in all your photos that you want to use on your banner. (I used pictures directly from Dana’s site by right clicking on the picture and clicking “save image as…” then you can save it to a folder on your own computer.) To open them up in Photoshop Elements click on FILE–>OPEN. All of your pictures will now be organized at the bottom of your screen.

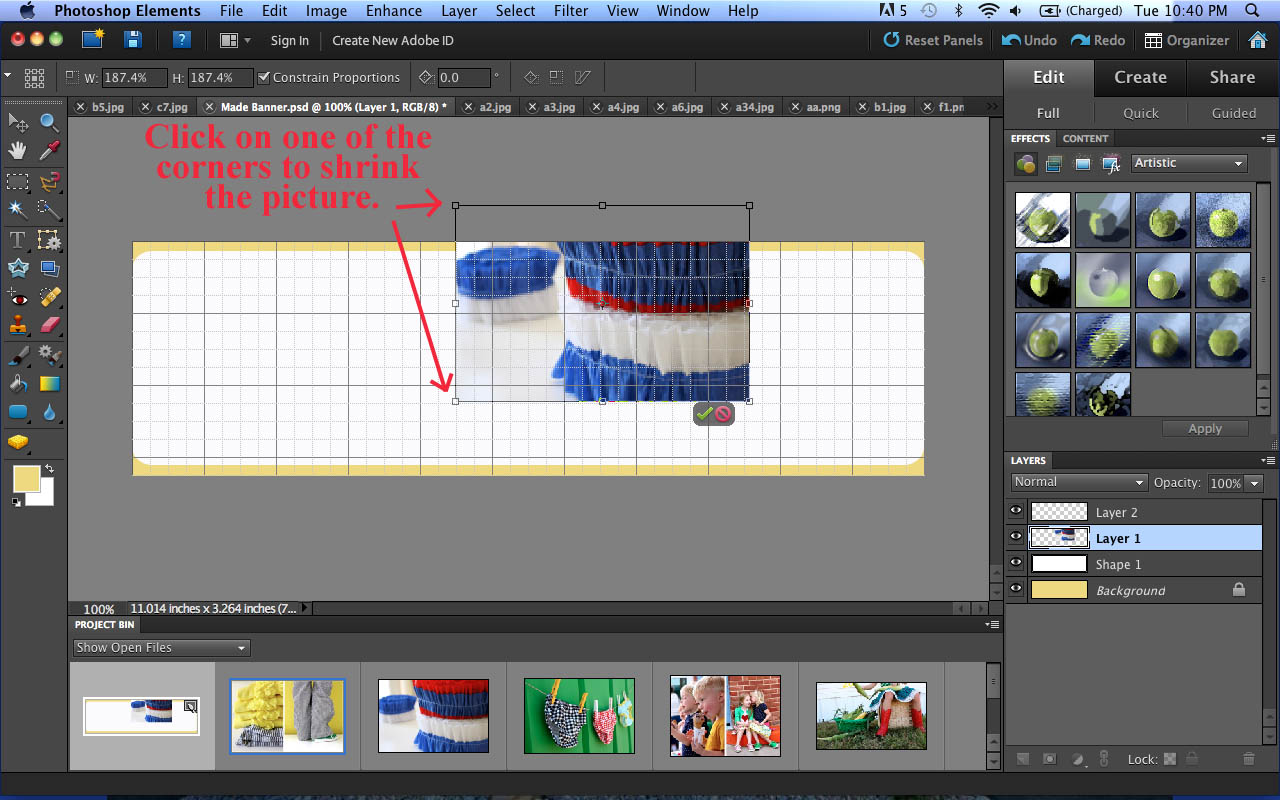
Now your picture is on your banner but you will have to shrink it down to the size you want. To resize it simply hover your curser on one of the corners of your picture until you see a diagonal line with arrows at each end. If you click and drag that line in toward the picture the entire picture will shrink proportionately.
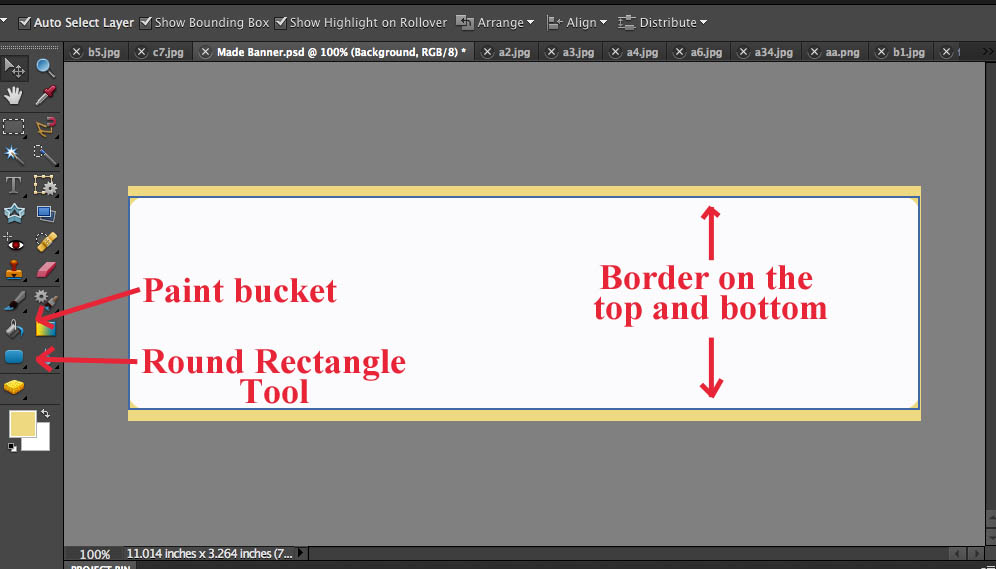
I like turning on the grid view which makes it easier to line up the edges of the pictures. To turn on the grid Click VIEW–>GRID.
As you bring in all your pictures and arrange them on your banner, zoom-in on your banner as it will help you align the pictures. To zoom-in push the apple key and “+” key for a mac or control key and “+” key for a PC. To zoom-out click the apple (or control) key and “-“ key. (see the screen shot below)

Now that you’ve arranged all of your pictures on your banner, you can use the TYPE TOOL to write on your banner. To turn the text sideways (as I did for “MADE”), click on the text with the MOVE TOOL then hover your pointer over one of the corners until to see a small curved line with arrows on each side. Click on that curved line and move your cursor up or down to rotate your text.
Once you are finished creating your banner click FILE–>SAVE FOR WEB... You will then see this screen:
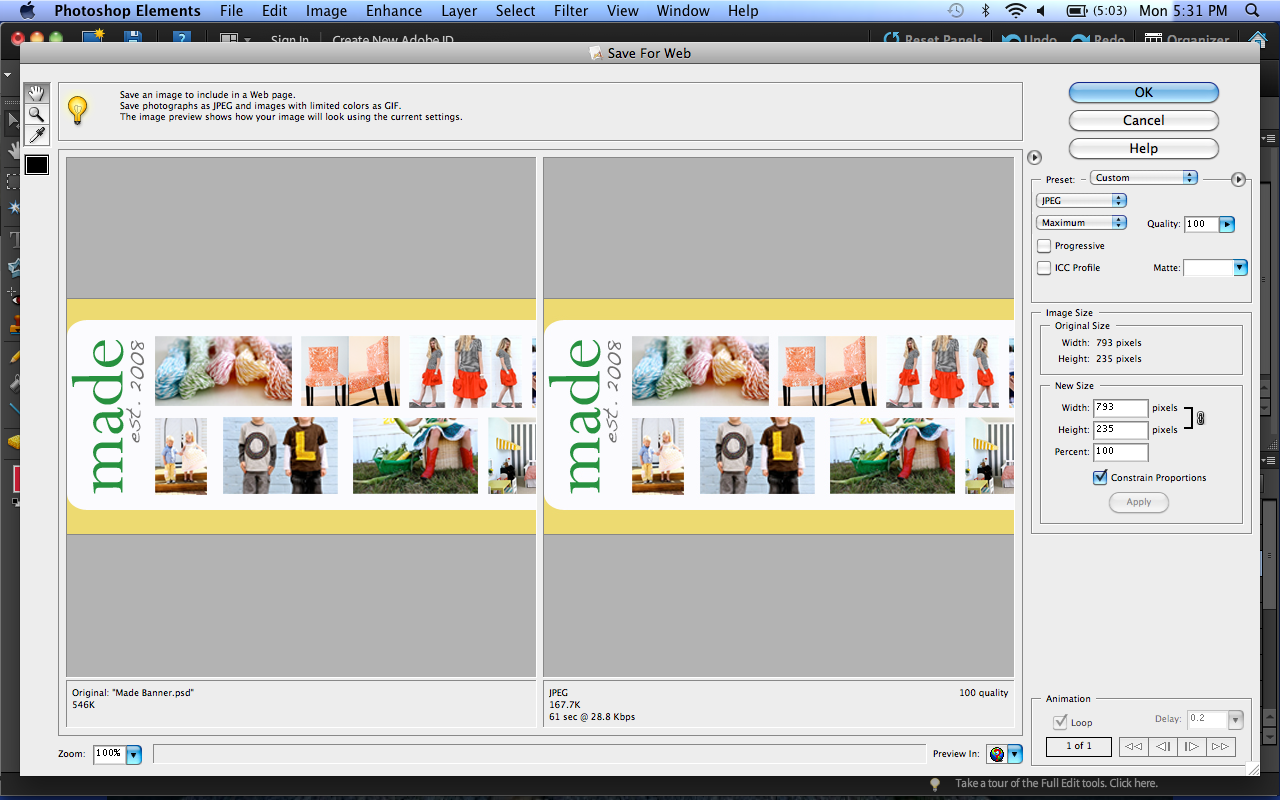
In the right column choose JPEG and MAXIMUM. Then click OK. You will then be given the opportunity to name your file and chose where it will be saved. Now click SAVE and you’re done!
Good luck and I can’t wait to see what you come up with!
———————————————————————
Thanks Katie!
Make sure to check out Katie’s photography blog for other photo tips and ideas.


Hi Katie,
Step by step procudure to create a banner/header for website 🙂 helped me to create one on my own.
You are awesome 🙂
I will post my website address as soon as its ready for you view and comment.
Thanks a lot for making this.
regards,
Sathish