
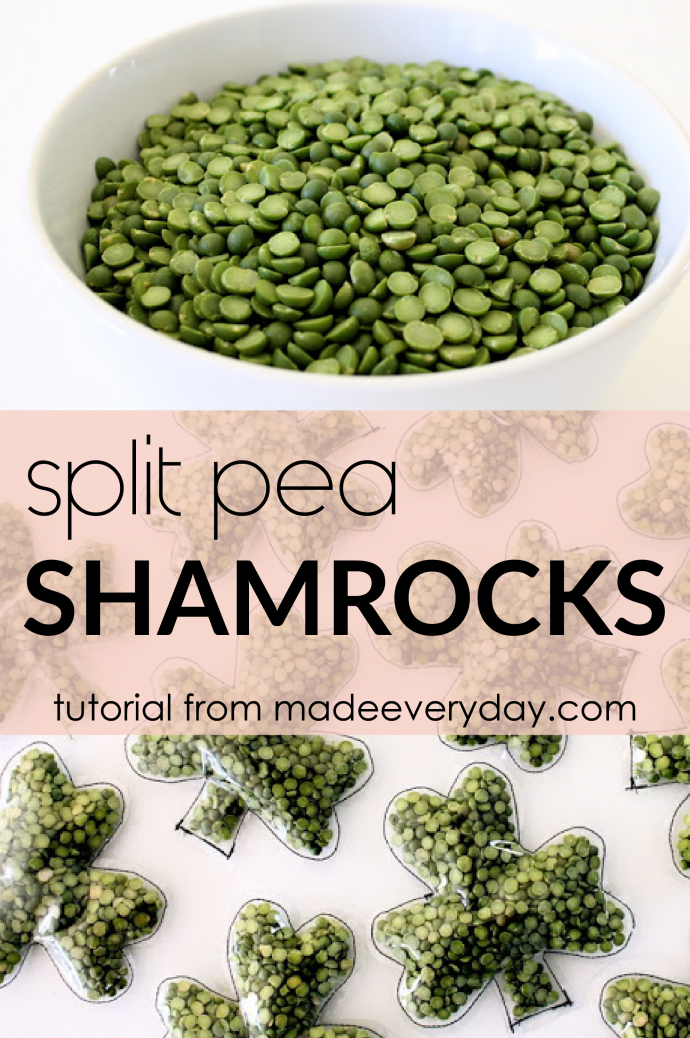
St. Patrick’s Day is a funny holiday to me. It’s nothing to “write home” about. Yet the simple excuse to create something clever and GREEN really excites me. When I was buying rice at the store the other day, I spotted a bag of Split Peas and thought, I’ve gotta use those for something. So here you have it. My St. Patrick’s Day contribution….
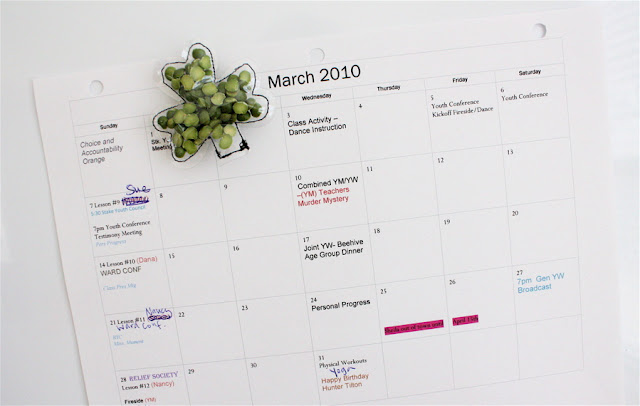
They’re the perfect Green decor, so love them all month long.
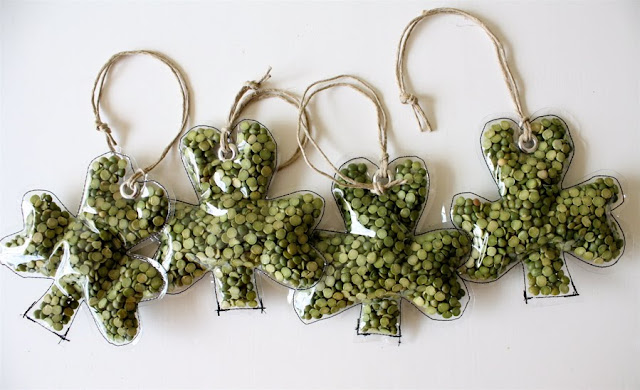
Arrange them on a table:
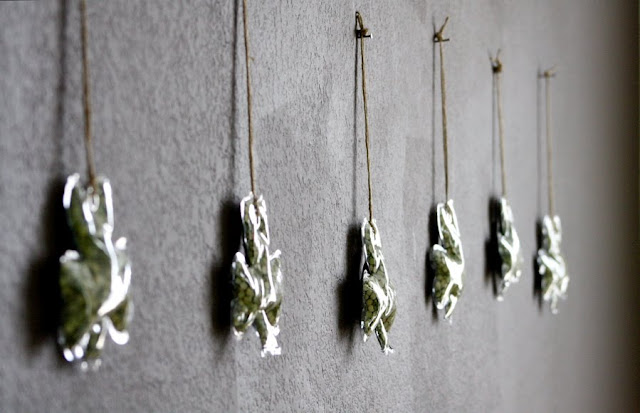
 Hang them in a room:
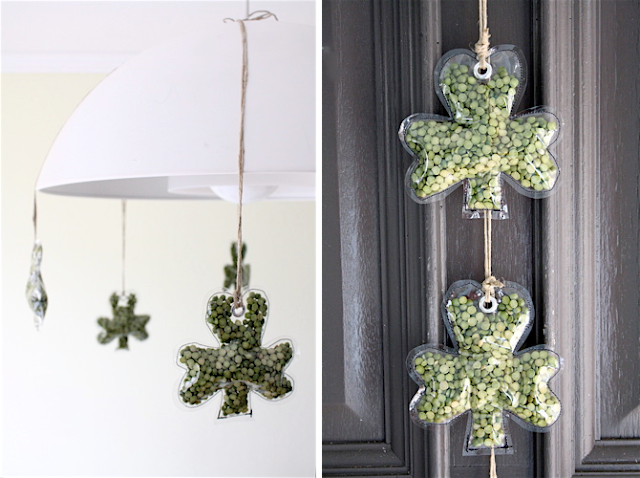
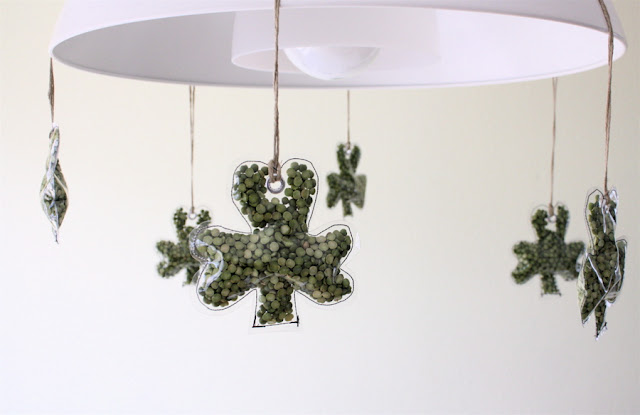
 Dangle Shamrocks from a chandelier………or link them together on your Front Door:
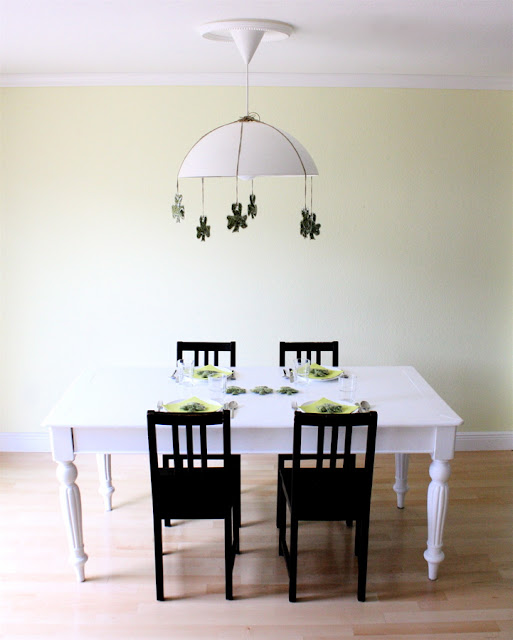
 Decorate a Dinner Party:
 Relieve your stress:
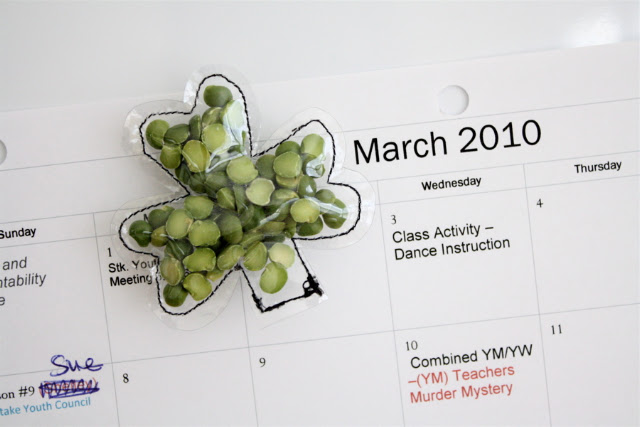
 Make a mini-magnet for the fridge:
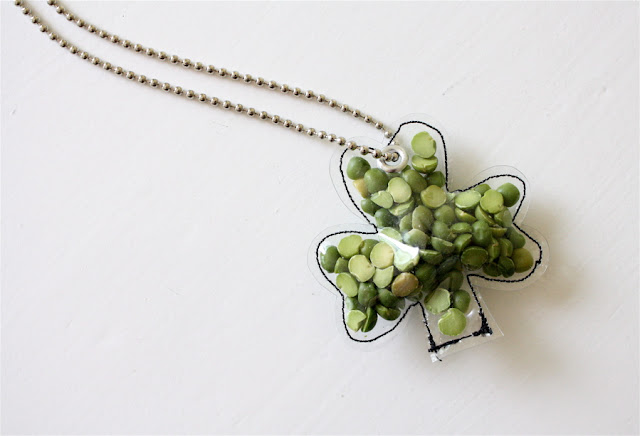
 And a necklace for the holiday. No pinching here.
 Or try what we love best…..
 A good old fashioned “Split Pea” Toss.
 Who can throw the most Shamrocks in the Bucket ‘O Gold?
 In this tutorial we’ll share all our methods with you. Of course, I’m sure you’ll find a whole slew of uses for your own Split Pea SHAMROCKS too.
So let’s get started!
————————————————————–
Skill Level: Any
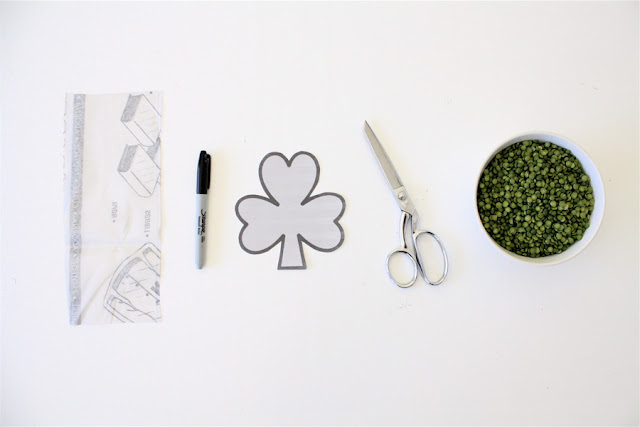
Needed:
* 2 bags of Split Peas
* Clear Vinyl (8 gauge or other)
* Shamrock print-out
* Marker
* Scissors
* Sewing Machine
* Metal Eyelets (Large and Small)
* Hammer
* Rope or Ball Chain (for hanging)
Similar to our Heartbreaker Valentines, these are a great craft to do as a family and are so easy to make.
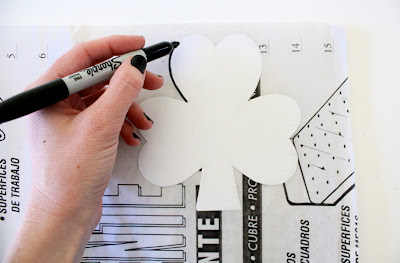
First print off your Shamrock. Use our image, an image you found online, or draw one! I used the one below.
Click on the image and save it your computer.
Using a Word Doc, you can insert the image into a Text Box and play with the size to determine exactly how you want it.
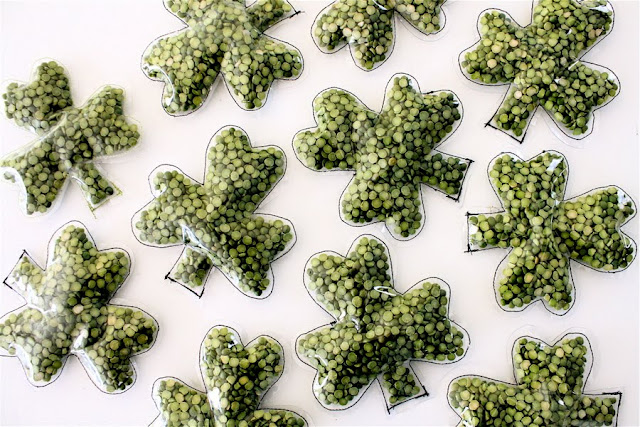
I printed two sizes, a larger one for the main Shamrocks and a smaller one for the necklace and fridge magnets. If you find that it’s hard to get the peas inside the shamrock, make your stem a bit wider than in the picture:
 Now gather your supplies:
 I’ve never actually made Split Pea Soup. But I love how gorgeous the uncooked peas look in a bowl.

 If you’re anything like my husband, you may enjoy just sifting through them for while, feeling them slip between your fingers. Simple pleasures.
 But let’s get creating….
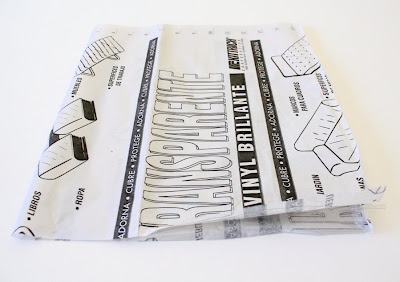
You’ll need about 1/2 yard of Clear Vinyl (for appx 14 Shamrocks). Vinyl is sold at most craft stores, even Walmart. It’s very inexpensive, about $2/yard. It comes on a large roll; sold by the yard. There’s a piece of tissue paper layered on the vinyl to keep it from sticking to itself. So it often looks like this:
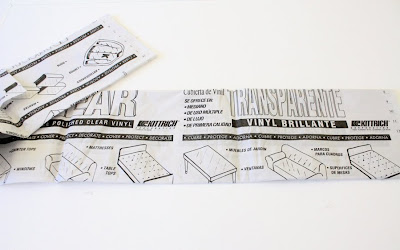 You can buy different “gauges” which refers to the weight/thickness of the vinyl. I used 8 Gauge. If you want something lighter, do 4 gauge or vice versa. Here you can see the Vinyl with the paper layered behind it:
 Now, sewing with Vinyl can be annoying at times if it starts sticking beneath your presser foot. All that vinyl, sandwiched in-between metal. So, a very simple solution is to sew the vinyl with a piece of tissue paper over it and then peel it off when you’re done. This is what I did and it worked great! Took a bit more time to peel off the paper and to make sure all the pieces were off. But I found that I had much more control over my sewing, especially moving around the curves of the Shamrock. Of course if sewing straight Vinyl/Vinyl works in your machine, then go for it!
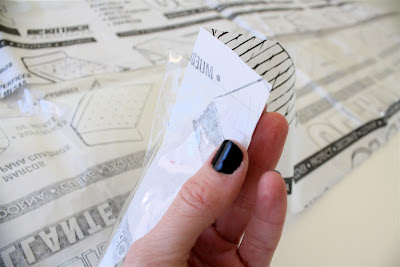
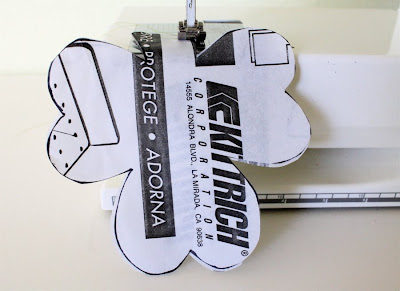
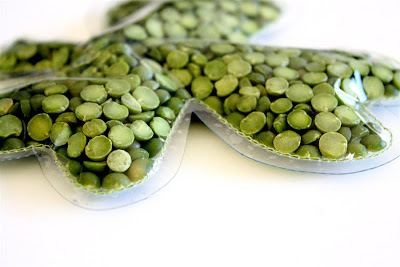
Since the Vinyl already comes with a layer of paper on it, it’s perfect! Fold your vinyl in half and trace your Shamrock pattern right on top of the paper (so that you have two layers: a Shamrock TOP and Shamrock BOTTOM):
 Cut out your Shamrocks, with the vinyl sandwiched inside of the outer paper:
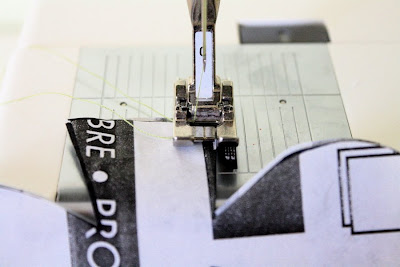
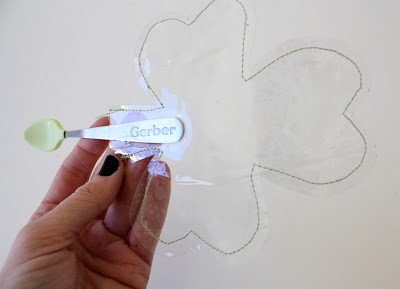
 Start at one end of the stem and sew all the way around to the other end. LEAVE the stem OPEN at the bottom so you can insert the peas!
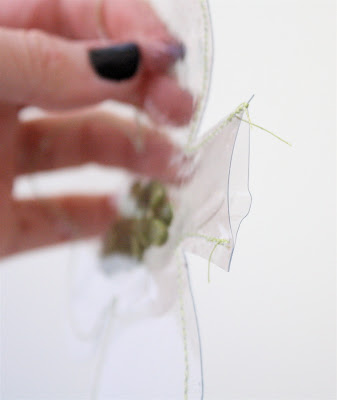
 When you’re done, just peel off the paper:
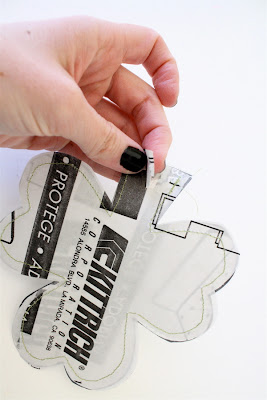 It takes some time to get all the little pieces off but it should come clean. If your stitches are too tight, it will be harder to get the paper off. This is a great time to grab all those shamrocks and sit in front of your favorite TV show for a bit:
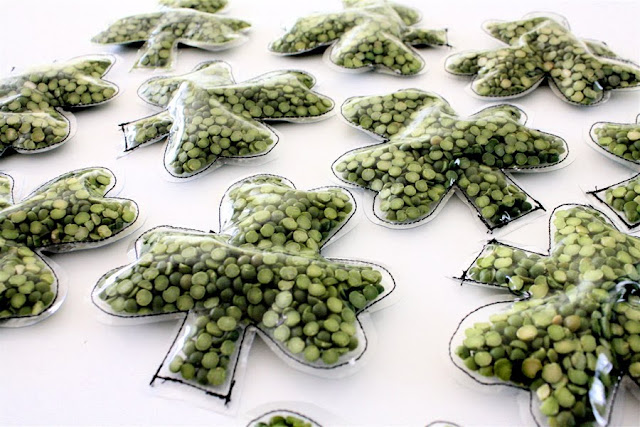
 When all your paper is off, it should look like this (I used Green thread for my first Shamrock but decided later that BLACK thread looks best. The Black really outlines the Shamrock).
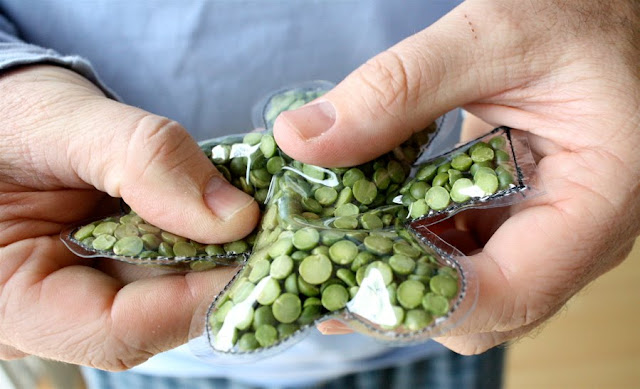
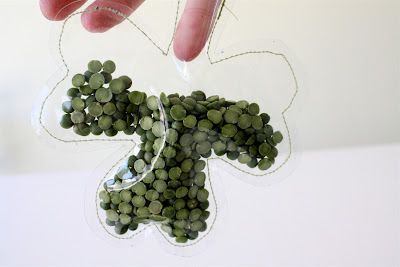
 Now it’s time for stuffing. Gather the kids around, they’ll want to help. And make sure you sweep-up the floor afterward! Use something to separate the opening. It will probably be smashed together:
 Then start sliding uncooked Split Peas down into the shamrock. You may try using a funnel? I didn’t have one. I just used my hands:
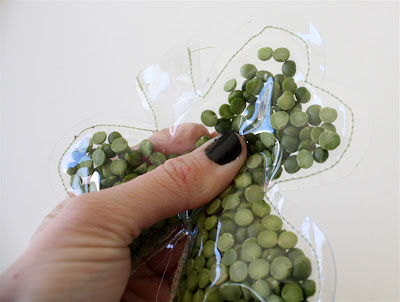
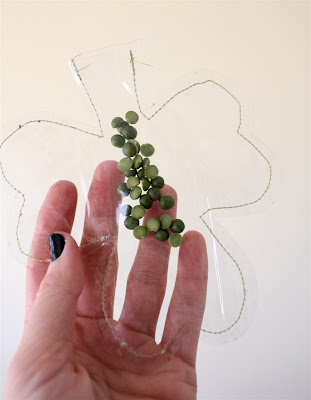 Use something to push them down and around:
 My little finger worked best:
 Make sure you squish them all around so they fill out to the edges:
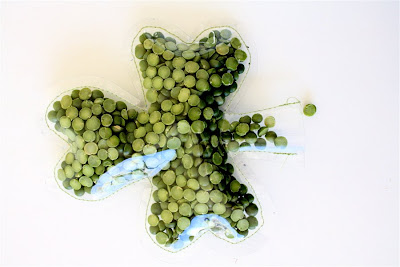
 Leave the stem a bit empty, so the peas have room to move around in there:
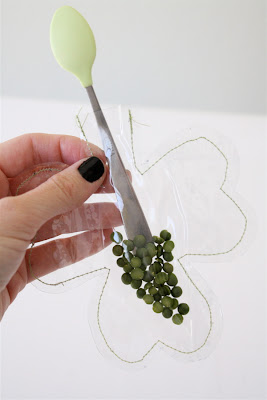
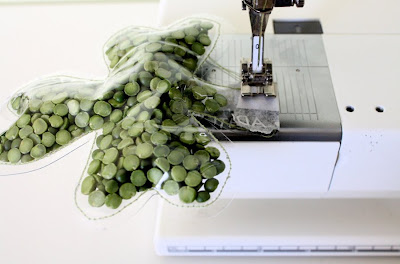
 And sew the stem shut. You prob don’t need to use tissue paper on top of the vinyl here. I found that sewing without it was fine:
 And you’re done!!
 Now go crazy and make 15 more……
Or try some variations……
——————————————————————
Want to hang them up? It’s easy!
 By adding a metal Eyelet to each Shamrock you can hang them from a wall, a light fixture, even your door:
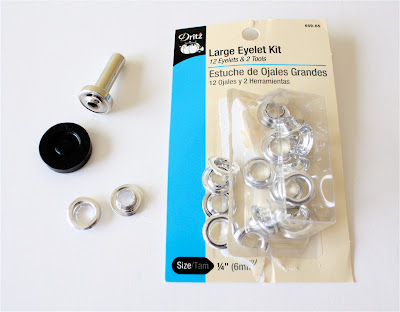
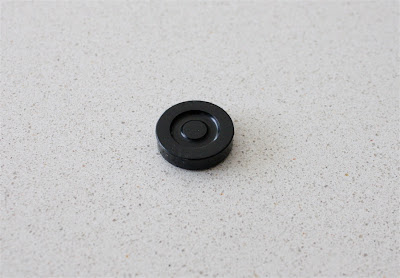
 These metal Eyelets are so very easy to use. Find them at your local craft store in the Notions area:
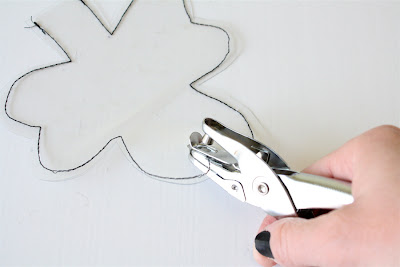
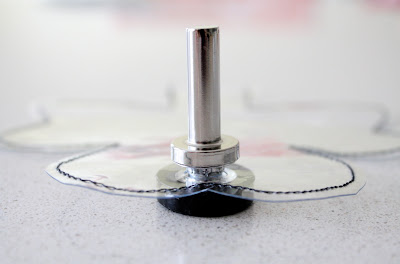
 First, cut a hole where you want the Eyelet to go. This is the same way you would do it with other fabrics. You can trace the Eyelet to get an exact size. Or…..I simply took a hole punch and punched a couple of holes next to each other, right at the top of my Shamrock:
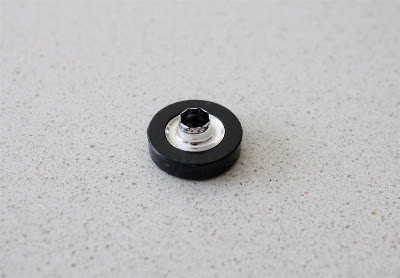
 Then layer everything together. Read the instructions on your Eyelet package first. But here’s what I did with mine…..
Start with the base piece:
 Put the Eyelet with the smaller opening on top of that:
 Put your Shamrock hole over that:
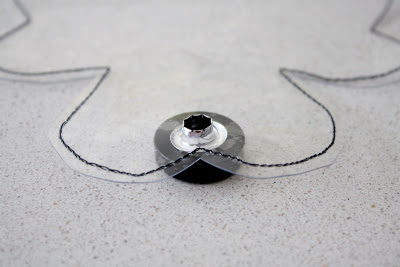 Sandwich the other Eyelet over the Shamrock:
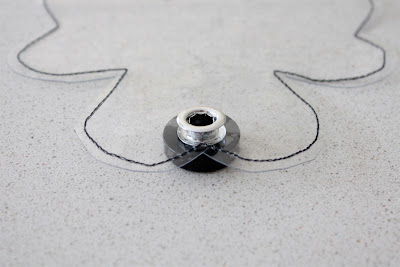 And top it with the pounding bar:
 Give the whole thing a whack with a your hammer a few times:
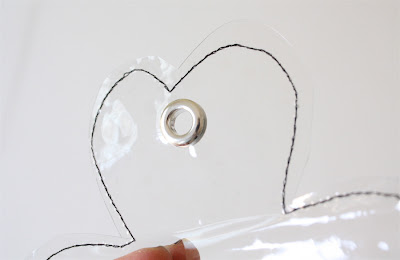
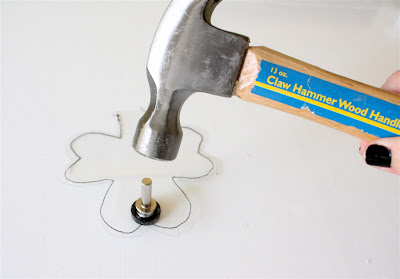 And you’re done! A cool metal eyelet. Adds character.
Make sure you put the Eyelet in before filling the shamrock with peas.
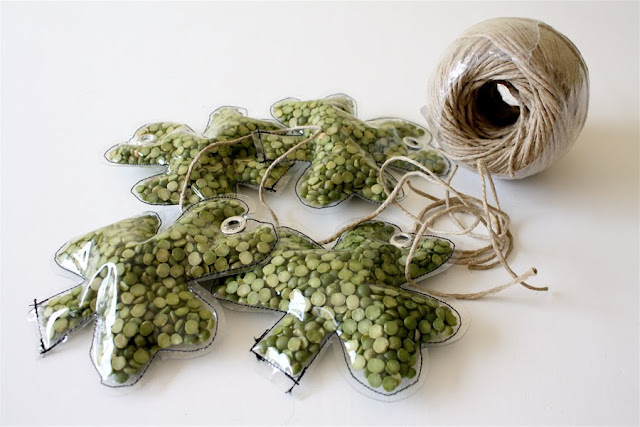
 Then go ahead and fill ‘er up! When you’re done, tie a piece of rope or twine through the eyelet:
 And start decorating:
 You can link them together and created a long chain for your front door:
 or simply hang one on a door knob in the house:
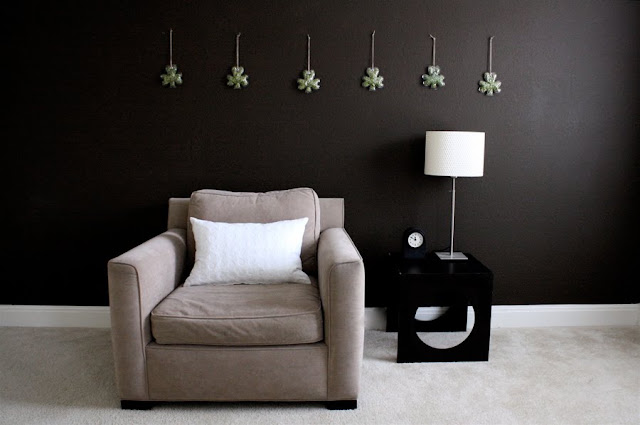
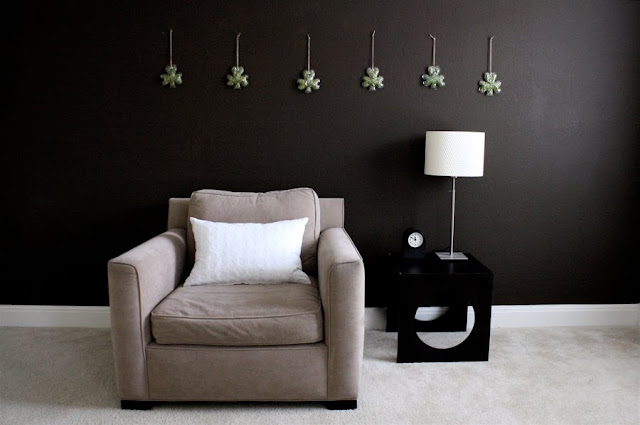
 Line them up on your bedroom wall:
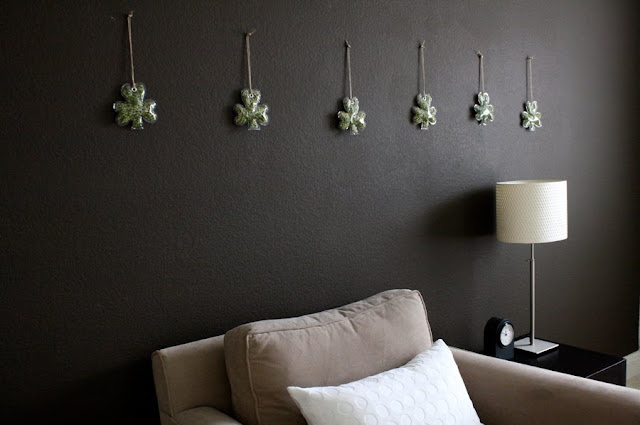 Don’t worry about making them perfectly straight. It makes the look more exciting.
 ————————————————————————
Want to make a necklace? Cut your necklace Shamrock much smaller than your Shamrocks above.
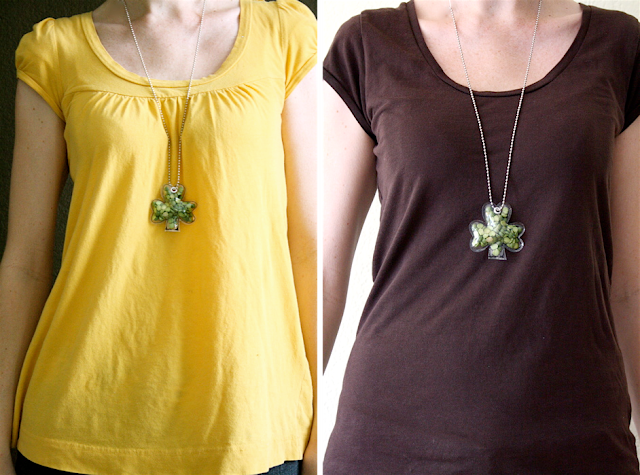 Use a “SMALL” Eyelet and using the same method above, add an SMALL eyelet to your mini shamrock before filling with split peas. Link it through a small Ball Chain and you’re decorated for the holiday! Chains can be found in most craft stores in the jewelry-making section. You may also try attaching a mini Shamrock to a fabric cuff bracelet. A great gift for friends or class mates!
 ————————————————————————
Another easy gift idea is the Shamrock Magnet. Simply glue a round magnet to the back of a mini Shamrock (no eyelet needed in this one). Use craft glue:
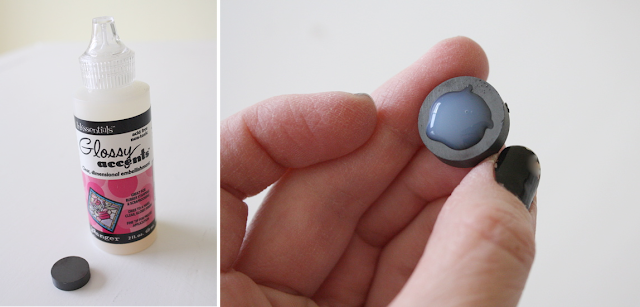 And just stick it on:
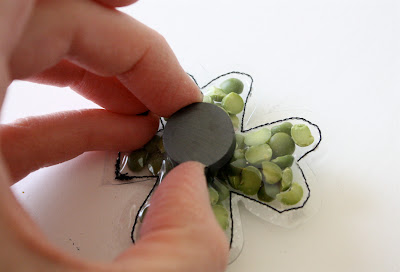 Make sure it dries long enough:
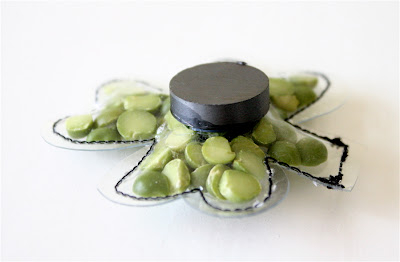 And stick it on the fridge:
 ————————————————————————
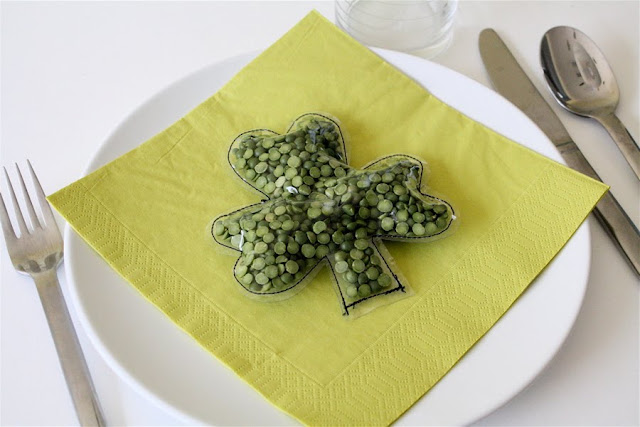
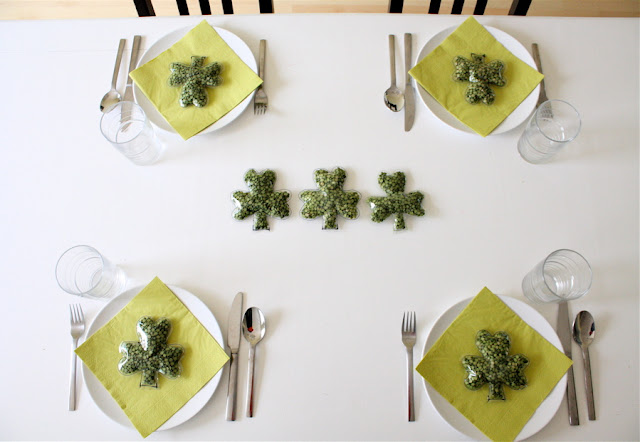
Throwing a Dinner Party? Get the table decorated with Split Pea Shamrocks.
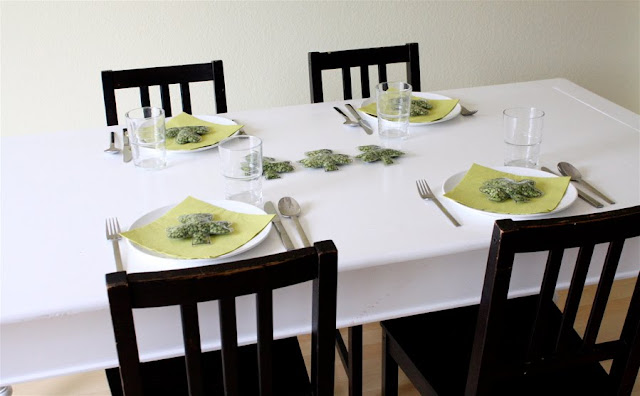 Set them on plates, arrange them around the table, attach them to a napkin ring, go crazy with the green:
 ————————————————————————
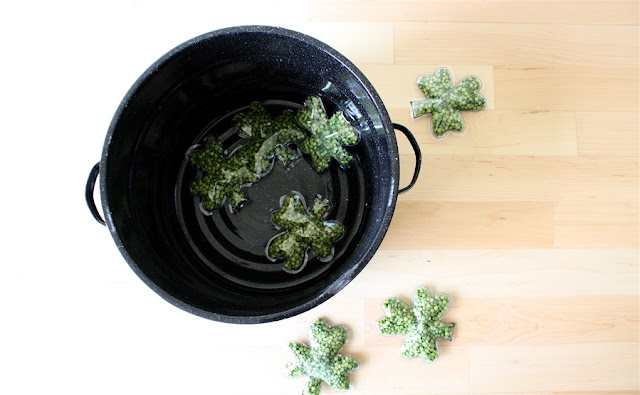
Or keep it simple and use your Shamrocks for our new favorite game: Shamrock Toss. My kids (and even Dad) think it’s great fun.
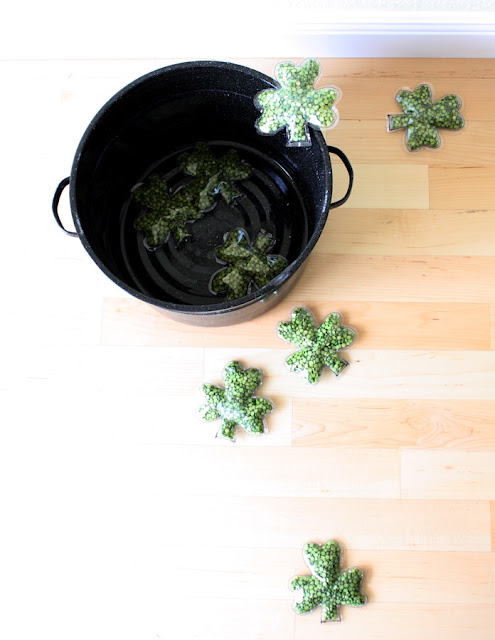 Who can toss the most Shamrocks in the Pot ‘O Gold?
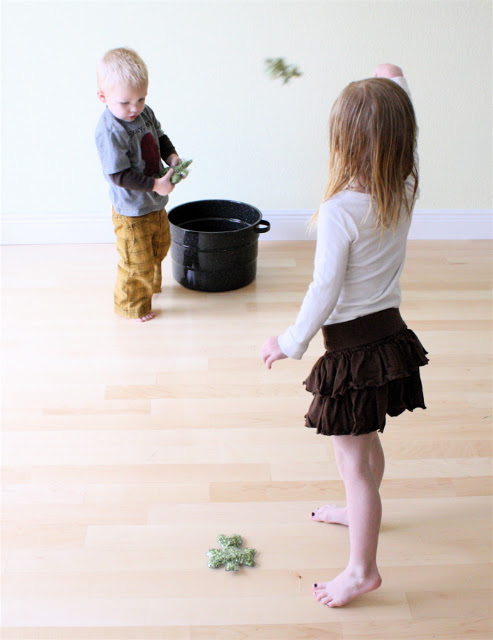 Yipee!! Victory dance.
 ————————————————————————
But no matter what, just make sure you’re having fun.
 Split Peas. They never tasted so playful.
 Try this technique for any holiday decor. You’ll just need to find something clever to fill them with:
* Easter Eggs
* Heart Valentines
* Red, White, and Blue Stars
* Pumpkins
* Christmas Trees
Happy St. Patrick’s Day!


Loving this craft idea — so versatile for other holidays! But it’s killing me that I don’t sew (sewing is like the final frontier of crafting for me)! Maybe one small one for a necklace, but not the multitude that you have me envisioning ;p
Is there a special glue I could use instead, or use an iron to melt the edges together, or even tape around the edges? I know it wouldn’t look as cute, but it could still be handy.
I just love this!
I think these r great!!! I would like to make these w/my grandson,but would like to seal them w/out sewing them together. What would u use ?
hmmm. maybe you could glue them? I’ve never tried it but it might work.
How about a hot glue gun, the low temp one, to seal the edges together?? Hmmm… seems more my speed, too. 😉 LOL Might have to give it a go! Also thinking about one side clear vinyl and the other maybe a green or gold pattern. The kids could flip them for tic tac toe… or for making pattern games. Seemingly endless with fun ideas! I’m thinking circles (with lemon heads or yellow coarse crystal sugar inside), squares, triangles, hearts (oooo… with red hots candies insided!), pumpkins, christmas trees, easter egge, flags (rectangles filled with some red, blue, mylar ribbon and clear plastic beads) and so much more! Now ya got me goin… lol 🙂
these are soo cool. what a fabulous idea!