
 Despite the popular zig-zag trend, chevron patterned fabric is hard to come by. But with simple quilting techniques, you can make your own! Inspired by the photo from THIS Instructable, I tried my own take on it and created a comprehensive tutorial to share with you guys. You can find additional ideas in the book Stitch by Stitch where Deborah uses zigzagging to make curtains!
UPDATE: Here are few links to shops that carry chevron printed fabric
* City Craft (in the Michael Miller section)
* Premier Prints
* Paula Prass, Summer Soiree (at HancockFabrics!)
* Heather Bailey, Pop Garden
* Tonic Living (a Canadian shop!)
Okay…..basically, you take striped fabric, cut bias strips in two different directions, and sew them together to create a zigzag chevron! I know, I know, nothing new. In fact it’s probably one of those Quilting 101 concepts. But it was an “ah-hah!” moment in my mind.
 You can use this sewing method for a variety of designs: curtains, bags, wall hangings, clothing, blankets, and today….we’re making a Pillow.
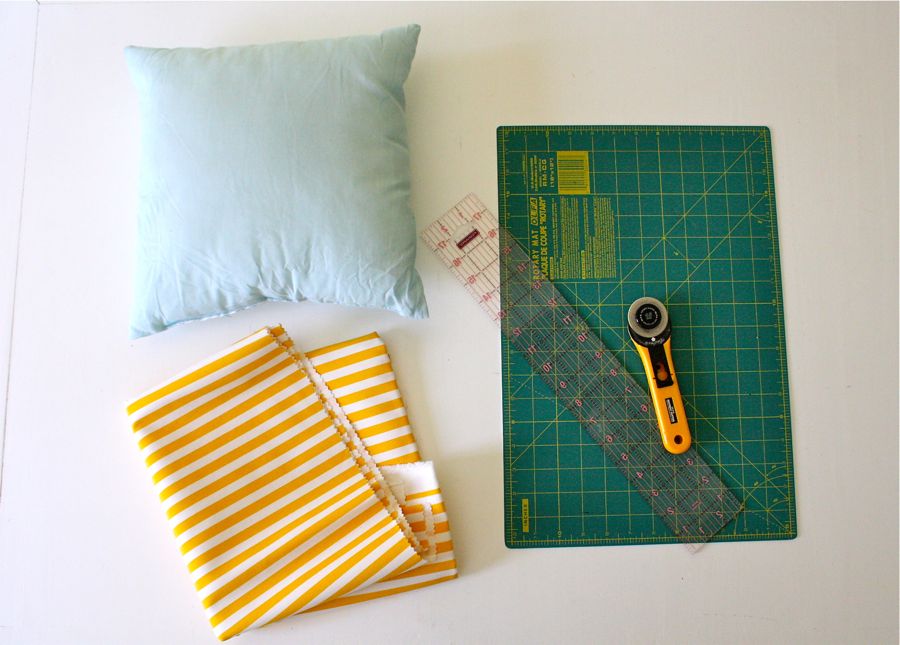
What you need:
* appx 3/4 yard of STRIPED fabric – cotton works best (the amount of fabric needed will vary with the size of pillow your making)
* pillow insert (or stuffing)
* rotary cutter, mat, and ruler
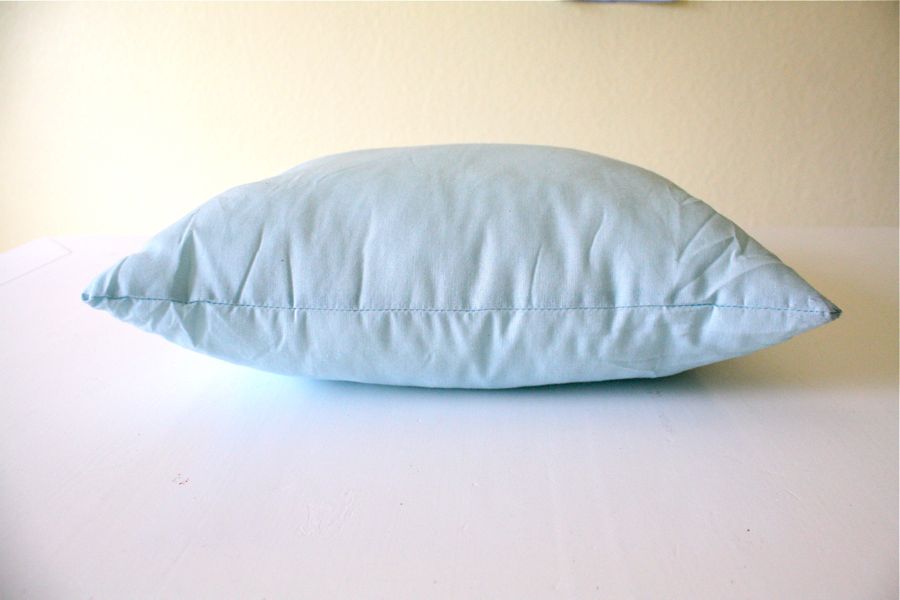
 There are various ways to make pillows. A nice method is to make a pillow sham with overlapping panels in the back, or with a zipper so you can remove it and wash the cover when needed. Today we’re taking the easy approach. We’ll make a simple pillow cover, fill it with a pillow insert, and sew it closed. You can buy these at most fabric shops (or at IKEA for $2). This one is about 13×13 inches:
 If you’ve never used a rotary cutter, mat, and ruler it’s easy, great, and you MUST buy them.
 Of course you can always use scissors but the mat and cutter makes the process more precise.
 Okay….let’s get started.
The hardest part about this pillow is simply cutting the strips. It’s not that it’s hard, you just need to be exact.
First, you need to cut a 45 degree, bias line into your fabric.
So, take your fabric (I’m using orange stripes here because I forgot to take this photo with my yellow fabric)
 Fold one side down onto the other side, creating a right-angle. This gives you the 45 degree angles needed to cut on the bias. This method is used for making bias tape as well.
 Use scissors or your rotary cutter and cut all the way down the diagonal side of your triangle, so your fabric has a diagonal bias edge.
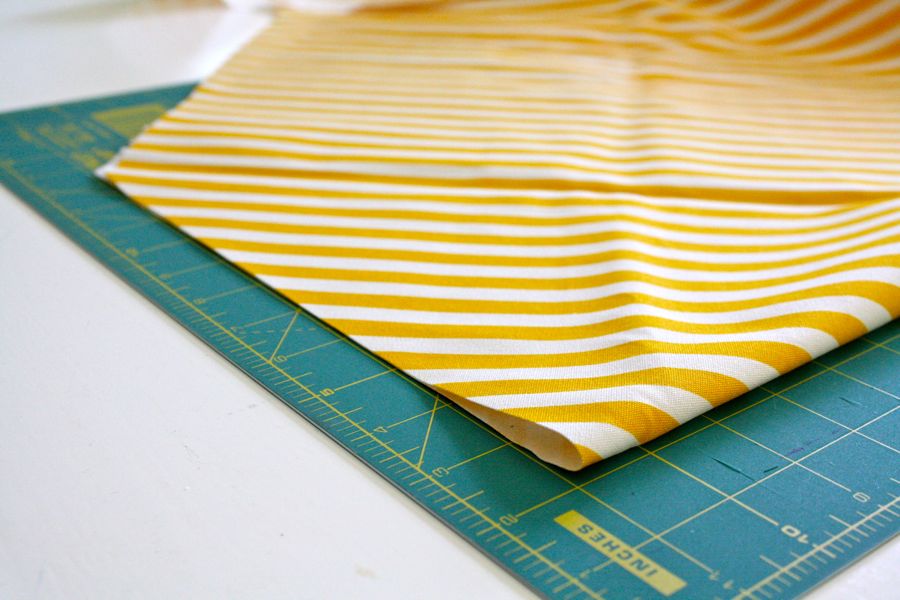
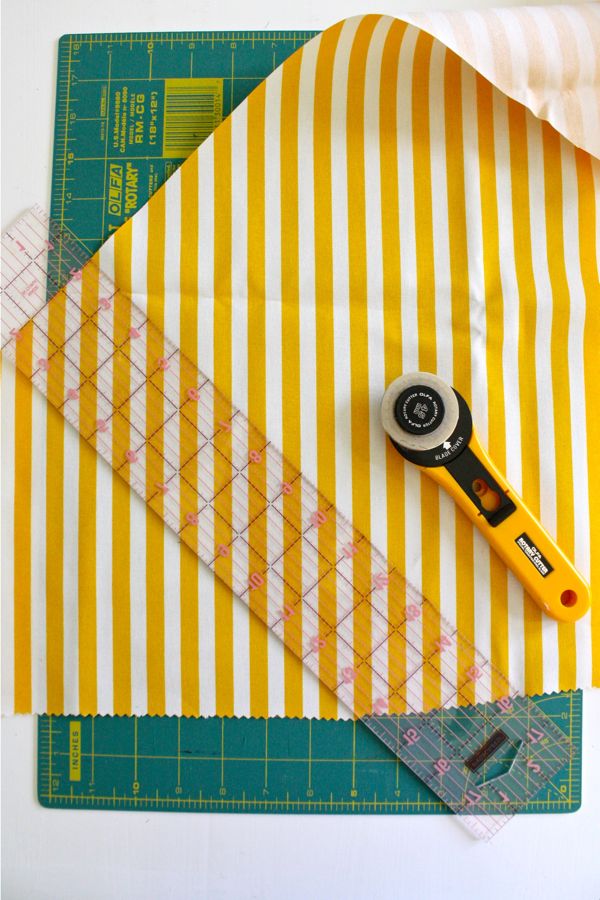
 If you have fabric that’s already cut (making it hard to do a right triangle), you can always cut a 45 degree line by using the markings on your mat.
Lay your fabric down, line up the horizontal stripes of the fabric with the horizontal lines on the mat,
 and place your ruler so that both ends are on the 45 degree line:
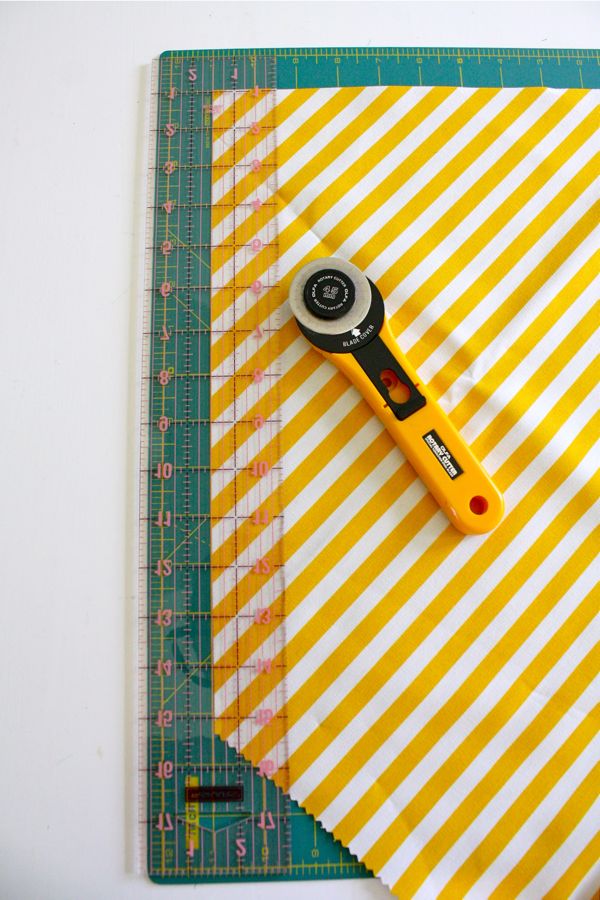
 And cut:
 Okay, now that you’ve got a clean 45 degree angle turn the fabric vertical and start cutting strips. Make them as wide or as narrow as you like. I cut my strips 1 1/2-inch wide (though 2 inches would have been better) and made them a few inches longer than my pillow, so about 1 1/2 x 15 inches. 2 or 3 inches wide works too, it really just depends on how wide your stripe pattern is and what look you want. If your stripes are very wide, you’ll want wider strips or the chevrons “V”s will be narrow.
You’ll be cutting 2 different versions of these strips (with the stripes angling in two directions). I know what you’re thinking, “why doesn’t she just cut them all the same direction and then flip half of the strips around vertically?” I thought the same thing too! But it doesn’t work. The stripes will still be facing the same direction. Now if you have double-faced, or reversible fabric, you can cut them all the same direction and then flip half of them over onto the “back” side. That will work.
Okay, back to cutting strips. Do some quick math, accounting for seam allowances, and figure out how many strips you need. For my 13×13 pillow, I used about 12 strips on each side of the pillow. So, 24 strips total (12 of each angle direction). I recommend cutting more strips than you think you need because some of them may end up shorter than you thought or might have a mess-up and it’s a total pain to come back and cut more later.
So cut about 15 vertical strips:
 If your fabric is too wide for your mat, you can always fold it in half and cut the strip through two layers of fabric:
 Okay, now that you have enough strips for one angle of the chevron, let’s cut strips for the other angle. Turn the fabric so that the stripes are now lined up vertically (before they were lined up horizontally), and cut another 45 degree angle. If you’re into math….you’ll notice that this makes a right angle with the other bias side you were cutting from. Okay, so line it up:
 And cut. Just like that:
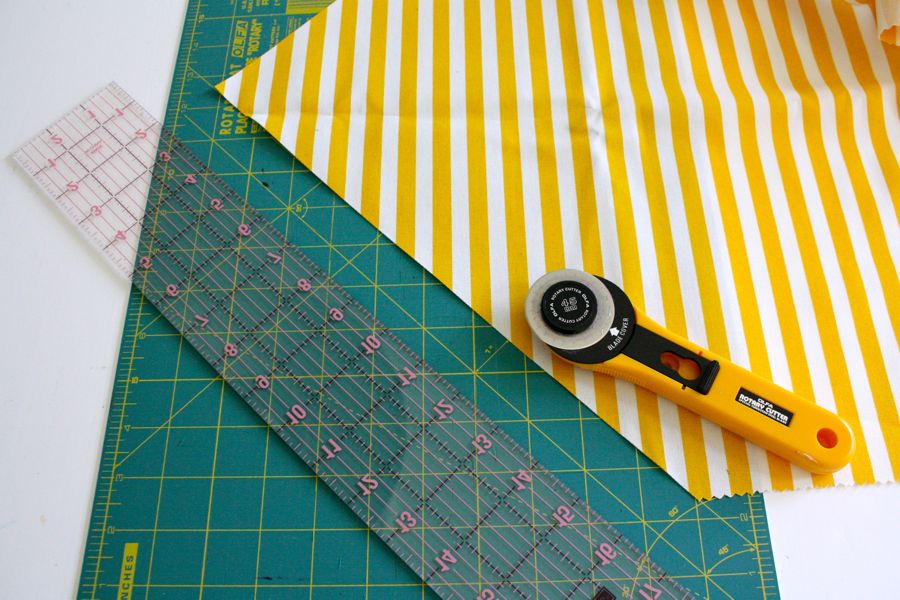 Then turn your fabric vertically and cut 15 strips:
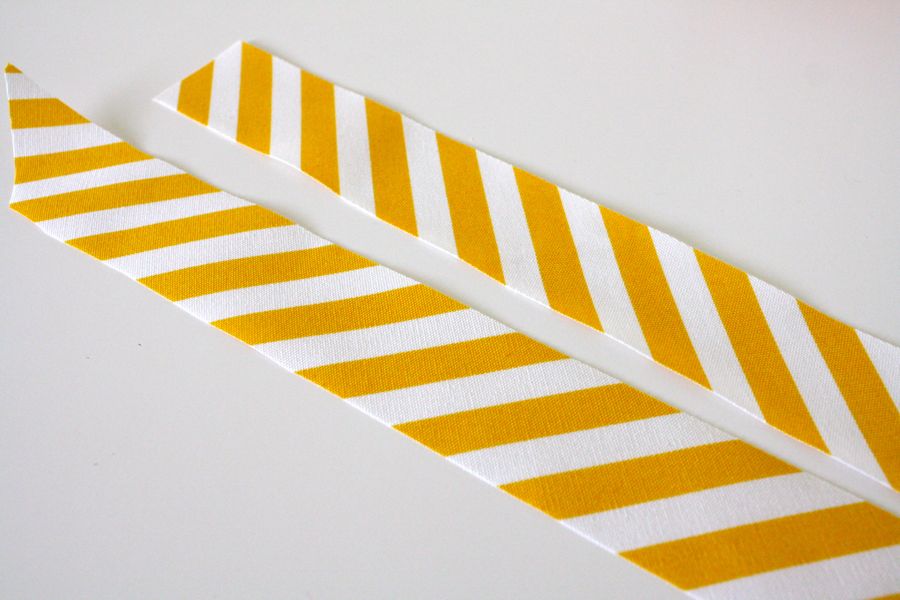
 Before cutting too many, lay the new strip next to the previous strips you cut and make sure they’re going in opposite directions. It would be a real pain to cut everything out and realize they’re going in the same direction. You need them to be opposites!
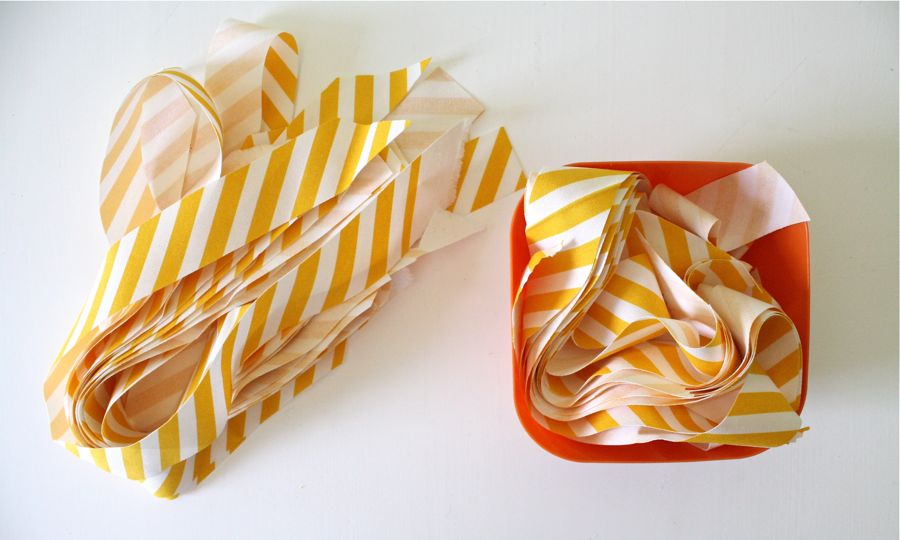
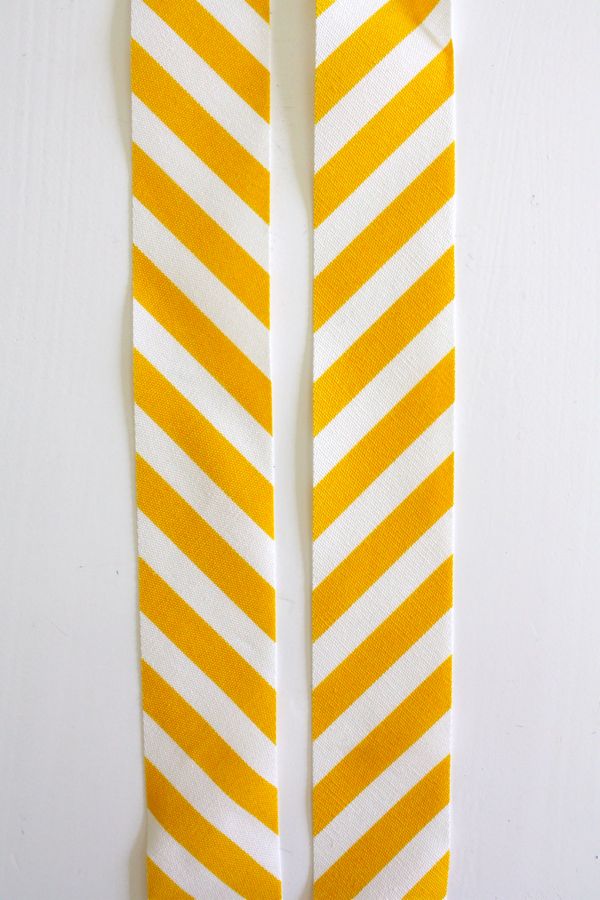 Keep the strips in separate piles so they’re easier to grab when you sew:
 And pat yourself on the back. The hardest part is behind you! Let’s start sewing.
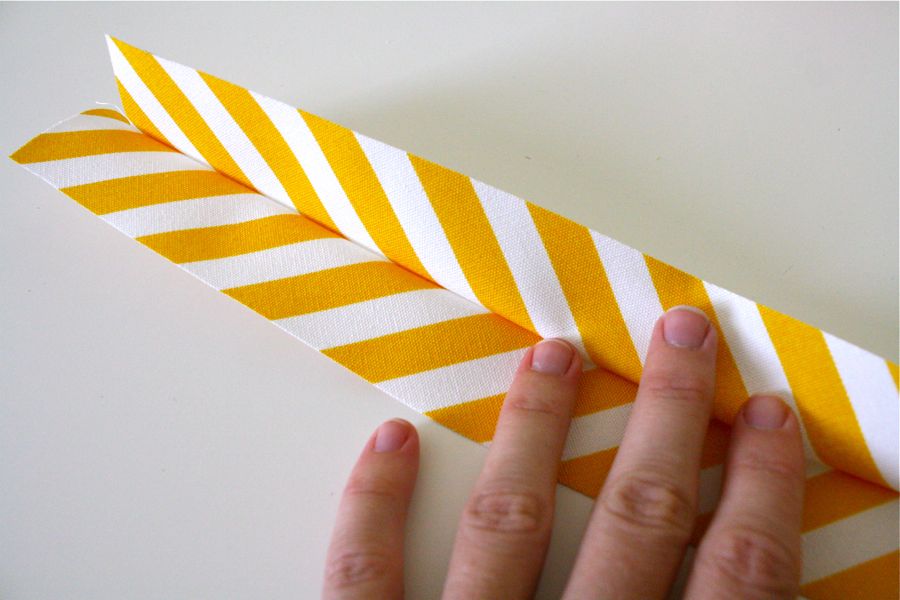
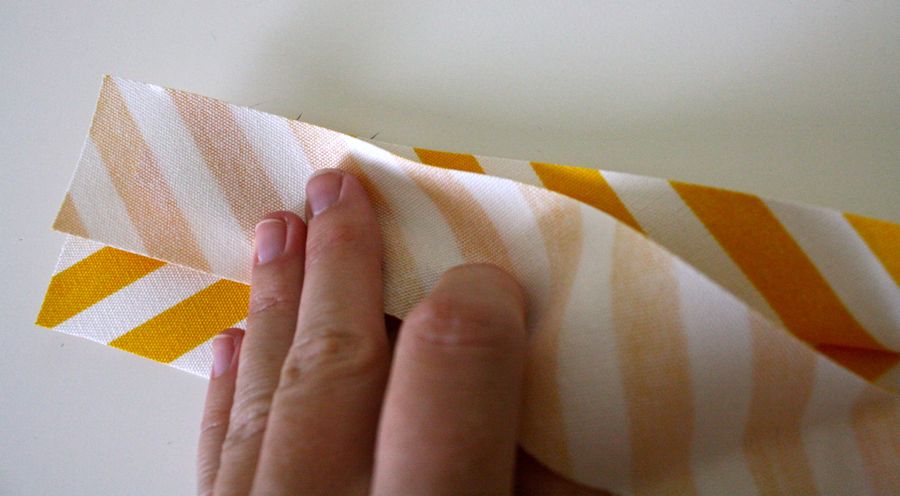
Grab two strips, with stripes going in opposite directions.
 You’ll know that they’re opposites because the stripes actually match up together when the right sides are placed together. So, line the colored stripes up as precisely as you can. This will make your chevrons look exact.
 Choose your seam allowance. I recommend 1/4 inch (however, I cut my strips thinner than I’d hoped so I ended up using a 1/8 inch allowance):
 Sew all the way down. And when you open it up, look! You have a chevron!
 Now, keep doing this over and over, alternating the angles of the stripes until you have a square large enough to cover your pillow.
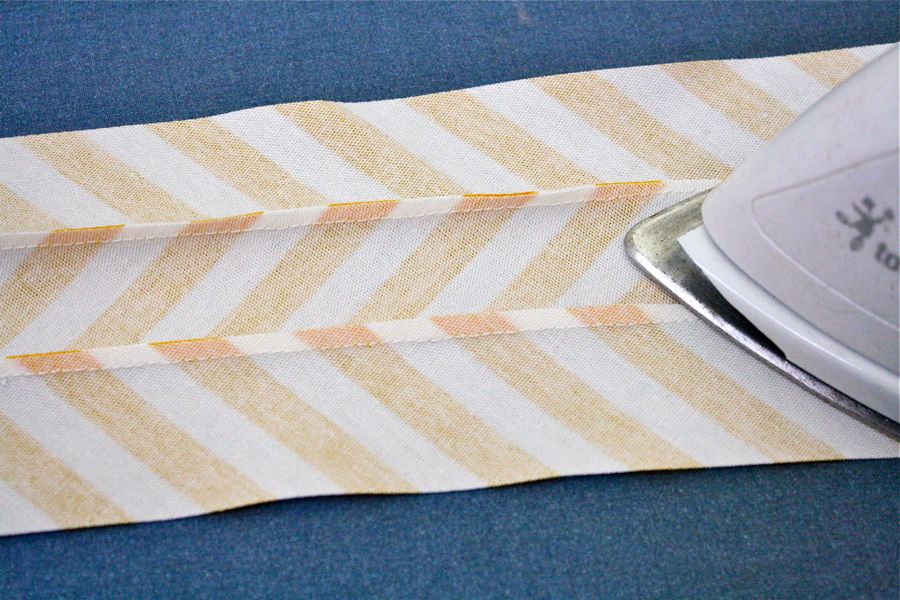
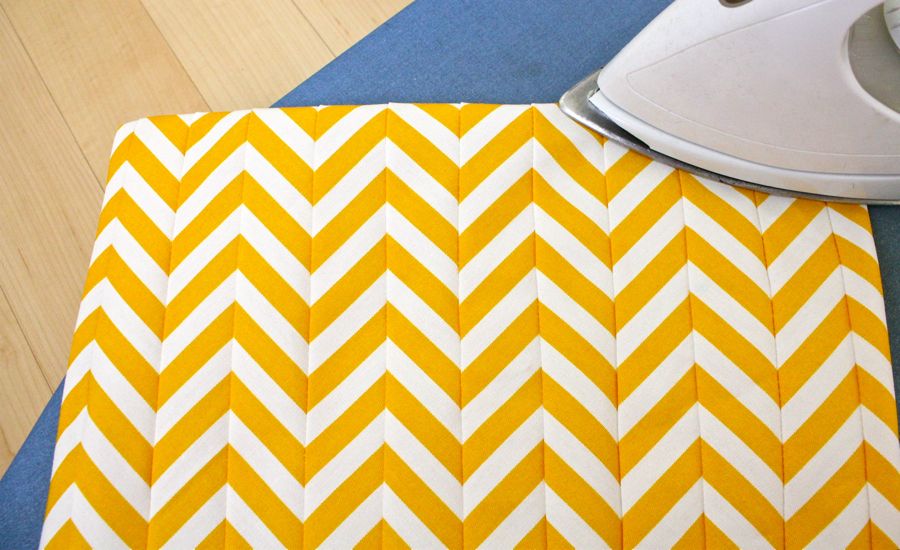
 When you’re done, iron out the seams so that everything lays flat. You can iron your seams to the side, or opened, whichever you prefer. I found that ironing to the side (since my seams were so small) helped the quilted fabric lay nicer.
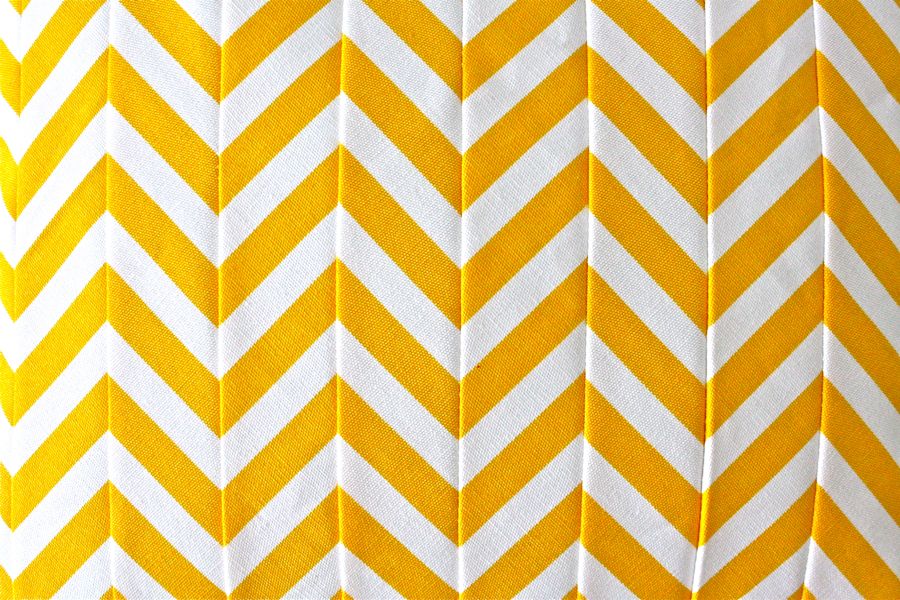
 and….ta-da! It worked!
 Your squares will be a little jagged since the stripes are not exact. So let’s clean it up.
Lay your pillow over the fabric, center it for measuring , and cut your pillow front and back.
 Your rotary cutter and mat work best.
 Two pillow squares, ready to sew:
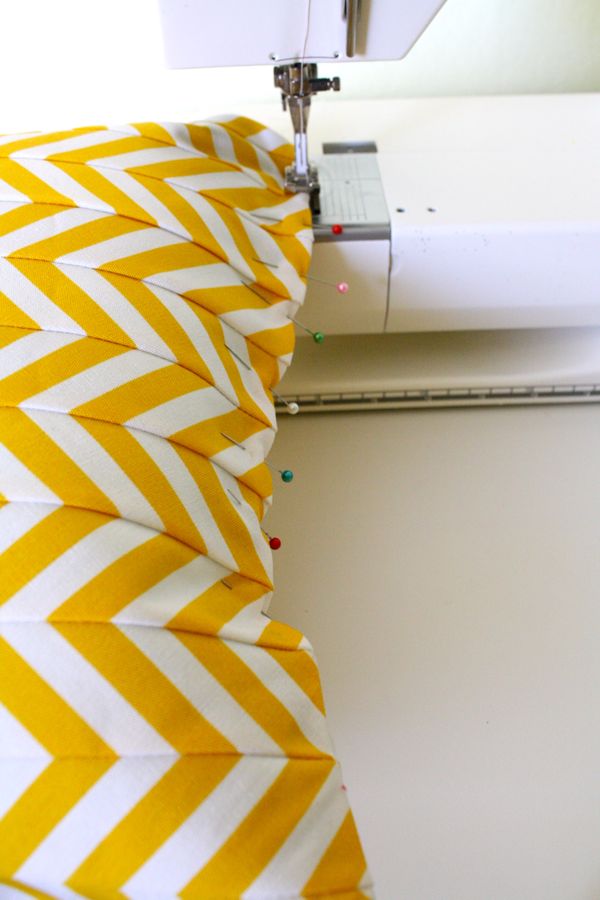
 Before sewing the pillow together, however, do a baste stitch down the bottom sides of the pillow. Do this for the front and back of the pillow. This is the side that will be left open; where the pillow will be inserted. And since you’ve trimmed the edges down with your rotary cutter, this side has a tendency to come apart at the end seams when you stuff the pillow in. The baste stitch (a simple stitch on the top of the fabric, about 1/4 inch in from the edge) will help keep the quilted seams in place.
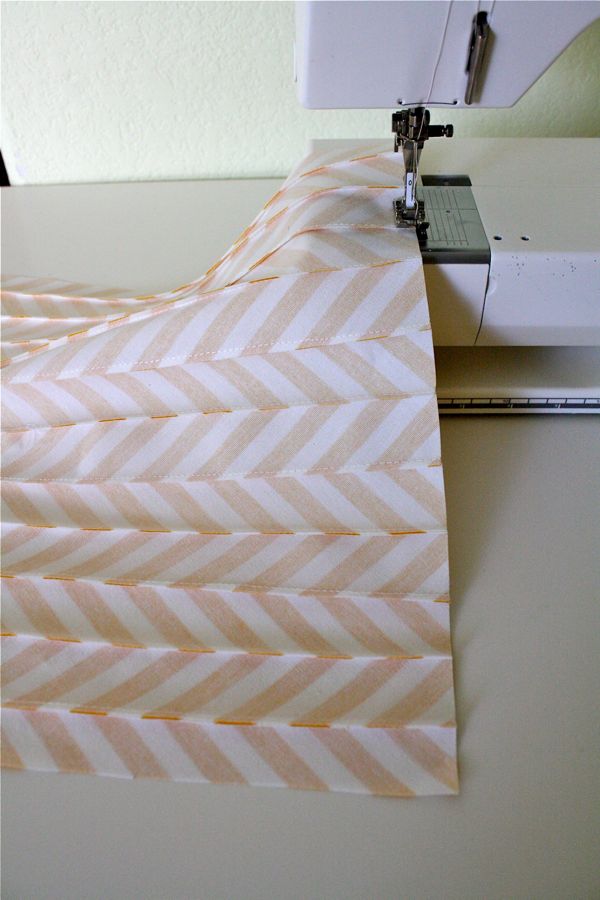 It looks like this:
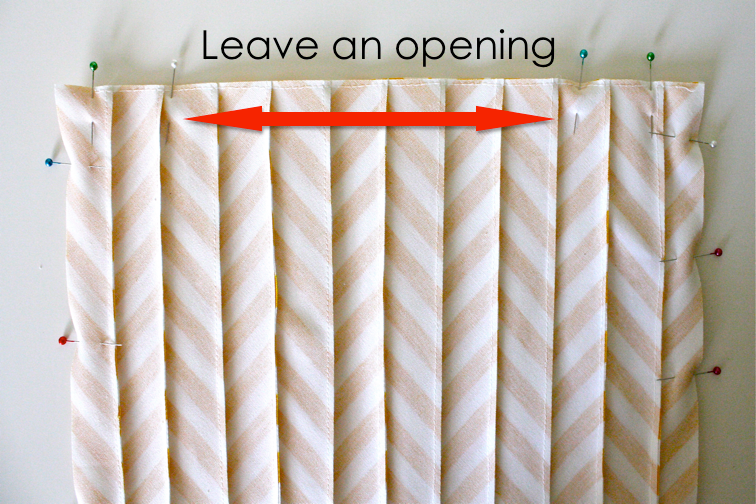
 Then with right-sides together, pin the front and back of the pillow together. Make sure the basted sides are together and leave an opening so you can insert the pillow.
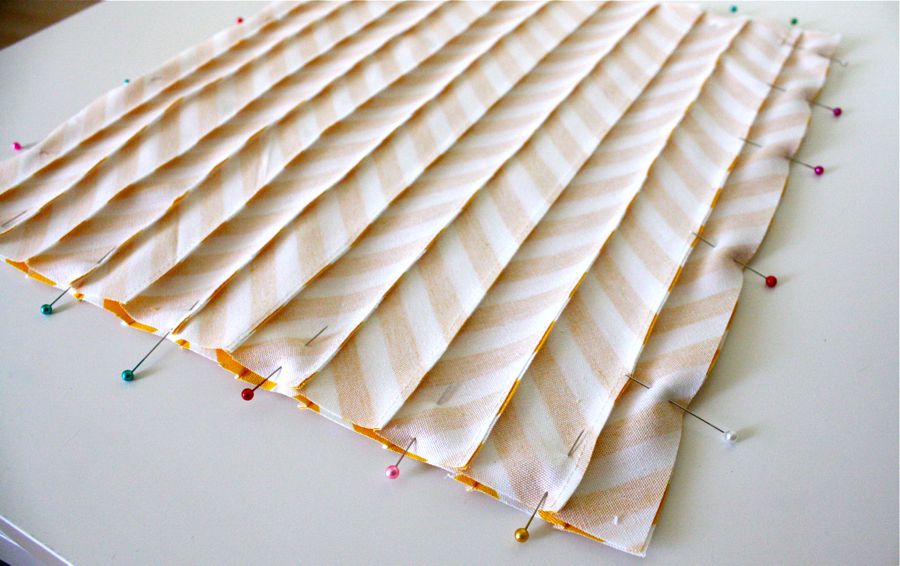
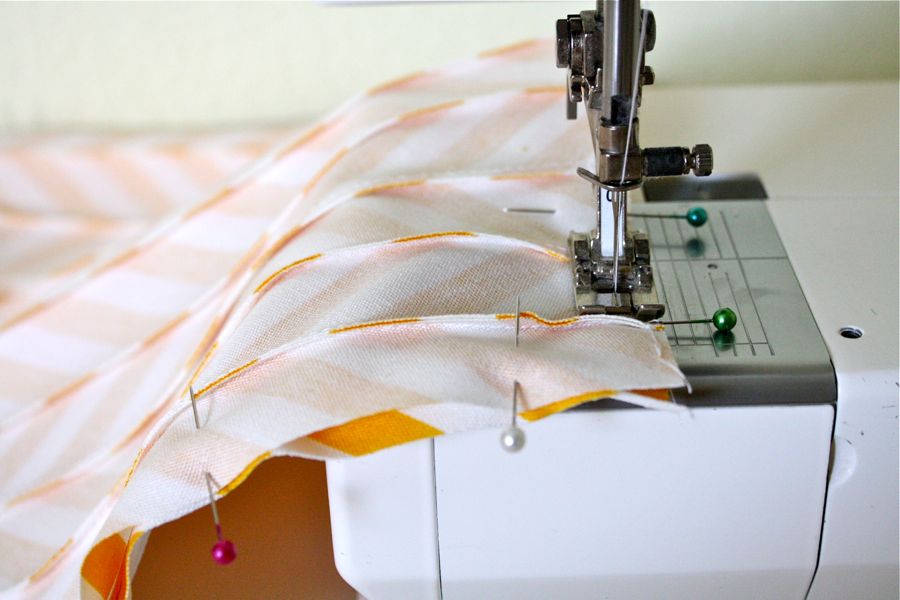
 Then sew around the pinned areas:
 When you’re done, turn the pillow right side out, pushing the corners out and iron down the seams.
 When you get to the opening, fold the edges in and iron those down too.

 Then, stuff your pillow inside!

 Pin the opening closed:
 And sew it shut, very close to the edge. The seam will be visible but you can place that side of the pillow down when using it.
 and there you go!
 If I was really clever, I would have made everything line up into little diamonds on the bottom of the pillow. But eh, it’s close enough for my needs.
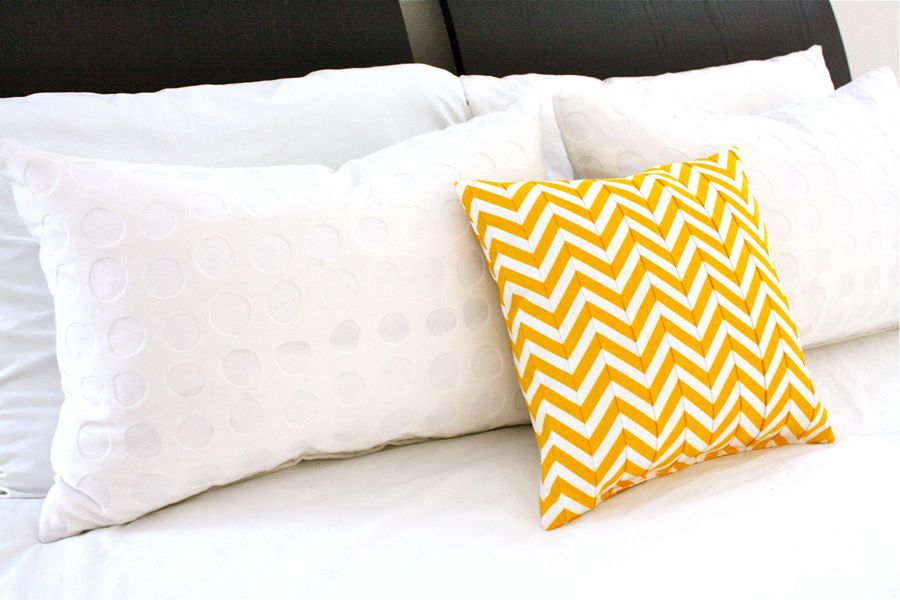
 Throw it on your bed, the couch, or a chair. It livens up any room!


I love your pillow!!! I just featured it on my blog! I’m a new follower!!
http://www.mycraftspotlight.com
xoxo Patty
this is a great tutorial. i’m going to have to try this….i love it!!!
Great tutorial, thanks for sharing! I made a picnic mat with my chevron fabric: http://bluemilkandcookies.blogspot.co.uk/2012/04/raspberry-ripple-chevron-picnic-mat.html
I love this project! I included it in last week’s Link Love Chevron Roundup on FaveCraftsBlog:
http://www.favecraftsblog.com/link-love-chevron-patterns/
this is a great tutorial. i’m going to have to try this….i love it!!!
Thank you so much for this idea! I used an old dress I found at the thrift store and was able to whip up two pillows out of it using your process. Thanks a bunch!
http://thecraftedcure.blogspot.com/2012/07/jumping-on-bandwagon.html
Really nice photos, I guess it’s a good enough tutorial but I don’t really understand the measurements. Why didn’t you give cm? Nobody learns inches anymore. At least I’ve never met anyone under the age of around 40 who even uses them.
While your explanation of 45 degree angle and cutting strips is so much clearer than others, making the strips nearly drove me mad. I am excellent at geometry yet I stared at your photos and my expensive fabric for HOURS before daring to cut – but I did it. After making the 45 degree cut, i somehow folded the fabric right sides together and cut pairs of strips. Thank you so much for your tutorial. My center accent of my maxi dress will be gorgeous.
this is a great tutorial. i’m going to have to try this….i love it!!
I love the chevron look and will have to try this. When I make pillow covers, I like to add the invisible zipper for easy cleaning. Thanks so much for sharing.
Nunca havia pensado nisso,ficou linda! Parabéns pelo TUT.
bjs, Eva do Brasil